Introduction
This is my second post on The Code Project and here I am going to show how to create a simple nice jquery image slider. I hope this tip will help beginners to get an idea about how to create your own simple jquery slider like below:
Preparing HTML and CSS Markup
Ok, first we will create some HTML code snippet to store our images which are used for the slide show. MainDiv holds the main slider and two navigation images LeftArrow and RightArrow.
<div id="MainDiv">
   <img src="Images/Image1.jpg" alt="About Us"
   id="MainImage" width="800" height="600"/>
       <div id="child">
           <img id="Next" src="Images/RightArrow.png"
           class="img-responsive NextButton"/>
           <img id="Previous" src="Images/LeftArrow.png"
           class="img-responsive PreButton"/>
       </div>
</div>
CSS for MainDiv
#MainDiv
{
    position: relative;
    width:800px;
}

#child .NextButton
{
    position: absolute;
    top: 50%;
    right: 2%;
}

#child .PreButton
{
    position: absolute;
    top: 50%;
    left: 2%;
}
Remember it is important to set position of MainDiv to relative. So it positioned element relative to its normal position. Position absolute tells the browser that whatever is going to be positioned should be removed from the normal flow of the document and will be placed in an exact location on the page. Top 50% and right 2% will always display 2% from the right and 50% top of the MainDiv. Read more about CSS positioning here.
Now we are going to set the bottom slider which holds all the images:
<div id="slider">
   <ul class="slides">
     <li class="slide">
        <img src="Images/Image1.jpg" alt="Image 1" width="200"/>
     </li>
     <li class="slide">
        <img src="Images/Image2.jpg" alt="Image 2" width="200"/>
     </li>
     <li class="slide">
        <img src="Images/Image3.jpg" alt="Image 3" width="200"/>
     </li>
     <li class="slide">
        <img src="Images/Image4.jpg" alt="Image 4" width="200"/>
     </li>
     <li class="slide">
        <img src="Images/Image5.jpg" alt="Image 5" width="200"/>
     </li>
     <li class="slide">
        <img src="Images/Image6.jpg" alt="Image 6" width="200"/>
     </li>
  </ul>
</div>
CSS for Bottom Slider
#slider
{
    width: 800px;
    overflow: hidden;
    position: relative;
}

    #slider .slides
    {
        display: block;
        width: 8000px;
        margin: 0;
        padding: 0;
    }

    #slider .slide
    {
        float: left;
        list-style-type: none;
        height:120px;
    }
Ok, now we are done with the HTML and CSS part. Let's move on to the jquery part.
First we will get all the images src attribute values to an array for further usage. Here, I used jquery map() and get() functions. You can read further about them here and here.
var tn_array = $(".slides img").map(function () {
return $(this).attr("src");
}).get();
$('#MainImage').attr('src', tn_array[0]);
$('#Previous').css("visibility", "hidden");
Next Arrow Button Functionality
Some global variables to hold data are as follows:
var lengthImages = tn_array.length;
var CurrImage = 0;
var widthImg = 200;
var BottomLength = 4;
var IndexDiff;
Next Button Implementation
$('#Next').click(function () {
$('#MainImage').fadeOut('slow', function () {
CurrImage = CurrImage + 1;
$('#slider .slides').animate({ 'margin-left': '-=' +
widthImg}, 1000);
$('#MainImage').attr('src', tn_array[CurrImage]);
if (CurrImage == lengthImages - BottomLength) {
$('#Next').css("visibility", "hidden");
}
if ($('#Previous').css("visibility") ==
"hidden") {
$('#Previous').css("visibility",
"visible");
}
}).fadeIn(1000);
});
Previous Button Implementation
$('#Previous').click(function () {
$('#MainImage').fadeOut('slow', function () {
CurrImage = CurrImage - 1;
$('#slider .slides').animate({ 'margin-left': '+=' + widthImg },
1000);
$('#MainImage').attr('src', tn_array[CurrImage]);
if (CurrImage == 0) {
$('#Previous').css("visibility", "hidden");
}
if ($('#Next').css("visibility") == "hidden") {
$('#Next').css("visibility", "visible");
}
}).fadeIn(1000);
});
Selecting an Image from Bottom Slider
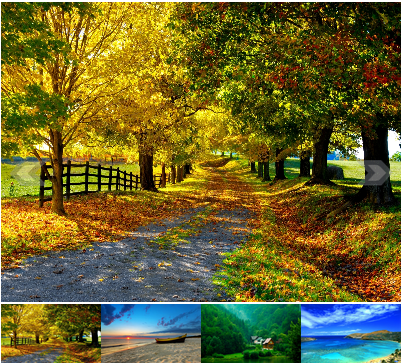
I put the below image to get an idea about what I am going to do. When you select an image from the bottom slider, the selected image will be set as the Main image and then the bottom slider will animate to the left side.

Here is the jquery code segment for animating the bottom slide and setting the selected image for the top slider. I put a comment on every line to explain clearly what happens inside the code.
$('.slides li img').click(function () {
var Imagesrc = $(this).attr('src');
var ImageIndex = $(this).parent('.slide').index();
$('#MainImage').fadeOut('slow', function () {
if (ImageIndex <= lengthImages - BottomLength) {
IndexDiff = CurrImage;
CurrImage = ImageIndex;
IndexDiff = Math.abs(IndexDiff - CurrImage);
$('#slider .slides').animate({ 'margin-left': '-=' +
widthImg * IndexDiff }, 1000);
$('#MainImage').attr('src', Imagesrc);
if (ImageIndex != 0) {
if ($('#Previous').css("visibility") == "hidden") {
$('#Previous').css("visibility", "visible");
}
}
if (ImageIndex == lengthImages - BottomLength) {
if ($('#Next').css("visibility") == "visible") {
$('#Next').css("visibility", "hidden");
}
}
}
else {
$('#MainImage').attr('src', Imagesrc);
}
}).fadeIn(1000);
});
Conclusion
I hope this tip will help beginners to understand how to create their own jquery slider with some simple animation effects. Feel free to ask any questions if you have any. I hope to extend this tip with some more animation effects in future.
Happy programming!
History
- 01-03-2015: First version
This member has not yet provided a Biography. Assume it's interesting and varied, and probably something to do with programming.


 General
  News
News  Suggestion
  Question
  Bug
Bug  Answer
  Joke
Joke  Praise
  Rant
Rant  Admin
Admin 


