Introduction
This is an example to use Websocket to create a simple chat program.
Background
This is an example to use Websocket to create a simple chat program. In order to give enough focus on Websocket, the example is kept as simple as possible to support only a single chat room. Since this is a simple chat room, a user does not need a password to log into the room. Although the back-end is created by Java on a Tomcat server, it should have some reference value to the people who use other platforms such as .Net or Node.js.
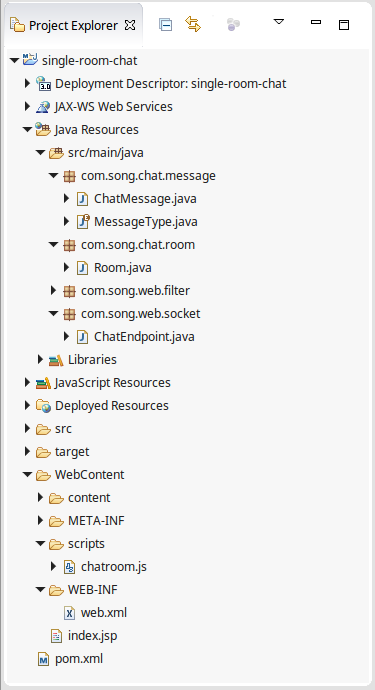
The attached is a Maven web project. I have tested it with Java 1.8.0_65 and Tomcat 7.0.54. I used Eclipse Java EE IDE for Web Developers Mars.1 Release (4.5.1) as my development IDE. I also deployed it on an Amazon EC2 Ubuntu instance and tested it with Chrome, Firefox, and a couple of mobile devices.
The Server Environment Setup
No special environment setup is needed in order to use Websocket on Tomcat 7 and above. At least there is no need on Tomcat 7.0.54. There is no special configuration for the Websocket in the "web.xml" file either. The following is the "pom.xml" file in the attached Maven project.
<project xmlns="http://maven.apache.org/POM/4.0.0"
xmlns:xsi="http://www.w3.org/2001/XMLSchema-instance"
xsi:schemaLocation="http://maven.apache.org/POM/4.0.0
http://maven.apache.org/xsd/maven-4.0.0.xsd">
<modelVersion>4.0.0</modelVersion>
<groupId>com.song.example</groupId>
<artifactId>single-room-chat</artifactId>
<version>0.0.1-SNAPSHOT</version>
<packaging>war</packaging>
<properties>
<tomcat.version>7.0.55</tomcat.version>
<websocket.version>1.1</websocket.version>
<jackson.version>2.6.4</jackson.version>
</properties>
<dependencies>
<dependency>
<groupId>javax.websocket</groupId>
<artifactId>javax.websocket-api</artifactId>
<version>${websocket.version}</version>
<scope>provided</scope>
</dependency>
<dependency>
<groupId>com.fasterxml.jackson.core</groupId>
<artifactId>jackson-databind</artifactId>
<version>${jackson.version}</version>
</dependency>
<dependency>
<groupId>org.apache.tomcat</groupId>
<artifactId>tomcat-servlet-api</artifactId>
<version>${tomcat.version}</version>
<scope>provided</scope>
</dependency>
</dependencies>
<build>
<finalName>${project.artifactId}</finalName>
<plugins>
<plugin>
<artifactId>maven-compiler-plugin</artifactId>
<version>3.1</version>
<configuration>
<source>1.8</source>
<target>1.8</target>
</configuration>
</plugin>
<plugin>
<artifactId>maven-war-plugin</artifactId>
<version>2.4</version>
<configuration>
<warSourceDirectory>WebContent</warSourceDirectory>
<failOnMissingWebXml>true</failOnMissingWebXml>
</configuration>
</plugin>
</plugins>
</build>
</project>
- The "javax.websocket-api" dependency is only needed to compile the code. Since Tomcat 7 and above have the Websocket support by default, we do not need to package this dependency into the war file;
- The "jackson-databind" dependency is used to serialize/de-serialize the messages from the web browsers. If you do not need the serialization or you want to use other serialization methods, you do not need to add it as a dependency.
The Message Between the Server and the Clients
For the simple chat room, the message is also simple. It has only a message type and a message content, which is implemented in the "ChatMessage.java" file.
package com.song.chat.message;

public class ChatMessage {
    private MessageType messageType;
    private String message;

    public void setMessageType(MessageType v) { this.messageType = v; }
    public MessageType getMessageType() { return messageType; }
    public void setMessage(String v) { this.message = v; }
    public String getMessage() { return this.message; }
}
The "MessageType" is implemented as an "enum" in the "MessageType.java" file.
package com.song.chat.message;

public enum MessageType { LOGIN, MESSAGE }
We have only two message types in this example. One is used for the requests to log into the chat room, the other is used to send messages to be broadcasted in the room.
The Server End Point
In order for the browsers to communicate with the server through Websocket, we need to create a class annotated by "@ServerEndpoint".
package com.song.web.socket;

import java.io.IOException;
import java.util.Map;
import java.util.logging.Logger;

import javax.websocket.CloseReason;
import javax.websocket.EndpointConfig;
import javax.websocket.OnClose;
import javax.websocket.OnError;
import javax.websocket.OnMessage;
import javax.websocket.OnOpen;
import javax.websocket.Session;
import javax.websocket.server.ServerEndpoint;

import com.fasterxml.jackson.databind.ObjectMapper;
import com.song.chat.message.ChatMessage;
import com.song.chat.message.MessageType;
import com.song.chat.room.Room;

@ServerEndpoint(value = "/chat")
public class ChatEndpoint {
    private Logger log = Logger.getLogger(ChatEndpoint.class.getSimpleName());
    private Room room = Room.getRoom();

    @OnOpen
    public void open(final Session session, EndpointConfig config) {}

    @OnMessage
    public void onMessage(final Session session, final String messageJson) {
        ObjectMapper mapper = new ObjectMapper();
        ChatMessage chatMessage = null;
        try {
            chatMessage = mapper.readValue(messageJson, ChatMessage.class);
        } catch (IOException e) {
            String message = "Badly formatted message";
            try {
                session.close(new CloseReason(CloseReason.CloseCodes.CANNOT_ACCEPT, message));
            } catch (IOException ex) { log.severe(ex.getMessage()); }
        } ;

        Map<String, Object> properties = session.getUserProperties();
        if (chatMessage.getMessageType() == MessageType.LOGIN) {
            String name = chatMessage.getMessage();
            properties.put("name", name);
            room.join(session);
            room.sendMessage(name + " - Joined the chat room");
        }
        else {
            String name = (String)properties.get("name");
            room.sendMessage(name + " - " + chatMessage.getMessage());
        }
    }

    @OnClose
    public void onClose(Session session, CloseReason reason) {
        room.leave(session);
        room.sendMessage((String)session.getUserProperties().get("name") + " - Left the room");
    }

    @OnError
    public void onError(Session session, Throwable ex) { log.info("Error: " + ex.getMessage()); }
}
- The "@ServerEndpoint" annotation indicates that the "ChatEndpoint" is a Websocket end point. The url to access this end point should be "ws://server-address:port-number/single-room-chat/chat";
- The "@OnOpen" annotation indicates that the "onOpen" method will be called when a new Websocket connection is requested;
- The "@OnMessage" annotation indicates that the "onMessage" method will be called when a new message arrives. The message can be a request for login or a message to broadcast a message to the room;
- The "@OnClose" annotation indicates that the "onClose" method will be called when a client closes the Websocket connection. This method will be called even when the closing of the connection is not voluntary, which can be closures due to the lost of the internet connection or an error condition;
- The "@OnError" annotation indicates that the "onError" method will be called when an error occurs
The "ChatEndpoint" class is not a singleton in the Tomcat environment. It has a session scope, which is instantiated for every Websocket connection session from the client. Once a connection is established, the session instance will be used for all the messages until the connection session is closed. The "Room.java" implements the chat room, which handles broadcasting the messages to all the active Websocket connections.
package com.song.chat.room;

import java.io.IOException;
import java.util.ArrayList;
import java.util.List;

import javax.websocket.Session;

public class Room {
    private static Room instance = null;
    private List<Session> sessions = new ArrayList<Session>();

    public synchronized void join(Session session) { sessions.add(session); }
    public synchronized void leave(Session session) { sessions.remove(session); }
    public synchronized void sendMessage(String message) {
        for (Session session: sessions) {
            if (session.isOpen()) {
                try { session.getBasicRemote().sendText(message); }
                catch (IOException e) { e.printStackTrace(); }
            }
        }
    }

    public synchronized static Room getRoom() {
        if (instance == null) { instance = new Room(); }
        return instance;
    }
}
- Since the application is a single chat room, the "Room" class is a singleton;
- Since there will be many users in the room, all the methods are synchronized to avoid conflicts and race conditions.
The Client Side
The client side html layout is implemented in the "index.jsp" file.
<body>
<div id="container">
    <div id="loginPanel">
        <div id="infoLabel">Type a name to join the room</div>
        <div style="padding: 10px;">
            <input id="txtLogin" type="text" class="loginInput"
                onkeyup="proxy.login_keyup(event)" />
            <button type="button" class="loginInput" onclick="proxy.login()">Login</button>
        </div>
    </div>
    <div id="msgPanel" style="display: none">
        <div id="msgContainer" style="overflow: auto;"></div>
        <div id="msgController">
            <textarea id="txtMsg"
                title="Enter to send message"
                onkeyup="proxy.sendMessage_keyup(event)"
                style="height: 20px; width: 100%"></textarea>
            <button style="height: 30px; width: 100px" type="button"
                onclick="proxy.logout()">Logout</button>
        </div>
    </div>
</div>
</body>
The Javscript to create the Websocket and communicate to the server is implemented in the "chatroom.js" file.
var CreateProxy = function(wsUri) {
var websocket = null;
var audio = null;
var elements = null;
var playSound = function() {
if (audio == null) {
audio = new Audio('content/sounds/beep.wav');
}
audio.play();
};
var showMsgPanel = function() {
elements.loginPanel.style.display = "none";
elements.msgPanel.style.display = "block";
elements.txtMsg.focus();
};
var hideMsgPanel = function() {
elements.loginPanel.style.display = "block";
elements.msgPanel.style.display = "none";
elements.txtLogin.focus();
};
var displayMessage = function(msg) {
if (elements.msgContainer.childNodes.length == 100) {
elements.msgContainer.removeChild(elements.msgContainer.childNodes[0]);
}
var div = document.createElement('div');
div.className = 'msgrow';
var textnode = document.createTextNode(msg);
div.appendChild(textnode);
elements.msgContainer.appendChild(div);
elements.msgContainer.scrollTop = elements.msgContainer.scrollHeight;
};
var clearMessage = function() {
elements.msgContainer.innerHTML = '';
};
return {
login: function() {
elements.txtLogin.focus();
var name = elements.txtLogin.value.trim();
if (name == '') { return; }
elements.txtLogin.value = '';
if (websocket == null) {
websocket = new WebSocket(wsUri);
websocket.onopen = function() {
var message = { messageType: 'LOGIN', message: name };
websocket.send(JSON.stringify(message));
};
websocket.onmessage = function(e) {
displayMessage(e.data);
showMsgPanel();
playSound();
};
websocket.onerror = function(e) {};
websocket.onclose = function(e) {
websocket = null;
clearMessage();
hideMsgPanel();
};
}
},
sendMessage: function() {
elements.txtMsg.focus();
if (websocket != null && websocket.readyState == 1) {
var input = elements.txtMsg.value.trim();
if (input == '') { return; }
elements.txtMsg.value = '';
var message = { messageType: 'MESSAGE', message: input };
websocket.send(JSON.stringify(message));
}
},
login_keyup: function(e) { if (e.keyCode == 13) { this.login(); } },
sendMessage_keyup: function(e) { if (e.keyCode == 13) { this.sendMessage(); } },
logout: function() {
if (websocket != null && websocket.readyState == 1) { websocket.close();}
},
initiate: function(e) {
elements = e;
elements.txtLogin.focus();
}
}
};
The "CreateProxy" function is used in the "DOMContentLoaded" event in the "index.jsp" file.
var proxy = CreateProxy(wsUri);

document.addEventListener("DOMContentLoaded", function(event) {
    console.log(document.getElementById('loginPanel'));
    proxy.initiate({
        loginPanel: document.getElementById('loginPanel'),
        msgPanel: document.getElementById('msgPanel'),
        txtMsg: document.getElementById('txtMsg'),
        txtLogin: document.getElementById('txtLogin'),
        msgContainer: document.getElementById('msgContainer')
    });
});
You may want to pay a little attention to the "login" function in the "chatroom.js" file. It is the place where the Websocket is created at the client side. You should also notice that it also sets up the "onopen", "onmessage", "onclose", and "onerror" events that are similar to the server side end-point. In my experience, the "onerror" method may not always reliably fire, but the "onclose" event always fires, even though the closure is due to the lost of the internet connection or shutting down the web server.
Run the Application
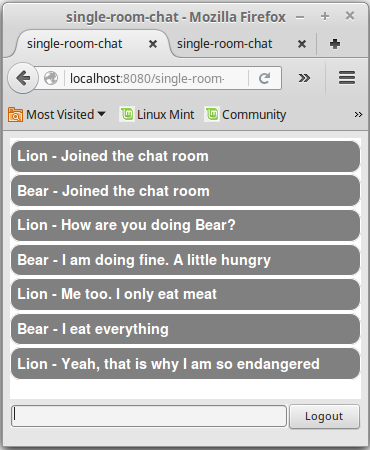
The attached is a Maven project. You can build it through "mvn clean install" and deploy the war file to a Tomcat server to run it. You can also import it into Eclipse to run it. If you are not sure how to import a Maven project into Eclipse, you can take a look at this link. When the application starts, you can see the login page that asks you to type in any user name to log into the chat room.

After logging into the room, you can then send and receive messages. You can try to open the web page in more than one browser windows to see if the messages are reliably broadcasted in the room.
Points of Interest
- This is an example to use Websocket to create a simple chat program;
- It is a little rudimentary, but it is simple enough so the focus is on Websoket;
- Whenever we talk about socket, we will need to take a good look into its reliability because of the internet is inherently not reliable. I have deployed this example on an Amazon EC2 Ubuntu instance and tested it with a few mobile devices while I went for shopping through the mobile internet connections;
- Although this example is on Tomcat, it should have some reference value if your platform is .Net or Node.js;
- I hope you like my postings and I hope this example can help you one way or the other.
History
First Revision - 1/25/2016
I have been working in the IT industry for some time. It is still exciting and I am still learning. I am a happy and honest person, and I want to be your friend.


 General
  News
News  Suggestion
  Question
  Bug
Bug  Answer
  Joke
Joke  Praise
  Rant
Rant  Admin
Admin 


