In this series, I want to show you how to create simple 2D games using JavaScript, React, Canvas and CSS. We will make a simple Space Invaders clone, you can check out the end result on https://phillikus.github.io/react_invaders/. To check out the full code, go to https://github.com/phillikus/react_invaders.
In this part, we will setup the project, add a TitleScreen component and a class to handle user input.
Requirements
Setup
First of all, we have to setup our project. To do this, go to your Projects folder and run the following command:
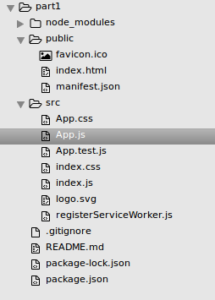
create-react-app react_invaders and open up the folder in your favourite JavaScript IDE (I like to use Sublime Text). You should see a project structure like this:
Now (or anytime you want to test our progress), we can run npm start from the command line to deploy our app locally. When you open the link from the command line in your browser, you should see a react welcome page.
Next, we will remove this welcome page so we can start adding our own content. To do this, open the App.js file in the project and replace the code from the render() method with an empty div:
render() {
   return (<div> </div>);
}
The render() method is the central place for all our rendering logic. It contains pseudo-HTML code (JSX) which will then be translated to real HTML in the browser.
We can also delete the logo.svg file and remove import logo from './logo.svg'; from App.js. After reloading the application in our browser, we should now see an empty page.
Drawing the Game Canvas
Our entire application will run inside an HTML canvas. To draw an empty canvas, we have to define its width, height and aspect ratio. For now, we will define 3 constants for that:
const width = 800;
const height = window.innerHeight;
const ratio = window.devicePixelRatio || 1;
We will place them right above our class definition. We can now use these constants to initialize the state of our App class. To do so, we have to add a constructor to our App class and initialize the state with these variables:
this.state = {
screen: {
    width: width,
    height: height,
    ratio: ratio
}};
I encapsulated the mentioned properties in a new screen property. Remember that we can initialize the state of a React component like this only in the constructor!
Next, we have to adjust the render method to draw a canvas with these values:
render() {
    return (
       <div>
          <canvas ref="canvas"
             width={ this.state.screen.width * this.state.screen.ratio }
             height={ this.state.screen.height * this.state.screen.ratio } />
      </div>
    );
  }
Finally, we have to add some CSS to the already existing App.css file to set the color and align our canvas properly:
canvas {
  display: block;
  background-color: #000000;
  margin-left: auto;
  margin-right: auto;
}
That’s it! Reload the app in your browser, and you should see a black empty canvas with the defined width and height. It should be positioned right in the middle of the screen.

Adding a TitleScreen Component
Now, it’s time to start adding some content to our freshly created canvas. To do so, we will add a new React-component to display the title-screen. To keep our React-components in one place, we will first add a new folder ReactComponents in the /src folder. Then, we can add a new TitleScreen.js file to this folder:
import React, { Component } from 'react';

export default class TitleScreen extends React.Component {
	render() {
		return (
			<div>
				<span className="centerScreen title">React Invaders</span>
				<span className="centerScreen pressSpace">Press Enter to start the game!</span>
			</div>
			);
	}
}
That’s all! We only need a render method that returns our Welcome messages and some CSS to format it properly. Just make sure that you are inheriting from React.Component. I used the following CSS (inside App.css), feel free to play around with it:
.centerScreen {
  text-align: center;
  display: block;
  position: absolute;
  z-index: 1;
  width: 100%;
}
.title {
  top: 20%;
  color: green;
  font-size: 80px;
}
.pressSpace {
  top: 35%;
  font-size: 20px;
  color: #ffffff;
}
Now we can import and use this class from our App.js file. To do so, we will first add an import line for our new component:
import TitleScreen from './ReactComponents/TitleScreen';
Finally, we can add this new component in the render method:
render() {
    return (
      <div>
        <TitleScreen />
        <canvas ref="canvas"
         .....
Reloading the page, we should now see the title of our game followed by instructions on how to start playing. Since our game doesn’t respond to any user input yet, pressing the Enter key won’t have any effect.
Handling User Input
Now that we have our first component up and running, it is time to think about handling user input. In JavaScript, we can intercept user input using the keyup and keydown events. To keep the logic for user input separated from our game logic, we will add a new class InputManager.js to the /src folder. The keyup and keydown events provide a simple integer to identify the pressed key. To make more sense of these keyCodes, we will first add a constant to give some better names to these keyCodes:
const KEY = {
   LEFT:  37,
   RIGHT: 39,
   A: 65,
   D: 68,
   SPACE: 32,
   ENTER: 13
};
You can check out the keyCodes on http://keycode.info/.
In the constructor of our InputManager class, we will add a new property pressedKeys which we will later use to see what keys were pressed by the user:
constructor() {
   this.pressedKeys = { left: 0, right: 0, space: 0, enter: 0 };
}
We will use the left and right keys to move the player, space for shooting and enter to navigate between menus.
Now, we will add two functions to bind the key-events when we open the app and to unbind them afterward. They will be responsible for binding these to a new handleKeys method, which will in turn be responsible for setting the pressedKeys property mentioned above:
bindKeys() {
   window.addEventListener('keyup',   this.handleKeys.bind(this, false));
   window.addEventListener('keydown', this.handleKeys.bind(this, true));
}

unbindKeys() {
   window.removeEventListener('keyup', this.handleKeys);
   window.removeEventListener('keydown', this.handleKeys);
}

handleKeys(value, e){
   let keys = this.pressedKeys;
   switch (e.keyCode) {
      case KEY.LEFT:
      case KEY.A:
         keys.left  = value;
         break;
      case KEY.RIGHT:
      case KEY.D:
         keys.right  = value;
         break;
      case KEY.SPACE:
         keys.space  = value;
         break;
      case KEY.ENTER:
         keys.enter = value;
         break;
    }
    this.pressedKeys = keys;
}
For the keyup event, we call <handlekeys> with the value false and for the keydown event with true. For example, when the A key is pressed down, handleKeys will be called with value==true and e.keyCode == KEY.A, so keys.left will be set to true; As soon as the key is released, the keydown event is triggered and keys.left is set back to false.
This completes our InputManager class and we are now ready to integrate it into our App.js class. First, we have to add an import statement for it:
import InputManager from './InputManager';
Then, we will initialize a new instance of this class in the constructor and assign it to a new state property:
constructor() {
  super();
  this.state = {
    input: new InputManager(),
      screen: {
        width: width,
        height: height,
        ratio: ratio
      }
    };
  }
To call our bindKeys and unbindKeys methods, we will override the componentDidMount and componentWillUnmount methods provided by React. They will be called when we load and unload our app, respectively:
componentDidMount() {
  this.state.input.bindKeys();
}

componentWillUnmount() {
  this.state.input.unbindKeys();
}
That is all we need! If you set a breakpoint in handleKeys in your browser developer tools, you will see that it is triggered whenever you push/release some key.
In the next part of this series, we will add a player-controlled ship class, game state management, a Game Over screen and an overlay to show the controls of the game!
Thank you for reading this article :) If you have any questions, problems or feedback, please let me know in the comments.


 General
  News
News  Suggestion
  Question
  Bug
Bug  Answer
  Joke
Joke  Praise
  Rant
Rant  Admin
Admin 


