Introduction
Today we’ll cover many concepts of typescript in depth. And if you’ve not even read my previous article of angular series, here is the link
Go ahead and read this article. And then start exploring Typescript. Let’s start our journey.
What is TypeScript?
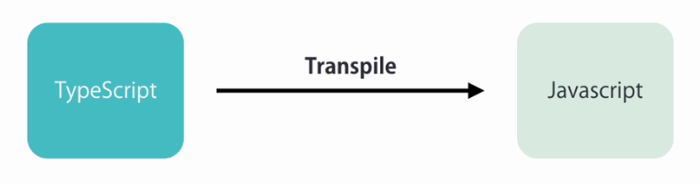
Typescript is nothing but a superset of javascript, it means that everything we can do with javascript we can also be developed through Typescript. But Typescript has most of the features that javascript don’t have supported by any browser. For example,
- Typescript has the concept of strong typing. As we already know that in different programming languages like in C#, Java when we make the datatype of any variable then this type can’t be changed and we can debug the program very easily if there is any kind of exception.
Similarly, in Typescript, we declare the type of any variable optionally but if we declare it with specific type we can debug our application very easily when something goes wrong.
- Typescript also brings with quite a bunch of features of object-oriented programming. We’ve missed these OO features in Javascript for a long time. Now we have the concepts of classes, interfaces, constructors, access modifiers, fields, properties, generics and so on.
- Another beautiful feature of Typescript is we can catch the error at compile time instead of runtime. But it doesn’t mean we can catch all kinds of errors but a lot of errors we can catch.
So there is a compilation step involved and when we compile our typescript code, we can catch the errors and resolve them before deploying our application.
- If we’re using Typescript then we’ve some awesome tools we can use in our application like intellisense in code editor etc.
Any valid and correct Javascript code also have the valid Typescript code. Most important point is browsers don’t understand the typescript itself. So we need to compile our typescript code into javascript. So this is the part of our application building, whenever we build the application transcript compiler comes into play and compile our typescript code into javascript code to understand the browser.
First Typescript Program
Here we’ll explore how to install typescript and how to write the first program using typescript. Now open the Node.js cmd (Run as Administrator) or open the integrated terminal in Visual Studio Code and write the below command it is up to your choice.
We already know the pattern of the write command to install the package.
npm install –g packagename
-g is for to install the package globally.
PS C:\Users\Ami Jan\HelloWorld> npm install -g typescript
Here we’ve installed the latest version of typescript which is 2.8.3
Now if you want to know the compiler version of typescript. Then write here in VS Code terminal.
PS C:\Users\Ami Jan\HelloWorld> tsc –version
Now let’s make a transcript file and start coding but before getting started let’s make a new folder and make a new file in it.
PS C :\Users\Ami Jan\HelloWorld> cd .\MyFirstAngularProject\
PS C :\Users\Ami Jan\HelloWorld\MyFirstAngularProject> mkdir ts-helloworld
PS C :\Users\Ami Jan\HelloWorld\MyFirstAngularProject> cd .\ts-helloworld\
PS C :\Users\Ami Jan\HelloWorld\MyFirstAngularProject\ts-helloworld> code main.ts
This is how VS Code Terminal works actually Windows Powershell commands are working at the backend.
We see “code filename.ext” is used to create the file and open it and “code .” is used to open the current project in which directory you’re executing this command.
Here we’ve created “main.ts” file. As we already know that any valid javascript has valid typescript. Here in this file, we’ll write some plain javascript code and all the valid javascript code has valid typescript code.
Now we’ll compile the typescript code. So, first of all, make sure your directory where you have the typescript file and compile it,
Typescipt Code Compilation Command:
PS C :\Users\Ami Jan\HelloWorld\MyFirstAngularProject\ts-helloworld> tsc main.ts
And if we directly build the angular project with “ng serve” then we don’t have to do it manually, angular automatically calls the typescript compiler and compile the code under the hood.
Now let’s open “main.js” file and run it and show the output in terminal.
PS C :\Users\Ami Jan\HelloWorld\MyFirstAngularProject\ts-helloworld> code main.js
PS C :\Users\Ami Jan\HelloWorld\MyFirstAngularProject\ts-helloworld> node main.js
Look it is exactly the same code, we wrote in typescript file but now it is javascript file. So the results are all javascript code is also valid for typescript code.
Declaring Variables
Let’s discuss some specific feature of Typescript that doesn’t have in javascript. Yes we’re talking about Typescript strong typing. Here we’ve 2 ways to declare the variable.
- We can use “var” keyword like we do in javascript.
- We can use “let” keyword.
We already know that javascript has few different versions, we’ve
ES5 (EcmaScript 5): supported by all browsers. We’re using it for a long time.
ES6 (2015): it is the newer version and it was introduced in 2015. And here EcmaScript team extended javascript decided to use year number instead of version number. Here “let” keyword was introduced.
ES2016
ES2017
And then these new versions became introduced with year name.
Let me tell you the difference of var and let, write some code in “main.ts” file. Here in the below image I’m compiling my typescript code and run the javascript code in a single statement in the terminal.
And one important thing make sure you’ve saved the file on writing the code in typescript file otherwise you’ll see the previous compiled code result.

Look here it is valid and showing us the result with a digit number. And we already knew that the variable is not accessible outside of the loop.
Now try it with let, look even I’ve not save my file yet but typescript knows at compile time that it can’t be possible, your colorful file names become red and messaging you about something wrong.
Here i is outside of the scope. And if you hover the mouse on i you’ll see the message that it doesn’t find i variable.
Let’s save the file and remove our last built main.js
PS C :\Users\Ami Jan\HelloWorld\MyFirstAngularProject\ts-helloworld> rm main.js
Look we’ve removed the file. Now compile the typescript file, and here we’ll see the error in console or in terminal.
And we’ve generated the compiled js file with bug as you can see in the above image. Typescript compiler generates it for us even our typescript file has error. Let’s look what we’ve in this main.js
PS C :\Users\Ami Jan\HelloWorld\MyFirstAngularProject\ts-helloworld> code main.js
As we can see here our typescript file was showing us error but here the code is compiled with var, actually typescript code is by default compiled into ES5 which is supported by all browsers. And ES5 doesn’t have let keyword that’s why it is using var keyword. And this is perfectly valid javascript code which is generated in main.js and if we simply go into the terminal and run this main.js file, we’ll see the same results as we see before.
So the conclusion is typescript compiler just reports this error at the compile time. But it is still generating the valid javascript code. And now we’ll always use let keyword in the next examples although it is generating the valid javascript but at least we can catch the errors at compile time.
Types
Here we’ll explore different types which we’ve in Typescript.
Let’s start with creating the integer number data type variable and then again assign that variable a string. Here we’ll see the error message if we hover the mouse on the variable.
But we can perfectly do this in javascript because in Javascript we can change the type of variables on the fly but in the typescript, we get the compilation error. Now once again, we can also compile this using typescript compiler and we’ll surely get the valid javascript code as we do earlier. But although it will generate the valid javascript that code can break in future because might be we use this countNumber variable somewhere else in the application like in a loop. So our program will break at the runtime.
What if, if we declare the variable without initialization. Let’s look at this type.
We can see here we’ve variable type is any like we have the variable in javascript. So here we can do some tricky things.
let a;
a = 5;
a = true;
a = "usama";
Look everything is happening there and even compiler don’t reporting it actually because it doesn’t know about the type at declaration.
The solution to this kind of problem is we use type annotations, we declare the type of the variable in the first statement and then if we try to initialize a different type of value then we’ll see the compile time error.
Here in typescript, we’ve different kinds of types.
let a: number;
let b: boolean;
let c: string;
let d: any;
let e: number[];
Now let’s suppose we want to initialize the variable at the declaration time as well.
let isAvailable: Boolean = true;
let marks: number = 530;
Typescript also uses the template strings. Template strings are surrounded with backticks (``) and we use them with ${} syntax like we do in C# (string interpolation).
let fullName: string = `usama`;
let position: number = 1;
let sentence: string = `Hello, World! My name is ${fullName} and I’ve got ${position + 1} in exams`;
We can define the dimensions of array but it is optional.
let f: number[] = number[1, 2, 3];
let g: any[] = any[1, true, ‘a’, false];
of course these techniques aren’t recommended but we’re discussing them here just to know about the things.
As we have the generics in C#, we’ve also the generics in Typescript as well. We can declare the array with generics as well.
let list: Array<number> = [1, 2, 3];
We’ve also enums in typescript, enums are used to define the constants. We put all the constants in a container. In old Javascript language, we explicitly define the constants like,
const ColorRed = 0;
const ColorGreen = 1;
const ColorBlue = 2;
But now in typescript we can define the enum as.
enum NameOfEnum { elements }
enum Color { Red, Green, Blue }
Look we see the intellisense in typescript, it helps to write the code so fast. We don’t any need to remember the things. We already know that enums are 0 based by default and each next value will be incremented with the next value. So we don’t any need to set the explicit value in enum. But the best practice is to explicitly assign the values to the elements. Because if you’re using the old enum in your application and then in future you add one more element inside the enum elements then the order of elements and their values will become change. So the best approach is to assign the explicit value and assign the 1 value to the first element of enum because if your enum is 0 based and you’re working with database then you might face the errors in your application.
enum Color { Red = 1, Green = 2, Purple = 4, Blue = 3 }
Now let’s compile our typescript file and watch how our typescript enum is render into the javascript.
PS (Take Care of File Folder Path) > tsc main.ts
You can see how much complex our javascript code is which we compiled through our typescript code. That’s why developers love angular and typescript. The statement which we write in just one line is compiled into the many lines in javascript. This is the major difference among both of 2, typescript and javascript.
If we want to initialize a variable with any enum element. Then we’ll declare the variable as,
enum Color { Red, Green, Blue }
let c: Color = Color.Green;

Destructuring
Another beautiful feature of ECMAScript 2015 that includes in Typescript is destructuring. Let me share the example with you.
let x = [50, 100];
let [e1, e2] = x;
console.log(e1);
console.log(e2);
Under the hood, it creates the 2 different variables e1 and e2 containing the values on x array 1st and 2nd index.
Spread
If you’re an expert of Javascript then you’ll certainly know about these features of Javascript. Yes there is a concept of spread in javascript. Here we’ll implement spread in typescript. Actually it is opposite to the destructuring, let me share the example with you.
let x = [5, 7];
let y = [3, 8];
let both = [9, x, y, 10];
look if we combine the array like this,
console.log(both);
it will show like in this format. But if we use the spread operator,
let both = [9, …x, …y, 10];
it will render our array in original,
console.log(both);
you can see these three dots with name of variable (…x) is called spread. In destructuring we’re splitting the things, it allows us to spread an array into another array. We can even spread an object into another object.
Type Assertions
Let’s start by declaring the variable.
let text = ‘usama’;
Here intellisense guides us how to write the code. But sometimes typescript become confuse about the type of the variable like if the variable declaration with ‘any’.
let text;
text = ‘usama’;
let found = text;
As we can see we’re not getting any intellisense. And we can’t apply any method which we were implementing before. So in this scenario, we need to manually tell the typescript compiler the type of the variable. This is called type assertion.
There are 2 ways to make type assertion.
(<type>variable).
Here we get all the methods and functions that we can implement upon the string type.
The second method is to use the “as” keyword like we do in C#.
(text as string).
Keep in mind, type assertion doesn’t change the type of the variable at runtime. Infact it doesn’t restructure the variable in memory. It just helps us to behave a variable like a specific type.
Arrow Functions
It is also an important concept, in javascript we already know that how can we declare the function
let log = function (text) {
          console.log(text);
}

log(‘usama’);
We don’t need any function keyword here. This is the technique same like we do in C#. In C# we call this lambda expression and in typescript we call this arrow function. Yes it is exactly the same thing.
If the method body has only 1 statement, then we can also remove the curly braces as well and if there is only 1 parameter then we can remove the parenthesis of parameters. If there are multiple lines then we use curly braces and if there are multiple parameters then we must use the parenthesis enclosed parameters.
One more thing, always use double quote for string here. Otherwise you’ll see errors.
let logMessage = message => console.log(message);
let logMessage1 = (message, recipient) => {
          console.log("Hello" + message);
          console.log("I\’m here" + recipient);
}

logMessage("usama");
logMessage1("sweety", "Usama");
But the best practice is to always to use the parameters in parenthesis to make it more readable.
And if we don’t have any parameter for our function then we’ll surely make the parenthesis empty and write our arrow function.
let logMessage2 = () => console.log("Hello, World!");
if we compile our arrow functions, let’s see how does it look like in javascript. But save the typescript file.
Interface
Let’s see how can we use custom types in typescript. Let’s suppose we’re working with a function who needs 2 points to draw something.
let drawPoints = (x, y) => {
}
But if there are multiple points and if we pass all the parameters to a function, then this would be a code smell. We always try to make our code clean.
let drawPoints = (a, b, c, d, e, f, g, h) => {
}
Instead of passing all the parameters, we can pass a single object which has all these properties.
let drawPoints = (point) => {
}
And then we can call this function as.
drawPoints({
x: 5,
y: 8,
z: 9
});
Now our code is much clean, but still there is a problem of this kind of logic. We can pass anything to the point object like.
drawPoints({
          name: "Usama",
          loves: "Azure"
});
And if we already define the implementation of the points in arrow function and we’re passing different named parameters then surely our code will break at the runtime. So need to limit the user to pass the specific named parameters.
Here we’ve 2 solutions to solve this problem.
Use inline annotation
let drawPoints = (point: { x: number, y: number }) => {
}
It works fine for simple cases but let’s suppose we’re doing function overloading then we need to repeat the inline annotations again and again with the other functions as well. So in that scenario, we need to use ‘Interface’
Concepts are same in every programming language, just syntax changes. If you know the concept of interface because we use interface OO languages like in C#, Java then surely you’ve have an idea why interface is important.
Come in Typescript file and define interface. Defining interface is just like the defining the shape of the object.
interface Point {
     x: number,
     y: number
}
Now simplify the implementation of the function.
let drawPoints = (point: Point) => {
}
Now it is much cleaner and we can reuse this in multiple places. If you’re defining the custom types always use Pascal notation like we do here in our code. It helps you during development.
Here is my final main.ts file.
And my main.js file is which I compiled through my main.ts file.
In some programming languages, we always need to explicitly define the class with interface to implement the interface like in static programming languages. But as we know javascript itself and javascript family is a dynamic programming language. So, here we don’t any need to implement the interface explicitly.
interface Label {
    label: string;
}

function printMessage(labelObj: Label) {
    console.log(labelObj.label);
}

let myObj = { name: "Usama", label: "Hello, World!"};
printMessage(myObj);
For more examples with different scenarios in Typescript’s interface, open this link. If you know OOP in C# or Java, you’ll get to the point that it is totally you already know. Just you’ve syntax changing here. Nothing is new.
Classes And Objects
Now we’ve seen how we can define the shape of the object but still there is a problem with this implementation. In OOP, we’ve the concept of cohesion which means that the things are related should be part of one unit. Everything that is in the block should be relevant to the block. Things are fully structured and relevant to each other. This is called cohesion.
Now look in the previous example, we made the interface and implement it in the function. Here we violated the concept of cohesion. Although we can use interface in that manner, and I’m not telling you that you should avoid from interface and go ahead with classes. I’m just creating the scenario to make you understand the different concepts. Interface has its own benefits that we can never enjoy without interface. So interfaces are also important. Let’s suppose you’re using a utility library in your project then how will you use the object in the function. Certainly, the below code technique. So it is also important to know.
interface Point {
     x: number,
     y: number
}

let drawPoints = (point: Point) => {
}
Here the Point should be highly related to the function, these should not be 2 separate things.
So the class is
“Properties And Methods That Are Highly Related.”
Yes I know it is my own created definition and if any reader of this article is experienced, surely he’ll kill me. But it is just for the understanding of you people. This is not the proper definition of class.
In the above example we can’t move the function inside the interface because interfaces are purely for declarations, they can’t have implementation of anything. But we can also declare the function prototype in the interface.
interface Point {
x: number,
y: number,
draw: () => void
}
As these properties and method is the part of one code block, so we don’t any need to pass the parameters inside the method. That’s why draw method has no parameter. Now we can implement it somewhere else.
We were discussing the cohesion principal, we already knew that coupling and cohesion principle implements on the classes. So, we convert it into the class and follows the class syntax with a new example.
class Vehicle {
x: number;
y: number;
Drive() {
}
CoveredDistance(distance: Vehicle) {
}
}
Here we can see things are fully related to each other. When a function is part of a class, it is called method.
Now let’s create the object variable of this custom type.
let car: Vehicle;
look we’re getting the intellisense for the available methods and properties.
Now let’s run the Drive method with this object variable. Compile and run the program but essentially save your typescript file prior.
Here we get the compile time error.
Look it is undefined. Actually in the above code we have just created the specific type ‘Vehicle’ variable. It is actually not allocating the space into the memory. So, we need to make it complete.
let car: Vehicle = new Vehicle();
As we can see we’re repeating the Vehicle 2 times, so we need to make our code clean.
let car = new Vehicle();
it is ok now. Here typescript compiler automatically knows from the initialization that ‘car’ is the type of Vehicle
Now let’s compile, run main.js and check the type of ‘car’
Now look we’ve not even assigned the values to the properties and still it is compiled successfully. And if we console.log the properties in the Drive()
Now let’s initialize the x and y points. Now it is working successfully.
Keep in mind, Vehicle is the class and car is the object. And object is the instance of Class.
Constructors
Look here we’ve 3 lines to initialize the properties. This approach is not good. Constructor basically uses to initialize the properties. Imagine if the class has few more properties then surely you’ll be tired to initialize all the properties line by line.
let car = new Vehicle();
car.x = 50;
car.y = 100;
Let’s discuss the concept of constructor. Every class has a default constructor which is basically called when we create the instance of the class with the help of new Obj()
But let’s suppose we don’t know the constructor parameters and their patterns. In C#, Java other programming languages we’ve the default constructor as well but here in typescript, we don’t have the default constructor. So if we’re not providing the initial values we’ll be getting the error.
let car = new Vehicle();
car.Drive();
So in this kind of scenario, we need to make our parameters optional. And we can do it by using question mark (?).
In C# we can have multiple constructors but in typescript we can’t have multiple constructors.
That’s why we’re making it optional.
Now we’re not getting any compilation error.
Inheritance
In Typescript, we can also extend the implementation of any class just by inherit the base class with child class. Yes we can do in Typescript, this is the beauty of Javascript.
class Vehicle {
          move(direction: string = "forward") {
                   console.log(`Vehicle is moving ${direction}`)
          }
}

class Car extends Vehicle {
          numberOfSeats(number: int) {
                   console.log(`Car has ${number} of seats`);
          }
}

let car = new Car();
car.numberOfSeats(4);
car.move("forward");
Constructor Inheritance
Yes we can also make inheritance in constructors like we do in C# with the help of base(), here we use super()
class Vehicle {
    private wheelers: number;

    constructor(wheel: number) {
        this.wheelers = wheel;
        console.log(`Vehicle has ${this.wheelers} wheels`);
    }

    move(direction: string = 'forward') {
        console.log(`Vehicle is moving ${direction}`)
    }
}

class Car extends Vehicle {

    constructor(wheels: number) { super(wheels); }

    numberOfSeats(number: number) {
        console.log(`Car has ${number} of seats`);
    }

    move(direction: string) {
        super.move(direction);
    }
}

class MotorBike extends Vehicle {

    constructor(wheels: number) { super(wheels); }

    numberOfSeats(number: number) {
        console.log(`MotorBike has ${number} of seats`);
    }

    move(direction: string) {
        super.move(direction);
    }
}

let car = new Car(4);
let motorbike : Vehicle = new MotorBike(2);
car.move('backward');
motorbike.move('forward');
We already knew that if the variable is of base type then we can make the child type object with this variable. This is the concept of OOP. Don’t confuse about the results, these are actually the simple objects of a simple classes. And here is the result.
Access Modifier
Look in the above example, still we can initialize the variable after creating object.
let car = new Vehicle(50, 100);
car.x = 30;
car.y = 70;
it is ok in our scenario, but we want to limit our properties to not accessible outside of the class here we need access modifiers. It reduces the chances of bugs.
We apply the access modifier on the member of the class to control the accessibility of class members.
In Typescript we’ve 3 access modifiers.
By default class all members are public, that’s why x and y we’re accessing with the instance object as well. Let’s make our properties private and if we’re using x and y with the instance object then we’ll see compilation error.
class Vehicle {
    private x: number;
    private y: number;

    constructor(x?: number, y?: number) {
        this.x = x;
        this.y = y;
    }

    Drive() {
        console.log('Initial Point is: ' + this.x +
        ' And Final Point is: ' + this.y);
    }
}

let car = new Vehicle(50, 100);
car.Drive();
Now let’s compile the code and open the main.js
Now let’s discuss a very beautiful feature in typescript as well. As you can see we’re making our code redundant by using (this.x, this.y) in the constructor. We can make our code clean by just simply prefixing it with private in constructor header and remove the redundant code.
class Vehicle {

    constructor(private x?: number, private y?: number) {
    }

    Drive() {
        console.log('Initial Point is: ' + this.x +
        ' And Final Point is: ' + this.y);
    }
}

let car = new Vehicle(50, 100);
car.Drive();
it will automatically creates the private class member properties and initialize it like we do in constructor before. Now let’s verify it by generating its main.js
Yes it is looking same. So typescript has a very beautiful feature with constructors. We can also make constructor parameters public, all it depends upon our requirements.
We already know that protected number is only available in the derived class. So let’s make an experiment.
class Vehicle {

    protected wheel: number;

    constructor(wheel: number) {
        this.wheel = wheel;
        console.log(`Vehicle has ${this.wheel} wheels`);
    }
}


class Car extends Vehicle {

    private name: string;

    constructor(model: string, wheels: number) {
         super(wheels);
         this.name = model;
         console.log(`My Car is ${this.name} and it has ${this.wheel}`);
    }
}

let car = new Car("Honda", 4);
Look we can see this.wheelers can be accessible in the derived class.
this pointer
Do you know the concept of this pointer? this pointer contains the reference of its type. Look in the derived class we can use the variable of parent member because the member is protected in the parent class, and protected members are accessible in the derived class. And here we’re using this, means Car class has the wheel field.
Properties
Now this implementation has still tiny problem. We’ve constructor to initialize the fields. We’ve function to perform some custom operation and this operation can be anything. But we don’t have any type to read the value of the fields.
We’ve few methods to return the value of the fields like.
The first technique is,
class Vehicle {

    constructor(private x?: number, private y?: number) {
    }

    Drive() {
        console.log('Initial Point is: ' + this.x +
        ' And Final Point is: ' + this.y);
    }

    getX() {
        return this.x;
    }
}

let car = new Vehicle(50, 100);
console.log(car.getX());
car.Drive();
The result of this code will be.
Now if we wanna set the field value later on after creating the object and call its constructor even after initializing the variables. Then we use setter technique. These are the things all we do and all we know if you’re C# developer. So let’s add Setter in the class.
class Vehicle {

    constructor(private x?: number, private y?: number) {
    }

    Drive() {
        console.log('Initial Point is: ' + this.x +
        ' And Final Point is: ' + this.y);
    }

    getX() {
        return this.x;
    }

    setX(value) {
        if (value < 0) {
            throw new Error('Enter a valid value');
        }
        this.x = value;
    }
}

let car = new Vehicle(50, 100);
car.setX(70);
console.log(car.getX());
Now we can also set our field values outside of the class. Same scenario we do in C#, initially we were creating the getter and setter manually but later C# introduced the concept of properties.
Here we’ve made the getter setter code manually. Similarly now typescript also introduced with some new feature, now we’ve get and set built-in keywords. Look the code below.
class Vehicle {

    constructor(private x?: number, private y?: number) {
    }

    Drive() {
        console.log('Initial Point is: ' + this.x +
        ' And Final Point is: ' + this.y);
    }

    get X() {
        return this.x;
    }

    set X(value) {
        if (value < 0) {
            throw new Error('Enter a valid value');
        }
        this.x = value;
    }
}

let car = new Vehicle(50, 100);
car.X = 80;
console.log(car.X);
if you’re an experienced developer then you surely know that if we want to make the property as readonly then we’ll just use getter, we don’t implement or write the code for setter. So comment out the setter code in our class to make the property as readonly.
Look here we’re getting the error on initializing the readonly property.
Modules
Now I’ve simplified my Vehicle class, now I’ve simple constructor and a method. This is a very simple program.
class Vehicle {

    constructor(private x?: number, private y?: number) {
    }

    Drive() {
        console.log('Initial Point is: ' + this.x +
        ' And Final Point is: ' + this.y);
    }
}

let car = new Vehicle(50, 100);
car.Drive();
with only 1 file but if in the real world, application consists of hundreds of files. We don’t write all the code in just one file. So here we’ll learn how to depreciate the code in files.
First of all we move the definition of Vehicle class in a file (Vehicle.ts)
PS > code Vehicle.ts
And now move the Vehicle class from main.ts to Vehicle.ts. This is the concept we called Modules. In Typescript, we think each file as a Module. So in this program, we can say we’ve 2 modules but not accurately. In Vehicle.ts file, we can’t access the Vehicle class outside of the file. This file has its own scope. Look here we’re getting the error.
But if we want to access this class outside of this file we need to export this class. Just prefixing the class with export keyword.
export class Vehicle {

    constructor(private x?: number, private y?: number) {
    }

    Drive() {
        console.log('Initial Point is: ' + this.x +
        ' And Final Point is: ' + this.y);
    }
}
Now this file considered as a module, save the export file. Now we need to import this file in main.ts as well. So,
import { comma separated class names if multiple (class name) } from ‘relative path (name of module)’;
import { Vehicle } from './Vehicle';


let car = new Vehicle(50, 100);
car.Drive();
(./) is because both files (main.ts and Vehicle.ts) are in the same folder. Don’t add the extension name with file otherwise you’ll see the compilation error.
There are a lot more stuff that can be discussable in modularity, but the things which we’ve discussed quite enough to start the angular project.
Keep in mind angular modules are defined in a different way, we don’t add the relative path in angular module cases. When we define the angular modules and import it into our typescript file, we just use the library names as a module names like,
import { Vehicle } from ‘@angular/core’;
In Typescript, we devide our program into multiple files. In each file we export one or more types, these types can be classes, functions, simple variables and objects and where were we need to use these types we need to import them first. When we’ve an import and export statement on top of the file. That file is a module in typescript’s point of view. We’ve also the concept of module in angular but it is little bit different, they are not about the organization of code in different files. They are about organization of your application into smaller functional areas.
Conclusion
Here we’ve covered a lot of stuff of Typescript. But everything is not complete, but if you’ve read this article then you can move with the project. And if you want to learn more about typescript. Then the best source is its documentation.
Recently Microsoft has introduced new updates in Typescript. If you want to know about these updates, here is the link.


 General
  News
News  Suggestion
  Question
  Bug
Bug  Answer
  Joke
Joke  Praise
  Rant
Rant  Admin
Admin 


