Razor Pages is the cool new project template that Microsoft introduced recently as part of the asp.net stack. It is probably the simplest and most straightforward to work with amongst the other asp.net project templates.
Today I will show you how to perform basic jQuery image upload using Razor Pages and JQuery. You will see how easy it is do so.
For examples of image upload methods with jQuery and other tools, see this jQuery image and video upload documentation page by Cloudinary, uploading with Zurb, or Dropzone’s various implementations.
Prerequisites
Steps
First, let us create a directory for our project and also create a new Razor Pages project by running the following commands.
mkdir JqueryRazorImageUpload
cd JqueryRazorImageUpload
dotnet new razor
Now go ahead and restore the default packages.
dotnet restore
If it works, great. Now stop the application and create two new files in the Pages folder. ImageUpload.cshtml which is the Page View and ImageUpload.cshtml.cs which is the Page Model.
using System.IO;
using System.Threading.Tasks;
using Microsoft.AspNetCore.Http;
using Microsoft.AspNetCore.Mvc.RazorPages;
namespace jqueryRazorpagesSimpleFileUpload.Pages
{
public class ImageUploadModel : PageModel
{
public void OnGetAsync()
{
}
}
}
<!-- ImageUpload.cshtml-->
@page
@model ImageUploadModel
<h1>Image Upload Page </h1>
Now go to open the _Layout.cshtml and add your new page to the navigation bar. it should look something like this.
<div class="navbar-collapse collapse">
   <ul class="nav navbar-nav">
      ...
      <li>
        <a asp-page="/ImageUpload">Image Upload</a>
      </li>
  </ul>
</div>
While at it also add a Styles section at the top of your _Layout.cshtml file, just after the head closing tag.
<head>
  ...
  @RenderSection("Styles", required: false);
</head>
Now go ahead and run the application to reveal the default Razor Pages application. You should also find Image Upload on the navigation bar.
dotnet run
Well, so far we have only covered the basics of setting up Razor pages. Now for the real deal. How do we Upload our files to our Page Model?
Let's start by downloading dropzone here. Add the js and CSS file to the Js and CSS folders under wwwroot.
Now, reference the CSS and Js files on your Page View. The CSS at the top and the js at the bottom. Although truthfully this doesn't matter since the RenderSection helper would only place them at locations where they were declared but just to keep you mentally organized.
<!--
@section Styles {
<link rel="stylesheet" href="~/css/dropzone.css" />
}
<!--
@section Scripts {
<script src="~/lib/dropzone.js"></script>
}
First, let us modify our Page Model to handle our future uploads. Go ahead and add the following piece of code to ImageUpload.cshtml.cs
using System.IO;
using System.Threading.Tasks;
using Microsoft.AspNetCore.Http;
using Microsoft.AspNetCore.Mvc.RazorPages;
namespace jqueryRazorpagesSimpleFileUpload.Pages
{
    public class ImageUploadModel : PageModel
    {
        public void OnGetAsync()
        {
        }
        public async Task OnPostAsync(IFormFile image)
        {
            var path = Path.Combine(
                        Directory.GetCurrentDirectory(), "wwwroot/uploads",
                        image.FileName);
            var memory = new MemoryStream();
            using (var stream = new FileStream(path, FileMode.Create))
            {
                await image.CopyToAsync(stream);
            }
        }
    }
}
We have added a method to handle all image uploads to our Page Model. Now we can go ahead and tell our view how to upload the Images.
Now let us add our form and then modify it to use our JQuery plugin.
<h1>Image upload page</h1>
<hr />
<div class="row">
    <div class="col-md-12">
        <h2>Upload Image</h2>
        <form method="post" enctype="multipart/form-data">
            <div class="form-group">
                <input name="image" type="file" class="form-control" accept="image/*"/>
            </div>
            <input type="submit" value="Upload" class="btn btn-default" />
        </form>
    </div>
</div>
As it is right now, our application is fully capable of handling our images but what we want is to upload our images using JQuery. So let us start by modifying our form by adding dropzone support.
<form method="post" enctype="multipart/form-data" id="imageUploadForm" class="dropzone">
    <div class="fallback">
            <div class="form-group">
            <input name="image" type="file" class="form-control" accept="image/*"/>
        </div>
            <input type="submit" value="Upload" class="btn btn-default" />
    </div>
</form>
All we need for Dropzone to work is add the class todropzone the form but in cases where Js is not available, we want our original form to act as a fallback. Awesome right. Right now Dropzone doesn't have enough information to work with, So at the bottom of our page, where we have our Scripts section, let's add some code for our image upload to function.
@section Scripts {
...
<script>
    $("#imageUploadForm").dropzone({
        url: "/imageupload",
        paramName: "image",
        acceptedFiles: "image/*"
    });
</script>
}
With this, our application is good to go. Go ahead and run your application and try it out. Cool right?
One more thing
Now we are done with our JQuery image upload and It's working, but what if we want to display the most recently uploaded image. There are only two simple steps to achieve this. Add the piece of code below right below the div with a class of row.
<div class="row">
    <div class="col-sm-12">
        <h3>Recent Upload</h3>

        <div>
            <img id="recentImage" class="img-responsive img-thumbnail" width="500"/>
        </div>
    </div>
</div>
Now update the JS section to handle Image uploads for files successfully uploaded to the server.
<script>
    $("#imageUploadForm").dropzone({
        url: "/imageupload",
        paramName: "image",
        acceptedFiles: "image/*",
        success: function(file){
            $("#recentImage").attr('src', `./uploads/${file.name}`);
        }
    });
</script>
Now that we have come to this point, there's quite a lot of changes we have made to our View file. So below find the completed View code with all the changes we have made so far.
@page
@model ImageUploadModel
@{
    ViewData["Title"] = "Image Uploader";
}
@section Styles {
    <link rel="stylesheet" href="~/css/dropzone.css" />
}
<h1>Image upload page</h1>
<hr />
<div class="row">
    <div class="col-md-12">
        <h2>Upload Image</h2>
        <form method="post" enctype="multipart/form-data" id="imageUploadForm" class="dropzone">
            <div class="fallback">
                 <div class="form-group">
                    <input name="image" type="file" class="form-control" accept="image/*"/>
                </div>
                 <input type="submit" value="Upload" class="btn btn-default" />
            </div>
        </form>
    </div>

</div>
<div class="row">
    <div class="col-sm-12">
        <h3>Recent Upload</h3>

        <div>
            <img id="recentImage" class="img-responsive img-thumbnail" width="500"/>
        </div>
    </div>
</div>
@section Scripts {
    <script src="~/lib/dropzone.js"></script>
    <script>
        $("#imageUploadForm").dropzone({
            url: "/imageupload",
            paramName: "image",
            acceptedFiles: "image/*",
            success: function(file){
                $("#recentImage").attr('src', `./uploads/${file.name}`);
            }
        });
    </script>
}
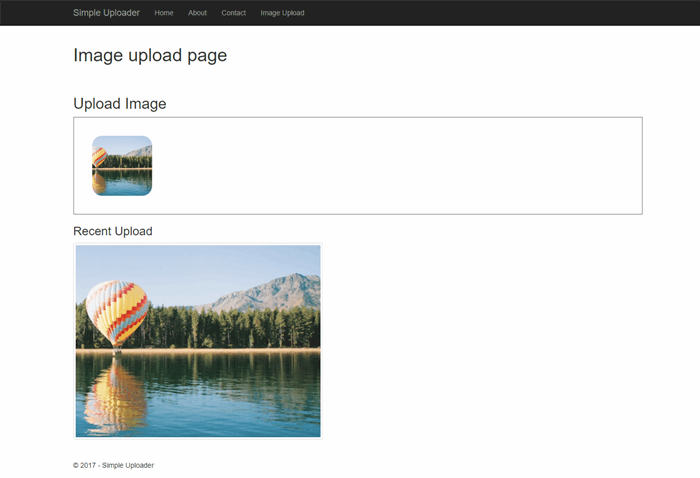
Here's what the final app should look like:
Conclusion
Thanks for sticking around. Here’s a link to the GitHub repo for the codes. I hope you learned something new. Please share and leave a comment for any reason you feel like it.
This member has not yet provided a Biography. Assume it's interesting and varied, and probably something to do with programming.


 General
  News
News  Suggestion
  Question
  Bug
Bug  Answer
  Joke
Joke  Praise
  Rant
Rant  Admin
Admin 


