Introduction
The main objective of this article is to discover more features about Angular4 and .NET CORE Framework such as:
- Create a RestFul Server using WebApi v2
- Using Entity framework for .NET Core code first approach
- AutoMapper
- Using .NET Core Dependency Injection
- Using Swagger API within .NET Core project
- Create Single Page Application using Angular
- Create components, services, and classes in Angular
- Angular Routing system
- Angular Form Validation
- Communicate between components using Subject pattern
- Working with Angular-datatables
Background
To better understand this article, it is recommended to have good knowledge about:
- Programming in C#
- SQL language
- Entity Framework
- Visual Studio code
Using the Code
I) Server Side
a) Prerequisites
Before starting the implementation of WebApi service project, below you will find all useful links:
- Visual Studio Code (link)
- DotNetCore 2.0.0 (link)
- NET Core Command Line Tools (link)
- AutoMapper (link)
- Swagger Api (link)
b) Setting Up the Project
Using Visual Studio code integrated terminal, we run the following command lines to create a new DotNet Core MVC project with individual authentification system inside demobackend folder.
mkdir demobackend
dotnet new mvc -au Individual -f netcoreapp2.0
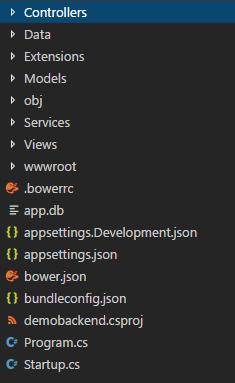
Here, it's the project structure:
To use only WebApi with identity system, you should introduce some changes into project:
Replace the startup program:
public void ConfigureServices(IServiceCollection services)
{
services.AddDbContext<ApplicationDbContext>(options =>
options.UseSqlServer(Configuration.GetConnectionString("DefaultConnection")))
services.AddIdentity<applicationuser, identityrole="">()
.AddEntityFrameworkStores<applicationdbcontext>()
.AddDefaultTokenProviders();
services.AddMvc();
}
public void Configure(IApplicationBuilder app, IHostingEnvironment env)
{
if (env.IsDevelopment())
{
app.UseDeveloperExceptionPage();
}
app.UseMvc();
}
Remove all controller classes present into Controller folder except AccountController class.
Replace AccountController by the following code to have only useful actions like login, logout and signup that return only http status code (200, 400).
namespace demobackend.Controllers
{
[Authorize]
[Route("[controller]/[action]")]
public class AccountController : Controller
{
private readonly UserManager<applicationuser> _userManager;
private readonly SignInManager<applicationuser> _signInManager;
private readonly ILogger _logger;
public AccountController(
UserManager<applicationuser> userManager,
SignInManager<applicationuser> signInManager,
ILogger<accountcontroller> logger)
{
_userManager = userManager;
_signInManager = signInManager;
_logger = logger;
}
[TempData]
public string ErrorMessage { get; set; }
[HttpPost]
[AllowAnonymous]
public async Task<iactionresult> Login([FromBody]LoginViewModel model)
{
if (ModelState.IsValid)
{
var result = await _signInManager.PasswordSignInAsync
(model.Email, model.Password, model.RememberMe, lockoutOnFailure: false);
if (result.Succeeded)
{
var msg = "User logged in.";
return Ok(msg);
}
}
return BadRequest("Fail to login with this account");
}
[HttpPost]
[AllowAnonymous]
public async Task<iactionresult> Register([FromBody] RegisterViewModel model)
{
var msg = "Bad Request";
if (ModelState.IsValid)
{
var user = new ApplicationUser { UserName = model.Email, Email = model.Email };
var result = await _userManager.CreateAsync(user, model.Password);
if (result.Succeeded)
{
_logger.LogInformation("User created a new account with password.");
var code = await _userManager.GenerateEmailConfirmationTokenAsync(user);
_logger.LogInformation("User created a new account with password.");
msg = "User created a new account with password.";
return Ok(msg);
}
}
return BadRequest(msg);
}
[HttpGet]
[AllowAnonymous]
public async Task<iactionresult> Logout()
{
await _signInManager.SignOutAsync();
_logger.LogInformation("User logged out.");
var msg = "User logged out.";
return Ok(msg);
}
}
c) Setting Up the Database
First, you should create an empty database named demoangulardatabase using SSMS.
Next, you should modify default connection string inside appsettings.json:
"ConnectionStrings": {

"DefaultConnection": "Server=(LocalDb)\\MSSQLLocalDB;Database=demoangulardatabase;
                        Trusted_Connection=True;MultipleActiveResultSets=true"
},
For this example, you need only Car entity, to do that, you need to create Car class into Data folder:
using System;
using System.Collections.Generic;
using System.ComponentModel.DataAnnotations;

namespace demobackend.Data
{
    public class Car
    {
        [Key]
        public int Id {get; set;}
        [StringLength(50),Required]
        public string Name {get; set;}
        [StringLength(50),Required]
        public string Mark {get; set;}
        [StringLength(50),Required]
        public string Model {get; set;}
        [Required]
        public DateTime Registered { get; set; }
    }
}
To update database schema, we will use Entity Framework Core migrations tools:
- Add a new migration script:
dotnet ef migrations add initialMigration -c ApplicationDbContext -v - Update database schema:
dotnet ef database update -c ApplicationDbContext -v
Finally, when you refresh your database server, you will get this result:

d) Using AutoMapper
The purpose is to create mapping from ViewModel objects to Entities objects and vice versa:
First, create CarViewModel class into Model folder:
using System;
using System.Collections.Generic;
using System.ComponentModel.DataAnnotations;

namespace demobackend.Models
{
    public class CarViewModel
    {
        public int Id {get; set;}
        [StringLength(50),Required]
        public string Name {get; set;}
        [StringLength(50),Required]
        public string Mark {get; set;}
        [StringLength(50),Required]
        public string Model {get; set;}
        [Required]
        public DateTime Registered { get; set; }
    }
}
Second, configure mapping via AutoMapper Profile Configuration file: create this file inside AutoMapperProfile folder:
using demobackend.Data;
using demobackend.Models;
using System.Collections.Generic;
using AutoMapper;
using System;

namespace demobackend.AutoMapperProfile
{
    public class AutoMapperProfileConfiguration : Profile
    {
        public AutoMapperProfileConfiguration()
        : this("MyProfile")
        {
        }
        protected AutoMapperProfileConfiguration(string profileName)
        : base(profileName)
        {

            CreateMap<Car, CarViewModel>();
            CreateMap<CarViewModel, Car>();
        }
    }
}
Finally, in startup.cs, add the following lines in ConfigureServices method to create and initiate IMapper service that will be injected into controllers:
var config = new AutoMapper.MapperConfiguration(cfg =>
            {
                cfg.AddProfile(new AutoMapperProfileConfiguration());
            });

var mapper = config.CreateMapper();
services.AddSingleton(mapper);
Creating Car Management API using ASP.NET Core Web API 2.0
Create a new controller named ManageCarController, that will contain endpoints for each CRUD method:
Get(): Returns HttpResponseMessage that contains all available carsGet(int id): Returns HttpResponseMessage that contains a specific car object identified by id parameter.Post([FromBody] CarViewModel _car): It will create a new car and will return an Http ok status code (http 200) if operation is checked, else it will return (http 400)Put(int id, [FromBody] CarViewModel value): It will modify a specific car (identified by id parameter). It will return Http not found code if car doesn't exist, http 200 status code if update operation is valid, else Http bad request.Delete(int id): It will delete a specific car (identified by id parameter) and will return an Http ok status code (http 200) if operation is valid.
using System;
using System.Collections.Generic;
using System.Linq;
using AutoMapper;
using demobackend.Data;
using demobackend.Models;
using Microsoft.AspNetCore.Authorization;
using Microsoft.AspNetCore.Mvc;
using Microsoft.AspNetCore.Http;
namespace demobackend.Controllers
{
[Authorize]
[Route("api/[controller]")]
public class ManageCarController : Controller
{
private IMapper _mapper;
private ApplicationDbContext dbContext;
public ManageCarController(IMapper mapper, ApplicationDbContext context)
{
this._mapper = mapper;
this.dbContext = context;
}
[HttpGet]
public IEnumerable<carviewmodel> Get()
{
IEnumerable<carviewmodel> list =
this._mapper.Map<ienumerable<carviewmodel>>(this.dbContext.cars.AsEnumerable());
return list;
}
[HttpGet("{id}")]
public IActionResult Get(int id)
{
var _car = this._mapper.Map<carviewmodel>(this.dbContext.cars.Find(id));
return Ok(_car);
}
[HttpPost]
public IActionResult Post([FromBody] CarViewModel _car)
{
if (ModelState.IsValid)
{
_car.Registered = DateTime.Now;
var newcar = this._mapper.Map<car>(_car);
this.dbContext.cars.Add(newcar);
this.dbContext.SaveChanges();
return Ok();
}else{
return BadRequest();
}
}
[HttpPut("{id}")]
public IActionResult Put(int id, [FromBody] CarViewModel value)
{
if (ModelState.IsValid)
{
var existingCar = this.dbContext.cars.Find(id);
if(existingCar == null){
return NotFound();
}else{
existingCar.Name = value.Name;
existingCar.Mark = value.Mark;
existingCar.Model = value.Model;
this.dbContext.cars.Update(existingCar);
this.dbContext.SaveChanges();
return Ok();
}
}else{
return BadRequest();
}
}
[HttpDelete("{id}")]
public IActionResult Delete(int id)
{
this.dbContext.cars.Remove(this.dbContext.cars.Find(id));
this.dbContext.SaveChanges();
return Ok();
}
}
}
e) Using Swagger
To test each action in our ManageCar WebApi, we will use swagger API:
First, we should install it:
dotnet add package Swashbuckle.AspNetCore --version 1.0.0
Next, in startup.cs:
- Add the following lines inside
ConfigureServices section:
services.AddSwaggerGen(c =>
{
c.SwaggerDoc("v1", new Info { Title = "My API", Version = "v1" });
});
- Add the following lines inside
Configure section:
app.UseSwagger();
app.UseSwaggerUI(c =>
{
c.SwaggerEndpoint("/swagger/v1/swagger.json", "My API V1");
})
f) Running API
To run project, execute the following command-line:
dotnet run
Open browser and write the following URL:
http://localhost:5000/swagger/
Finally, you wil get Swagger UI interface to test your API:
Here are some examples for how to use Account & ManageCar services:
Test Subscription Service
Result:
Test Authentification Service
Result:
Test the Creation of a New Car
Result:
Test the Get of All Available Cars
II ) Client Side
a) Prerequisites
Before starting the implementation of Client side project, below you will find all useful links:
- Install Visual Studio Code (link)
- Install nodejs + npm (link)
- Set up the Development Environment (link)
- Install Angular-Datatables (link)
- Install Angular2-busy (link)
- Angular form validation (link)
- Subject pattern (link)
b) Setting Up the Project
To create a new Angular project, execute the following command-lines inside your workspace folder:
First, install Angular CLI tools:
npm install -g @angular/cli
Second, generate a new Angular project using a template:
ng new demo
Finally, run the application:
cd demo
ng serve --open
c) Implement Services
Before starting implementation of services, we should declare model class first:
ICar: Used to deserialize json data into a ICar object.
export interface ICar {
id: number,
name: string,
mark: string,
model: string,
registered : Date
}
Message: Used to hold information about thrown notifications:
Type: It’s an Alert Type, It Can Take as value: ‘Error’ or ‘Success’Text: It’s an Alert Description
export class Message {
 constructor(public type : string, public text: string) {
 }
}
User: Used to deserialize json data into a user object.
export class User {
email : string = "";
password : string = "";
rememberMe : boolean = false;
}
LoginService
Contains methods that manage session with server:
loginSubject: It implements Subject pattern. Used to track session state, when user creates new session, he will receive a notification (loginSubject.next(1)) to show email address on top of page, else when he logs out, the email will disappear.login(currentUser : User): Sends a POST http request to Account/Login service to try a new connection with server. As parameter, it will pass a User object.logout(): Sends POST http request to Account/Logout service trying to end the current session.
import { Injectable } from '@angular/core';
import { Http, Headers, RequestOptions, Response, RequestMethod } from '@angular/http';
import {User} from '../models/user';
import  'rxjs/add/operator/toPromise';
import { Subject } from 'rxjs';

@Injectable()
export class LoginService {
    public loginSubject = new Subject<any>();
    _baseUrl : string = "http://localhost:5000/Account";

    options = new RequestOptions({
           withCredentials : true
    });
    constructor(private http: Http) { }

    public login(currentUser : User) {

        let _currentUser = JSON.stringify(currentUser);
        return this.http.post(this._baseUrl + '/Login', currentUser, this.options)
         .toPromise()
         .catch(this.handleError);

    }
    public logout(){
        return this.http.get( this._baseUrl + '/Logout', this.options)
        .toPromise()
        .catch(this.handleError);
    }
    private handleError(error: any): Promise<any> {
        return Promise.reject(error.message || error);
      }
}
CarService
Contains methods that manage cars data into database.
getCars(): Sends a Get http request to /api/ManageCar service to get all available carsgetCar(id : number): Sends a Get http request to /api/ManageCar service to get a specific car (identified by id parameter)addNewCar(_car : ICar): Sends a POST http request to /api/ManageCar service with _car object as parameter to create a new row into CAR table.updateCar(_car : ICar): Sends a PUT http request to /api/ManageCar service with _car object as parameter to update existing car (identified by _car.id).deleteCar(id : number): Sends a Delete http request to /api/ManageCar service to remove a specific car (identified by an id).
import { Injectable } from '@angular/core';
import { Observable, Subject } from 'rxjs/Rx';
import { Http, Headers, RequestOptions, Response, RequestMethod } from '@angular/http';
import { ICar } from './../models/ICar';

@Injectable()
export class CarService {
    carsList : ICar[];
    _baseUrl : string = "http://localhost:5000/api/";
    _getCarsUrl : string = "ManageCar";
    options = new RequestOptions({
        withCredentials : true
    });
    constructor(private http: Http) {

    }
    public getCars() {
        return this.http.get(this._baseUrl + this._getCarsUrl, this.options)
        .toPromise();
    }
    public getCar(id : number) {
        return this.http.get(this._baseUrl + this._getCarsUrl + "/"+ id, this.options)
        .toPromise();
    }
    public addNewCar(_car : ICar){
       return this.http.post(this._baseUrl + this._getCarsUrl, _car, this.options)
       .toPromise();
     }
    public updateCar(_car : ICar){
        return this.http.put(this._baseUrl + this._getCarsUrl + "/"+
                             _car.id, _car, this.options)
        .toPromise();
    }
    public deleteCar(id : number){
         return this.http.delete(this._baseUrl + this._getCarsUrl + "/"+ id, this.options)
        .toPromise();
    }
}
CanActivateService
The purpose is to secure some route access by checking if the user is authorized or not to read more about this service via this link.
It implements canActivate method from CanActivate interface.
import { Injectable } from '@angular/core';
import { Router, CanActivate, ActivatedRouteSnapshot, RouterStateSnapshot }
from '@angular/router';
@Injectable()
export class CanActivateService implements CanActivate {
constructor(private router: Router) { }
canActivate(route: ActivatedRouteSnapshot, state: RouterStateSnapshot) {
if (localStorage.getItem('loggedUser')) {
return true;
}else{
this.router.navigate(['/login'], { queryParams: { returnUrl: state.url }});
return false;
}
}
}
NotifService
It implements notification system, it will use to display success and error messages inside page throw alert dialog.
This service implements Subject pattern to capture observer’s notifications for showing or hiding messages on page.
import { Message } from './../models/Message';
import { Injectable } from '@angular/core';
import { Subject, Observable} from 'rxjs/Rx';
import { Router, NavigationStart, Event} from '@angular/router';

@Injectable()
export class NotifService {
subject = new Subject<any>();
constructor(private router: Router) {
router.events.subscribe( event =>
{
if(event instanceof NavigationStart) {
this.subject.next();
}
});
}
success(message: string) {
this.subject.next(new Message('alert-success', message));
}
error(message: string) {
this.subject.next(new Message('alert-danger', message));
}
getMessage(): Observable<any> {
return this.subject.asObservable();
}
}
d) Implement Components
Login Component
LoginComponent.ts
login(): It will call login method from LoginService by passing username and password through model object.
In case of success operation, it will create a new session with Server and navigate to list page using router service. Else, it will show error message by calling error method from notifService.
import { Headers } from '@angular/http';
import { Component, NgModule, OnInit } from '@angular/core';
import { FormBuilder, Validators } from '@angular/forms';
import { Router, ActivatedRoute } from '@angular/router';
import { User } from '../../models/user';
import { LoginService } from './../../services/login-service.service';
import { NotifService } from './../../services/notif-service.service';
@Component({
selector: 'app-login',
templateUrl: './login.component.html',
styleUrls: ['./login.component.css']
})
export class LoginComponent implements OnInit {
EMAIL_REGEXP = "^[a-z0-9!#$%&'*+\/=?^_`{|}~.-]+@[a-z0-9]([a-z0-9-]*[a-z0-9])?
(\.[a-z0-9]([a-z0-9-]*[a-z0-9])?)*$";
model : User;
loading = false;
message = "";
busy: Promise<any>;
constructor(
private router: Router,
private notifService : NotifService,
private loginService : LoginService
) {
this.model = new User();
}
ngOnInit() {
localStorage.removeItem('loggedUser');
this.loading = false;
this.loginService.logout().then(resp => {
this.loginService.loginSubject.next(1);
});
}
ngDestroy()
{
}
login() {
this.notifService.subject.next();
this.loading = true;
this.busy = this.loginService.login(this.model).then(resp => {
this.loading = false;
localStorage.setItem('loggedUser', this.model.email);
this.loginService.loginSubject.next(1);
this.router.navigate(["/list"]);
}).catch(exp => {
this.notifService.error(exp._body);
this.loading = false;
}) ;
}
}
Login.component.html
This page offers a login interface for user to enter his credentials (email and password) to open a new session with server and have access to application.
<form [ngBusy]="busy" class="form-horizontal" (ngSubmit)="f.form.valid && login()"
        #f="ngForm" novalidate>
<div class="row">
<div class="col-md-3"></div>
<div class="col-md-6">
<h4>Please Login</h4>
<hr>
</div>
</div>
<div class="row">
<div class="col-md-3"></div>
<div class="col-md-6">
<div class="form-group">
<label class="sr-only" for="email">E-Mail Address</label>
<div class="input-group mb-2 mr-sm-2 mb-sm-0">
<div class="input-group-addon" style="width: 2.6rem">
<i class="fa fa-at"></i></div>
<input type="email" class="form-control" name="email"
[(ngModel)]="model.email" #username="ngModel" [pattern]="EMAIL_REGEXP" required />
</div>
</div>
</div>
<div class="col-md-3">
<div class="form-control-feedback" *ngIf="f.submitted && !username.valid">
<span class="text-danger align-middle">
<i class="fa fa-close"></i> Username is required
</span>
</div>
</div>
</div>
<div class="row">
<div class="col-md-3"></div>
<div class="col-md-6">
<div class="form-group">
<label class="sr-only" for="password">Password</label>
<div class="input-group mb-2 mr-sm-2 mb-sm-0">
<div class="input-group-addon" style="width: 2.6rem"><i class="fa fa-key"></i></div>
<input type="password" class="form-control" name="password"
[(ngModel)]="model.password" #password="ngModel" required />
</div>
</div>
</div>
<div class="col-md-3">
<div class="form-control-feedback" *ngIf="f.submitted && !password.valid">
<span class="text-danger align-middle">
<i class="fa fa-close"></i> Password is required
</span>
</div>
</div>
</div>
<div class="row">
<div class="col-md-3"></div>
<div class="col-md-6" style="padding-top: .35rem">
<div class="form-check mb-2 mr-sm-2 mb-sm-0">
<label class="form-check-label">
<input [(ngModel)]="model.rememberMe" class="form-check-input" name="rememberMe"
type="checkbox" >
<span style="padding-bottom: .15rem">Remember me</span>
</label>
</div>
</div>
</div>
<div class="row" style="padding-top: 1rem">
<div class="col-md-3"></div>
<div class="col-md-6">
<button [disabled]="loading" class="btn btn-primary"><i class="fa fa-sign-in"></i> Login</button>
</div>
</div>
</form>
List Component
List.component.ts
init(): Initializes datatable object by configuration paginType and pageLength properties. Then, it will load available cars by calling getCars method from CarService. If exception raised, an error message will appear at the top of the page by calling error method from NofifService.- searchCar (): It filters displayed cars by id. It is called when user chooses car name from dropdown menu.
deleteCar(id : number): It deletes a specific item (identified by id argument) from database and removes it from view. This method will call deleteCar action from CarService. If exception raised, an error message will appear at the top of the page by calling error method from NofifService.
import { NotifService } from './../../services/notif-service.service';
import { Component, NgModule , OnInit } from '@angular/core';
import { CarService } from '../../services/car-service.service';
import { Subscription } from 'rxjs/Subscription';
import { ICar } from './../../models/ICar';
import { Subject } from 'rxjs/Rx';
import { RouterLink, Event } from '@angular/router';
@Component({
selector: 'app-list',
templateUrl: './list.component.html',
styleUrls: ['./list.component.css']
})
export class ListComponent implements OnInit {
listCars : any = [];
filtredCars : any = [];
carName : string = "";
selectedItem : number;
dtTrigger = new Subject();
dtOptions: DataTables.Settings = {};
constructor(private _carService : CarService, private notifService : NotifService ) {
this.init();
}
private init()
{
this.dtOptions = {
pagingType: 'full_numbers',
pageLength: 10
};
this.selectedItem = -1;
this._carService.getCars() .then( response => {
this.listCars = response.json() as ICar[];
this.filtredCars = this.listCars.slice(0);
this.dtTrigger.next();
}).catch((resp) => {
console.log(resp);
this.notifService.error("Server Exception was raised");
});
}
public searchCar ()
{
if(this.selectedItem == -1)
{
this.filtredCars = this.listCars.slice(0);
}else
{
this.filtredCars = this.listCars.filter(
car => car.id == this.selectedItem );
}
}
public deleteCar(id : number)
{
this._carService.deleteCar(id).then( response => {
this.filtredCars = this.filtredCars.filter(
(item : ICar) => {
return (item.id != id)
})
this.notifService.success("Delete was well done");
}).catch((resp) => {
this.notifService.error("Server Exception was raised");
});
}
ngOnInit()
{
}
}
List.component.html
This page displays all available cars with details, and lets user to filter by car id using dropdown filter or using native search box of datatable component.
Through datatable, you can remove, update a specific car, or add new one.
To update or to create a car, you will navigate to a dedicated page.
<div class="row">
<div class="col-lg-8">
<p><b>Filter by car id :</b>
<select [(ngModel)]="selectedItem" (ngModelChange)="searchCar()" >
<option [value]="-1" selected>choose option</option>
<option *ngFor="let item of listCars" [value]="item.id" >{{item.name}}</option>
</select>
</p>
</div>
<div class="col-lg-4">
<a class="btn btn-primary btn-xs pull-right " routerLink="/newcar"
preserveQueryParams preserveFragment><b>+</b> Add new car </a>
</div>
</div>
<br>
<div class="row">
<div class="col-lg-12">
<table datatable [dtOptions]="dtOptions" [dtTrigger]="dtTrigger" class="row-border hover">
<thead>
<tr>
<th>ID</th>
<th>Name</th>
<th>Mark</th>
<th>Model</th>
<th>Registred Date</th>
<th></th>
</tr>
</thead>
<tbody>
<tr *ngFor="let car of filtredCars">
<td>{{car.id}} </td>
<td>{{car.name}}</td>
<td>{{car.mark}}</td>
<td>{{car.model}}</td>
<td>{{car.registered | date }}</td>
<td>
<button class="btn btn-link" routerLink="/updatecar/{{car.id}}"
preserveQueryParams preserveFragment>
<i class="fa fa-pencil" aria-hidden="true"></i> Update
</button>
<button class="btn btn-link" (click)="deleteCar(car.id)">
<i class="fa fa-trash" aria-hidden="true"></i> Delete
</button>
</td>
</tr>
</tbody>
</table>
</div>
</div>
Notificationcar Component
Notification.component.ts
It uses notifService to subscribe on Subject Obsevable, it will listen to all notifications send from other components (observers) and show the appropriate message.
import { Component, OnInit } from '@angular/core';
import { NotifService } from './../../services/notif-service.service';
import { Message } from './../../models/Message';

@Component({
selector: 'notification',
templateUrl: './notification.component.html',
styleUrls: ['./notification.component.css']
})

export class NotificationComponent implements OnInit {

message : Message;
constructor(public notifService : NotifService ){}
ngOnInit() {
this.notifService.getMessage().subscribe(p =>
{
this.message = p;
});
}
}
Add New Car Component
Newcar.component.ts
complexForm: used for Form validation, to validate the following inputs before submitting : name, mark and model.newCar(model: ICar): will create a new car entry into database by calling addNewCar action of CarService.
If exception raised, an error message will appear at the top of the page by calling error method of NofifService instance.
import { Component,NgModule, OnInit } from '@angular/core';
import { FormGroup, FormControl, FormBuilder, Validators } from '@angular/forms';
import { ICar} from "../../models/ICar"
import { CarService } from './../../services/car-service.service';
import { NotifService } from './../../services/notif-service.service';
@Component({
selector: 'app-newcar',
templateUrl: './newcar.component.html',
styleUrls: ['./newcar.component.css']
})
export class Newcar implements OnInit {
complexForm : FormGroup;
constructor(fb: FormBuilder, private carService : CarService
,private notifService : NotifService
){
this.complexForm = fb.group({
'name' : [null, Validators.required],
'mark': [null, Validators.required],
'model' : [null, Validators.required],
});
}
ngOnInit() {
}
public newCar(model: ICar){
this.carService.addNewCar(model).then(resp => {
this.notifService.success("Insertion operation was well done");
}).catch(exp => {
this.notifService.error("Server Exception was raised");
}) ;
}
}
Newcar.component.html
Via this page, user can enter information (name, mark, model) about new car and submit it to server.
All inputs are required to achieve this action, else he will get validation error messages.
<h3> New Car</h3>
<form [formGroup]="complexForm" (ngSubmit)="newCar(complexForm.value)">
<div class="form-group">
<label for=""><b>Name</b></label>
<input type="text" class="form-control" [formControl]="complexForm.controls['name']" />
<div *ngIf="complexForm.controls['name'].hasError('required')" class="has-error">
field required</div>
</div>
<div class="form-group">
<label for=""><b>Mark</b></label>
<input type="text" class="form-control" [formControl]="complexForm.controls['mark']"/>
<div *ngIf="complexForm.controls['mark'].hasError('required')" class="has-error">
field required</div>
</div>
<div class="form-group">
<label for=""><b>Model</b></label>
<input type="text" class="form-control" [formControl]="complexForm.controls['model']"/>
<div *ngIf="complexForm.controls['model'].hasError('required')" class="has-error">
field required</div>
</div>
<div class="form-group">
<button type="submit" class="btn btn-primary" [disabled]="!complexForm.valid">Submit</button>
</div>
</form>
Update Car Component
Update.component.ts
constructor(…): Gets details of specific car (using id parameters given from route url arguments) and initialize FormGroup object (complexForm) to fill and validate form fields.updateCar(model: ICar): will update specific car by calling updateCar action of CarService.
If exception raised, an error message will appear on the top of the page by calling error method of NofifService instance.
import { Component,NgModule, OnInit } from '@angular/core';
import { FormGroup, FormControl, FormBuilder, Validators } from '@angular/forms';
import { ICar } from "../../models/ICar"
import { CarService } from './../../services/car-service.service';
import { NotifService } from './../../services/notif-service.service';
import { ActivatedRoute } from '@angular/router';
@Component({
selector: 'app-updatecar',
templateUrl: './update.component.html',
styleUrls: ['./update.component.css']
})
export class UpdateCarComponent implements OnInit {
complexForm : FormGroup ;
constructor(private fb: FormBuilder
, private carService : CarService
, private notifService : NotifService
, private route: ActivatedRoute ){
this.route.params.subscribe(params => {
let id = +params['id'];
this.complexForm = fb.group({
'id' : [""],
'name' : ["", Validators.required],
'mark': ["", Validators.required],
'model' : ["", Validators.required],
});
this.carService.getCar(id).then(resp => {
let car = resp.json() as ICar;
this.complexForm = fb.group({
'id' : [car.id],
'name' : [car.name, Validators.required],
'mark': [car.mark, Validators.required],
'model' : [car.model, Validators.required],
});
}).catch(exp => {
this.notifService.error("Server Exception was raised");
}) ;
});
}
ngOnInit() {
}
public updateCar(model: ICar){
console.log(model);
this.carService.updateCar(model).then(resp => {
this.notifService.success("Update operation was well done");
}).catch(exp => {
this.notifService.error("Server Exception was raised");
}) ;
}
}
Update.component.html
This page will show specific car details inside an HTML form that allows user to modify some information like (name, mark, model).
App Component
App.component.ts
Used as code behind for the app.html template, in which you will have implementation of:
constructor: used to initialize our master page (app.html), and to declare router listener that controls user navigation depending on current session value (session is managed by cookies)logOut: This event is used to free current session by clearing cookies, and redirect user to Login page.
import { Component } from '@angular/core';
import { User } from '../../models/user';
import { LoginService } from '../../services/login-service.service';
@Component({
selector: 'app-root',
templateUrl: './app.component.html',
styleUrls: ['./app.component.css']
})
export class AppComponent {
title = 'Angular 4 Demo';
userEmail : string = "";
constructor(private loginService : LoginService) {
loginService.loginSubject.asObservable().subscribe(p =>
{
this.userEmail = localStorage.getItem('loggedUser') || "";
});
}
ngOnInit() {
this.userEmail = localStorage.getItem('loggedUser') || "";
}
}
App.component.html
<div class="container">
<div style="text-align:center">
<h1>
{{title}}
</h1>
</div>
<div *ngIf="userEmail">
<p><b>Welcome</b> {{userEmail}}
(<a [routerLink]="['/login']">Logout</a>) </p>
</div>
<notification></notification>
<router-outlet></router-outlet>
</div>
App Routing Component
app.routing.component.ts
Used to configure routing system. Only list, update and create path are not allowed to anonymous users, that’s why we add canActivate attribute inside path declaration.
import { Routes, RouterModule } from '@angular/router';
import { LoginComponent } from '../login/login.component';
import { Newcar } from '../newcar/newcar.component';
import { AppComponent } from '../shared/app.component';
import { ListComponent } from '../list/list.component';
import { CanActivateService } from '../../services/canActivate.service';
import { PageNotFoundComponent } from './../pageNotFound/PageNotFound.component';
import { UpdateCarComponent } from './../updatecar/update.component';
const appRoutes: Routes = [
{ path: 'login', component: LoginComponent },
{ path: 'list', component: ListComponent, canActivate: [CanActivateService] },
{ path: 'newcar', component: Newcar , canActivate: [CanActivateService]},
{ path: 'updatecar/:id', component: UpdateCarComponent },
{ path: '**', component: PageNotFoundComponent }
];
export const routing = RouterModule.forRoot(appRoutes);
App.module.ts
This file is used to:
- define routes using Router Module: "
RouterModule" - import needed Angular modules via the word key: "
imports" - declare components via the word key: "
declarations" - declare services via the word key: "
providers" - specify the root components to include into index.html file via the word key: "
bootstrap"
import { CanActivate } from '@angular/router';
import { BrowserModule } from '@angular/platform-browser';
import { NgModule, Component } from '@angular/core';

import { FormsModule, ReactiveFormsModule } from '@angular/forms';
import { HttpModule } from '@angular/http';
import { routing } from './components/app.routing/app.routing.component';
import { CanActivateService } from './services/canActivate.service';
import { NotificationComponent } from './components/notification/notification.component';
import { NotifService } from './services/notif-service.service';
import { LoginService } from './services/login-service.service';
import { CarService } from './services/car-service.service';

import { DataTablesModule } from 'angular-datatables';
import { BusyModule, BusyConfig} from 'angular2-busy';

import { LoginComponent } from './components/login/login.component';
import { ListComponent } from './components/list/list.component';
import { Newcar } from './components/newcar/newcar.component';
import { AppComponent } from './components/shared/app.component';
import { UpdateCarComponent } from './components/updatecar/update.component';

import { PageNotFoundComponent } from './components/pageNotFound/PageNotFound.component';

export function getBusyConfig() {
return new BusyConfig({
message: 'Please wait ...',
backdrop: false,
delay: 300,
minDuration: 800,
wrapperClass: 'ng-busy'
});
}
@NgModule({
declarations: [
AppComponent,
ListComponent,
Newcar,
LoginComponent,
UpdateCarComponent,
NotificationComponent,
PageNotFoundComponent
],
imports: [
BrowserModule,
BusyModule.forRoot(getBusyConfig()),
FormsModule,
ReactiveFormsModule,
HttpModule,
routing,
DataTablesModule
],
providers: [CarService, CanActivateService, NotifService, LoginService ],
bootstrap: [AppComponent, NotificationComponent]
})
export class AppModule { }
III) Running Project
To run the front-end project, you should write the following command-line using CMD, but first be sure that you are in the root directory of your application:
- npm start: To transpile TS files to JavaScript files and start application
When you try to open application via the given URL (http://localhost:4200), you will get the below result:
Note: The above steps are used when you start a project from scratch, if you want to use attached projects, you should first install required packages, to do that, you need to execute the following commands-lines inside each project root folder:
dotnet restore for dotnet projectnpm install for angular project
Before running dotnetcore project: you need to create a database using SSMS and run available migration scripts by executing the following command-line: "dotnet ef database update -c ApplicationDbContext -v"
References
Points of Interest
I hope that you appreciated this post. Try to download the source code and don't hesitate to leave your questions and comments.
History
- v1 05/11/2017: Initial version
Microsoft certified professional in C# ,HTML 5 & CSS3 and JavaScript, Asp.net, and Microsoft Azure.


 General
  News
News  Suggestion
  Question
  Bug
Bug  Answer
  Joke
Joke  Praise
  Rant
Rant  Admin
Admin 


