Introduction
NES, short for Nintendo Entertainment System, is an 8-bit cartridge-based game console developed by Nintendo company and first released in 1983 in Japan and then 2 years later in the U.S. Once it hit the market, it became very popular as it provided multimedia gaming experience at a rather low cost, thanks to the color TV set. It is not the first TV game console on the market but it came out with features superior to its counterparts, like the vertical/horizontal screen scrolling, 5 sound channels, and great extensibility through the cartridge system, which even supports customized computer keyboard and mouse for certain cartridge mapper types. Even today, after 30+ years of development of the game industry, the NES game console still has a place in the TV gaming world and its classic edition is quite popular on Amazon.
Emulator is software simulation of the hardware that makes your target software run on a different, incompatible platform. From a high level, you can consider emulator as a middle layer between your target software and your computer system. It translates instructions between your target software and the computer operating system.
TypeScript is an enhanced version of JavaScript that supports strict typing and class based OOP programming, and therefore it fits the development of large scale front web application, more than with pure JavaScript. It is open-source and this language is developed and maintained by Microsoft.
Background
Writing an NES emulator is a challenging but rewarding process. It is challenging because you need to dive into the hardware specifics and have an in-depth understanding of its architecture. The NES game console composed of different parts (CPU/PPU/Mapper…) and a small error in any of them may prevent the game from running as expected. It also challenges your coding skills as you need to implement the NES hardware with the language you choose. However, it is also a very rewarding process. NES, although an 8-bit computer, runs under a more primitive but similar principles with modern computers. It drives you to explore topics like how CPU interacts with peripherals, or how the audio processing unit generates digital MIDI-like music.
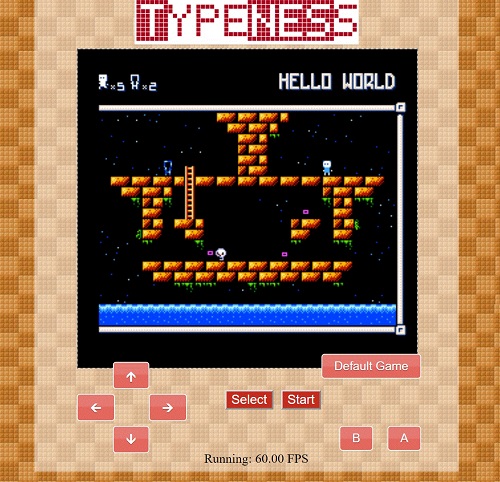
How TypeNESs emulator works
In a real NES system, the CPU (Central Processing Unit), PPU (Picture Processing Unit) and APU (Audio Processing Unit) are running side by side, and they each have their clocking speed. PPU and APU maps their registers to the CPU's addressing space (the 'bus'), so CPU can control these units by reading/writing their mapped registers. On the other side, PPU and APU can spontaneously notify the CPU of any status change by triggering an interrupt. The NES 6502 CPU has a 16bit addressing bus from 0x0000 - 0xffff (65536 bytes in total). Theoretically, NES can read value or write value from any of these 65536 bytes. In reality the NES RAM only has 2k bytes of capacity, with address ranging from (0x0000 - 0x07ff), so the remaining addressing space gives stage to other units in the NES system. For example, PPU has 8 registers mapped to $2000 - $2007, and NES program can fetch the status of the PPU by reading value from these address, or set the PPU status by writing value to these addresses.

For emulation, you may want to use multi-threading to emulate the 3 units as they're running in parallel. However, as the code runs in browser with JavaScript (after compilation from TypeScript), restrictions are imposed on the emulator's attempt to run an NES emulator with multi-threading. HTML5 does support multiple threading, but it has two major drawback:
- A web worker is not allowed to access DOM elements, nor the HTML5 audio.
- Web worker does not share the same memory with your JavaScript main thread. Passing and returning large chunks of data to/from web worker can be very slow (say, you run your PPU in a web worker, and you have to return 0x4000 bytes of video RAM data 60 times every second)
Because of such restriction for multi-threading in HTML5, we need to figure out a way that emulates the side-by-side execution of these units. The 6502 CPU is running at 1.789773 MHz (NTSC) and PPU is at 5.369318 MHz (NTSC). And if you check carefully, you'll find PPU is running 3 times the speed of CPU. For a CPU instruction, we can do calculation and find out how many cycles it takes to execute. Time this cycle number by 3, and we get the result that how many steps the PPU can take after this CPU instruction.
while(true){
cycles = cpu.step();
cycles *=3;
ppu.incrementCycle(cycles)
}
In this way, we only need one thread but we can emulate the parallel running of CPU and PPU as granularly as possible.
6502 CPU
The MOS Technology 6502 is an 8-bit microprocessor first introduced in 1975. It powered up a series of primitive computers and game console like Apple II and Atari. NES adopts a variation of 6502 processor made by Ricoh named RP2A03 (NTSC) or RP2A07 (PAL).
Imagine CPU as a mechanic arm that constantly fetches commands from a paper strip. It reads one command from one cell of this paper strip, executes the command received, writes down the result on a temporary note, and moves to the next cell to reads its new command. This process goes on and on at a lightning speed. With this in mind, we can easily explain some of the terminologies that describes how a CPU works. Say, CPU instruction is the command written on the paper strip, which corresponds to what we call 'memory'. 'addressing' is how CPU locates the paper strip cell. And 'register' is what helps CPU to keep its command execution result temporarily.
For emulation, each CPU instruction is associated with its addressing mode, command length, and CPU cycles. With addressing mode, we can find out what value the instruction should work against, and we call this value as the instruction's 'operand'. With command length, we won't mistake an operand with CPU instruction. And CPU cycle helps control the speed of our emulator.
There're 6 registers in 6502 CPU, including an accumulator, 2 indexes, a program counter, a stack pointer, and a status register. All of them are 8-bit registers except for the program counter which is 16-bit in order to address the memory space from 0 - 0xffff. In the TypeNESs code, the status register are broken down into flags for faster processing.
The CPU class has a step() function which executes one CPU instruction at a time. Its working flow is like:
- Check if there's CPU interruption. If there is, handle it.
- Fetch the instruction according to program counter
- Prepare the operand according to addressing mode
- Execute the instruction
- Update the program counter and return the CPU cycles it takes.<
  export class CPU {
     private REG_A: number;
     private REG_X: number;
     private REG_Y: number;
     private REG_PC: number;
     private REG_S: number;
     private FLAG_N: number;
     private FLAG_V: number;
     private FLAG_B: number;
     private FLAG_D: number;
     private FLAG_I: number;
     private FLAG_Z: number;
     private FLAG_C: number;
   public step(): number {
             if (this.INT_requested) {
         ...
             }

         …
     var inst = this.read8(this.REG_PC);
         …
             switch (addrMode) {
                ...
             }

             switch (opcode) {
             ...
             }
             this.REG_PC += oplenth;
             var totalCycles = opcycles + extraCycle;
             return totalCycles;
  }
}
Mapper
Mapper is a key concept to understand the NES system as a cartridge system. In the early days, video games are published as cartridges which carries ROM chips that stores the game binaries. As said before, 6502 CPU interacts with others NES units by reading/writing its 16bit memory space. A mapper then plays the role that decides how the content of the game ROM mapped to the CPU accessible memory space (the bus). A more important issue the makes the mapper crucial to an NES system is that, an NES game might be too large to fit into the limited memory space. Say, an NES game can be as large as 1MB, while the entire NES memory space is 64KB (only 32KB, from $8000 - $FFFF, can be mapped with the game ROM content). To resolve this issue, mapper adopts a way named 'bank switching' to help map part of the game ROM (called a 'bank') into the memory space, and dynamically change the mapping content to another game ROM bank during the game execution.
There're more than 100 types of mappers. A game chooses a mapper primarily according to the game size. As an emulator, TypeNESs reads a game dump file instead of the ROM cartridge. The header (which describes this ROM) of the game ROM file is like this:
The higher 4 bits of byte 6 and byte 7 combines together to form the 8-bit mapper number. For the emulation, mappers are implemented with factory method, so once we get the mapper number from the ROM file, we can generate corresponding mapper object according to the mapper type.
public createMapper(): IMapper{
    switch (this.mapperType) {
        case 0:
            return new Mapper0(this.machine);
        break;
        case 1:
            return new Mapper1(this.machine);
        break;
    …
    }
}
Here the IMapper is an interface that abstracts common methods of all mapper types, so the emulator does not have to care about the ROM format or mapper type of the game, but read/write game ROM indirectly through the IMapper interface. Notice that 'writing' to a ROM, if the operation is legal, will usually be interpreted as writing to specific registers that the game cartridge contains, instead of modify the ROM directly. That is to say, 'writing' here does not violate what ROM stand for (Read Only Memory).
export interface IMapper {
    reset(): void;
    write(address: number, value: number): void;
    load(addr: number): number;
    regLoad(address: number): number;
    regWrite(address: number, value: number): void;
    loadROM(): void;
}
PPU
NES has a PPU (Picture Processing Unit), named 2C02, to generate video signals for a TV set with 240 lines of pixels. As said before, NES allows game programmers to smoothly scroll the game screen horizontally or vertically, and this feature distinguishes NES game console from its predecessors. A real 2C02 PPU chip contains too many details that go beyond what this article can cover, so here we focus on the game scrolling and image rendering from a high-level perspective, which I believe is a good entry point to understand the NES PPU system.
In the PPU RAM, a TV screen image is divided into 30 rows, each of which contains 32 units called tiles. That is to say, we have 32*30=960 tiles for one TV screen. We're allowed to prepare 4 screen images at most in the PPU memory, according to the PPU mirroring types, and when we control the PPU to display part of the image 1 and part of image 2 on the TV (see Figure 4). We gradually (in NES, it is at pixel level) move the yellow box from screen 1 to screen 2, and we'll see the game image is 'scrolling' on the TV screen.
PPU has its own 16KB memory, scanned 60 times per second to refresh the image. As said before, CPU cannot access the PPU memory directly to update the picture, but only through the PPU registers mapped to CPU accessible memory address from $2000 - $2007. By writing values to these address, CPU is able to control the behavior of the NES PPU and update its content. Suppose you're able to write, though indirectly, to any location of the PPU memory, then how do you control what to display and where to display on the screen? To answer this question, let's examine the layout of the PPU memory, which are divided into 3 areas. the pattern table, name table, and palettes.
Pattern table from 0x0 - 0x2000 defines the 'pattern' of an image. Remember that NES PPU screen are composed of tiles. Each tile is an 8x8 pixel picture. If we use 1bit to represent a pixel, then this tile needs 8x8=64 bits ( and therefore 8 bytes), to represent a tile. In the pattern table, the system uses 2 bits to represent a pixel, so a tile occupies 16 bytes of PPU memory space. If you dump the pattern table with some tools for the game Super Mario, you'll get the result in Figure 7.
Notice that the pattern table is actually an image 'library' for the game, and it decides what can be displayed on the screen. You may have found that the color for the pattern table dump is incorrect, and you're right. That's because a pattern table tells what the image would look like, but not exactly what the color is.
It is the name table that decides where to place tile images on the screen. Remember that we have 4 screens in the PPU memory, and therefore we have 4 name tables in the name table section from 0x2000 - 0x3F00. For every name table, there's a corresponding table called 'attribute table', which assigns 2 bits for every 4 tiles in the name table. These 2 bits from attribute will be combines with the 2 bits in the pattern table to form a 4-bit number, and this 4-bit number will point a value in the last section of the NES PPU memory, the palette table. An example of the palette table in the Super Mario game is like the following (Figure 8). Each pixel in image tile in the pattern table, once pointed by the name table, we can then tell what its color is by looking up the palette table.
It would be too long for me to list entire code of the PPU emulation, so here in this article I only give an example how you can draw the nametable on the HTML5 canvas element. This example can be very helpful when you debug your emulator, and it covers most of the points I described for how an image is rendered from the PPU memory to the screen.
public DrawNametable(canvasID: string, patterntableStartAddr: number, nametableStartAddr: number) {
var screen = <HTMLCanvasElement>
document.getElementById(canvasID);
var canvasContext = screen.getContext('2d');
var r = this.machine.ppu.imgPalette[0] & 0xff;
var g = (this.machine.ppu.imgPalette[0] >> 8) & 0xff;
var b = (this.machine.ppu.imgPalette[0] >> 16) & 0xff;
canvasContext.fillStyle = "rgb(" + r + "," + g + "," + b + ")";
canvasContext.fillRect(0, 0, 256, 240);
var canvasImageData = canvasContext.getImageData(0, 0, 256, 240);
for (var i = 3; i < canvasImageData.data.length - 3; i += 4) {
canvasImageData.data[i] = 0xFF;
}
for (var i = 0; i < 960; i++) {
var tableValue = this.machine.ppu.vramMem[nametableStartAddr + i];
var tileStartAddr = patterntableStartAddr + tableValue * 16;
var chars = [];
for (var j = 0; j < 16; j++) {
var num = this.machine.ppu.vramMem[tileStartAddr];
tileStartAddr++;
chars.push(num);
}
var attrByteIndex = Math.floor(i / 128) * 8 + Math.floor((i % 32) / 4);
var attrByte = this.machine.ppu.vramMem[nametableStartAddr + 960 + attrByteIndex];
var attrValue = (attrByte >> (((Math.floor((i % 128) / 64) << 1) | Math.floor((i % 4) / 2)) * 2)) & 0x3;
this.Draw8x8(canvasContext, i % 32, Math.floor(i / 32), chars, attrValue);
}
}
APU
APU stands for Audio Processing Unit. It is an RP2A03 (NTSC) chip or RP2A07 (PAL) chip in the game console. The APU unit maps its registers to the CPU memory space from $4000 to $4013, $4015 and $4017. The APU can generate sound waves through five channels: two pulse wave channels, a triangle wave channel, a noise channel, and a delta modulation channel. TypeNESs right now has no implementation for the delta modulation channel.
Let's take square wave as an example. The NES square wave channel has 4 modes defined by the following two dimensional binary arrays. When the square wave is generated with one of the following 4 modes, imagine there's a pointer looping around from first number to the 8th number, and then back again. When the number is 0, the square wave channel output 0, and 1 means the output is 1.
[0,1,0,0,0,0,0,0] [0,1,1,0,0,0,0,0] [0,1,1,1,1,0,0,0] [1,0,0,1,1,1,1,1]
If we choose the second mode, then the wave form we get from the square wave channel will be a repetition of the following:
For emulation, if we want to generate the middle C sound with square wave, what shall we do? The NES APU has the sampling rate of 44.1 KHz, which basically means in 1 second, there're 44,100 'dots' generated to describe what the square sound wave is like. The 6502 CPU is running at 1.789773MHz (NTSC), so at every interval of 1,789,773/44,100 = 40.5844 CPU cycles, the APU needs to provide a sample value. For central C note, the frequency is 261Hz, so for one period of the central C note, it lasts 1,789,773/261 = 6,857.3678 CPU cycles. Consider the 4 square wave modes, each of which has 8 'steps', so for every 1,789,773/261/8 = 857.171 CPU cycles, we notify the APU square wave channel that now it needs to look up the mode table to take an output value for sampling.
public addCycles(cpuCycles: number) {
this.apuCycleCounter += cpuCycles;
if (this.apuCycleCounter >= this.SAMPLING_CYCLES) {
this.apuCycleCounter -= this.SAMPLING_CYCLES;
this.sample(cpuCycles);
}
……
this.square1.addCycles(cpuCycles);
……
}
Keyboard
NES joystick is connected to the NES system by mapping itself to the memory bus, so 6502 CPU can detect the button press by reading the byte value. The exact mapping depends on the mapper type. For the joysticks in emulation, joystick 1 is mapped to 0x4016, and joystick 2 is mapped to 0x4017 (for current mapper type supported). Notice that a joystick can have at least 8 button actions, then you may wonder how 1 byte can server 8 keys. The answer is that, NES keeps some kind of state machine to record the reading order. When reading 0x4016 (or 0x4017) for the first time, the cartridge servers the key A button state; for the second time at the same address, it servers the Key B state; for the 3rd time, it is the SELECT key. After this byte has been read 24 times, it goes back to serve Key A again (some reading actions has no meaning but simply to 'drive' the state machine).
Points of Interest
Engineering an NES emulator in browser is a challenging but exciting process. Before writing an emulator, you might be very confident in your knowledge of computer architecture as well as the assembly language; it is writing an emulator that gives you an in-depth review of your understanding of a computer system. You'll come across a lot of 'ah ha' moments during the programming/debugging process. TypeNESs is an open-source project. You can fork and contribute your code to this project. Work items can be adding more ROM format support, performance improvement, bug fix, audio enhancement, etc.
TypeNESs on Github
Have fun emulating!
My name is Charlie and interested in working on fun projects.


 General
  News
News  Suggestion
  Question
  Bug
Bug  Answer
  Joke
Joke  Praise
  Rant
Rant  Admin
Admin 


