One Android application package can be run on a ton of devices including a phone, tablet, PC, etc. In this article we will talk about how to make the app suitable for the big screen, how can efficiently use the screen space, and tip and trick to make the app better.
When you run the app on the bigger screen, you may see that sometime there is a lot of unused space because that app doesn't designed for the big screen. Android provides the alternative resource mechanism to give the right resource to the right screen but it not enough, Android also provide the Fragment that is used to create multi-pane application with the Fragment you can put many screen of application into a one screen.
Android 3.0 introduce the Fragment, Fragment is a portable user interface that makes possible in multi-pance UI creation, it is working like a View and you can add many Fragments to a single Activity. Each Fragment has its own lifecycle that's completely separates from the Activity lifecycle, because you can add or remove it at a runtime.
For the compatibility with older versions of Android, Android also provides the support library that allows you to use new features on the older Android version including the Fragment. In this article we will focus on the Fragment class from the support library (don't worry both Fragment classes have a same behavior, only the package name that different).
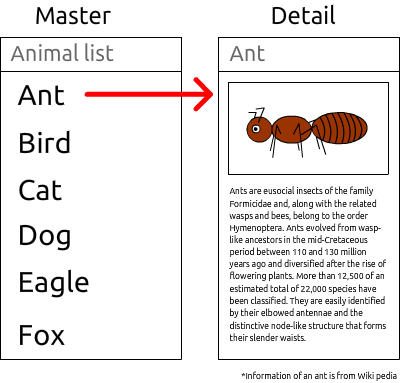
Master-Detail style application is the great example to learn about the Fragment. A lot of application has a menu or link that when click it, the app will bring you to a new page or show some data that relate to that menu/link, this is called Master-Detail user interface.
The picture above shows about Master-Detail user interface style on the phone. You will see the master menu/link and the details are placed on the different pages.

The picture above shows about Master-Detail user interface style on the tablet. You will see that on the tablet or a large screen device you can merge a master page and detail page into a single page, yes it looks like a tab control (tab control is an implementation of the master detail user interface).
Create 2 layouts for small and large screen as an alternative resource isn’t a good idea because you need to duplicate the logic part and when you want to add/remove something to/from the page you need to do it on both layout files.
Think about creating a master page and a detail page separately with their own logic part. Display only the master menu when the app run on the small screen but when the app run on the large screen, attach the detail page to right of screen. This idea is called multi-pane because you put many panes of UI on the single screen.
On the Android, showing many Activities on the screen is impossible, you have to create Fragments for both pages and then attach it to the activity.
Task: Your task for this article is create the application to display the list of animals and their details like pictures above. We will learn to create it together, Let' start now!! Please create a new application without using any template (Add no Activity) because we will create all parts of the app ourself.
Like the Activity, you need to create the class that derived from the Fragment!!
Note: Please use the Fragment from package android.support.v4.app.Fragment.
To use the Fragment from support library you need to add the library to the project, If you use an Android Studio as IDE, open the build.gradle file in app directory then leek at the dependencies and add the support library like this:
dependencies {
    compile fileTree(dir: 'libs', include: ['*.jar'])
    compile 'com.android.support:appcompat-v7:20.0.0'
    compile 'com.android.support:support-v4:20.0.0'
}
if you use the eclipse as IDE you need to copy the android-support-v4.jar file from SDK_LOCATION/extras/android/support/v4 to the libs directory of your project (and make sure that the libs directory is exist in your project compile classpath).
Create the AnimalListFragment.
import android.support.v4.app.Fragment;

public class AnimalListFragment extends Fragment{

}
Then create the layout for this Fragment.
Note: To name the layout for Fragment please start with the "fragment_" prefix.
fragment_animal_list.xml:
="1.0"="utf-8"
<LinearLayout xmlns:android="http://schemas.android.com/apk/res/android"
android:orientation="vertical" android:layout_width="match_parent"
android:layout_height="match_parent">
<ListView
android:layout_width="match_parent"
android:layout_height="match_parent"
android:id="@android:id/list" />
</LinearLayout>
I have created the layout that contains only LinearLayout and ListView because I want to display the names of animals as a list.
When the Fragment was attached to the Activity, the Activity will call the getView() method to get the View of Fragment. So, you need to create the View before the getView() method call. Fragment provides the onCreateView() method for using to construct its View. Now, implement the onCreateView() method by inflating the layout and return it as a result of the method.
@Override
public View onCreateView(LayoutInflater inflater, ViewGroup container, Bundle savedInstanceState) {
    View view = inflater.inflate(R.layout.fragment_animal_list,null);
    return view;
}
Note: I have put the null value as the second parameter of inflate() method because I don't want to attach the inflated View to any ViewGroup now. (host Activity of this Fragment will attach the view automatically but if the View was attacthed, the exception will thrown)
Next, create the Animal class to store the animal data.
public class Animal {
    private String name;
    private String imageUrl;
    private String description;

    public String getName() {
        return name;
    }

    public void setName(String name) {
        this.name = name;
    }

    public String getImageUrl() {
        return imageUrl;
    }

    public void setImageUrl(String imageUrl) {
        this.imageUrl = imageUrl;
    }

    public String getDescription() {
        return description;
    }

    public void setDescription(String description) {
        this.description = description;
    }
}
I have created the Animal class with only 3 attributes there are name, imageUrl, and description. (but you can add more attributes if you want)
Then, back to the fragment, create mock Animal objects and store in the List. (In this article I will use the mock data from the Wikipedia, but in the real application you should avoid using static data)
private List<Animal> generateAnimalList(){
    List<Animal> animals = new ArrayList<Animal>(10);

    Animal ant = new Animal();
    ant.setName("Ant");
    ant.setImageUrl("http://upload.wikimedia.org/wikipedia/commons/8/85/WeaverAntDefense.JPG");
    ant.setDescription("Ants are eusocial insects of the family Formicidae and, along with the related wasps and bees, belong to the order Hymenoptera. Ants evolved from wasp-like ancestors in the mid-Cretaceous period between 110 and 130 million years ago and diversified after the rise of flowering plants. More than 12,500 of an estimated total of 22,000 species have been classified. They are easily identified by their elbowed antennae and the distinctive node-like structure that forms their slender waists.");
    animals.add(ant);

    Animal bird = new Animal();
    bird.setName("Bird");
    bird.setImageUrl("http://upload.wikimedia.org/wikipedia/commons/3/32/House_sparrow04.jpg");
    bird.setDescription("Birds (class Aves or clade Avialae) are feathered, winged, two-legged, warm-blooded, egg-laying vertebrates. Aves ranks as the tetrapod class with the most living species, approximately ten thousand. Extant birds belong to the subclass Neornithes, living worldwide and ranging in size from the 5 cm (2 in) bee hummingbird to the 2.75 m (9 ft) ostrich. The fossil record indicates that birds emerged within the theropod dinosaurs during the Jurassic period, around 150 million years ago. On 31 July 2014, scientists reported details of the evolution of birds from theropod dinosaurs. Most researchers agree that modern-day birds are the only living members of the Dinosauria clade.");
    animals.add(bird);

    Animal cat = new Animal();
    cat.setName("Cat");
    cat.setImageUrl("http://upload.wikimedia.org/wikipedia/commons/thumb/b/bb/Kittyply_edit1.jpg/800px-Kittyply_edit1.jpg");
    cat.setDescription("The domestic cat is a small, usually furry, domesticated, and carnivorous mammal. It is often called the housecat when kept as an indoor pet, or simply the cat when there is no need to distinguish it from other felids and felines. Cats are often valued by humans for companionship, and their ability to hunt vermin and household pests.");
    animals.add(cat);

    Animal dog = new Animal();
    dog.setName("Dog");
    dog.setImageUrl("http://upload.wikimedia.org/wikipedia/commons/1/13/Gaia_Basenji.jpg");
    dog.setDescription("The domestic dog is a member of the Canidae family of the mammalian order Carnivora. The term \"domestic dog\" is generally used for both domesticated and feral varieties. The dog was the first domesticated animal and has been the most widely kept working, hunting, and pet animal in human history. The word \"dog\" can also refer to the male of a canine species, as opposed to the word \"bitch\" which refers to the female of the species.");
    animals.add(dog);

    return animals;
}
After that, override the onViewCreated() method. You should set data or Listeners of Views in this method.
@Override
public void onViewCreated(View view, Bundle savedInstanceState) {
    super.onViewCreated(view, savedInstanceState);
    ListView animalListView = (ListView) view.findViewById(android.R.id.list);
}
Now, we need to create the Adapter for using to provide the data to ListView.
public class AnimalListAdapter extends BaseAdapter {

    List<Animal> animalList;
    Context context;

    public AnimalListAdapter(Context context,List<Animal> animalList){
        this.context = context;
        this.animalList = animalList;
    }

    @Override
    public int getCount() {
        return animalList==null?0:animalList.size();
    }

    @Override
    public Animal getItem(int i) {
        return animalList==null?null:animalList.get(i);
    }

    @Override
    public long getItemId(int i) {
        return 0;
    }

    @Override
    public View getView(int i, View view, ViewGroup viewGroup) {
        if(view==null)
            view = LayoutInflater.from(context).inflate(android.R.layout.simple_list_item_1,null);
        Animal animal = getItem(i);
        TextView nameTextView = (TextView)view.findViewById(android.R.id.text1);
        nameTextView.setText(animal.getName());
        return view;
    }
}
I have created a simple adapter for list of Animal objects, this adapter will use the android.R.layout.simple_list_item_1 layout to display the list item.
Next, back to the fragment create an instance of the adapter and set it to the ListView.
Note: To get the Context object from the Fragment, you can use the getActivity() method to get the instance of Activity that this Fragment attached.
@Override
public void onViewCreated(View view, Bundle savedInstanceState) {
    super.onViewCreated(view, savedInstanceState);
    ListView animalListView = (ListView) view.findViewById(android.R.id.list);
    AnimalListAdapter animalListAdapter = new AnimalListAdapter(getActivity(),generateAnimalList());
    animalListView.setAdapter(animalListAdapter);
}
Next, we will create the activity for using to display our Fragment.
To put the Fragment to the Activity you need to have a FragmentManager object, the FragmentManager allows you to manage Fragments on your Activity.
When there are two types of Fragment (native and support library), you need to get the right FragmentManager object. If your Fragment derrived from android.app.Fragment you need to use the FragmentManager from android.app.FragmentManager but if your Fragment derived from android.support.v4.app.Fragment you need to use the FragmentManager from android.support.v4.app.FragmentManager.
Android 3+'s android.app.Activity and android.support.v4.app.FragmentActivity provide the getFragmentManager() method that return the FragmentManager object of android.app.FragmentManager class but only the android.support.v4.app.FragmentActivity provides the getSupportFragmentManager() method that return the FragmentManager object from support library.
In this article, I will create the Activity that derived from the FragmentActivity class.
Note: ActionBarActivity is derived from FragmentActivity with an Action Bar implementation.
Now, create the MainActivity that derived from FragmentActivity.
public class MainActivity extends FragmentActivity {
    @Override
    protected void onCreate(Bundle savedInstanceState) {
        super.onCreate(savedInstanceState);
    }
}
Don't forget to add the MainActivity to the manifest (if you manually create the Activity class file). And then set MainActivity as main and luancher.
AndroidManifest.xml
<activity android:name=".MainActivity">
    <intent-filter>
        <action android:name="android.intent.action.MAIN" />
        <category android:name="android.intent.category.LAUNCHER" />
    </intent-filter>
</activity>
To attach your Fragment to the Activity you can do it by adding the <fragment /> element to the layout directly or write the Java code to dynamically add or remove.
You can put the Fragment to the layout file directly by creating the <fragment /> element, but by defining the Fragment in the layout file you will can't remove or replace it at runtime.
The most important attribute of fragment element is android:name attribute that is refers to the full class path of Fragment that you want to display, other attributes are as same as other view common attributes.
Create the layout file for MainActivity.
="1.0"="utf-8"
<LinearLayout xmlns:android="http://schemas.android.com/apk/res/android"
android:layout_width="match_parent"
android:layout_height="match_parent"
android:orientation="vertical">
<fragment
android:layout_width="match_parent"
android:layout_height="match_parent"
android:name="me.vable.android.animallist.fragment.AnimalListFragment"/>
</LinearLayout>
I have added the AnimalListFragment to the layout file of MainActivity.
Back to the Activity file and add the setContentView() statement to the onCreate() for using to inflate the layout file.
setContentView(R.layout.activity_main);
Then, run the app!!
Like a View if you add the Fragment to layout file, you can set its id and you will can get it instance with that id. Only the difference is no method of Activity that is used to get the Fragment instance, you need to get the instance of FragmentManager and then call the findFragmentById() method.
public class MainActivity extends FragmentActivity {
    @Override
    protected void onCreate(Bundle savedInstanceState) {
        super.onCreate(savedInstanceState);
        setContentView(R.layout.activity_main);
        Fragment animalListFragment = getSupportFragmentManager().findFragmentById(R.id.fragment_animal_list);
    }
}
Note: Don't forget please make sure that you have imported the correct Fragment class, Android Studio will suggest to import the android.app.Fragment but if you use the android.support.v4.app.Fragment you need to import it manually.
Now you have a list of animals on the screen, next we will learn about adding the Fragment dynamically in Java code.
You can also add, remove, or replace the Fragment at runtime by using the Java code.
If your app has some functions that need to change some Fragment at runtime for example when user tap the settings menu at the right Fragment then the left Fragment will replace with a settings Fragment, you need to do that via Java code.
To put the Fragment to an Activity via Java code you need to provide the container View for a Fragment, I recommend you to use the FrameLayout becaase it's simple and putting many Fragments in a single container isn't a good idea because it hard to manage them.
Back to our app, when the user selects the animal the detail of that animal will show by replace the animal list with animal detail on a phone but on a tablet we will show the animal detail at the right of the screen. That meant our app will not use the static Fragment(fragment element in layout).
In the MainActivity layout file replaces the fragment element with a FrameLayout.
="1.0"="utf-8"
<LinearLayout xmlns:android="http://schemas.android.com/apk/res/android"
android:layout_width="match_parent"
android:layout_height="match_parent"
android:orientation="vertical">
<FrameLayout
android:id="@+id/framelayout_left"
android:layout_width="match_parent"
android:layout_height="match_parent">
</FrameLayout>
</LinearLayout>
Then we need to create a one more layout file for the tablet.
Creating a layout directory for tablet
(you can simply create the layout-large directory in the res directory manually)
Right click on the res select New > Android resource directory
Then, set the Resource Type to layout .
After that, select the Size in Available qualifiers and click >> button then change the Screen size option to large.
Press OK button you will see the layout-large directory under the res directory.
Then create the Activity layout file in the layout-large directory with the same name with layout for the phone.
Now, when run the application on tablet the layout file in the layout-large will inflate.
Next, add the view to the new layout. For the tablet, animal list and detail will show on the same screen, you need to add 2 FrameLayouts on the Left and Right to display the Fragments.
Note: You need to set the id of left FrameLayout as same as the FrameLayout in phone layout and limit its width.
="1.0"="utf-8"
<LinearLayout xmlns:android="http://schemas.android.com/apk/res/android"
android:orientation="horizontal" android:layout_width="match_parent"
android:layout_height="match_parent">
<FrameLayout
android:id="@+id/framelayout_left"
android:layout_width="200dp"
android:layout_height="match_parent">
</FrameLayout>
<FrameLayout
android:id="@+id/framelayout_right"
android:layout_width="match_parent"
android:layout_height="match_parent">
</FrameLayout>
</LinearLayout>
After that, go to the Activity file. In onCreate() method create a new AnimalListFragment instance.
AnimalListFragment animalListFragment = new AnimalListFragment();
Then get the FragmentManager instance for using to manage fragments. (I have used the FragmentManager form support library)
FragmentManager fragmentManager = getSupportFragmentManager();
These are methods of FragmentManager that you should to know:
beginTransaction() - Returns the instance of FragmentTransaction that is used to add, remove, replace, and other operation with fragments.getFragments() - Returns the list of Fragments in current context. *Only FragmentManager from support library*findFragmentById() - Find the specific Fragment instance by using the resource id.findFragmentByTag() - Find the specific Fragment instance by using the tag.
Now, we will get the FragmentTransaction object.
FragmentTransaction fragmentTransaction = fragmentManager.beginTransaction();
Important methods of FragmentTransaction:
add() - Add the Fragment to the specific container.remove() - Remove a specific Fragment.replace() - Remove all Fragments in specific container and add a new Fragment.addToBackStack() - Add this transaction to a back stack after commited, so you can reverse this transaction.commit() - Schedules a commit of this transaction, all commands of this transaction will not execute immediately after commit but it will execute when the main thread is ready.
Note: All commands in a transaction will not schedules to execute until you commit a transaction.
Then, we will add the Fragment to the left FrameLayout.
fragmentTransaction.add(R.id.framelayout_left,animalListFragment);

fragmentTransaction.commit();
Run the app!!
On the phone you will get the same result with the static Fragment.
When run the app on a tablet you will see that there is a blank area on the right because we haven't created and add the detail Fragment.
Create a new Fragment called AnimalDetailFragment
public class AnimalDetailFragment extends Fragment {

}
Then, create the view for this Fragment. Add an ImageView and a TextView.
="1.0"="utf-8"
<ScrollView
xmlns:android="http://schemas.android.com/apk/res/android"
android:layout_width="match_parent"
android:layout_height="match_parent">
<RelativeLayout
android:layout_width="match_parent"
android:layout_height="wrap_content">
<ImageView
android:id="@+id/imageview_animal"
android:layout_width="wrap_content"
android:layout_height="150dp"
android:layout_margin="16dp"
android:layout_alignParentTop="true"
android:layout_centerHorizontal="true"
android:src="@drawable/android3"
/>
<TextView
android:id="@+id/textview_description"
android:layout_width="match_parent"
android:layout_height="wrap_content"
android:layout_margin="16dp"
android:layout_alignParentBottom="true"
android:text="@string/lorem_ipsum"
android:layout_below="@+id/imageview_animal"/>
</RelativeLayout>
</ScrollView>
I have used the ScrollView as root View because I don't know the content length if the content is too long, the user can scroll down. And I have created the Lorem ipsum string for using to mock the screen.
This is an image that I set to ImageView src.
Next, back to AnimalDetailFragment and override onCreateView() method, inflate the layout and return as method result.
@Override
public View onCreateView(LayoutInflater inflater, ViewGroup container, Bundle savedInstanceState) {
    View view = inflater.inflate(R.layout.fragment_animal_detail,null);
    return view;
}
After that, back to the MainActivity and put this Fragment to the right FrameLayout of an Activity content view.
Note: You hate to check for the existence of the container View before putting the Fragment because when you have many layout files for support many devices, sometime some Views in some layout are not exist in another layout.
@Override
    protected void onCreate(Bundle savedInstanceState) {
        super.onCreate(savedInstanceState);
        setContentView(R.layout.activity_main);

        AnimalListFragment animalListFragment = new AnimalListFragment();
        FragmentManager fragmentManager = getSupportFragmentManager();
        FragmentTransaction fragmentTransaction = fragmentManager.beginTransaction();
        fragmentTransaction.add(R.id.framelayout_left,animalListFragment);

        if(findViewById(R.id.framelayout_right)!=null){
            AnimalDetailFragment animalDetailFragment = new AnimalDetailFragment();
            fragmentTransaction.add(R.id.framelayout_right,animalDetailFragment);
        }

        fragmentTransaction.commit();
}
Run the app!!
On the phone there is nothing change.
On the tablet you will see the View of AnimalDetailFragment at the right of the screen. Seem not beautiful? Try to change the background color of the animal list now!!
Copy the layout of AnimalListFragment to the layout-large and then edit the copy.
="1.0"="utf-8"
<LinearLayout xmlns:android="http://schemas.android.com/apk/res/android"
android:orientation="vertical" android:layout_width="match_parent"
android:layout_height="match_parent"
android:background="#F4B700"
>
<ListView
android:layout_width="match_parent"
android:layout_height="match_parent"
android:id="@android:id/list"
/>
</LinearLayout>
Run the app again!!
Seem better by not enough hahaha :D Try to make it more beautiful yourself!!
Then when the user taps on the animal list item, it should to be highlighted to make clear that this item was selected. Go to the animal list layout for tablet again and put the listSelector attribute to the ListView.
="1.0"="utf-8"
<LinearLayout xmlns:android="http://schemas.android.com/apk/res/android"
android:orientation="vertical" android:layout_width="match_parent"
android:layout_height="match_parent"
android:background="#F4B700"
>
<ListView
android:layout_width="match_parent"
android:layout_height="match_parent"
android:id="@android:id/list"
android:listSelector="@android:color/white"
/>
</LinearLayout>
Run the app again!! And try to select the animal.
Ok now our UI is almost done.
Like the Activity you can pass the Bundle object to the Fragment. Bundle is a key-value collection that is mostly used to pass the data to the Activity/Fragment during instantiation. For the Fragment you can pass the Bundle object by calling the setArguments() method.
Note: The setArguments() method of Fragment can only be called before the Fragment has been attached. The arguments will be retained across Fragment state.
In our app we will pass the Animal object to the AnimalDetailFragment and then after the View created we will add the data to the UI.
Override the onViewCreated() of AnimalDetailFragment and get arguements object by calling the getArguments() method.
@Override
public void onViewCreated(View view, Bundle savedInstanceState) {
    super.onViewCreated(view, savedInstanceState);
    Bundle bundle = getArguments();
}
Make sure that the Animal class is derived from the Serializable marker interface because to add the complex type to the bundle you need to make it serializable.
public class Animal implements Serializable {
...
}
Then back to the AnimalDetailFragment and get the Animal object from the arguments.
Note: To get something from the Bundle you need to know the key of them and should to check the existence of that key before.
@Override
public void onViewCreated(View view, Bundle savedInstanceState) {
    super.onViewCreated(view, savedInstanceState);
    Bundle bundle = getArguments();
    if(bundle.containsKey("animal")) {
        Animal animal = (Animal)bundle.getSerializable("animal");
    }
}
After that, we will set the View data by using to Animal object if it exists.
I will use the Picasso library to load the animal image. On Android Studio you can add this library by go to the build.gradle file in app directory and add the "compile 'com.squareup.picasso:picasso:2.3.4'" to a dependencies list. (If you use an eclipse as IDE you need to download jar file and put it in a libs directory and make sure that the libs directory is appear in the compile classpath)
dependencies {
    compile fileTree(dir: 'libs', include: ['*.jar'])
    compile 'com.android.support:appcompat-v7:20.0.0'
    compile 'com.android.support:support-v4:20.0.0'
    compile 'com.squareup.picasso:picasso:2.3.4'
}
When the image is load from the internet, we need to add the internet access permission to the manifest file.
<uses-permission android:name="android.permission.INTERNET"/>
Back to the AnimalDetailFragment and try to set the image to ImageView and set the description text.
@Override
public void onViewCreated(View view, Bundle savedInstanceState) {
    super.onViewCreated(view, savedInstanceState);
    Bundle bundle = getArguments();
    if(bundle.containsKey("animal")) {
        Animal animal = (Animal)bundle.getSerializable("animal");

        ImageView animalImageView = (ImageView)view.findViewById(R.id.imageview_animal);
        TextView descriptionTextView = (TextView) view.findViewById(R.id.textview_description);

        Picasso.with(getActivity()).load(animal.getImageUrl()).placeholder(R.drawable.android3).into(animalImageView);
        descriptionTextView.setText(animal.getDescription());
    }
}
Then go to the MainActivity and create the fake Animal object and pass it to the AnimalDetailFragment fragment.
if(findViewById(R.id.framelayout_right)!=null){

    Animal animal = new Animal();
    animal.setName("Penguin");
    animal.setImageUrl("http://www.emperor-penguin.com/penguin-chick.jpg");
    animal.setDescription("Penguin Penguin Penguin Penguin Penguin Penguin Penguin Penguin Penguin Penguin Penguin Penguin Penguin ");

    Bundle bundle = new Bundle();
    bundle.putSerializable("animal",animal);

    AnimalDetailFragment animalDetailFragment = new AnimalDetailFragment();

    animalDetailFragment.setArguments(bundle);

    fragmentTransaction.add(R.id.framelayout_right,animalDetailFragment);
}
Run the app on tablet!!
Now, we can pass the data to the Fragment.
On an Activity if you have the instance of Fragment you will can communicate to the Fragment directly by calling the methods of Fragment, on the other hand you can also get the Activity instance from the Fragment and call the Activity methods directly too. However when Fragment can be attached on any Activity, it should not depend on some Activity. So we will not invoke the Activity methods directly but we will create the interface (listener) that is used to communicate with Activity, thus every Activity that wants to receive the message from the Fragment must implement that interface.
In our app, when the user taps on the animal list item, the application will show the detail of that animal. To make our app work, we need to create the interface for notifying an Activity that user has select the animal.
Our interface is simple, we need only a method that uses to notify the Activity that a item on the list was selected. Go to the AnimalListFragment and create the interface now!!
public interface OnFragmentInteractionListener {
    public void onAnimalSelected(Animal animal);
}
When the Fragment was attached on the Activity, we should get the interface (listener) object and store for further use. Override onAttach() method and check if the Activity is derived from OnFragmentInteractionListener assign it to variable.
Note: onAttach() method will call when the Fragment was attached to the Activity.
Note: You can test for class derived by using the instanceof keyword.
OnFragmentInteractionListener listener;

@Override
public void onAttach(Activity activity) {
    super.onAttach(activity);
    if(activity instanceof  OnFragmentInteractionListener){
        listener = (OnFragmentInteractionListener) activity;
    }
}
Now, when you put the Fragment on the Activity you will get the instance of OnFragmentInteractionListener if that Activity derived from this interface.
When the Fragment was detached from the Activity you should to remove the listener too to prevent accidently call the listener method. Override the onDetach() method and set the listener to null.
Note: onDetach() method will call when the Fragment was detached from the Activity.
@Override
public void onDetach() {
    super.onDetach();
    listener = null;
}
When the list item was selected we will notify the Activity by calling the onAnimalSelected() method of OnFragmentInteractionListener.
Implement the OnItemClickListener for the ListView.
@Override
public void onViewCreated(View view, Bundle savedInstanceState) {
    super.onViewCreated(view, savedInstanceState);
    ListView animalListView = (ListView) view.findViewById(android.R.id.list);
    AnimalListAdapter animalListAdapter = new AnimalListAdapter(getActivity(),generateAnimalList());
    animalListView.setAdapter(animalListAdapter);

    animalListView.setOnItemClickListener(onAnimalListViewItemClickListener);

}

AdapterView.OnItemClickListener onAnimalListViewItemClickListener = new AdapterView.OnItemClickListener() {
    @Override
    public void onItemClick(AdapterView<?> adapterView, View view, int i, long l) {

    }
};
Call the onAnimalSelected() when onItemClick() invoked.
AdapterView.OnItemClickListener onAnimalListViewItemClickListener = new AdapterView.OnItemClickListener() {
    @Override
    public void onItemClick(AdapterView<?> adapterView, View view, int i, long l) {
        Animal animal = (Animal)adapterView.getItemAtPosition(i);
        if(listener!=null)
            listener.onAnimalSelected(animal);
    }
};
Note: Please make sure the listener is not null then call the onAnimalSelected() method;
Now, we will implement OnFragmentInteractionListener on the MainActivity. Go the the MainActivity and add "implements AnimalListFragment.OnFragmentInteractionListener" to the class signature.
public class MainActivity extends FragmentActivity implements AnimalListFragment.OnFragmentInteractionListener {
...
}
The IDE will ask you to implements the method(s) of that interface, confirm it and you will get the onAnimalSelected() method. (if an IDE doesn't ask to implement, please do it yourself)
@Override
public void onAnimalSelected(Animal animal) {

}
Next, ask the FragmentManager to show the AnimalDetailFragment when onAnimalSelected() was called. On the phone we will replace the AnimalListFragment with the AnimalDetailFragment, but on the tablet we will replace the existing right Fragment with a new one.
@Override
public void onAnimalSelected(Animal animal) {
    FragmentManager fragmentManager = getSupportFragmentManager();

    FragmentTransaction fragmentTransaction = fragmentManager.beginTransaction();

    int containerViewId = R.id.framelayout_left;

    if(findViewById(R.id.framelayout_right)!=null)
        containerViewId = R.id.framelayout_right;

    Bundle bundle = new Bundle();
    bundle.putSerializable("animal",animal);

    AnimalDetailFragment animalDetailFragment = new AnimalDetailFragment();
    animalDetailFragment.setArguments(bundle);
    fragmentTransaction.replace(containerViewId,animalDetailFragment);

    fragmentTransaction.commit();
}
Run the app and try to select the animal!!
You will see that when you select the animal that detail will change to math that animal!!
On the phone when you tab on the animal name the detail of the animal will show but can't go back to the animal list T^T
When the Fragment was replaced you, by default will can't go back to the previous Fragment, but you can do that by adding the FragmentTransaction to the back stack via the addToBackStack() method.
Note: The FragmentTransaction in the back stack will reverse execute when user presses the back button.
We will try to add the FragmentTransaction to a back stack before commit the Fragment replace only when user run the app on the phone.
@Override
public void onAnimalSelected(Animal animal) {
    FragmentManager fragmentManager = getSupportFragmentManager();

    FragmentTransaction fragmentTransaction = fragmentManager.beginTransaction();

    int containerViewId = R.id.framelayout_left;

    if(findViewById(R.id.framelayout_right)!=null)
            containerViewId = R.id.framelayout_right;

    Bundle bundle = new Bundle();
    bundle.putSerializable("animal",animal);

    AnimalDetailFragment animalDetailFragment = new AnimalDetailFragment();
    animalDetailFragment.setArguments(bundle);
    fragmentTransaction.replace(containerViewId,animalDetailFragment);

    if(findViewById(R.id.framelayout_right)==null)
        fragmentTransaction.addToBackStack(null);

    fragmentTransaction.commit();
}
Re run the app on the phone!!
Now, you can press the back button on the detail page to back to the animal list.
Our app is almost complete but there is something that you should know.
**Picture form Official Document**
When the Fragment has its own lifecycle, you should to know that what you should do in which state.
These are the callback method that will call when you attach the Fragment to the Activity:
onAttach() - Called when the Fragment was attached to the Activity.onCreate() - Called to initial the Fragment.onCreateView() - Create a View for the Fragment after View created the onViewCreated() method will call immediately.onActivityCreated() - Notify that Activity.onCreate() is completed.onViewStateRestored() - Tell to restore the date from a saved state.onStart() - Called after Fragment is visible to the user.onResume() - Called when Fragment is fully active.
These are the callback method that will call when the Fragment is no longer use:
onPause() - Called when the Fragment is no longer interacting with the user. Should save data at this state.onStop() - Called when the Fragment is no longer visible.onDestroyView() - Called when the View was destroyed.onDestroy() - Called to do final cleanup.onDetach() - Called when the Fragment is no longer attached to the Activity.
When you run our app on the phone, you will found that if you select an animal then rotate the device, the animal list will place over the detail page.
Every FragmentTransaction will store for re-execute every time when the Activity re-create for example when the device orientation change the Activity will recreate then every FragmentTransaction that do before screen rotate will re-execute automatically. Sound good but the problem is if you add the Fragment in onCreate() method of an Activity, your Fragment will and place over the Fragment from the re-execute of FragmentTransaction.
You can solve this problem by check the Bundle parameter of Activity.onCreate(), if the Bundle is null that meant this is first time that onCreate() called, you can do a FragmentTransaction. But If the Bundle is not null, don't do any FragmentTransaction to avoid the problem
@Override
protected void onCreate(Bundle savedInstanceState) {
super.onCreate(savedInstanceState);
if(savedInstanceState!=null)
return;
}
Back to our MainActivity and edit it.
@Override
protected void onCreate(Bundle savedInstanceState) {
    super.onCreate(savedInstanceState);
    setContentView(R.layout.activity_main);
    if(savedInstanceState!=null)
        return;
    AnimalListFragment animalListFragment = new AnimalListFragment();
    FragmentManager fragmentManager = getSupportFragmentManager();
    FragmentTransaction fragmentTransaction = fragmentManager.beginTransaction();
    fragmentTransaction.add(R.id.framelayout_left,animalListFragment);
    if(findViewById(R.id.framelayout_right)!=null){
        Animal animal = new Animal();
        animal.setName("Penguin");
        animal.setImageUrl("http://www.emperor-penguin.com/penguin-chick.jpg");
        animal.setDescription("Penguin Penguin Penguin Penguin Penguin Penguin Penguin Penguin Penguin Penguin Penguin Penguin Penguin ");
        Bundle bundle = new Bundle();
        bundle.putSerializable("animal",animal);
        AnimalDetailFragment animalDetailFragment = new AnimalDetailFragment();
        animalDetailFragment.setArguments(bundle);
        fragmentTransaction.add(R.id.framelayout_right,animalDetailFragment);
    }
    fragmentTransaction.commit();
}
Run the app and try again!!
Now, the problem is gone Hahaha.
The thing that is more important than what you learn today is what you will learn tomorrow. In this article I talk about only a basic of Fragment usage but there are many implementations of Fragment that interesting and you should learn it.
Tabs - Most of tabs implementation use the Fragment as content.
ViewPager - Want to make a horizontal page scroll? ViewPager is the answer, it work like a ListView but the items in ViewPager are Fragments.
Navigation Drawer - There are many apps that have a navigation drawer such as Facebook. Move the side menu to the navigation drawaer is a good idea.
Hope you enjoy your Android Application Developer life.
- 05/10/2014 Initial release
- 06/10/2014 Correct some words
Windows Platform, Android, Server-Side and Web Application Developer. I am a Programming Lover. I love to make an application and design it structures.


 General
  News
News  Suggestion
  Question
  Bug
Bug  Answer
  Joke
Joke  Praise
  Rant
Rant  Admin
Admin 


