Table of Contents
- Introduction
- WebPart
- Visual WebPart
- Webpart Properties
- Custom Editor Part
- Connectable Web Parts
Introduction
Webparts are one of the most commonly used components of SharePoint. Webparts are nothing but a collection of controls which can be added to the Page. Webparts framework was first introduced in ASP.NET 2.0. Webparts that are inherited from Webpart class are fully supported in SharePoint and useful in many ways. Webpart allows the end user to personalize and set the content as per their requirements within the browser. As a developer, one can develop the webparts with the webpart properties defined, using which the end user can customize the page content without any administrator involvement or without writing any code.
WebParts
In the below article, we will start with understanding of basic sandbox webpart.
We can develop our own webpart by inheriting the webpart class which is available in the namespace “System.Web.UI.WebControl”.
- Go to Visual Studio, select File=>New=>Project=>Empty SharePoint Project, give appropriate name and select the location to save the project
- Right click on solution explorer, select Add=>New Item, select webpart from the dialogue and give the name of the webpart (example:
Hello Webpart).
The following code is generated by default:
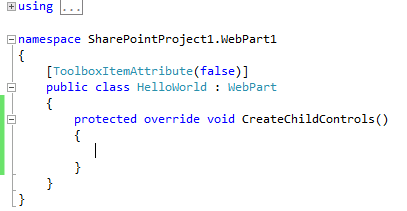
- The following are the methods available to override from the
Webpart base class in order of their occurrence (methods invoked).

- In the
CreateChildControls(), we can add our controls to be displayed in the webpart. Below is the sample code which is used to add simple label control.
Label lbl = new Label();
lbl.ID = "lblHelloworld";
lbl.Text = "Hello World";
Controls.Add(lbl);
- In the above code,
Controls is the webpart ControlCollection property which holds the controls.
- Now build and deploy the solution to the SharePoint farm.
- The deployed webpart is available in the webpart gallery from where it can be added to any page available in the SharePoint Site.
Visual WebPart
One of the main drawbacks of the webpart is that the design of UI part becomes more complex as we don’t have any design file to add the controls and every time we are supposed to write more code to add controls in the CreateChildControls() method. The Visual Webpart allows us to use the web user control component to design the UI and controls to the .ascx file, which can be directly added to ControlCollection in the CreateChildControls() method of the webpart.
Now we will see how to add Visual Web Part to our SharePoint Project and deploy it.
- Right click on the SharePoint Project, select add new item=>Visual Web part from the dialogue box.
VisualWebPart1 is added to our project. It contains four files, elements.xml, visualwebpart1.webpart, VisualWebPart1.cs and VisualWebPartUserControl.ascx respectively.
- VisualWebPartUserControl.ascx file is the user control file where we can add our controls and write the code behind functionality for the webpart. VisualWebPart1.cs file is the actual
Webpart class which inherits the webpart class and the user control is added to it. VisualWebPart1.webpart file contains the metadata and properties definition for the webpart and finally elements.xml file has the mapping URL and other related information for the webpart.
- Now select the Visual WebPart and add the Grid View Control to the file. Write the below code in the code behind file.
public static DataTable GetDataTable()
        {
            DataTable dt = new DataTable();
            SPSecurity.RunWithElevatedPrivileges(delegate()
            {
                using (SPSite site = new SPSite(SPContext.Current.Site.Url))
                {
                    using (SPWeb web = site.OpenWeb())
                    {
                 SPList lst = web.Lists[ConfigurationManager.AppSettings["listname"]];
                 dt = lst.Items.GetDataTable();
                    }
                }
            });
            return dt;
        }

    protected void Page_Load(object sender, EventArgs e)
        {
            GridView1.DataSource = GetDataTable();
            GridView1.DataBind();
        }
- Build and deploy the solution. Once the solution is deployed successfully, the webpart will be the webpart gallery and can be added to the page.
- The webpart displays the data from the specified SharePoint list.
Visual WebPart Properties
Now for example, consider a scenario where we need to provide the ability to the user to choose the list name within the browser itself for displaying the data. As previously in the above code, we are reading the list from the web.config file, alternatively we can get the list name from the webpart custom properties.
In the below example, we will see how to use the WebPart properties:
- First in the
VisualWebpart1UserControl class, declare the below property:
public VisualWebPart1 vwpone { get; set; }
- After that, declare the below property in the
VisualWebPart1 class which is inheriting the webpart class as shown below:
[WebBrowsable(true), WebDisplayName("Name"), WebDescription("List Name"),
        Personalizable(PersonalizationScope.Shared), Category("Custom Property"),
        System.ComponentModel.DefaultValue("EmployeeList")]
        public string listname { get; set; }
- After that, change code as shown below, replace list name retrieving from the web.config file with the
webpart property as shown below:
public  DataTable GetDataTable()
        {
            DataTable dt = new DataTable();
            SPSecurity.RunWithElevatedPrivileges(delegate()
            {
                using (SPSite site = new SPSite(SPContext.Current.Site.Url))
                {
                    using (SPWeb web = site.OpenWeb())
                    {
                        SPList lst = web.Lists[vwpone.listname];
                        dt = lst.Items.GetDataTable();
                    }
                }
            });
            return dt;
        }
- Now build and deploy the solution to check the output in the browser for the custom property.
Custom Editor Part
Now consider a scenario where the user wants to choose the required fields to be displayed in the gird view directly from the browser without writing any code. For this, we can add the CheckboxList control to the Webpart editor and we can allow the user to select the field names from the check box list, similarly as we have added a textbox control to the WebPart editor in the previous scenario.
In this example, we will see how to add the custom editor part.
- Declare the below property in the
VisualWebpart1 class:
[Personalizable (PersonalizationScope.Shared), WebBrowsable (false)]
public List<string> GridViewColumnslst {get; set ;}
- After these, define a new
VisualWebPart1EditorPart class which inherits the EditorPart class.
- In this Class, we are going to add a new
CheckboxList control and bind the list columns to it which is added to the webpart editor.
- Declare the below variables in the
EditorPart class:
private CheckBoxList chkblst;
 private VisualWebPart1 vwp1;
- In the
EditorPart class, we have four methods to concentrate on, we will see these methods one by one as shown below.
- Coming to the first one, we have
OnInit method, where we can initialize our controls, in our case the CheckboxList control:
protected override void OnInit(EventArgs e)
        {
            base.OnInit(e);
            chkblst = new CheckBoxList();
            chkblst.DataSource = VisualWebPart1UserControl.GetDataTable().Columns;
            chkblst.DataBind();
        }
- And then, we have
CreateChildControls where we will bind the CheckboxList control to the ControlCollection.
protected override void CreateChildControls()
       {
           base.CreateChildControls();
           Controls.Add(chkblst);
       }
- After these, we have two important methods which are used to set and get the value respectively.
ApplyChanges method which is used to assign the values to the declared property and SyncChanges method which is used to retrieve the values from the assigned property or properties.
public override bool ApplyChanges()
        {
            vwp1 = this.WebPartToEdit as VisualWebPart1;
            vwp1.GridViewColumnslst = new List<string>();

            foreach (ListItem itm in chkblst.Items)
            {
                if (itm.Selected)
                {
                    vwp1.GridViewColumnslst.Add(itm.Text);
                }
            }
            vwp1.SaveChanges();
            return true;
        }

        public override void SyncChanges()
        {
            vwp1 = this.WebPartToEdit as VisualWebPart1;
            if (vwp1.GridViewColumnslst != null)
            {
                foreach (string s in vwp1.GridViewColumnslst)
                {
                    foreach (ListItem itm in chkblst.Items)
                    {
                        if (itm.Text.Equals(s))
                        {
                            itm.Selected = true;
                        }
                    }
                }
            }
        }
- Once our
EditorPart class is ready, we need to bind it to the control collection of WebPart, we can achieve this by using the CreateEditorParts method available in the WebPart class as shown below:
public override EditorPartCollection CreateEditorParts()
        {
            VisualWebPart1EditorPart edprt = new VisualWebPart1EditorPart();
            edprt.ID = this.ID + "edprt";
            edprt.Title = "Configure Grid Columns";
            edprt.TabIndex = 3;
            edprt.GroupingText = "Configure Grid Columns";
            ArrayList arrylst = new ArrayList();
            arrylst.Add(edprt);
            return new EditorPartCollection(arrylst);
        }
- Finally use the
WebPart Properties in the User Control to bind it to the grid view accordingly.
  public DataTable InitializeDataTable()
        {
            DataTable dt = GetDataTable();
            DataView dv = new DataView(dt);
            DataTable customview = dv.ToTable(false, vwpone.GridViewColumnslst.ToArray());
            return customview;
        }
protected override void OnPreRender(EventArgs e)
        {
            base.OnPreRender(e);
            if (vwpone != null)
            {
                GridView1.DataSource = InitializeDataTable();
                GridView1.DataBind();
            }
        }
- Build and deploy the solution to see the output as below:
Connectable Web Parts
In the SharePoint, in order to achieve the Master-Child Grid View, Connectable webparts comes in a handy way.
Below are the steps to be followed to build the Connectable webpart application:
Developing Provider WebPart:
- Add an interface and define the integer member as shown below:
public interface ICities
    {
        int Cityid { get; set; }
    }
- After that, add a visual webpart and name it as Connection Provider.
- Implement the interface in the webpart and declare the below properties. The completed code for the webpart looks similar to the below code.
[ToolboxItemAttribute(false)]
public class ConnectableWebPart : WebPart, ICities
{
private const string _ascxPath =
@"~/_CONTROLTEMPLATES/SharePointProject1/ConnectableWebPartProvider/ConnectableWebPartUserControl.ascx";
protected override void CreateChildControls()
{
ConnectableWebPartUserControl vwp1uc =
Page.LoadControl(_ascxPath) as ConnectableWebPartUserControl;
vwp1uc.CWP = this;
Controls.Add(vwp1uc);
}
[ConnectionProvider("Provider for String From TextBox", "TextBoxStringProvider")]
public ICities CitiesStringProvider()
{
return this;
}
[Personalizable()]
public int Cityid
{
get;
set;
}
}
- Now in the user control, in grid view selected index change event get the item id and assign it to the property defined in the webpart:
protected void GridView1_SelectedIndexChanged(object sender, EventArgs e)
        {
            if (CWP != null)
            {
                CWP.Cityid = Convert.ToInt32(GridView1.SelectedRow.Cells[0].Text);
            }
        }
- Now create a new webpart and name it as Connection Consumer and declare a property with interface as type.
public ICities _myProvider { get; set; }
- After these, add the below code which helps to retrieve the information from the Provider web part.
[ConnectionConsumer("String Consumer", "StringConsumer")]
        public void TextBoxStringConsumer(ICities Provider)
        {
            _myProvider = Provider;
        }
- Now call the property and get the data based on the item id in the
OnPreRender method of User Control as shown below:
protected override void OnPreRender(EventArgs e)
        {
            EnsureChildControls();
            if (_cnnConsumer != null)
            {
                if (_cnnConsumer._myProvider != null && _cnnConsumer._myProvider.Cityid > 0)
                {
                    GridView1.DataSource = Bind();
                    GridView1.DataBind();
                }
            }
        }
private DataTable Bind()
        {
            DataTable dt = new DataTable();
            SPSecurity.RunWithElevatedPrivileges(delegate()
            {
                using (SPSite site = new SPSite(SPContext.Current.Site.Url))
                {
                    using (SPWeb web = site.OpenWeb())
                    {
                        SPListItem lst = web.Lists["GridViewConfig"].GetItemById(_cnnConsumer._myProvider.Cityid);
                        dt = lst.ListItems.GetDataTable();
                    }
                }
            });
            return dt;
        }
Points of Interest
In all the above scenarios, while using the custom properties, to access the properties from the WebPart to the User Control, a property is declared with user control as type and value to this property is assigned in the CreateChildControls method of WebPart. And in order to retrieve the property values, these values are available in the OnPreRender method of the User Control.
Example
By default, the code is generated as shown below:
  private const string _ascxPath =
@"~/_CONTROLTEMPLATES/SharePointProject1/VisualWebPart1/VisualWebPart1UserControl.ascx";

      protected override void CreateChildControls()
      {
          Control control = Page.LoadControl(_ascxPath);
          Controls.Add(control);
      }
It should be replaced with the below code:
protected override void CreateChildControls()
        {
            VisualWebPart1UserControl vwp1uc = Page.LoadControl(_ascxPath) as VisualWebPart1UserControl;
            vwp1uc.vwpone = this;
            Controls.Add(vwp1uc);
        }


 General
  News
News  Suggestion
  Question
  Bug
Bug  Answer
  Joke
Joke  Praise
  Rant
Rant  Admin
Admin 


