Scope
In this article, we'll see how to develop a Windows Phone app capable of automatically taking photos through the device's camera, uploading them on a web server through which they can be seen from a browser. In other words, we'll develop a sort of network camera / webcam that could be run from a smartphone or tablet to monitor a certain place from elsewhere. We'll use Visual Basic .NET for the app part, while the server-side coding will be done in PHP, as we've done in a previous article about geolocalization (refer to Geolocalize a device and store coordinates on Webserver for further information).
Prerequisites
To use the code presented in the article, you'll need:
- Windows 8.1
- Visual Studio with Windows Phone 8.1 SDK
- A local or hosted web server, with Apache with PHP support enabled. Alternatively, the web server part could be written in ASP/ASP.NET.
Configuring each one of the above prerequisites goes beyond the scope of the article, so I will not address this point, assuming that everything was previously successfully configured and running. If you need a brief reference on how to install an Apache plus PHP/MySQL server, you could refer to my article Quickly installing LAMP server on Debian or Ubuntu Linux.
Introduction
In this article, I'll present a simple method to implement a sort of smartphone/tablet base webcam, useful to set-up scenarios that can be evolved into surveillance application, and the like. A growing attention to the Iot application field bring us to be increasingly concerned and aware of the possibilities of interconnectivity of our daily use devices, and I think the present could be a nice (though really basic) exercise in that direction.
What we will do here is to use a Windows device as an automatic camera, to take pictures as data stream every predetermined seconds, to send them remotely to a PHP script that will consolidate them as a file on the remote webserver, making it available to be seen while standing at any place that allows Internet connections.
Let's start from the server part, in order to do some initial assumptions that will make the app development clearer.
Server-side Scripts
As we've previously stated, we'll use PHP (and an Apache webserver) to setup a simple script capable of receiving a file, which will be sent through POST method, to store it and thus making it subsequently accessible to further HTTP requests, such as a browser navigation. The script is the most simple possible: it consists in the reception of a POST content (namely, "file" parameter), proceding then in opening an arbitrary file (which I've named "test.jpg"), writing in it what was sent in binary mode. Let's see it:
<?php
$content = $_POST['file'];
$sfile = fopen("test.jpg", 'wb');
fwrite($sfile, $content);
fclose($sfile);
?>
Pretty self explanatory with minimum PHP knowledge.
Next, we will prepare another page, which I've named "index.html": a plain HTML file in which our "test.jpg" will be shown.
<title>Network Camera</title>
<!--
<h1>Network Camera</h1>
<div id="imgwrapper">
<img src="test.jpg">
</div>
To sum up this part of our project, we are speaking here about having a web server equipped by two simple scripts. The first one will be exploited by our Windows Phone app, and it will receive and file remotely the data stream sent by the app itself, while the second one is simply a viewer for those data, encapsulating the sent data (i.e., a photo) in an IMG tag, to allow users to see it. Now we can implement our app to complete the work.
Automatic Camera App for Windows Phone
In this section, we will develop our Windows Phone app, which will consist of the following:
- Automatic camera shooting
- Automatic photo upload (i.e., submitting the photo to our upload.php page)
We will make use of Windows.Media.MediaProperties namespace to access our device's camera capabilities.
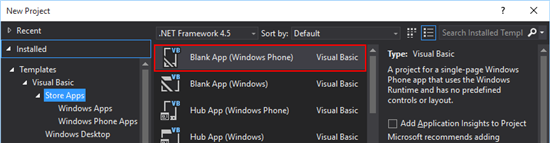
First, open Visual Studio and select from Visual Basic template menù the Store Apps / Blank App (Windows Phone) template. It will create for us a simple layout based on a single page, namely MainPage.xaml, on which we will apply the needed controls and business logic.
Let's see what elements we will include in our XAML:

First we have a CaptureElement, i.e., a control in which we will render the camera preview, in order to observe what will be acquired as image. A TextBox named txtRemUP will contain the remote address of our upload.php (useful in case our app must communicate with different hosts, instead of hardcoding un URI). A ToggleButton will allow us to start and stop image acquisition, and last we have a couple of TextBlock for log purposes (date and time of the last shoot and upload), and a Canvas that will show us the last picture taken.
App Prerequisites
Since our application must require the use of hardware device and network communications, we must set the app's Capabilities and Requirements accordingly.
Thus, we must double-click on Package.appxmanifest file (which was created by Visual Studio), accessing both the Capabilities and Requirements tabs, setting the camera and network flag as follows:
Camera Initialization
Code-side, the first thing to do is to initialize our camera when the app starts, setting the CaptureElement Source property accordingly. Please note almost all the events that will be presented will be asynchronous. Let's start with the OnNavigatedTo event, which defines the moment in which a certain Page will be shown.
Protected Overrides Async Sub OnNavigatedTo(e As Navigation.NavigationEventArgs)
    cam = New Windows.Media.Capture.MediaCapture
    Await cam.InitializeAsync()
    mCanvas.Source = cam
    Await cam.StartPreviewAsync()
End Sub
I've declared a MediaCapture variable, cam, as visible to the entire scope. Here, we'll use the method InitializeAsync on it, to initialize our camera, binding the MediaCapture variable as the source of our CaptureElement control. A further call to the StartPreviewAsync method will result in a graphical rendering of the camera acquisition on the control.
On the Toggled event of our ToggleButton, we will control a Timer launch or its disposition, depending on the ToggleButton status.
If toggler.IsOn Then
    t = New System.Threading.Timer(AddressOf Shoot, Nothing, TimeSpan.Zero, New TimeSpan(0, 0, 10))
    t.Change(30000, Threading.Timeout.Infinite)
Else
    If Not (t Is Nothing) Then t.Dispose()
End If
If the ToggleButton is active, we will create a new instance of a t Timer, using 30 seconds as its interval. For each interval, a call to the subroutine Shoot will be made. In that sub, we will control the picture acquisition, plus its uploading.
Photo Capturing
The Shoot subroutine is as follows:
Public Async Sub Shoot(sender As Object)
        Dim imgFormat As ImageEncodingProperties = ImageEncodingProperties.CreateJpeg()
        stream = New Streams.InMemoryRandomAccessStream

        Await cam.CapturePhotoToStreamAsync(imgFormat, stream)
        Await stream.FlushAsync
        stream.Seek(0)

        Await Windows.ApplicationModel.Core.CoreApplication.MainView.CoreWindow.Dispatcher.RunAsync_
                      (Windows.UI.Core.CoreDispatcherPriority.Normal, AddressOf SetCanvas)
        Await Windows.ApplicationModel.Core.CoreApplication.MainView.CoreWindow.Dispatcher.RunAsync_
                      (Windows.UI.Core.CoreDispatcherPriority.Normal, AddressOf MarshalToggler)
End Sub
In it, we define a RandomAccessStream that will be initialized by calling the method CapturePhotoToStreamAsync (from the MediaCapture variable). Simply as that, the calling to that method will access the camera to take a shoot, proceeding in copy the image to a stream. At the end of our routine, you can see two Dispatchers towards two subroutines, the latter being simply a check on the ToggleButton status. The first one, though, calls upon the SetCanvas routine, which will be used to save the image to our Canvas, but - more importantly - to upload it on our webserver, through a POST towards our upload.php URI.
Private Async Sub SetCanvas()
        tmpLab.Text = DateTime.Now.ToString
        Dim b As New BitmapImage()
        Await b.SetSourceAsync(stream)
        pCanvas.Source = b

        Dim io As Stream = stream.AsStreamForRead
        Dim buf(io.Length) As Byte
        io.Position = 0
        Await io.ReadAsync(buf, 0, io.Length)

        Dim httpClient As New HttpClient
        Dim form = New MultipartFormDataContent
        form.Add(New ByteArrayContent(buf, 0, buf.Length), "file")
        Dim response = Await httpClient.PostAsync(txtRemUP.Text, form)

        response.EnsureSuccessStatusCode()
        httpClient.Dispose()
        Dim sd As String = response.Content.ReadAsStringAsync().Result
        lastSent.Text = Date.Now.ToString
End Sub
Apart from the TextBlocks used for logging purposes, what this routine will do is as follows:
- Creation of a
BitmapImage object: through the method SetSourceAsync, a new Bitmap is made from our RandomAccessStream, using it as the Source of our Canvas, in order to show the last taken picture. - Creation of a simple
Stream to access to a Byte array from our original RandomAccessStream (our image). That will be needed to upload correctly our data. - Creation of a
MultipartFormDataContent (i.e. a "simulated" HTTP form, with the web awaited variable, which we've named "file" when we've created our upload.php page). - Physical upload of our image.
The complete MainPage code-behind will be as follows:
Imports System.Net.Http
Imports Windows.Storage
Imports Windows.Media.MediaProperties

Public NotInheritable Class MainPage
    Inherits Page

    Dim t As System.Threading.Timer
    Dim cam As Windows.Media.Capture.MediaCapture
    Dim stream As Streams.InMemoryRandomAccessStream

    Protected Overrides Async Sub OnNavigatedTo(e As Navigation.NavigationEventArgs)
        cam = New Windows.Media.Capture.MediaCapture
        Await cam.InitializeAsync()
        mCanvas.Source = cam
        Await cam.StartPreviewAsync()
    End Sub

    Private Async Sub SetCanvas()
        tmpLab.Text = DateTime.Now.ToString
        Dim b As New BitmapImage()
        Await b.SetSourceAsync(stream)
        pCanvas.Source = b

        Dim io As Stream = stream.AsStreamForRead
        Dim buf(io.Length) As Byte
        io.Position = 0
        Await io.ReadAsync(buf, 0, io.Length)

        Dim httpClient As New HttpClient
        Dim form = New MultipartFormDataContent
        form.Add(New ByteArrayContent(buf, 0, buf.Length), "file")
        Dim response = Await httpClient.PostAsync(txtRemUP.Text, form)

        response.EnsureSuccessStatusCode()
        httpClient.Dispose()
        Dim sd As String = response.Content.ReadAsStringAsync().Result
        lastSent.Text = Date.Now.ToString
    End Sub

    Private Sub MarshalToggler()
        If toggler.IsOn Then
            t = New System.Threading.Timer(AddressOf Shoot, Nothing, TimeSpan.Zero, _
                New TimeSpan(0, 0, 10))
            t.Change(30000, Threading.Timeout.Infinite)
        Else
            If Not (t Is Nothing) Then t.Dispose()
        End If
    End Sub

    Public Async Sub Shoot(sender As Object)
        Dim imgFormat As ImageEncodingProperties = ImageEncodingProperties.CreateJpeg()
        stream = New Streams.InMemoryRandomAccessStream

        Await cam.CapturePhotoToStreamAsync(imgFormat, stream)
        Await stream.FlushAsync
        stream.Seek(0)

        Await Windows.ApplicationModel.Core.CoreApplication.MainView.CoreWindow.Dispatcher.RunAsync_
                (Windows.UI.Core.CoreDispatcherPriority.Normal, AddressOf SetCanvas)
        Await Windows.ApplicationModel.Core.CoreApplication.MainView.CoreWindow.Dispatcher.RunAsync_
                (Windows.UI.Core.CoreDispatcherPriority.Normal, AddressOf MarshalToggler)
    End Sub

    Private Sub toggler_Toggled(sender As Object, e As RoutedEventArgs)
        MarshalToggler()
    End Sub
End Class
Upon the completion of those steps, our "
test.jpg" file will be uploaded and ready to be viewed by knowing the remote URI and being able to access it from any device.
Let's see an example of the execution of the project.
An Overall Test
A simple test will consist in setting up the webserver and the device, launch the Windows Phone app awaiting it to take and upload photos, checking for them later through a browser, visiting the HTML page we've created before:
Source Code
The complete source code used in the present article can be downloaded at: https://code.msdn.microsoft.com/Get-Automatic-Pictures-3b3875dd.
Bibliography
Working in IT since 2003 as Software Developer for Essetre Srl, a company in Northern Italy.
I was awarded in 2014, 2015 and 2016 with Microsoft MVP, for Visual Studio and Development Technologies expertise. My technology interests and main skills are in .NET Framework, Visual Basic, Visual C# and SQL Server, but i'm proficient in PHP and MySQL also.


 General
  News
News  Suggestion
  Question
  Bug
Bug  Answer
  Joke
Joke  Praise
  Rant
Rant  Admin
Admin 


