Introduction
Everyone is talking about HTML5 and CSS3 these days. You want to learn more about the topic but it seems like the more you try to learn, the further away the finish line moves. You started off just wanting to learn how to make a simple web page and before you know it, the tutorials are telling you that you need to know HTML, CSS, JavaScript, Bootstrap, and Git just to get started. You find that each of these topics seemingly also has their own array of topics to learn just to get started. Before you know it, you are overwhelmed and ready to give up.
If that describes you, never fear, you aren’t alone. I’ve been there and I know how it feels. That is why this tutorial is different. My focus is on walking with you from the very beginning to a place where you feel comfortable writing HTML and CSS on your own. Along the way, I will point out the various side tracks. I will give you introductory information on them so you know what they are and how to get started. However, we are going to stay focused on getting you up to speed in HTML and CSS. These articles will get you across that finish line.
The Foundation
Let's start at the very beginning. HTML (Hyper-Text Markup Language) is not technically a programming language. Instead, it started out as a way to display text, images and other types of data. Over time, the standard was developed and built upon to expand what HTML could do. These changes have led to the major revisions of the HTML specification. The latest specification, which is still being finalized, is HTML5. The group that heads up the modifications to the HTML specification is called the W3C (World Wide Web Consortium).
Pretty dry stuff, huh? Before we dive into the history of CSS, let's take a step back and figure out what this means so far. Basically, HTML was developed as a way to share documents between researchers. In the early stages, it wasn't much more than a manual version of a very basic Microsoft Word. You could bold text, italicize, add pictures and do other basic document "markup" things. The thing that a lot of people miss is that this simplistic foundation of HTML still exists today. That is where we are going to start you out. We can get a quick win in just a few minutes and you will actually see real progress. So, hang in there while we go through the foundations of CSS and then we will dive right in.
CSS (Cascading Style Sheets) is a way to modify the look of a HTML page. Actually, CSS doesn't have to be applied just to HTML but that is by far the primary use for it. Just like HTML, CSS has gone through multiple iterations. Also like the HTML specification, the CSS specification is maintained by the W3C. Currently, CSS3 is being finalized.
So that gives us an idea of where CSS came from but what does it actually do? I'm glad you asked. CSS has been designed to separate your design from your content. Your content goes in the HTML and then the CSS makes that content look pretty. Because there is this separation, you can easily switch out the look of your site without needing to change your structure or content.
As you probably noticed by now, HTML5 is the latest revision of HTML so calling it just HTML is perfectly acceptable. The same goes for CSS, since CSS3 just specifies the latest version of the CSS specification. In general, when we discuss HTML and CSS, we are referring to the latest version of the specifications.
The Browser
The job of the browser is to interpret the HTML and CSS that you provide it. That seems like a simple job, especially since there is a clear specification. Unfortunately, it isn't that simple. Each browser has to figure out how best to implement the features of the specification. They also have to figure out which potential upcoming specifications to implement. For instance, HTML5 and CSS3 aren't complete yet but the major browsers all support most of the features in the specification so far. This means that sometimes the browser developers have to guess which features will be ratified and how they will work. Other times, the browser developers decide to add a feature to their browser that will make a technical leap forward. If the feature becomes successful, other browser developers might also implement the feature and it might end up in the specification.
All of this to say that browsers are different. These differences will cause your web pages to look differently in different browsers. Don't worry, though, these differences will mostly be minor and we will discuss how to work around the differences. When it is time, we will also go over resources that help point out potential pain points.
Getting Started
OK, that's it. We are done with the intro and we are ready to get our hands dirty. This is always my favorite part. So, here is the game-plan for moving forward:
- We need to set up our development environment.
- We need to get a quick tour of the basics of our development environment.
- We build a basic Hello World web page (WooHoo!).
- We deconstruct the web page to identify all the parts.
That will start us off well. From there, we will move into more HTML markup and then we will mix in our first CSS and see how that starts to change things.
Setting Up Our Development Environment
A dev environment is a very personal thing. Each person has their own idea about which IDE is best. HTML and CSS do not need to be compiled (like C# and other languages do). That really opens up your options for which editor you can use. That means that even Notepad is a valid HTML and CSS editor. For this tutorial, we will be using Web Matrix from Microsoft. There are a number of reasons for this. First, it is free. Second, it comes with a lite version of IIS (Internet Information Server), which is what we use to run our web pages. This makes it a bit easier to test our web pages. Third, you can use Web Matrix to develop in a number of different web languages (JavaScript, PHP, etc.) That means you can keep the same editor for multiple similar tasks. I find that when I only have to learn one editor, I learn it better than if I'm constantly switching.
With that being said, you can feel free to use any editor that you want. Some of the screenshots might not be relevant but overall this tutorial will work with whatever editor you choose to use. In that spirit, here are some popular recommendations:
Action Step - Install Web Matrix (or the IDE of your choice). When installing Web Matrix, just accept the defaults. This will set up everything you need.
A Quick Tour of Web Matrix
For those of you who have installed Web Matrix, let's look over the basics. When you first open Web Matrix, you see the following screen:
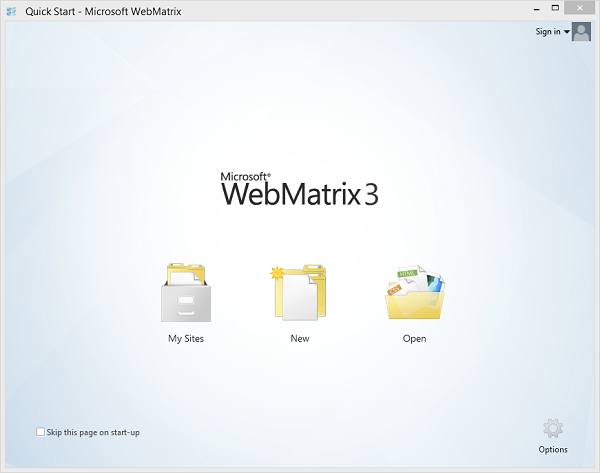
Select the "New" option and then choose "Empty Site":

Now you have an empty site from which to build your web site:
The great thing about this IDE is that there isn't a lot to get confused by. On the page you start out on, you have three menu tabs at the top. We will not be using tabs two and three. Tab two (Remote) is for publishing to a remote server. You use that when you want to publish your completed website to your web host. Tab three (Source Control) is where you can configure git or TFS for this project. Source control is a whole topic unto itself. It is an amazing resource to use and in a perfect world you would know how to use it. However, we are just getting started in HTML and CSS and we don't want to take a side track. Just be aware that this is a topic that you will want to learn more about at some point in the future. Not knowing about it will not hold back your web development, though.
On the Home menu tab (the one already open), we will only be using a few options. Starting on the left, there is the Site controls including Run, Publish and Restart. This is the controls for our web server (IIS Express). The web server is what hosts the website and allows it to be viewed properly in the browser. This is one of the benefits of installing Web Matrix (it comes with a web server). Our typical process will be to make changes to our site and then hit the Run button to view the site in our browser. If there was an issue with the web server, you could always hit the restart or stop/start button(s). Next is the Files controls. The key option here is the New button. This is how we will add all of our files and folders. Everything else on the menu tab is either self explanatory or we don't use it.
Creating Our Hello World Page
Ready to build your first web page? Let's do it. Hit the New button to create a New File. When choosing the File Type, select HTML. Before you hit OK, make sure to name the file "index.html".
We choose the name index.html because web servers look for certain file names as the entry point to a website. Typically, they look for index.html, index.htm, default.html, and default.htm. While this means we could call the page default.htm, the currently accepted standard entry point name is index.html. When you name a page index.html, that is the default page that will be loaded when no page is explicitly specified. That means that index.html will be our homepage.
When your page is created, it contains the following HTML by default:
<!DOCTYPE html>

<html lang="en">
   <head>
      <meta charset="utf-8" />
      <title></title>
   </head>
   <body>

   </body>
</html>
This is the basic skeleton of a web page. We are going to come back and dissect what each line really means but first, let's concentrate on one section: the body. HTML is composed primarily of "tags". Most tags have an opening and a closing tag. For instance, <body> is a tag. Its closing tag is </body>. Note the slash before body. Whenever you see this slash before a tag name, you know that this is the closing tag. When you encounter a tag pair like body, everything in between the opening tag and the closing tag is inside that tag. That means that if we put something between the body tags, that something will be in the body of our page.
In our case, we want to get started being web developers so let's put something in the body of our HTML page. Type "Hello World" (without the quotes) in between the opening and closing body tags like so:
<body>
   Hello World
</body>
That's it. Now hit the Run button in the upper left to save this page and run it in our browser. When we do, we should get something like this:
Not very spectacular, but it is a start. Congratulations, you just made your first web page.
Deconstructing a Basic Web Page
Now that we have our feet wet, let's go back and look at that HTML markup in more detail:
<!DOCTYPE html>

<html lang="en">
   <head>
      <meta charset="utf-8" />
      <title></title>
   </head>
   <body>

   </body>
</html>
The first line is a special directive called the DocType. This directive tells the browser what HTML specification this page was built upon. Remember how I said that we are currently on HTML5? Well, obviously as the specification changed, tags and their usage changed too. In order to prevent a new specification from ruining existing pages, the DocType was used to identify which specification was used to build the page. DocType is not really used for this use anymore. Now, we include it just to indicate that this page conforms to the latest standards. If you do not include a DocType, your page will be rendered in "Quirks" mode, where the browser uses the oldest specification it has to render your page. Bottom line here is that you need to include this line but you never need to change it.
Next is the "html" tag. This one is interesting because we are also introduced to an attribute. An attribute extends or works on the tag in some way. In this case, it specifies that the primary language for everything between the html tags is English. The html tag itself wraps the entire document. You should not have any tags (except DocType) outside of the html tags.
Up next is the head tag. Think of the head section like the header of an email. It contains all of the information about the page. Most items in the head section are optional but the title is required. This brings up another point we are starting to see: tags can be nested inside of each other. The only thing to watch here is that you close your tags in the proper order. For instance, you need to close your title tag before you close your head tag.
The next tag we see is the meta tag. This one is interesting for a few reasons. First, it has an attribute (charset). Next, it has no closing tag. Finally, it has a slash at the end (hint: these last two are related). Let's start at the beginning. Meta tags are typically information about the page. These tags aren't visible to the user. Instead, they are used by browsers, web servers and other machine readers to learn about the page. In our case, we are telling the browser that this page uses utf-8 (Unicode) for its character set. This is a widely-used character set that can handle most languages. Other meta tags can give a description of the site, the author, etc. By default, include at least this meta tag. Not including the other meta tags will not negatively impact your website. As you learn more about SEO (Search Engine Optimization) and other topics, you will probably revisit this section.
Now, the meta tag does not have a closing tag but it has that slash at the end. When you see this, it means that the tag is self-closing. In the case of meta tags, there should not ever be a true closing tag. It is technically supported in HTML5 for certain tags to not have a closing tag. Previously, though, when an item did not have a closing tag, we indicated it with a slash at the end like you see here. HTML5 works fine with items that have a slash at the end. That means that this is typically the preferred method of handling tags that do not have closing tags.
The title section inside the head is where we put the page title (whoa, really?). The title is what shows up on the title bar or tab title in our browser. For instance, if we modify our title like so:
<title>Our First Website</title>
Our web page will now look like this (note the difference in the tab name up top):
That concludes our survey of the default markup included by Web Matrix in a default web page. This is another reason why I love Web Matrix: the default templates are really small. As you progress in your web development, you may end up wanting more in your starter template but for now it keeps the template small and keeps the confusion to a minimum.
To wrap up, HTML is composed of tags. Most tags have an opening tag and a closing tag. Nested tags need to be closed before their parent tag can be closed. The two major sections of a HTML page are the head and the body. Data about the page typically goes in the head while the page data typically goes in the body.
Other HTML Tags
This is an introductory article, so we aren't going to dive deep into HTML tags. However, when you are just getting started, there are a few tags that you should know how to use.
Heading Tags
Heading tags allow you to identify the outline for your web page. There are a total of six different heading tags (h1 through h6). Each one indicates a heading level (h1 being the highest and typically the biggest and h6 being the smallest and typically the smallest). To demonstrate this, let's modify our page to have an overall heading and a couple section headings like so:
<body>
    <h1>Sample Hompeage</h1>
    <h2>Section One</h2>
    Hello World
    <h2>Section Two</h2>
</body>
Since the Hello World is just content and not a header, I left it outside of a header tag. This breaks up the document into sections like so:
Note the differences in the sizes of the fonts. These are the defaults for HTML.
Paragraph Tags
When you have regular text that you want to display on a web page, the standard place to put it is inside of a paragraph tag like so:
<p>Hello World</p>
The paragraph tag keeps the text together and it (typically) puts a line break after the text. Thus, if we were to modify the markup like so:
<p>Hello World</p>
<p>How are you?</p>
It would look like this:
Basic CSS
By now you are wondering if we forgot about CSS. We have built our page and have the basics working but we haven't needed to use CSS. The reality is that we don't technically need to use CSS to build a web page. However, instead of throwing it out, let's look at why we would use CSS.
Right now our web page is pretty plain. It is black and white and blah. CSS is where we change all of that. Let's start by adding a new file. This time we will choose CSS and we will name it site.css:
The name here isn't as important as it was with the homepage. My standard is to call my main CSS file site.css. Once you add the new CSS file, it will open up and you will see the default starting text for our CSS file:
body {
}
This is a great time to discuss what CSS does. CSS modifies portions of your HTML in some way. For instance, it can change the font of a certain section, it can change the background color of a different section, or it can put extra space around certain tags. So, that means there are two parts to a CSS rule: the item being affected and what you want to change about the item. Looking above at our default CSS, we see "body". That looks familiar. This CSS rule affects the body of our HTML page. Now, normally we would have something inside the curly braces (the things to change) but as of right now our rule is empty. Why don't we change that and then see what happens. I am going to change the font for the body (and everything inside it) to be "Comic Sans MS":
body {
   font-family: 'Comic Sans MS';
}
When you refresh your page, nothing changes. What gives? Well, remember how I said that when the web server runs the site, it runs index.html by default. That is what it is doing (which is what we want). However, it doesn't know to include our CSS file. We need to bring in our CSS file as a resource on our index page. We do this by linking to it like so:
<head>
    <meta charset="utf-8" />
    <title>Our First Website</title>
    <link rel="stylesheet" type="text/css" href="site.css" />
</head>
Notice the "link" tag on line four. That is where we bring in our CSS file. Now there are a few attributes on this tag. The first attribute, rel, specifies the relationship between the two documents. In this case, we are saying that site.css is a stylesheet that we are using in this web page. Next is the type of document. We specify "text/css" to indicate that it is a CSS document. Finally, the href is the path to our CSS file. In our case, since the two files are at the same level (they are in the same folder), we can just specify the name of the file without putting in a path. This could also be a full URL that points to an external site. For instance, if our style sheet was stored somewhere else on the web.
Now when we refresh the page, we get the (amusing) results we were expecting:
So that is the basics of CSS. We specify which tag to affect and then inside the curly braces, we specify what things to change in the pattern of item colon value then semicolon (font-family: 'Comic Sans MS';) This raises the question, though, of what we would do if we want to change only one section. For example, what if we want to make a change to our "Hello World" paragraph but not the "How Are You?" paragraph? This is where attributes come into play. In HTML, you can add an id attribute to any tag to uniquely identify it like so:
<p id="intro">Hello World</p>
<p>How are you?</p>
Then, we can target just this first paragraph using CSS like so:
#intro {
   font-weight: bold;
}
Note that the pound (#) sign indicates an id tag. This changes our page like so:
Id tags are great, but they do have a downside: they can only be used once. You cannot have two tags with the same id attribute on them. This is where the class attribute makes things much easier. A class attribute can be placed on more than one tag. For instance, if we were to add a third paragraph to our page, we could add class attributes on the last two paragraphs like so:
<body>
    <h1>Sample Hompeage</h1>
    <h2>Section One</h2>
    <p id="intro">Hello World</p>
    <p class="sub-paragraph">How are you?</p>
    <p class="sub-paragraph">I am good.</p>
    <h2>Section Two</h2>
</body>
Note that the final two paragraphs have a class called "sub-paragraph". We can create a CSS rule for this class like so:
.sub-paragraph {
   color:  red;
}
Note that the period before sub-paragraph indicates that this is a class name. Now when we refresh our web page, we get the following result:
There are a number of different items that you can modify using CSS. While going over all of them is outside the scope of this article, we will be going into more detail in a future article. In the meantime, if you want to modify something using CSS, either use the intelisense in Web Matrix to look through your options or use Google.
Conclusion
So that's it. In just a short period of time, you have gone from nothing to having an actual web page running in your browser. Sure, it doesn't look like much but it is a start. We also didn't get bogged down in all of those peripheral things like source control, SEO, or JavaScript. Hopefully you learned something useful and are prepped and ready to dig even deeper next time.
I am currently a Senior Software Developer at a company in Illinois called DeGarmo. My primary skills are in .NET, SQL, JavaScript, and other web technologies although I have worked with PowerShell, C, and Java as well.
In my previous positions, I have worked as a lead developer, professor and IT Director. As such, I have been able to develop software on a number of different types of systems and I have learned how to correctly oversee the overall direction of technology for an organization. I've developed applications for everything from machine automation to complete ERP systems.
I enjoy taking hard subjects and making them easy to understand for people unfamiliar with the topic.


 General
  News
News  Suggestion
  Question
  Bug
Bug  Answer
  Joke
Joke  Praise
  Rant
Rant  Admin
Admin 


 Typically, if you need help like this, you can ask a question in the "Quick Answers" section and you will get a number of experts looking at your issue. For this specific question, I would recommend you start here: