Introduction
If you ask Google, "what are code snippets", rapidly you will get the following answer:
Code snippets are ready-made snippets of code you can quickly insert into your code. For example, the for code snippet creates an empty for loop. Some code snippets are surround-with code snippets, which enable you to select lines of code, and then choose a code snippet which incorporates the selected lines of code.
I will not get into on how to create code snippets or getting in to details about how do they work. In case you are interested in that, you can read the following article on MSDN. What I'm interested to show here, is not such an obvious thing, that is, how to deploy you snippets via VSIX package and have it registered in Visual Studio as an extension (with all of the benefits of that choice).
Before I started with this task, I have only found a single article speaking about this procedure. On Mads Kristensen's blog you will find a blog post titled Shipping Visual Studio snippets in an extension. You could now ask yourself, why are you then writing about this? Well, first of all, that blog has several technical issues (at the time of writing) and images are not visualized nor the layout is in place which makes it extremely hard to follow. As the second thing, in order to accomplish successfully this task, that guide misses several important steps which I will try to describe more in detail and moreover give you a working example of code.
There is another way of deploying code snippets and you can find on MSDN the following article about distributing code snippets via Visual Studio Content Installer. I will not go to describe the differences and pros and cons of this two methods. Both of them are valid ways of approaching this problem and based on your situation you should choose the direction to follow.
Background
Before we start, make sure that you have downloaded and installed the Visual Studio SDK. It should match the version of Visual Studio you are using. For the 2013 version you can download it from here.
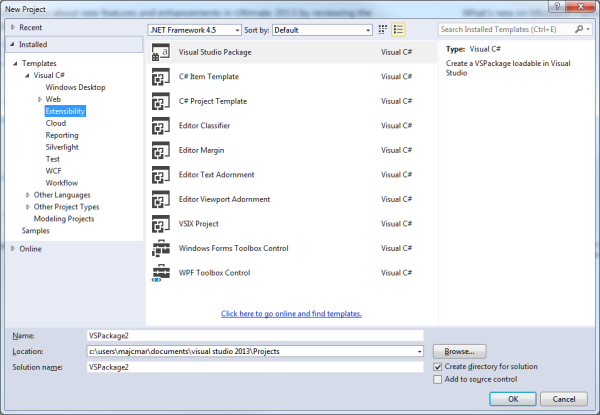
Once installed, beside other things, you will get some new project templates in Visual Studio, as shown in the following picture:
At this point we are going to create one snippet that we are going to deploy later on. Create a text file with a snippet extension, in my case it will be called helloworld.snippet. The content of our file is the following
<codesnippets xmlns="http://schemas.microsoft.com/VisualStudio/2005/CodeSnippet">
<codesnippet format="1.0.0">
<Header>
<Title>Hello World</Title>
<author>Mario Majcica</author>
<description>For demo purposes inserts a simple Hello World in your code</description>
<helpurl>http://blog.majcica.com/2014/10/27/deploying-snip…n-vsix-package/</helpurl>
<snippettypes>
<keywords>
<shortcut></shortcut>
</Header>
<snippet>
<references>
<imports>
<declarations>
<code delimiter="$" kind="method body" language="csharp"><
What you can see is a typical vsixmanifest designer window (can be different in case you are not using Visual Studio 2013). You can feel free to change this fields accordingly to your needs and you will find plenty of guides about this argument by simply 'googling' vsix package. We can close this window for now. As a next thing we will add a folder in our solution and call it 'Snippets'. Another sub-folder will be added in my case and I will call it 'My snippets'. In this sub folder I will add the file we previously created, our helloworld.snippet. It should all look like this:
We are still not done with it. For each code snippet file you added, we need to make sure that the prroperties are set in the right way, otherwise your snippets will not be a part of VSIX package. Right click you code snippet and chage the Build Action to 'Content' and Include in VSIX to 'True'. Once done, it should look like this:
You will need to do the same for all the snippets that you added inside this project. Bare in mind that you can select multiple files in the Solution Explorer and do this operation only once. Once this is done, the only thing we are missing is a way to register our snippets. A package definition can be really handy for this task.
Registering with pkgdef
A package definition (.pkgdef) file is way to encapsulate application configuration information in an easily editable, distributable, and deployable form. It was introduced in Visual Studio 2008 SP1 to support the configuration of Isolated Shell applications. From Visual Studio 2010, .pkgdef files take on a more expanded role and are much more integrated into both the IDE and the Shell (Integrated and Isolated).
Package definition file looks a lot like a .reg file as exported from the Registry Editor. There is one key difference: the root of the registry key (e.g., "HKEY_LOCAL_MACHINE\Software\Microsoft\VisualStudio\12.0") has been abstracted into the token "$RootKey$". This, and several other tokenized values for registry keys and paths, allows a given .pkgdef file to be reusable for multiple applications and portable to any machine. Package files can be easy leveraged by VSIX projects. Once the pkgdef file is added inside the project it is sufficient to add it as an asset inside the VSIX manifest and the job is done. It means it will be executed by the installation process. Let's check in detail how this is achieved.
First of all create a text file in root of your project and name it snippets.pkgdef. As a content specify the following
[$RootKey$\Languages\CodeExpansions\CSharp\Paths]
"MySnippets"="$PackageFolder$\Snippets\My Snippets"
As you can see I'm using several tokens (substitution Strings) as $RootKey$ and $PackageFolder$. You can find a list of these strings at the following address. What this code does is creating a key in the registry, called MySnippets, in the path HKEY_CURRENT_USER\Software\Microsoft\VisualStudio\12.0Exp_Config\Languages\CodeExpansions\CSharp\Paths (in our case, which is VS2013 and experimental version, so 12.0Exp_Config key will defer based on your environment, this also means that the $RootKey$ is replaced dynamically with a different string, depending on the context). The value of my MySnippets key equals to $PackageFolder$\Snippets\My Snippets where $PackageFolder$ will be substituted by the full path of the directory in which files are deployed. Once the file is created we need to "wire" it to the VSIX package. Open your manifest designer and move to the Assets tab
Click on new to add a new asset and set it up in the following way
The asset should be of VsPackage type and source should be set to 'File on filesystem'. For the path choose the path to your .pkgdef file. Click OK and the job is done. If you prefer to get here by editing the vsixmanifest without the designer, you can add following inside the PackageManifest element:
<assets>
  <asset d:source="File" path="snippets.pkgdef" type="Microsoft.VisualStudio.VsPackage">
</asset></assets>
Deploy and test
We can quickly check if our extension is working as expected. A simple hit to F5 will launch Visual Studio in Experimental mode and deploy our extension. Let's try it out. First of all we will check if the extension is deployed. Go to the TOOLS -> Extensions and updates... menu. You should find your extension there. It should look lit similar to the following picture:
If this is right, second thing to check is if the snippets are correctly registered. Go to the TOOLS -> Code Snippets Manager... or press CTRL + K, CTRL + B. Once the Code Snippets Manager window opens, in the Language drop down, choose Visual C#, and you should see your snippets registered and visible to Visual Studio as show in the following picture
You can now build for release your project and distribute your SnippetsCollection.vsix package. All other files you will find in the bin folder are not necessary. Installation is straight forward and if you have decided to support multiple versions of Visual Studio, the only thing you will get prompted is for which version of Visual Studio you whish to install your extension.
Considerations
This article shows a graceful way to distribute your code snippets. It is also a neat solution when it comes to the maintenance as just by increasing the version of the VSIX package you will be able to deploy your changes. If you decide to distribute your VSIX packages through a private gallery, you will make the installation and update as simple as possible for all of your users.
You can read more about this argument here and here. You also may consider deploying your wsix as part of an installer and soon I will write more about this argument. In case of debugging problems you can check one of my tips Resetting the Visual Studio Experimental instance. If any do not hesitate to comment.
History
Initial version is valid for Visual Studio 2012 and Visual Studio 2013.
An accomplished software engineer specialized in object-oriented design and analysis on Microsoft .NET platform with extensive experience in the full life cycle of the software design process.
Experienced in agile software development via scrum and kanban frameworks supported by the TFS ALM environment and JIRA. In depth know how on all automation process leading to continuous integration, deployment and feedback.
Additionally, I have a strong hands-on experience on deploying and administering Microsoft Team Foundation Server (migrations, builds, deployment, branching strategies, etc.).


 General
  News
News  Suggestion
  Question
  Bug
Bug  Answer
  Joke
Joke  Praise
  Rant
Rant  Admin
Admin 


