Introduction
For so long now, you have been working on OSX and UNIX, but want to taste some Microsoft’s cutting edged technologies. By which I mean you want to end up writing some code in C#. Now the burning question is, how am I going to even write C# code without Visual Studio? And moreover, my OS doesn’t support running Microsoft’s products. Well! You don’t have to whine anymore because I’ve got good news for you. If you attended the Microsoft’s virtual event called Connect(); earlier November 2014, you may have come across knowing that ASP.NET 5 has gone open source. It is known as ASP.NET vNext.
Event videos can be found in this link below:
Link to the GitHub repository for ASP.NET vNext is down below:
Setting Up
If you’ve already browsed the repository and read the documentation, you may have seen the minimum requirements and tools to run ASP.NET vNext applications in OSX and UNIX operating systems.
In short, all you have to do is to install two things in order to create an environment in which you can run C# applications. One of those is KVM (K Version Manager) which basically provides you with .NET framework libraries. And the second one is KRE (K Runtime Environment) which is just a runtime environment provider for the framework. It’s just like you have to install JDK and JRE for building and running JAVA applications. So all the hard work is done and it is time to write some C#.
Before that, let's say I don’t have Visual Studio installed in my Windows (of course, you can’t install this mind blowing IDE in OSX and UNIX). However, I want to take full advantage of IntelliSense supported in Visual Studio. Let’s take some tiny steps in building our own Visual Studio. First of all, choose any advanced text editing tool you like. Not just any though, to have the full IntelliSense support you’ve to choose between these advanced text editing tools. Don’t worry, Sublime Text is one of them and the rest are:
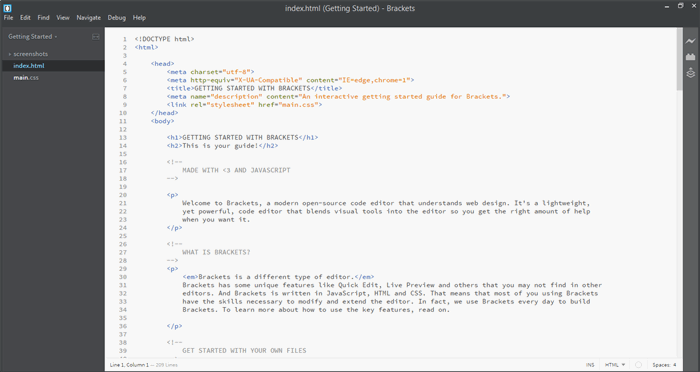
I choose Brackets since it has some features that fit my needs. Okay, so I’ve installed Brackets and fired it up. Here's what you will see at the first run.
Let’s click on the icon that says Extension Manager. In this window, you can install some extensions for Brackets which will ultimately make your development life easier.
So why would I go to the Extension Manger window? Of course, for installing an extension. But which one? The name of the extension is OmniSharp.

You can visit the official website of this project by going to:
As you will see the tag line, it says:
OmniSharp - Cross platform .NET development
.NET in Your Editor of Choice
So it’s just an extension provider for your favorite text editor which will enable the IntelliSense support for .NET applications. It provides more features than just the IntelliSense support. I leave the rest for you to discover. So far so good.
You are almost ready, in Windows, let’s run the command prompt in administrative mode. Copy and paste the following command and hit enter.
@powershell -NoProfile -ExecutionPolicy unrestricted -Command "iex
((new-object net.webclient).DownloadString
('https://raw.githubusercontent.com/aspnet/Home/master/kvminstall.ps1'))"
This command will install the KVM (k Version Manager) in your system.
Again, to install the KRE (K Runtime Environment), fire up another command prompt and run the following command:
kvm upgrade
Using the Code
Now clone the ASP.NET vNext home repository into your desktop.
If you browse the Home folder, you will find three subfolders under the samples folder. These are:
- ConsoleApp
- HelloMVC
- HelloWeb
Well, if you want to write a console application you will work in the ConsoleApp folder, the HelloMVC is for creating an ASP.NET MVC app and the HelloWeb is just a basic web application skeleton which will just show a static page if you run it.
Building a Console Application
Now let’s make a traditional “Hello World” application. Before that, let’s go inside of the ConsoleApp folder from the command prompt and run the command below:
kpm restore
It will restore the packages required by that sample. All the command does is to simply look at the project.json file and download and add the dependencies provided there. Just like nuget package manager.
Now open the ConsoleApp folder in brackets and modify the Program.cs file inside that. Change the text inside the Console.WriteLine method to “Hello from ASP.NET vNext!” and save it.
Finally, it’s time to run the console application. To do that, just type the command below in the command prompt:
k run
It will build and run the console application inside the command prompt and you will get your “Hello from ASP.NET vNext!” string printed on the console.
Building an ASP.NET MVC Application
Just like the console application, let’s change our directory and go inside HelloMVC folder and run the command below to restore the packages required by the sample.
kpm restore
Now open the folder in brackets and you will see an MVC application skeleton with a simple POCO class named User inside the Models folder, a HomeController inside the controllers and Index.cshtml inside the Home folder under the Views folder. We also have a _Layout.cshtml file under shared folder which basically just works like a master page for your application.
Rather than wasting time, let’s create a POCO class of our own called Employee.cs and add these properties down there.
namespace MvcSample.Web.Models
{
    public class Employee
    {
        public string Name { get; set; }
        public string Address { get; set; }
    }
}?
Now create a controller named EmployeesController and define an Index method which will be responsible for returning a list of predefined employees into the view.
using System.Collections.Generic;
using Microsoft.AspNet.Mvc;
using MvcSample.Web.Models;

namespace MvcSample.Web
{
    public class EmployeesController : Controller
    {
        public IActionResult Index()
        {
            List<Employee> employees = new List<Employee>()
            {
                new Employee(){ Name = "Blake", Address = "Ap #343-2378 Erat Rd." },
                new Employee(){ Name = "Kibo", Address = "Ap #987-4812 Nonummy. Avenue" },
                new Employee(){ Name = "Finn", Address = "266-551 Curabitur Avenue" },
                new Employee(){ Name = "Gareth", Address = "1221 Hendrerit Rd." },
                new Employee(){ Name = "Adam", Address = "Ap #181-8987 Est Rd." },
                new Employee(){ Name = "Omar", Address = "P.O. Box 221, 1322 Nibh St." },
                new Employee(){ Name = "Kirk", Address = "847-8772 Urna. Street" }

            };

            return View(employees);
        }
    }
}
Time to create the view in which we will show the list of employees in a tabular manner. Create an Employees folder under Views and add an Index.cshtml file there. Write the code below:
@model IEnumerable<MvcSample.Web.Models.Employee>

@{
    Layout = "/Views/Shared/_Layout.cshtml";
    ViewBag.Title = "Home Page";
    string helloClass = null;
}

<h2>All Employees</h2>

<table class="table table-striped table-bordered">
    <tr>
        <th>
            @Html.DisplayNameFor(model => model.Name)
        </th>
        <th>
            @Html.DisplayNameFor(model => model.Address)
        </th>
    </tr>

@foreach (var item in Model) {
    <tr>
        <td>
            @Html.DisplayFor(modelItem => item.Name)
        </td>
        <td>
            @Html.DisplayFor(modelItem => item.Address)
        </td>
    </tr>
}

</table>
Our simple MVC application is ready to run. Running a web application is slightly different from running a console app, instead of k run you will have to type the command below and hit enter:
k web
The command will create a server and will an open a listening port on http://localhost:5001.
Open your favorite browser and browse the link. It will show you the home page. Let’s see our Tabular Employee list. For that, go to http://localhost:5001/Employees. There you will see your Tabluar employee list.
Conclusion
So here you go. I’ve shown you how you can both modify, build and run your own Console and ASP.NET MVC application with the help of ASP.NET vNext.
I hope you enjoyed the post. I’ll come again with interesting posts like this. Till then, happy coding and happy New Year!
Tech Enthusiast | Contributing Author on Microsoft Docs | Github Country Leader (C# and Typescript)
A .NET and JavaScript enthusiast. Likes to work with different technologies on different platforms. Loves the logic and structure of coding and always strives to write more elegant and efficient code. Passionate about design patterns and applying Software Engineering best practices.
I'm a young coder who did exceedingly well in my education and was offered an internship by Microsoft. I've tried a range of things and realized that what I need is a super creative challenge. I'm hungry for a real role in a challenging startup, something I can stick with for years


 General
  News
News  Suggestion
  Question
  Bug
Bug  Answer
  Joke
Joke  Praise
  Rant
Rant  Admin
Admin 


