Introduction
This tip walks you through the steps for creating a ASP.NET MVC 5 Web Application using Bootstrap as template for layout.
STEP 1 - Create ASP.NET Web Application
- Open Visual Studio 2013 and create a new project of type ASP.NET Web Application.
- On this project, I create a solution called
MVCBootstrap.
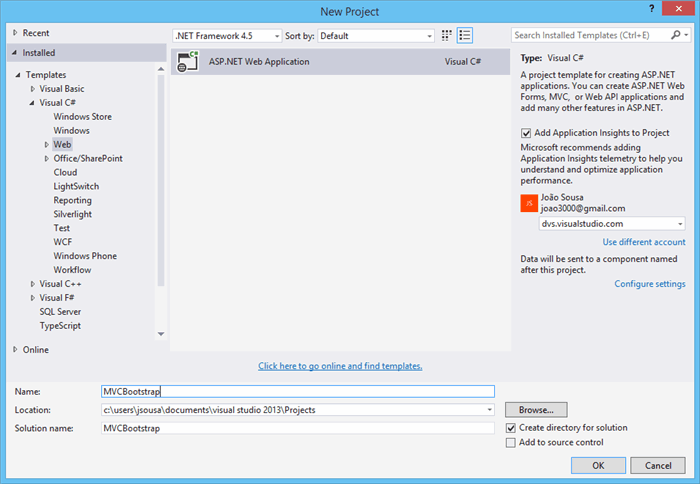
- Press OK, and a new screen will appear, with several options of template to use on our project.
- Select the option MVC.

STEP 2 - Upgrade Version if Necessary
You can verify the version of bootstrap on two ways.
First one, accessing the files on Content or Scripts folder. If open for example the file Bootstrap.css, we can check that the version of bootstrap is the 3.0.0.
Another way to verify the bootstrap version is to check the installed NuGet package.
- Right click the solution and select Manage NuGet packages for solution.. option.
- In the Manage NuGet screen, select Installed Packages section.
- Then select the bootstrap package in the center pane to see the version details.
As you see, the version is 3.0.0.
STEP 3 - Change Layout
The default bootstrap template used in Visual Studio 2013 is Jumbotron. Jumpotron’s original source code is available here in bootstrap website.
On this sample, we will change this template to the Justified-Nav one. So for that, do the next steps:
- Add the style sheet justified-nav.css to the Content folder
- Open the BundleConfig.cs file under the App_Start folder.
- Add the justified-nav.css to the “~/Content/css” style bundle.
- Now, open the layout file _Layout.cshtml in the Shared folder under Views Folder
- Remove the section within the
div tag with class=”navbar navbar-inverse navbar-fixed-top
- Open the Index.cshtml file in the Home folder under Views
- Change the class
col-md-4 to col-lg-4 - Now the sample is ready.
This is the sample created with solution:
This is the sample after our changes:
I am João Sousa, and since i finish my degree I’m working in software development using Microsoft technologies.
I was awarded
Microsoft Most Valuable Professional (MVP) 2015 – .Net
My profissional profile:
Azure Developer
.NET Developer
My Certifications:
MCTS - .NET Framework - Application Development Foundation
MCTS - .NET Framework 2.0 - Windows-based Client Development
MCTS - .NET Framework 3.5 ADO.NET Applications
MCTS - .NET Framework 3.5 ASP.NET Applications
MCSD - Programming in HTML5 with JavaScript and CSS3
MCSD - Developing ASP.NET MVC 4 Web Applications
MCSD - Developing Windows Azure and Web Services
MCSA Office 365 - Managing Office 365 Identities and Requirements
MCSA Office 365 - Enabling Office 365 Services
MCSD - Implementing Microsoft Azure Infrastructure Solutions


 General
  News
News  Suggestion
  Question
  Bug
Bug  Answer
  Joke
Joke  Praise
  Rant
Rant  Admin
Admin 


