
Introduction
The objective of this tutorial is to provide a means for each developer to generate screens based on predefined and predetermined rules of a tables schema.
The result of this code generation is to allow developers to concentrate on creating the database structure rather than the code. Although there are many interfaces or code generators online, each of them provide DLLs and mostly use XML schemas to generate these views.
Using this simple tutorial, any developer can change and update/Insert/Delete code using any control. One can change the control to any available controls online such as the TELERIK CONTROLS or even the built in controls for ASP.NET development.
So this article will serve as part of 1 of 3 part tutorial on creating a complete CS class file to generate views for common INSERT/UPDATE/DELET<code>E procedures for each table. I will subsequently add to these tutorials to improve the functionality of the class file.
Background (Things to Consider/Prerequisites)
I am using VISUAL STUDIO 2010 Professional Edition.
My development environment and language are C#.NET 4.0.
I'm creating a custom user control (hopefully extend this to a full functional DLL).
I'm also using SQL Server 2008 R2 Standard edition as my database.
NOTE: Some of the TSQLs are not supported by other DBMLs, so you may want to Google the correct syntax for different databases.
Another prerequisite is the connection string located in the web.config file
<connectionStrings>
  <add name="DBASE" connectionString="Data Source=ARESHSAHARKHIZ;
   Initial Catalog=TABLENAME;Integrated Security=True"
   providerName="System.Data.SqlClient" />
</connectionStrings>
Take note of the name "DBASE" (do not change). However you can change the initial catalog to the database that you would want to use.
Using the Code
Before I go through the code, let's create a table in our database:
Create a table by right clicking on the TABLES folder of the database.
Add Columns and their data types. Oops, you need to follow a few rules so our admin generator code can follow this:
YOU MUST FOLLOW THESE CONVENTIONS:
- As much as possible, make sure all your tables are normalized.
- Make sure your tables have relationships. You will see this in the DATABASE DIAGRAMS folder if foreign keys are defined and connected to primary keys.
- Table names should include a prefix "
tbl_" followed by their name. example: tbl_user primary key should always be an integer with identity specific option set to true (for Deleting and Updates in a grid) - Primary key should include a "
pk_" prefix followed by the table name and "_id". example: pk_user_id (from tbl_user), pk_inventory_id (from tbl_inventory) - Foreign keys should include the "
fk_" prefix followed by the foreign table name and "_id". example: fk_role_id (linked to tbl_role), fk_stock_id (linked to tbl_stock) - If a column is not required to be shown in the admin view, add the column name followed by "
_non_". example: userHash_non_, userSalt_non_ - For all Columns with a
datetime datatype, add a "date_". - (OPTIONAL for auditing purposes) all tables should include the following column names
user_created nvarchar(50) date_created datetime status nvarchar(50) name nvarchar(250). Used for foreign key reference name
After creating your tables, you will notice under each column properties, there is a property called "DESCRIPTION". Use this property to add meaningful descriptions for each column. You can see from the above image that I've placed a description for the "name" column.
Now for the coding
First I need a few TSQL statements that will get the database schema for me.
Gives me the complete schema of a database:
private String Completeschema
    { get { return "SELECT * FROM INFORMATION_SCHEMA.COLUMNS"; } }
Gives me all the tables in a particular schema or database:
private String Tables
    { get { return "SELECT distinct TABLE_NAME FROM INFORMATION_SCHEMA.COLUMNS"; } }
Returns all the column names and Datatypes of those columns given a table name:
private String Columns { get
    { return "SELECT * FROM INFORMATION_SCHEMA.COLUMNS Where TABLE_NAME = '{0}'
    order by ORDINAL_POSITION ASC"; } }
private String DataTypes { get
    { return "SELECT DATA_TYPE FROM INFORMATION_SCHEMA.COLUMNS Where
    TABLE_NAME = '{0}' and COLUMN_NAME = '{1}'"; } }
Returns the column description and gives the name of the column and its table:
private String ColumnDescription { get
    { return "SELECT [Description] = ex.value FROM sys.columns
    c LEFT OUTER JOIN sys.extended_properties ex ON ex.major_id =
    c.object_id AND ex.minor_id = c.column_id AND ex.name = 'MS_Description'
    WHERE OBJECTPROPERTY(c.object_id, 'IsMsShipped')=0 AND
    OBJECT_NAME(c.object_id) = '{0}' AND c.name = '{1}'
    ORDER BY OBJECT_NAME(c.object_id), c.column_id"; } }
So we are set to see what's inside a database. Since we have relationships, we would like a foreign key to be a dropdown and use the primary key as the value item property and the [name] column as the text item property.
private String FKTable { get { return "select * from {0}"; } }
And that's it. We have all the SQL statements we need.
NOTE: You will notice that I'm using STRING FORMATTING to construct these statements, and they will be prone to injection. However there are many ways to overcome these. However for the INSERT/UPDATE/DELETE to the database, I construct SQL parameters so as to avoid any injection on that part.
The Connection
We use the following private static method to get and open the connection for each transaction:
private static SqlConnection getSqlConn()
{
ConnectionStringSettingsCollection connections =
ConfigurationManager.ConnectionStrings;
string SqlConn = connections["DBASE"].ConnectionString;
SqlConnection con = new SqlConnection(SqlConn);
try
{
con.Open();
}
catch (Exception)
{ }
return con;
}
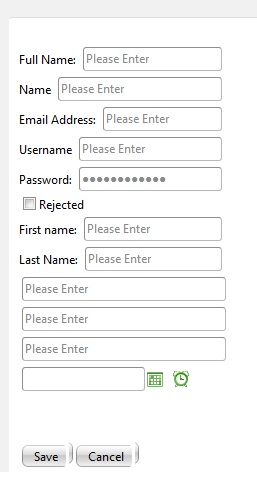
To create the controls dynamically, we need to place these controls in a placeholder where we can reference them later. We always know that these controls will be generated based on the column ordering. So if we define a column name password before the username, the output will be the textbox password and then textbox username. Therefore you need to arrange this order in the database structure. So I'll be using this variable to hold these controls.
private ArrayList TextboxNames = new ArrayList();
The Controls
We create several private methods that will create controls and add them to the control holder and return that control to be added to the page placeholder.
We need to create a few controls specific for each datatype. I will be using telerik controls here.
NOTE: telerik controls have a numeric textbox. So for any decimal or int datatype, the program generates a numeric textbox. If you are using other controls. you can change this to a textbox or special control.
So we need a few controls here:
Textbox for nvarchar /varchar NumericTextbox for int /Double /Float DateTimePicker for Date /DateTime Combobox for foreign keys int Radbutton for Checkbox bit
In the case of ASP.NET controls, you will be using:
Textbox for nvarchar/varchar/int/double/float/datetime DropDownList for foreign keys int Checkbox for bit
private RadTextBox Textbox(String ID, String EmptyText, String Label)
{
RadTextBox txtbox = new RadTextBox();
txtbox.ID = "txt" + ID;
txtbox.EmptyMessage = "Please Enter";
txtbox.Label = Label;
txtbox.Width = Unit.Pixel(200);
if (Label == "Password:")
{
txtbox.TextMode = InputMode.Password;
}
TextboxNames.Add(txtbox);
return txtbox;
}
private RadNumericTextBox intBox(String ID, String lbl)
{
RadNumericTextBox bx = new RadNumericTextBox();
bx.Label = lbl;
bx.Value = 0.0;
bx.ShowSpinButtons = true;
bx.Width = Unit.Pixel(120);
TextboxNames.Add(bx);
return bx;
}
private RadButton Button(String ID, String Text)
{
RadButton btn = new RadButton();
btn.ID = "btn" + ID;
btn.Text = Text;
btn.Click += new EventHandler(SaveButton_Click);
return btn;
}
private RadComboBox ComboBox(String ID,String ColumnName, String Label)
{
RadComboBox cmb = new RadComboBox();
cmb.EmptyMessage = "Select the "+ Label;
cmb.Width = Unit.Pixel(200);
cmb.ID = "cmb" + ID;
cmb.DataSource = getFKTable(ColumnName);
cmb.DataTextField = "name";
cmb.DataValueField = ColumnName.Replace("fk_", "pk_");
cmb.DataBind();
TextboxNames.Add(cmb);
return cmb;
}
private RadDateTimePicker DatePick(String ID)
{
RadDateTimePicker date = new RadDateTimePicker();
date.ID = "dt" + ID;
TextboxNames.Add(date);
return date;
}
private RadButton Checkbox(String ID, String Label)
{
RadButton chk = new RadButton();
chk.ID = "chk" + ID;
chk.ButtonType = RadButtonType.ToggleButton;
chk.ToggleType = ButtonToggleType.CheckBox;
chk.Text = Label;
chk.ToggleStates.Add(new RadButtonToggleState(Label + " Accepted"));
chk.ToggleStates.Add(new RadButtonToggleState(Label + " Rejected"));
chk.AutoPostBack = false;
TextboxNames.Add(chk);
return chk;
}
For the button, create a save button handler.
(I will discuss the SQL construction and parameters in the next set of this tutorial.)
protected void SaveButton_Click(object sender, EventArgs e)
{
RadAjaxManager.GetCurrent(Page).Alert("The Information is Saved.");
}
And now for the final part, we need to extend our class to use the usercontrol class...
public class adminGenerator : System.Web.UI.UserControl
...after which we need to override the createchildcontrols method:
protected override void CreateChildControls()
{
base.CreateChildControls();
String TableName = Request.QueryString["tbl"] == null ?
"Test" : Request.QueryString["tbl"].ToString();
String Operation = Request.QueryString["mod"] == null ?
"list" : Request.QueryString["mod"].ToString();
#region INSERT Generator
if (Operation == "add")
{
DataSet Columns = getColumns(TableName.ToString());
foreach (DataRow c in Columns.Tables[0].Rows)
{
String Description = getDescription
(TableName, c["COLUMN_NAME"].ToString());
ProduceOutput(Controls, c["COLUMN_NAME"].ToString(),
TableName, Description);
Controls.Add(new LiteralControl("<br/>"));
}
Controls.Add(Button("Saveme", "Save"));
Controls.Add(Button("Cancelme", "Cancel"));
}
#endregion
#region LIST GENERATOR
if (Operation == "list")
{
}
#endregion
}
Take note of the Query Strings. We are looking for 2 values, the "tbl" determines the table name and the "mod" determines the type of operation. And that's it. We are all set. We just need to construct the SQL statements used for the schema and we can add this to any page and run it.
private String getSQLDataType(String TableName, String ColumnName)
{
return String.Format(DataTypes, TableName, ColumnName);
}
private String getSQLColumn(String TableName)
{
return String.Format(Columns, TableName);
}
private DataSet getTables()
{
DataSet ds = new DataSet();
using (SqlConnection conn = getSqlConn())
{
SqlCommand command = new SqlCommand(Tables, conn);
command.CommandType = CommandType.Text;
SqlDataAdapter da = new SqlDataAdapter(command);
da.Fill(ds, "CompleteSchemaDatabase");
}
return ds;
}
private DataSet getColumns(String TableName)
{
DataSet ds = new DataSet();
using (SqlConnection conn = getSqlConn())
{
SqlCommand command = new SqlCommand(String.Format(Columns, TableName), conn);
command.CommandType = CommandType.Text;
SqlDataAdapter da = new SqlDataAdapter(command);
da.Fill(ds, "CompleteColumnDatabase");
}
return ds;
}
private String getDescription(String TableName, String ColumnName)
{
using (SqlConnection conn = getSqlConn())
{
SqlCommand command = new SqlCommand
(String.Format(ColumnDescription, TableName, ColumnName), conn);
command.CommandType = CommandType.Text;
Object desc = command.ExecuteScalar();
return desc.ToString();
}
}
private String getDataType(String TableName, String ColumnName)
{
using (SqlConnection conn = getSqlConn())
{
SqlCommand command = new SqlCommand(String.Format
(DataTypes, TableName, ColumnName), conn);
command.CommandType = CommandType.Text;
Object datatype = command.ExecuteScalar();
return datatype.ToString();
}
}
private DataSet getFKTable(String ColumnName)
{
DataSet ds = new DataSet();
try
{
using (SqlConnection conn = getSqlConn())
{
String tblName = ColumnName.Replace("fk_", "");
tblName = "tbl_" + tblName.Replace("_id", "");
SqlCommand command = new SqlCommand
(String.Format(FKTable, tblName), conn);
command.CommandType = CommandType.Text;
SqlDataAdapter da = new SqlDataAdapter(command);
da.Fill(ds, "CompleteSchemaFKDatabase");
}
}
catch (Exception Ex)
{ }
return ds;
}
The final part of the code is to generate the view based on the column datatypes or names.
private void ProduceOutput
(ControlCollection sc, String ColumnName, String TableName, String lbl)
{
String datatype = getDataType(TableName, ColumnName);
if ((ColumnName.Contains("user_created") == true) ||
(ColumnName.Contains("date_created") == true) ||
(ColumnName.Contains("status") == true) ||
(ColumnName.Contains("_non_") == true) ||
(ColumnName.Contains("pk_") == true)
)
{}
else
{
if (ColumnName.Contains("fk_"))
{
sc.Add(ComboBox(ColumnName, ColumnName, lbl));
return;
}
if (ColumnName.Contains("date_"))
{
sc.Add(new LiteralControl(lbl));
sc.Add(DatePick(ColumnName));
return;
}
switch (datatype)
{
case "int":
case "double":
case "float":
case "decimal":
RadNumericTextBox i = intBox(ColumnName, lbl);
sc.Add(i);
break;
case "bit":
RadButton btn = Checkbox(ColumnName, lbl);
sc.Add(btn);
break;
default:
RadTextBox d = Textbox(ColumnName, ColumnName, lbl);
sc.Add(d);
break;
}
return;
}
}
And that's it. You can change the case of the datatype to represent your own controls or ASP.NET control.
Creating a Dynamic Insert Statement (Using String Formatting)
So this is how I'm creating the SQL insert statement using strings.
private String constructSql()
    {
        String TableName = Request.QueryString["tbl"].ToString();
        String sql = "INSERT INTO " + TableName + " (";
        DataSet Columns = getColumns(TableName.ToString());
        int i = 0;
        foreach (DataRow c in Columns.Tables[0].Rows)
        {
            if (i > 0)
            {
                sql += c["COLUMN_NAME"].ToString() + ",";
            }
            i++;
        }
        sql += "ats) VALUES(";
        foreach (var textboxes in TextboxNames)
        {
            if (textboxes is RadTextBox)
            {
                RadTextBox txt = textboxes as RadTextBox;
                sql += "@" + txt.ID + ",";
                i--;
            }
            if (textboxes is RadNumericTextBox)
            {
                RadNumericTextBox txt = textboxes as RadNumericTextBox;
                sql += "@" + txt.ID + ",";
                i--;
            }
            if (textboxes is RadComboBox)
            {
                RadComboBox txt = textboxes as RadComboBox;
                sql += "@" + txt.ID + ",";
                i--;
            }
            if (textboxes is RadDateTimePicker)
            {
                RadDateTimePicker txt = textboxes as RadDateTimePicker;
                sql += "@" + txt.ID + ",";
                i--;
            }
            if (textboxes is RadButton)
            {
                RadButton txt = textboxes as RadButton;
                sql += "@" + txt.ID + ",";
                i--;
            }
        }
        sql += "'User','" + DateTime.Now.ToString("s") +"','NEW')";
        i = i - 3;
        for (int j = i; j > 1; j--)
        {
            sql += "null,";
        }
        sql = sql.Replace(",ats)", ")");
        return sql;
    }
The last addition to the SQL statement is the 3 additional fields of the database "user_created","date_created" and "status". Since I couldn't figure out what to do with the extra comma, I decided to add and replace values with a wildcard "ats".
The end result of the method is an SQL statement which takes note of the controls that were creating during runtime.
private SqlCommand AddParameters(SqlCommand com)
    {
        foreach (var textboxes in TextboxNames)
        {
            if (textboxes is RadTextBox)
            {
                RadTextBox txt = textboxes as RadTextBox;
                com.Parameters.Add("@" + txt.ID, SqlDbType.NVarChar).Value = txt.Text;
            }
            if (textboxes is RadNumericTextBox)
            {
                RadNumericTextBox txt = textboxes as RadNumericTextBox;
                com.Parameters.Add("@" + txt.ID, SqlDbType.Decimal).Value = txt.Value;
            }
            if (textboxes is RadComboBox)
            {
                RadComboBox txt = textboxes as RadComboBox;
                com.Parameters.Add("@" + txt.ID, SqlDbType.NVarChar).Value =
                            txt.SelectedValue;
            }
            if (textboxes is RadDateTimePicker)
            {
                RadDateTimePicker txt = textboxes as RadDateTimePicker;
                com.Parameters.Add("@" + txt.ID, SqlDbType.DateTime).Value =
                            txt.SelectedDate;
            }
            if (textboxes is RadButton)
            {
                RadButton txt = textboxes as RadButton;
                com.Parameters.Add("@" + txt.ID, SqlDbType.Bit).Value =
                        txt.SelectedToggleState.Selected;
            }
        }
        return com;
    }
This method gets the SqlCommand and adds in the parameters based on the controls. So the final INSERT statement for the save button will be:
SqlCommand com = new SqlCommand(constructSql());
com = AddParameters(com);
After which, the SQL command is sent to an execute query method:
private Boolean addRow(SqlCommand com)
    {
        using (SqlConnection conn = getSqlConn())
        {
            com.Connection = conn;
            int returned = com.ExecuteNonQuery();
            if (returned != 1)
            {
                return false;
            }
            else return true;
        }
    }
And I'm done with the insert statement for the save button.
If there is a better way of constructing this SQL statement and parameters, I would be glad to hear from you experts.
Points of Interest
That's it. You have noticed that I use a lot of string formatting as well and string manipulation to get this going. And I have a strict set of rules when it comes to the database. However the end result of this is much more interesting.
This work tries to extend the common functionality to other DBs. By changing the SQL statements, one can easily make the code adapt to support other DBs.
History
- Initial draft - Ver 1 (Aresh Saharkhiz)
- Added
INSERT statement and parameters (Nov 16 2011)
My name : Aresh Saharkhiz.
Origin: Unknown
Education : BS Computer Science
MS Computer Science
Interests : Genetic Programming
Neural Networks
Game AI
Programming: (language == statementEnd(semicolon)
http://sites.google.com/site/docaresh
Skill:
Flash
Carrara 3D
PHP,ASP,ASP.NET
J2SE


 General
  News
News  Suggestion
  Question
  Bug
Bug  Answer
  Joke
Joke  Praise
  Rant
Rant  Admin
Admin 


