Introduction
In this article I will show a complete walk through of building Restful services using asp.net WebAPI 2 and Entity Framework Code first approach.
Background
Asp.Net WebAPI is framework for building & consuming Http services to support broad range of devices including browsers, tablet, mobile etc. It provides a content negotiation feature with the help of which the api can give response based on the Content type requested. Most common content types used are JSON and XML.
It is built on the top of ASP.NET MVC and contains some of the MVC features such as routing, controllers, action, filter, model binders, IOC container or dependency injection.
Key Concepts
- Api services are actually controllers. All processing actually takes place in the controller class.
- Leverages MVC features.
- Routing
- Model Binding
- Action Filters
- Uses convention over configuration
- HttpResponseMessage with proper accepts header and status code.
- Built in media formatters for XML and JSON response
Using the code
In this article I will showing a complete walkthrough for creating RESTfull services using Asp.Net WebAPI 2 and Entity Framework Code first approach for all database related operations.
We will be developing a simple ProductReview services with two tables Product and Reviews as a Sample application to get an understanding about Web API.
We will be using Visual Studio 2013 and Entity Framework “Code First approach” where we’ll define our model objects using “Plain Old CLR Objects” POCO.
Let start by selecting a adding a new project in Visual Studio 2013. Goto File --> New --> Project , on the left select Web and ASP.NET Web Application.
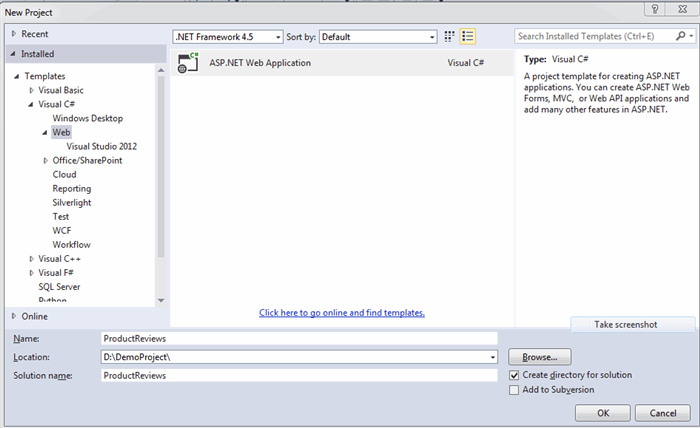
Choose the WebAPI template from the dialog box shown.

After this step Visual Studio creates a new sample WebAPI project template with all necessary files.
Adding Models classes for Database
In this section we will set up the Database using EntityFramework codefirst approach. We will be using two tables:
- Products and
- Reviews
With code first we will be adding two Model classes one for Products and another for Reviews. In the project, goto Models folder and add the following two model classes:
public class Product
{
public int ProductId { get; set; }
[Required]
public string Name { get; set; }
public string Category { get; set; }
public int Price { get; set; }
public ICollection<review> Reviews { get; set; }
}
</review>
public class Review
{
public int ReviewId { get; set; }
public int ProductId { get; set; }
[Required]
public string Title { get; set; }
public string Description { get; set; }
public Product Product { get; set; }
}
To explain in EntityFramework code first approach, it uses these models to create the corresponding tables. According to convention for both the Models the Id property will become the Primary key for that table.
Here we are considering a One - Many relationship between a Products and Reviews table(assuming a product can have multiple reviews).
So the Products model is having a navigation property which is a collection and refers to the Review. Similarly in Review table we have a navigation property for a Product(which is not a collection, as a review can be associated to only one prpoduct). Review table contains a property ProductId which is the Foreign key for the table.
Adding the Web API controller class
Here we are going to add a Web API controller class to facilitate all the CRUD(create, read, update and delete) operations with the database entities.
A WebApi controller class is the place were all the processing is done.
At this point within the Project inside the Controllers folder there's a ValuesController. We don't need this control as it just contains an example of a Web API controller.
Delete the ValuesController class and Build the project.
N.B: Please make sure that you have build the project. In the next step we will be adding a Web API controller by scaffolding and VS requires a compiled assembly to do so.
Next, right click on the controllers folder in the solution explorer and goto Add then Controller
After this a new dialog is shown asking for Add Scaffold. Select Web API2 Controller with actions, using Entity Framework.
After clicking the add button an Add Controller dialog box is shown.
Select the Model class for which we are going to add a controller. In our case this is Product. Select the DataContext class default name.
This create two classes in the Project:
- Controllers/ProductsController.cs : This represents the Web API controller that manages all the basic CRUD operation using RESTAPI.
- Models/ProductReviewsContext.cs : Represents the derived context that manages all the data operations with entities during runtime. It derives from System.Data.Entity.DbContext and exposes a generic type DbSet<TEntity> for each class in the Models.
Repeat the same steps to add a ReviewsController by scaffolding the Review Model class.
Setting up the Database
Now goto Tools -> Nuget Package Manager and select Package Manager Console. Inside package manager console dialog box execute the following command.
Enable-Migrations
After running this command, it adds a Migrations folder to our project. This Migrations folder contains a file:
Configuration.cs class file : This class contains methods to configure the Database migrations. Using database migrations, Entity Framework can easily use the Model classes define in the project to create the database.
Seeding the Database
The configuration.cs class contains a Seed method which is used to insert/update data during database initialization process. A commented out example code snippet for Adding data is already present inside the Seed method of Configuration class.
We will be modifying the Seed method to add some test data for Product and Review entities.
Add the following code in the Configuration.Seed method:
context.Products.AddOrUpdate(p => p.ProductId,
                new Product { Name = "Product 1", Category = "Category 1", Price = 200 },
                new Product { Name = "Product 2", Category = "Category 2", Price = 500 },
                new Product { Name = "Product 3", Category = "Category 3", Price = 700 }
                );

context.Reviews.AddOrUpdate(r => r.ReviewId,
                new Review {Title = "Review 1", Description = "Test review 1", ProductId = 1},
                new Review {Title = "Review 2", Description = "Test review 2", ProductId = 1}
                );
This uses a AddOrUpdate() which adds a new record if not present and updates an existing record if already present.
Next in the Package Manager console execute the following command:
First,
Add-Migration Initial
The above command generates the code to create the Database for the Models.
Update-Database
This command excutes the code generated by above "Add-Migration Initial" command and creates the database.
N.B: By default the database is created using localDb.
At this point in Web.Config ConnectionStrings section the connection string points to LocalDb.
<add name="ProductReviewsContext" connectionString="Data Source=(localdb)\v11.0; Initial Catalog=ProductReviewsContext-20140929010853; Integrated Security=True; MultipleActiveResultSets=True; AttachDbFilename=|DataDirectory|ProductReviewsContext-20140929010853.mdf"
      providerName="System.Data.SqlClient" />
This same connection string can be changed before executing the above commands to point to Sql Server Express instance to create the Database tables in Microsoft Sql Server.
Now the Database is created and can be seen in the server explorer window of Visual Studio.
To view data right click on any table and click show data.
Running and testing the application for basic CRUD operations
Routing in ASP.NET Web API
Web API uses routing to match uniform resource identifiers (URIs) to various actions. The WebApiConfig file, located inside the App_Start node in Solution Explorer, defines the default routing mechanism used by Web API. The mechanism is based on a combination of HTTP method, action, and attribute. However, we can define our own routing mechanism to support meaningful URIs.
The default routing specified is as follows:
config.Routes.MapHttpRoute(
                name: "DefaultApi",
                routeTemplate: "api/{controller}/{id}",
                defaults: new { id = RouteParameter.Optional }
            );
The default route template begins with the keyword "api" so as to avoid any conflicts with MVC routing.
Understanding how routing works in Asp.Net Web API
When the Web API receives an Http request, it tries to first match with the default route template i.e "api/{controller}/{id}". If there is no match then it returns a 404 not found error.
Once the request is matched:
- The request is forwarded to the Controller defined in the request. Let's say we have a request for "api/products" then the "ProductsController" is invoked.
- To find the action WebAPI looks for the requested method and then looks for the action whose name begins with the HttpMethod name.
Say for example: For a GET request "api/products", web API looks for an action starting with Get Http verb like GetProducts(). The same applies for all verbs POST, PUT and DELETE. - For the other placeholder {id} these are mapped to actions parameter.
Like for a requested url "api/products/1" this is mapped to action method GetProductById(int id)
I will be using a Google Chrome extension called Postman to check the response we get by the API. Postman is a very good extension to create Http requests and consume api services with multiple options available. Please download the extension from here.
Retrieve all product details(GET):
From the Visual studio run the application selecting Google Chrome browser. Launch the Postman app in the chrome and enter a Url like:
GET - http://localhost:53811/api/products : This will list out all the Products in the Database. When this url is requested the path is mapped to GetProducts() action of the ProductsController.
public IQueryable<Product> GetProducts()
{
return db.Products;
}
The response in the Postman window we get list of all products in JSON format.
If you notice all Products reviews are coming as null because EF is not able to load the related entries.
Lets try updating the GetProducts() action method to load Review Data.
public IQueryable<Product> GetProducts()
{
return db.Products.Include(p => p.Reviews);
}
Again executing this same requests http://localhost:53811/api/products generates the following error.
The problem here is when we defined the Product class we included a navigation property for Reviews:
public ICollection<Review> Reviews { get; set; }
and we also included a navigation property for Product in Review model class.
public Product Product { get; set; }
and when we try to load the data for related entities it creates a circular object graph.
As a result of this when the JSON or XML formatter tries to load and serialize the data both throws different exception.
To overcome this error, we will be using DTO(Data transfer Objects) class to get all data. Add the following new DTO class within Models folder.
public class ProductDetailsDto
{
    public string Name { get; set; }

    public string Category { get; set; }

    public int Price { get; set; }

    public List<Review> Reviews { get; set; }
}
Goto Controllers -> ProductsController.cs -> GetProducts() action and add the following code:
public IList<ProductDetailsDto> GetProducts()
{
return db.Products.Select(p => new ProductDetailsDto
{
Name = p.Name,
Category = p.Category,
Price = p.Price,
Reviews = p.Reviews.ToList()
}).ToList();
}
Launch postman homepage and enter the same URL http://localhost:53811/api/products. Following is the response we get which consist of both Product and related product reviews data.
Get the details for a product
Within the Postman app enter the Url http://localhost:53811/api/products/1. This invokes the GetProduct(int id) action of the Products controller where the placeholder id values 1 in the request is mapped to the Parameter of GetProduct(int id) action.
[ResponseType(typeof(Product))]
public IHttpActionResult GetProduct(int id)
{
Product product = db.Products.Find(id);
if (product == null)
{
return NotFound();
}
return Ok(product);
}
The response we get is a single Product details.
Create a new Product (CREATE)
We will create a POST request to add a new Product to the Database.
In the Postman page select the POST verb from the drop down -> Click Headers button at the top -> Set a header Content-Type : application/json.
Select the raw tab and enter a product details in JSON format. Ex:
{
        "Name": "Product 4",
        "Category": "Category 4",
        "Price": 200,
        "Reviews": [
            {
                "ReviewId": 1,
                "ProductId": 1,
                "Title": "Review 1",
                "Description": "Test review 1",
                "Product": null
            },
            {
                "ReviewId": 2,
                "ProductId": 1,
                "Title": "Review 2",
                "Description": "Test review 2",
                "Product": null
            }
        ]
    }
Enter the url http://localhost:53811/api/products and click Send button.
The request is mapped to the action PostProduct() in ProductsController since the requested method is of type Post.
[ResponseType(typeof(Product))]
public IHttpActionResult PostProduct(Product product)
{
if (!ModelState.IsValid)
{
return BadRequest(ModelState);
}
db.Products.Add(product);
db.SaveChanges();
return CreatedAtRoute("DefaultApi", new { id = product.ProductId }, product);
}
To verify the data is added to the Database or not send a Get request to http://localhost:53811/api/products.
Updating a Product details (PUT)
This is similar to the POST method. In this we will be sending a updated product JSON object to update an existing Product details. The only difference here is with the URL. The requested URl will be in the form:
http://localhost:53811/api/products/1 ,
where Id parameter is passed to match the product to be updated. The action method in ProductsController is as follows:
[ResponseType(typeof(void))]
public IHttpActionResult PutProduct(int id, Product product)
{
if (!ModelState.IsValid)
{
return BadRequest(ModelState);
}
if (id != product.ProductId)
{
return BadRequest();
}
db.Entry(product).State = EntityState.Modified;
try
{
db.SaveChanges();
}
catch (DbUpdateConcurrencyException)
{
if (!ProductExists(id))
{
return NotFound();
}
else
{
throw;
}
}
return StatusCode(HttpStatusCode.NoContent);
}
Lets test this using the same Postman extension. Compose a new request with URL http://localhost:53811/api/products/1 for updating the details of the first Product.
Set the header as Content-Type: application/json.
Add the following updated test JSON object in the raw tab of request body.
{
    "ProductId": 1,
    "Name": "Updated Product",
    "Category": "Updated Category",
    "Price": 1000,
    "Reviews": null
}
Send the request. After successfull completion of this request verify the same product details by sending a simple GET(http://localhost:53811/api/products/1) request to the Api.
Deleting a Product details (DELETE)
For the delete operation the requested URL is DELETE(http://localhost:53811/api/products/3) where the last parameter is the Id of the Product. The Delete(int id) action inside the ProductsController.cs file maps the Id in the Url to retrieve the Product details and the deletes it from the Database.
[ResponseType(typeof(Product))]
public IHttpActionResult DeleteProduct(int id)
{
Product product = db.Products.Find(id);
if (product == null)
{
return NotFound();
}
db.Products.Remove(product);
db.SaveChanges();
return Ok(product);
}
Lets compose the same to delete a Product with Id 3 from the database using Postman.
In the URL field enter the request url for Product to be deleted http://localhost:53811/api/products/3. Select the DELETE Http verb from the dropdown and send the request.
Now lets try to get the Product with Id = 3.
So we got no product at this URL and hence the Product with ID = 3 is now deleted from the Database.
This wraps up my article where we learnt how to build and consume RESTful services using ASP.Net Web API 2 and Entity Framework Code First.
This member has not yet provided a Biography. Assume it's interesting and varied, and probably something to do with programming.


 General
  News
News  Suggestion
  Question
  Bug
Bug  Answer
  Joke
Joke  Praise
  Rant
Rant  Admin
Admin 


