This is continuation of Article 1 Introduction to Android (The Fun Way)
What all things do i require to develop an android app in my PC/Mac/Linux?
1.)JDK (Java Development Kit)
2.)Android Studio IDE or Eclipse IDE with ADT
3.)Android SDK ( Software Development Kit )
How do install all these?
Let's go one by one. Android App is written in Java. And so you will need Java Development Kit since it helps in developing and testing programms written in java language. Here is the download link.
You can install it easily , The installation wizard is pretty straight forward. Make sure you note down the path of the directory in which you are installing JDK.
JDK is installed ? Now what shall i choose Eclipse or Android Studio? Whats the difference?
Eclipse is a general purpose IDE where Android Development tools come as a plugin . Android Studio is an IDE by google which is customized just for making Android Apps. . If you are begineer i would strongly recommend you to go ahead with Android Studio. If you have previous experience with Java , you can continue in ADT. But my articles will be based on Android Studio.
Here is the link to download Android Studio
The installation is simple and friendly. After you complete, open Android Studio. If you see encounter some errors like "JDK Not Found". Then set the system path to the path you copied earlier while installing JDK.
Android Studio has opened up , What's Next?
I will explain more about android studio in my next article. Now let's install Android SDK . It's a set of development tools with tools like debugger, libraries, a handset emulator, documentation , sample code and tutorials.

On the toolbar you will something similar to the above image. Click on the icon i have marked red. This opens Android SDK Manager . Now we need to select the API level. The latest stable version is API 19. We will go ahead with it.
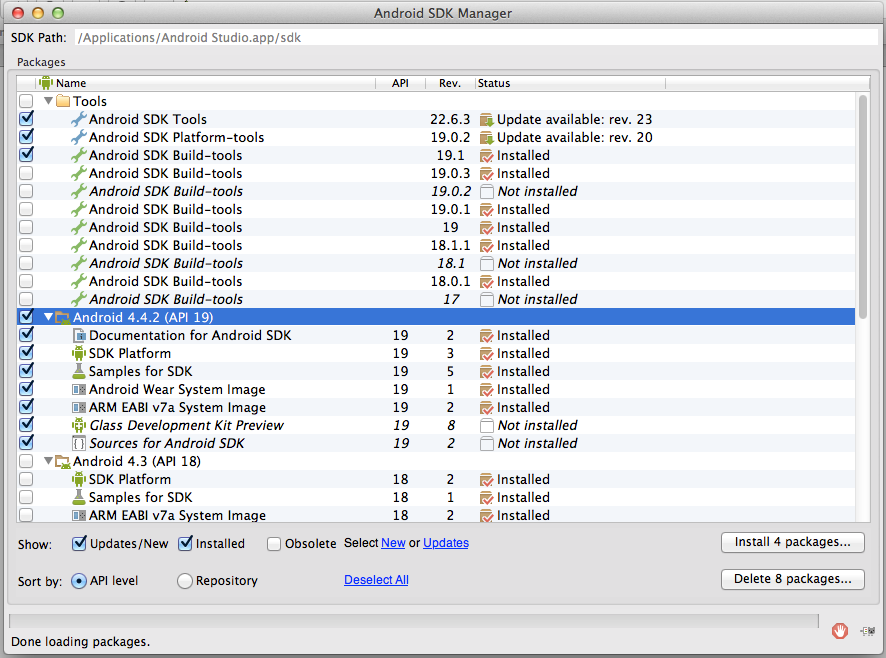
Now you see the above screen. You need to select the things as shown in the image. Click on Install Packages button. This will take some time please wait until the installation is done.
Packages Installed Successfully, Now What?
Awesome , now come back to Android Studio.

Click the icon marked as red. This opens Android Virtual Device (AVD) Manager. Your screen might defer from the below one.
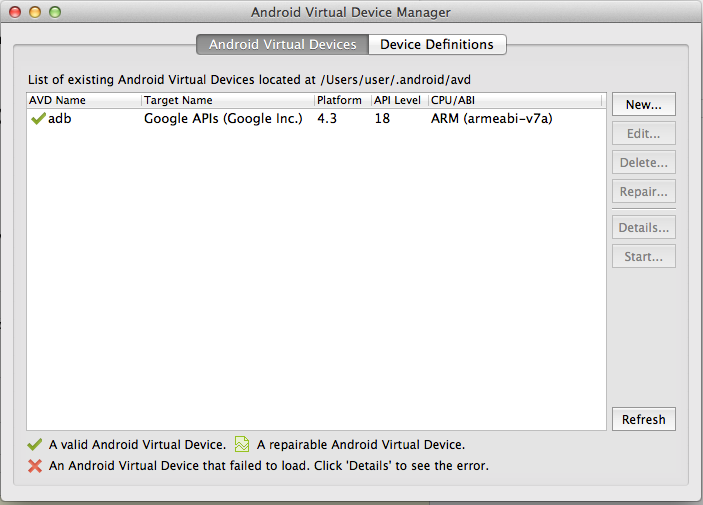
Click on new.
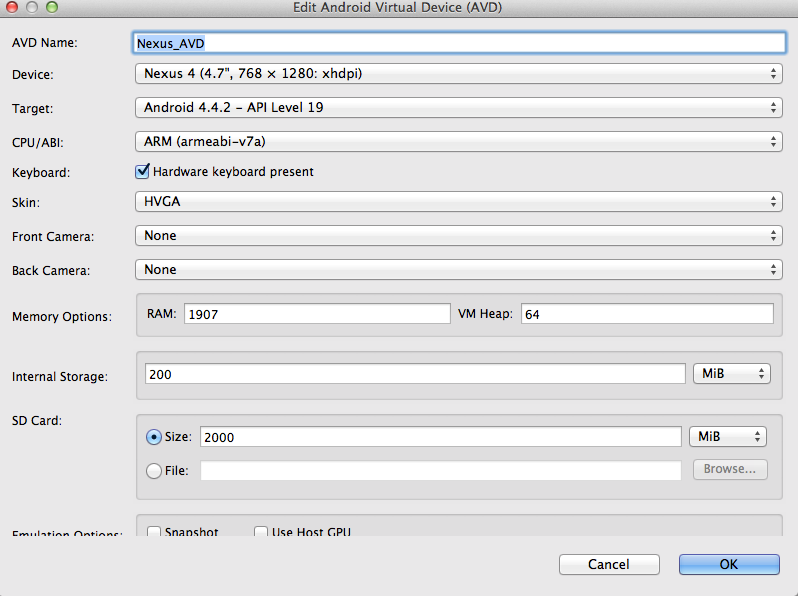
AVD Name
It's an identifier given to virtual device.
Device
Specify which hardware device you want to virtualize.
Target
The version of API you want to target. (Your version might defer from the one shown on the screen)
CPU
Specify which type of CPU you want to virtualize.
Memory Option
Here we specify how much RAM we need to give to the virtual machine.
SD Card Size
Size of SD Card (External Storage)
Fill in the details as shown in the screen.
Click on OK.
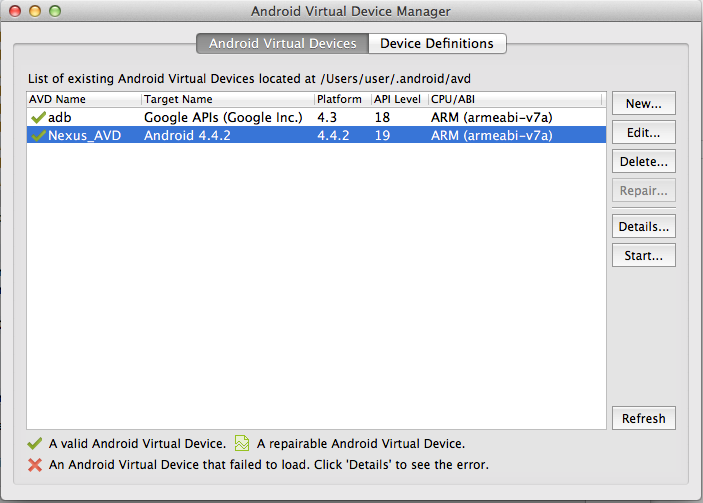
Select the newly created virtual device . Click on start . It opens a small window , then click on Launch.
It will take a while. Please be patient. If it doesn't show up for a very long time. Edit the emulator options and check "Use Host GPU" and start the emulator again. This should work.
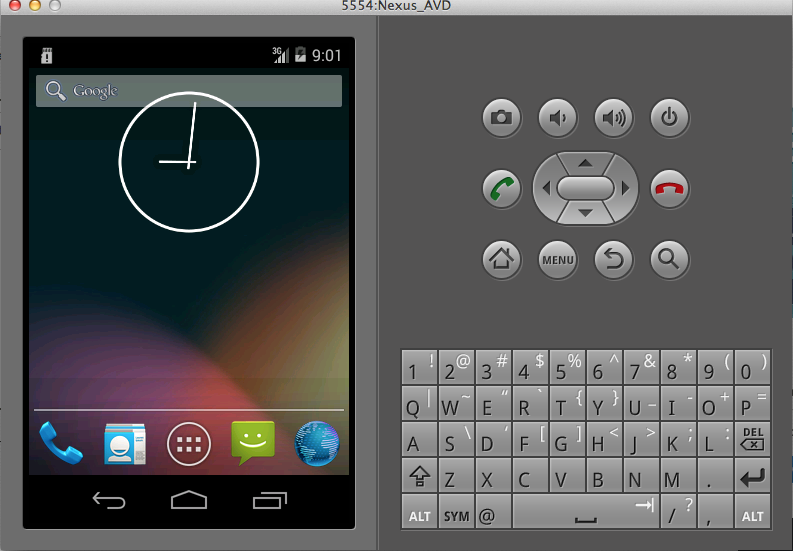
Awesome. You are all set to build your first app.
Tips & Best Practices
1.)Virtual Devices has it's own restrictions. It very much required to test your app in a real device (Explained in next Article).
2.)To quickly access the SDK manager , Go to command prompt or terminal and type
android sdk
3.) To quickly access avd manager, Go to command prompt or terminal and type
android avd
4.) To quickly access your virtual device, Go to command prompt or terminal and type
emulator -avd Nexus_AVD
5.) Keep your Android Studio updated.
Here is the link to the next Article Creating a Simple Hello World Project (The Fun Way)


 General
  News
News  Suggestion
  Question
  Bug
Bug  Answer
  Joke
Joke  Praise
  Rant
Rant  Admin
Admin 


