Introduction
A lot of articles and tutorials exist on the internet that explain in great detail how to write COM server applications that support automation. Those articles and tutorials cover a wide variety of methods to develop those COM-aware applications, including writing everything manually from scratch with a plain text editor, using ATL classes and macros, using ATL wizards, using C++ attributes, ...etc. However there's a small problem with all those articles and tutorials; they only explain how to start developing the application from scratch, not how to add COM automation support capability to an existing application.
In this article, I'm going to show you how you can take an existing Win32 application and add COM automation support to it. Such a need is very possible to arise when there's an application with many features and complex functionality that has been under development for several years and it's very difficult and impractical to start over from scratch and develop the application just to make sure we add the COM automation staff from the beginning.
Using the code
The code in the download package has been developed using visual studio 2010. This doesn't mean however that any of the steps involved in its development are particular to that version of visual studio; in fact the same steps depicted here can be used under any other version of visual studio. Just note that to open the solutions you'll have to use visual studio 2010 or later.
Another point to note is that I've used attributes to add the COM automation infrastructure code. This isn't the only way to develop COM applications but it's considered one of the easiest as it saves the developer from writing too much boilerplate code. Using any of the other methods would make this article much longer. The point here is to show what code is needed to add COM automation support and where to put it, not to discuss the different ways and components needed to build a COM application.
Walkthrough
In the next few sections, we'll be developing a simple Win32 application and then add the minimal infrastructure code to make it COM automation-aware. After that it'll be fairly easy to add any other functionality and expose it through our COM automation interface.
Create a Win32 Application
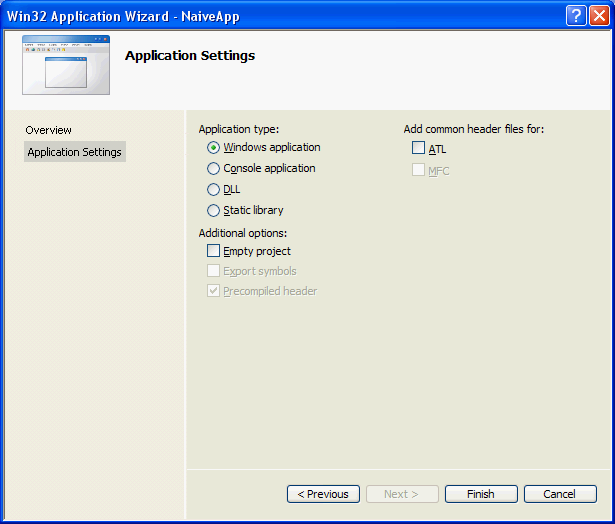
This's just a preliminary step so that we may have something to build our later work on. Of course in a real world case you'll already have in hand the application to be converted. For this step I just chose to create a project called NaiveApp with the "Win32 Project" wizard as shown.
Note that I haven't checked the ATL option on the right, even if I'm going to use them later. I want to emphasize the fact that the Win32 application is built with no intention that it'll ever need to use ATL and COM, something that would be very true in the practical case.
If you run the application you'll find an empty window with a main menu bar containing a help menu. The help menu contains a single item, "About ...", which displays an about box when clicked. This's a very simple and trivial application, but it suffices for our illustration purposes.
Modify the project settings and code
Now that we have an application to work on, the next step is to start adding glue code that will make our application ready to provide a COM automation object. As I stated earlier there are different ways to do that, but I'm going to use C++ attributes that are supported by Visual C++, along with some ATL, to accomplish the task while minimizing the code that has to be written. Developers familiar with other methods of programming COM servers may use those methods to get the same results.
We'll go through the next sequence of actions in modifying the project. It's important to note that the order isn't strictly mandatory, but they typically follow the logical and intuitive order of doing these actions.
- We've to tell our project that it's going to use ATL. To do this, we change the "Use of ATL" setting in the General Property Page of the project properties to "Static Link to ATL".

Make sure to change this setting for all configurations, not for a single one. - Now we add the registrar script. This's the script that contains the structure for the registry keys that will be written into the registry to make the operating system aware of our new COM server. In the resource view, we add a custom resource of type REGISTRY (as it isn't one of the built-in standard types).
Now you see that visual studio wasn't very helpful for us. It's automatically given the REGISTRY resource the name IDR_REGISTRY1 and associated a binary file registry.bin to the resource (; to see the binary file switch to the Solution Explorer view). This isn't very good because registrar script files typically have the extension .rgs and are plain text files, not binary ones. We're going to fix this soon but first paste the following code into the binary editor that opened and save.
HKCU
{

    Software
    {

        Classes
        {

            AppID
            {

                '%APPID%' = s 'NaiveAppServer'

                'NaiveApp.exe'
                {

                    val AppID = s '%APPID%'

                }

            }

        }

    }

}
I won't go into detail about the syntax for registrar scripts (; you can read about it on MSDN site). The important point here is to note that you should substitute your application name for NaiveAppServer and NaiveApp.exe above.
Now back to the misnamed resource and file problem, I had to close the solution in visual studio as I couldn't fix that while it was open. I came up with the procedure to fix this problem(and even the registrar script code shown above) by creating a COM server test application(another separate project) through visual studio ATL wizard and inspecting how the wizard generated and linked the registrar script and resources through different project files. So here are the steps to fix this problem:
- Close the solution completely in visual studio.
- Rename the file registry.bin to NaiveAppServer.rgs.
- Open NaiveApp.rc in a text editor(like notepad) and change the line
IDR_REGISTRY1 REGISTRY "registry.bin"
to
IDR_NAIVEAPPSERVER REGISTRY "NaiveAppServer.rgs"
- Open resource.h in a text editor and replace
IDR_REGISTRY1 with IDR_NAIVEAPPSERVER. - Open NaiveApp.vcxproj in a text editor and replace registry.bin with the new name NaiveAppServer.rgs. Do the same in NaiveApp.vcxproj.filters.
- Now you can reopen the solution in visual studio.
- The next step is to add some headers and macros needed to use ATL. Somewhere near the top of NaiveApp.cpp, we add the following lines.
#define _ATL_APARTMENT_THREADED
#define _ATL_ATTRIBUTES
#include <atlbase.h>
The first macro specifies that we're going to use the singled-threaded apartment model. The second macro enables us to use ATL attributes, as we're going to do in a moment. - Our COM server needs a new function (; the one generated by visual studio is named
_tWinMain, a name which follows Microsoft generic text mapping paradigm, but we're going to simply use WinMain as it's more widely used). This new function should initialize COM and do some other COM housekeeping chores. We can write this staff ourselves in the WinMain function of the application, but luckily we don't have to. There's an attribute called module that we can use to decorate a class and achieve the same effect. This attribute will instruct the compiler to generate a WinMain function that handles COM correctly (i.e. initialization, cleanup, registration requests ...etc.). The attribute also defines the type library in which our COM automation object(s) will reside. The following code is added in NaiveApp.cpp after the code in the previous step.
[module(exe, name = "NaiveAppServer",
       helpstring = "NaiveAppServer 1.0 Type Library",
       resource_name = "IDR_NAIVEAPPSERVER")]
class NaiveAppSrvMod
{
public:
    void RunMessageLoop() throw();
};
Note that resource_name above references the same resource we used to define the registrar script. We could have used the module attribute without a class, but that will make the generated WinMain function run separately from our code. i.e. it won't give us a chance to hook our code anywhere into the supplied WinMain function so that it may be executed at some time. Remember that we want our old WinMain function to still be called, as in real application it would contain the complete functionality of the application. Applying the module attribute to a class allows that class, by overriding certain methods, to hook into the generated WinMain function.
Since the module attribute is defined with type exe, the class implicitly inherits from CAtlExeModuleT which supplies some methods, of which we're interested in RunMessageLoop. This method is called after COM initialization; its default implementation simply runs the loop that will process COM messages. We're overriding this method here to redirect the execution to our old WinMain function, as shown in the next step. Since our old WinMain function also contains a message loop (as in any Win32 application), we're guaranteed that our function will handle COM messages correctly, as well as any other staff it already does. - We can't have two
WinMain functions in the same program, so we have to rename our old WinMain function to some other name, NaiveAppMain. Change the signature
int APIENTRY _tWinMain(HINSTANCE hInstance,
                     HINSTANCE hPrevInstance,
                     LPTSTR    lpCmdLine,
                     int       nCmdShow)
to
int APIENTRY NaiveAppMain(HINSTANCE hInstance,
                     HINSTANCE hPrevInstance,
                     LPTSTR    lpCmdLine,
                     int       nCmdShow)
- After the now-renamed
NaiveAppMain function, add the following definition of NaiveAppSrvMod::RunMessageLoop.
void
    NaiveAppSrvMod::RunMessageLoop()
{

    NaiveAppMain(GetModuleHandle(NULL), NULL, NULL, SW_SHOWNORMAL);

}
The method implementation merely does one thing, calling our old WinMain function.
Embrace your COM automation server.
Believe it or not, we now have a minimal, primitive working COM automation server. To see this in action, do the following:
- Build the application in visual studio. You'll notice two new files generated by the build: one called vc100.idl and the other called vc100.tlb (; they may have other names depending on the version of Visual C++ you're using). The former is the IDL file containing our the type library definition generated from the
module attribute we added earlier; that file will also contain other definitions that we may add later as we'll see shortly. The good news is that you don't have to bother yourself with that file; it gets automatically generated every time you build the application. The latter file, vc100.tlb, is the type library file. - Register the server. Open a command line and type
NaiveApp /RegServer
So what's that weird option /RegServer? Remember the magical module attribute we added and its associated CAtlExeModuleT class from which our class inherited? Two of the goodies that this class provides are the options: /RegServer and /UnRegServer. They're used to register and unregister the COM server, respectively. - Inspect the COM server type library in OLE/COM Object Viewer; it's a tool that gets installed with visual studio under the accompanying windows SDK folder. Our library is named "NaiveAppServer 1.0 Type Library (Ver 1.0)".
But wait, where's the COM automation object?
If you select to view the type library in OLE/COM Object Viewer, you'll notice that it's really empty and doesn't contain any COM objects or interfaces.
We haven't really added any COM automation objects yet; all we've done so far was just preparing the application to use COM and provide COM objects without specifying these objects. Now it's time to do that.
- Switch to the class view in visual studio and add a new class. In the "Add Class" wizard, select ATL Simple Object.
Then fill in the details the ATL Simple Object Wizard (; most of the information is really generated from the class short name, so you may only fill that one).
In the "Options" screen, set the "Threading model:" to "Single" and "Aggregation" to "No". The single threading model means that COM messages will be served by our main thread message loop. Aggregation is an intricacy we don't need for the moment.
Bang, a whole bunch of things have happened. A new file called NaiveAppServer.h opened in the editor with interface and class definitions. Moreover the class view shows now a new interface INaiveAppServer and a new class CNaiveAppServer; these are the interface and its associated COM object that our application will provide upon request.
Unfortunately, the generated code won't exactly achieve the desired effect. We have to add the library_block attribute to make sure the interface is generated inside the type library (instead of outside it) in the IDL file. We have to change
[
object,
uuid("E4782C67-CB9D-406D-AEA4-BAD8E970AB1B"),
dual,
pointer_default(unique)
]
__interface INaiveAppServer : IDispatch
{
};
to
[
object,
uuid("E4782C67-CB9D-406D-AEA4-BAD8E970AB1B"),
dual,
pointer_default(unique), library_block
]
__interface INaiveAppServer : IDispatch
{
};
Note the library_block attributed appended to the attribute list. - Although not necessary, it's still useful to attach a singleton factory to the object so that only one instance of the automation object may be created. Add
DECLARE_CLASSFACTORY_SINGLETON(CNaiveAppServer); just after the line containing DECLARE_PROTECT_FINAL_CONSTRUCT(). - Now to the final step we've strived to reach, adding a method to our object. For simplicity and demonstration purposes, we'll implement a super simple method that just calculates the square of a number. In the class view, add a method to the
INaiveAppServer interface (not the class). The method takes a number and returns its square.
As you can see, the wizard takes care of many things like generating the correct method prototypes in the interface and class, as well as generating the definition in a corresponding NaiveAppServer.cpp file. - Unfortunately, NaiveAppServer.cpp in its current form won't compile (; you can try it yourself). We have to put some headers and macros at the top of the file similar to those we added earlier in the preparation step. Add the following lines somewhere near the top of NaiveAppServer.cpp (but before NaiveAppServer.h include line).
#define _ATL_APARTMENT_THREADED
#define _ATL_ATTRIBUTES
#include <atlbase.h>
#include <atlcom.h>
- Fill in the implementation of the method so that it may read something like this:
STDMETHODIMP CNaiveAppServer::GetSquare(SHORT num, LONG* res)
{

    *res = num * num;
    return S_OK;
}
- Build the application, register the COM server(as explained earlier), and review how the COM server looks like in OLE/COM Object Viewer; you can see that the type library now has a COM interface
INaiveAppServer and class CNaiveAppServer, along with a method in each.
You can even try to instantiate an object from the COM server by expanding the "CNaiveAppServer Object" node under "Automation Objects"; this will open an instance of our application window(since our application was a GUI application in the first place). The application must run so that it can handle COM-related messages inside its main thread message loop.
- This concludes our objective as now we have a COM server able to provide COM automation objects. You may proceed with trying to us this COM server from other languages like C#, python ...etc. to create a COM object and call its method. This'll give you a feeling of how you're going to use your COM automation object from other programs.
Points of Interest
These are just some highlights of what can be improved and how we can proceed further.
-
Some people, including myself, may not like the fact that all COM symbols become available by including COM headers. In fact, all COM classes and types are defined inside the ATL namespace. However all the ATL namespace types and classes are imported once we start to include COM header files. To prevent this behavior, you can define the macro _ATL_NO_AUTOMATIC_NAMESPACE like #define _ATL_NO_AUTOMATIC_NAMESPACE just before including any of the COM headers.
Note however that you'll immediately get a lot of compilation errors once you use this macro, as the used attributes transparently translate to code using many of the COM types and classes defined inside the ATL namespace. You'll have to carefully inspect these messages to see which symbols you have to import with a using statement, like using ATL::_ATL_REGMAP_ENTRY;. - You may think that vc100.idl isn't a very meaningful name (and I strongly agree). We don't have to stick to that name, and fortunately there's a way to change the name of the generated IDL file. In the "Embedded IDL" Property Page of the project properties, under Linker settings, there's a setting for "Merged IDL Base File Name" which you can change to whatever name you deem meaningful.
- You can always inspect the code generated by the attributes you're using inside source files. This's always helpful when you want to know what classes and methods are being used as a result of some attribute you've just added. In the "Output Files" Property Page of the project properties, under C/C++ settings, change "Expand Attributed Source" to "Yes (/Fx)" and you'll be able to see what code your used attributes expand to in a separately generated source file.
- Remember that you have to register the server every time you make changes to the COM classes of the COM server (like adding/deleting/modifying COM interfaces/classes/methods) after rebuilding the server. Some people even opt to add this action as a post-build hook so that it gets automatically executed after each build of the application.
-
If you're handling command line options in your application, you should prepare your application to support the -Embedding option as this's the option that COM infrastructure invokes your program with when an external entity requests a COM object from your COM server. One easy way to support this option is to just let your application ignore it, unless you want your application to behave differently based on whether it was invoked interactively by the user or by COM infrastructure.
No matter what you decide about it, just remember to consider it. Some applications are normally written to reject unknown options and simply halt upon detecting one, others even worse may crash. So at least make sure your application won't malfunction when it sees that option. - The method we added was an unrealistically simple method. You'll probably want to add many, many other methods (and possibly other COM interfaces and classes) to expose more functionality from your application. The point to note here is that you'll most likely run into the situation where you find that you have to refactor your code to be able to provide or expose certain functionality.
This even becomes more pertinent if your application uses GUI and the functionality is tightly coupled to the event handlers of the GUI controls. In such a case you'll have to separate the logic of collecting and validating information from GUI controls from the logic of processing this information, a practice that would have been much easier had your application been designed from the outset with that principle of separation of concerns in mind.
- In the same vein, you may find that some of the functionality you want to expose may involve invoking some UI windows or dialogs (like showing an open dialog box for opening a file or showing an information message box that has to be dismissed). Typically in automation mode, you want to suppress this GUI interaction and supply needed information beforehand with the automation request. There're several ways to accomplish this, for example by using a boolean flag to differentiate interactive mode from automated mode and show/suppress appropriate GUI elements accordingly. Another approach is to put your possible GUI show methods into an abstract class and derive two concrete classes from it: one for automated mode(that will simply return pre-programmed replies for query dialogs, or does nothing for informative dialogs) and the other for normal GUI(which will simply resolve to the typical GUI methods).
References
- Walkthrough: Creating a COM Server Using a Text Editor
- The ATL Registry Component (Registrar)
- Attributes Tutorial
- ATL Reference
- Single-Threaded Apartments
- COM Attributes
- The macros for declaring and implementing COM interfaces - The Old New Thing - Site Home - MSDN Blogs
History
04-21-2014:
04-24-2014:
- Updating references
- Adding further improvement hints
06-29-2014:
- Updating references
- Adding more details about registrar script fixup
- Adding a hint about viewing attribute-generated code
This member has not yet provided a Biography. Assume it's interesting and varied, and probably something to do with programming.


 General
  News
News  Suggestion
  Question
  Bug
Bug  Answer
  Joke
Joke  Praise
  Rant
Rant  Admin
Admin 


