Several months ago, I posted an article regarding Live Migration of Sharepoint 2010 to Sharepoint 2013, that’s is a real good migration guide if you use the stock standard Sharepoint Server without any custom solutions deployed on your Farm, but if you have customized solutions then it would be a different issue. While your SharePoint might have custom solutions in place, using the guide will still work apart from pages on your Sharepoint where custom solutions are used, now that will all change as this article will talk about migrating those solutions as well. I know it’s a bit late compared to my original post, it is still better late than never.
I tried a lot of strategies in doing this but the easiest one will be this one, so let's start.
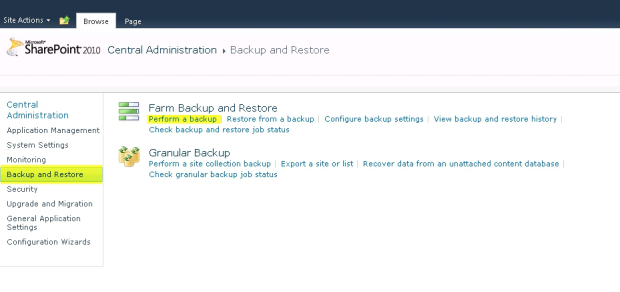
First you need to back up your Farm Solutions from your old Sharepoint instance by going to your Sharepoint 2010 Central Administration -> Backup and Restore then perform a backup.
Choose all the solutions, it will pick all solutions from the list. If you plan on migrating several but not all, still do this method as the import on 2013 will ask you first what solution would you want to import.

Hit next, then double-check the following items, you need to also indicate the Backup location. Then when you are ready, click Start Backup.
Back up now commences.
Once finished, it will tell you the result and fingers crossed, it will be all OK, it will show you what folder it created on your Backup location.
Verify that by going to the folder, at this point, your solutions are fully backed up.
Now let's restore it, go to your Sharepoint 2013 Central Administration -> Backup and Restore, then click “restore from a backup”.
Choose the Backup Directory Location you placed your backup click refresh, then select the solutions. Click Next.
Choose what you want to restore, you can click the Solutions and it will include everything or you can choose one child not multiple. Then go next.
Check the following details presented to you. For data to restore, we need both content and configuration, then for type of restore, we use new configuration. Click Start Restore when you are ready.
So if you are like me and forgot to add the permissions for the account Sharepoint 2013 is using on the folder, you placed your backup, then you will be presented with this error:
”Access to the path XXX is denied for the account XXX. Ensure that the Sharepoint Timer service and Microsoft SQL Server service accounts have Full Control permission on both the file share and underlying folder”
Fix that by giving “Full Permission” on the folder, then you have to go back to the restore step one. Once all ok, then it should start restoring.
Once completed, you might encounter some issues like I did on mine. You have to check it and adjust accordingly, the error on mine were the following:
Cannot locate class information for: Microsoft.SharePoint.Diagnostics.DiagnosticLog,
Microsoft.SharePoint.Diagnostics.ExtendedDiagnosticProviders, Version=1.0.0.0,
Culture=neutral, PublicKeyToken=425dfe2b2d249462.
Cannot locate class information for:
Microsoft.ReportingServices.SharePoint.Common.SPRSDiagnosticsService,
Microsoft.ReportingServices.SharePoint.Common, Version=10.0.0.0, Culture=neutral,
PublicKeyToken=89845dcd8080cc91.
I just disregarded that as I am not using DiagnosticLog for the moment as well as Reporting Services on this new Sharepoint instance. This is not related to my solution that I just restored.
After that, you just go to the Solution Management that is in Central administration and you will see your solutions imported but not deployed.
You can deploy them by going to each one, then clicking on “Deploy Solution”.
Once done for all, it will have a Deployed Status.
You can now start testing your pages with custom solutions and it should work as normal.
Some Caveats
- Your page with custom code will not work if you haven’t allowed server side scripts. To do that, check this post. It still works for Sharepoint 2013 http://macaalay.com/2010/10/21/how-to-enable-code-blocks-in-sharepoint-2010-works-also-in-2007/comment-page-1/
- If you have added web config items manually, you have to add them again in new Sharepoint.
Filed under: CodeProject, Servers
Tagged: Sharepoint, Sharepoint 2013, Sharepoint Foundation 2013


 General
  News
News  Suggestion
  Question
  Bug
Bug  Answer
  Joke
Joke  Praise
  Rant
Rant  Admin
Admin 


