Introduction
TinyMCE is a powerful JavaScript rich text editor, which is relatively easy to integrate to your application and is licensed user LGPL, meaning you can use it for commercial applications. Being a Javascript component, it can be used in any web technology, one wishes: PHP, JSF, Ruby on Rails, etc. This article will exemplify the use of TinyMCE in ASP.NET MVC, which, as the reader might already know, is a full MVC framework; thus its adaptation to other web development frameworks is straightforward.
This article however, will not focus on the basics of TinyMCE, because that can be easily found in its documentation. Here will be shown how to use advanced features that are not so clear how to implement, giving the readers very useful help for using this great component. Here are the features which are the focus of this article:
- Usage of more than one editor in the same form
- Validation using jQuery - some tweaks are needed.
- Setting up the max number of HTML characters allowed.
- Loading content on the rich text area, after the page is loaded, via TinyMCE load event.
- Manipulation of HTML tags when using TinyMCE.
Background
TinyMCE should really be considered as an option for rich text editor because of the following factors:
- It is free for commercial use.
- It has most features needed for a rich text editor, such as: font changing, link management, text manipulation, video usage, etc.
- It is simple to use.
- It has good documentation.
- It has various forums and discussions which will undoubtedly help developers.
- Since it is a pure JavaScript tool, it can be used in whichever web framework one desires.
Using the code
Application overview
Here will be depicted how the application works so one can have a better understanding of the code and also be full aware of the features implemented.
Firstly, when the application is launched, a screen as displayed below, is visualized.
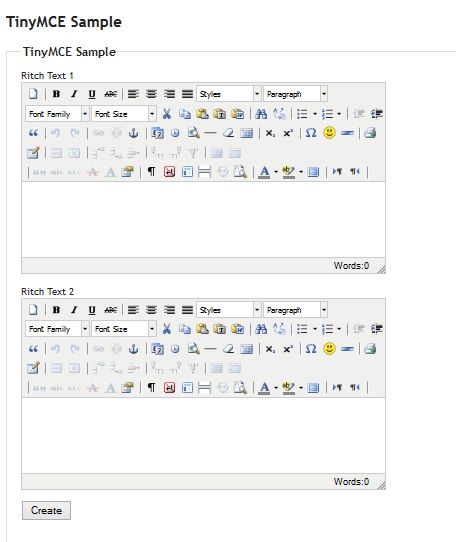
There you see that are two rich text areas at the same screen. To use them, simply fill in them with text using whichever features one wishes. Also note that when one is filling in the rich text area, a counter identifies how many HTML characters are being used, and there is a maximum quantity allowed. The screen below shows an example:

After that, press "Create" button to submit the form. What will be display next is screen screen with the same data that was previously there in the rich text areas, along with the submitted data sent by each rich text area with not formatted text as pure escaped HTML., as one can see below:
Note the values displayed in the top of the screen. They contained text along with escaped HTML characters, which format the text in the reach text areas. This data is the one which a software must store because this is the one containing formatted text by the rich text areas.
Observe the texts in the rich text areas. As stated before, there were reloaded there. This was done in the loading event of the TinyMCE component.
Finally, below is displayed messages for validation errors, (which were implemented using jQuery):
In the first rich text area the validation failed because a text is mandatory, and in the second one the validation was not successful because more than 5000 characters were inserted.
Understanding the code
Now it is time to understand the code itself. After extracting the contents of the project's zip file, one should open the project with either Microsoft Visual Studio 2010 (or superior) or Microsoft Visual Web Developer 2010 (or superior). One will note that this is a standard ASP.NET MVC 3 project. Here are the main aspects to observe about this project:
- Within the folder Scripts there is the one called tiny_mce. This holds the JavaScript code downloaded from the TinyMCE home page.
- Again, within the folder Scripts, there is the file JHomeINdex.js. This file manipulates the UI using TinyMCE.
- Within the Controllers folder there is the only Control - HomeControl.cs used for this application.
- Within the Models folder there is the only Model - SampleModel used for this small software.
- Within View folder, inside the Home folder there is the Index.cshtml, which is the only View (web page) used for this application, and the _Layout.cshtml is the "Master Page" of this small app.
Starting by the Model - SampleModel, have a look at its code below:
using System;
using System.ComponentModel.DataAnnotations;
using System.Web.Mvc;

namespace MvcAppTnyMCE.Models
{
    public class SampleModel
    {
        [AllowHtml]
        [Display(Name = "Ritch Text 1")]
        public String RichText1 {get; set;}

        [AllowHtml]
        public String RichText1FullHtml { get; set; }

        [AllowHtml]
        [Display(Name = "Ritch Text 2")]
        public String RichText2 {get; set;}

        [AllowHtml]
        public String RichText2FullHtml { get; set; }
    }
}
Note the four fields displayed are related to the text areas shown in the screen when the program is executed. The fields RitchText1 and RichText2 are bound directly to the textarea used by the TinyMCE component. The RichText1FullHtml and RichText2FullHtml are used to show the data submitted by the rich text areas, after the button "Create" is pressed. If one takes a look back in this article and check what the software does, one will note that the elements used in the Model suffice the needs of the application. Furthermore, note that in the parameters the AllowHtml tag is used in order to avoid security problems of setting and getting HTML content. Finally, observe that the display names for each field in the HTML is already defined here.
Next, the Controller - HomeController.cs display below: will be analyzed
using System.Web.Mvc;
using MvcAppTnyMCE.Models;

namespace MvcAppTnyMCE.Controllers
{
    public class HomeController : Controller
    {
        public ActionResult Index()
        {
            return View();
        }

        [HttpPost]
        public ActionResult Index(SampleModel model)
        {
            model.RichText1FullHtml = model.RichText1;
            model.RichText2FullHtml = model.RichText2;

            model.RichText1 = null;
            model.RichText2 = null;
            return View(model);
        }

    }
}
This controller is quite simple. The first method, simply displays the View - Index.cshtml. The second, retrieves data from the model - gets values entered by the user in both rich text areas (RitchText1 and RichText2) and set them in the fields (RichText1FullHtml and RichText2FullHtml) for displaying them as HTML elements. Finally, to be thorough, the values of RitchText1 and RichText2 are nulled, so one can be sure that they will be set on the loading event of the TinyMCE component.
Continuing, the next piece of code which will is worth discussing is the View element - Index.cshtml. Take a look of its code below:
@model MvcAppTnyMCE.Models.SampleModel

@using MvcAppTnyMCE.Models;

@{
    ViewBag.Title = "TinyMCE Sample";
}

<h2>TinyMCE Sample</h2>

@section JavaScriptSection {
    <script src="@Url.Content("~/Scripts/jquery.validate.min.js")" type="text/javascript"></script>

    <script src="@Url.Content("~/Scripts/tiny_mce/tiny_mce.js")" type="text/javascript"></script>

    <script src="@Url.Content("~/Scripts/JHomeIndex.js")" type="text/javascript"></script>
}

@using (Html.BeginForm("Index", "Home", FormMethod.Post, new { id = "formText" })) {

    <fieldset>
        <legend>TinyMCE Sample</legend>

        @{
    if (Model != null && Model.RichText1FullHtml != null && Model.RichText1FullHtml.Length > 0)
            {
                <p>
                    The submitted text from "Ritch Text 1" is:
                </p>
                <div>
                    @Model.RichText1FullHtml;
                </div>
                <input id="RichText1Value" name="RichText1Value"
                  type="hidden" value="@Server.HtmlDecode(Model.RichText1FullHtml)"/>
            }

    if (Model != null && Model.RichText2FullHtml != null && Model.RichText2FullHtml.Length > 0)
    {
        <p>
            The submitted text from "Ritch Text 2" is:
        </p>
        <div>
            @Model.RichText2FullHtml;
        </div>
        <input id="RichText2Value" name="RichText2Value"
          type="hidden" value="@Server.HtmlDecode(Model.RichText2FullHtml)"/>
    }
        }

        <p>
            @Html.LabelFor(m => m.RichText1)
            <input id="RichText1Copy" name="RichText1Copy" type="hidden"/>
            @Html.TextAreaFor(m => m.RichText1, new { @class = "mceEditor" })
        </p>
        <p>
            @Html.LabelFor(m => m.RichText2)
            <input id="RichText2Copy" name="RichText2Copy" type="hidden"/>
            @Html.TextAreaFor(m => m.RichText2, new { @class = "mceEditor" })
        </p>
        <p>
            <input id="saveButton" type="submit" value="Create" />
        </p>
    </fieldset>
}
Here, a few things are being done:
- The necessary JavaScript scripts are being imported. The basic jQuery script was already imported in the _Layout.cshtml View.
- The form was defined with the id formText.
- The top of the page where HTML submitted by rich text areas is displayed, in handled next. Observe that something is only shown in case there actually is data available. Also observe that this very data is saved in hidden fields (
RichText1Value and RichText2Value), because they will be used later to repopulate the rich text areas in the loading event of the TinyMCE component. - There are two more things to be mentioned here:
- The bound values from the Model to be used for the TinyMCE. They are:
RitchText1 and RichText2. - Also note that two hidden fields variables are being created (
RichText1Copy and RichText2Copy). As you will see later, these variables are used for validation using jQuery. This is a necessary workaround to accomplish successful validation via jQuery.
Now comes the core of the code, the manipulation of the UI using JavaScript, the JHomeIndex.js script. Have a look at it below:
var tinyMiceMaxCharLength = 5000;
function loadTinyMiceRichTextFeature(controlName, inputCopyIdentifier) {
var configArray = {
mode: "textareas",
theme: "advanced",
encoding: "xml",
mode : "specific_textareas",
editor_selector : "mceEditor",
mode: "none",
plugins: "autolink,lists,pagebreak,style,table,advhr,advlink,emotions,
iespell,inlinepopups,insertdatetime,preview,searchreplace,print,paste,
directionality,fullscreen,noneditable,visualchars,nonbreaking,xhtmlxtras,
template,wordcount,advlist,autosave,visualblocks",
theme_advanced_buttons1: "save,newdocument,|,bold,italic,underline,
strikethrough,|,justifyleft,justifycenter,justifyright,justifyfull,styleselect,formatselect",
theme_advanced_buttons2: "fontselect,fontsizeselect,!,cut,copy,paste,
pastetext,pasteword,|,search,replace,|,bullist,numlist,|,outdent,indent",
theme_advanced_buttons3: "blockquote,|,undo,redo,|,link,unlink,anchor,|,
insertdate,inserttime,preview,!,hr,removeformat,visualaid,|,
sub,sup,|,charmap,emotions,iespell,media,advhr,|,print",
theme_advanced_buttons4: "tablecontrols",
theme_advanced_buttons5: "moveforward,movebackward,absolute,|,cite,abbr,
acronym,del,ins,attribs,|,visualchars,nonbreaking,template,pagebreak,
restoredraft,visualblocks,|,forecolor,backcolor,fullscreen,|,ltr,rtl,|",
theme_advanced_toolbar_location: "top",
theme_advanced_toolbar_align: "left",
theme_advanced_statusbar_location: "bottom",
theme_advanced_resizing: true,
theme_advanced_path: false,
content_css: "../../Content/Site.css",
template_external_list_url: "lists/template_list.js",
external_link_list_url: "lists/link_list.js",
external_image_list_url: "lists/image_list.js",
media_external_list_url: "lists/media_list.js",
style_formats: [
{ title: 'Bold Text', inline: 'b' },
{ title: 'Red Text', inline: 'span', styles: { color: '#ff0000'} },
{ title: 'Red Title', block: 'h1', styles: { color: '#ff0000'} }
],
charLimit: tinyMiceMaxCharLength,
setup: function (ed) {
ed.onKeyUp.add(function (ed, e) {
updateTinyMiceHtmlCounter(ed, e, inputCopyIdentifier);
});
ed.onLoadContent.add(function (ed, o) {
if (tinyMCE.editors != null && tinyMCE.editors.length > 0) {
var trueValue = "#formText " + " #" + controlName + "Value";
if ($(trueValue) != null && $(trueValue).val() != null) {
tinyMCE.activeEditor.setContent($(trueValue).val());
updateTinyMiceHtmlCounter(ed, o, inputCopyIdentifier);
}
}
});
}
};
tinyMCE.settings = configArray;
tinyMCE.execCommand('mceAddControl', true, controlName);
}
function updateTinyMiceHtmlCounter(ed, e, inputCopyIdentifier) {
var tinymax, tinylen, htmlcount;
tinymax = ed.settings.charLimit;
tinylen = ed.getContent().length;
htmlcount = "# of HTML characters: " + tinylen + "/" + tinymax;
if (tinylen > tinymax) {
htmlcount = "<span style='font-weight:bold; color: #f00;'>" +
htmlcount + "</span>";
}
$(inputCopyIdentifier).val(ed.getContent());
tinymce.DOM.setHTML(tinymce.DOM.get(tinyMCE.activeEditor.id + '_path_row'), htmlcount);
}
var inputCopyId1 = "#formText #RichText1Copy";
var inputCopyId2 = "#formText #RichText2Copy";
$().ready(function () {
loadTinyMiceRichTextFeature("RichText1", inputCopyId1);
loadTinyMiceRichTextFeature("RichText2", inputCopyId2);
$.validator.setDefaults({ ignore: "" });
validateForm();
});
function validateForm() {
$().ready(function () {
$("#formText").validate({
rules: {
RichText1Copy: {
required: true,
maxlength: tinyMiceMaxCharLength
},
RichText2Copy: {
maxlength: tinyMiceMaxCharLength
}
}
});
});
}
Although this code looks quite long, it is not difficult to understand. Parts of it will be explained in details so the reader will see its purpose.
Observe the code below:
$().ready(function () {
loadTinyMiceRichTextFeature("RichText1", inputCopyId1);
loadTinyMiceRichTextFeature("RichText2", inputCopyId2);
$.validator.setDefaults({ ignore: "" });
validateForm();
});
This code is executed when the Index.cshtml is loaded. See what happens here:
- The TinyMCE component is attached to the fields
RichText1 and RichText2, via method loadTinyMiceRichTextFeature(controlName, inputCopyIdentifier). Note that RichText1 and RichText2 are the ids for the textarea tags which will hold the rich text areas using TinyMCE component. Note also that the method loadTinyMiceRichTextFeature(...) uses a second parameter, which is the jQuery identifier for the hidden fields associated with each rich text area (RichText1Value and RichText2Value). - The validation using jQuery is setup here as well, via method
validateForm().
Now, observe the the method loadTinyMiceRichTextFeature(...) displayed below:
var tinyMiceMaxCharLength = 5000;
function loadTinyMiceRichTextFeature(controlName, inputCopyIdentifier) {
var configArray = {
mode: "textareas",
theme: "advanced",
encoding: "xml",
mode : "specific_textareas",
editor_selector : "mceEditor",
mode: "none",
plugins: "autolink,lists,pagebreak,style,table,advhr,advlink,emotions,iespell,
inlinepopups,insertdatetime,preview,searchreplace,print,paste,directionality,
fullscreen,noneditable,visualchars,nonbreaking,
xhtmlxtras,template,wordcount,advlist,autosave,visualblocks",
theme_advanced_buttons1: "save,newdocument,|,bold,italic,underline,strikethrough,|,
justifyleft,justifycenter,justifyright,justifyfull,styleselect,formatselect",
theme_advanced_buttons2: "fontselect,fontsizeselect,!,cut,copy,paste,
pastetext,pasteword,|,search,replace,|,bullist,numlist,|,outdent,indent",
theme_advanced_buttons3: "blockquote,|,undo,redo,|,link,unlink,anchor,|,insertdate,
inserttime,preview,!,hr,removeformat,visualaid,|,sub,sup,|,
charmap,emotions,iespell,media,advhr,|,print",
theme_advanced_buttons4: "tablecontrols",
theme_advanced_buttons5: "moveforward,movebackward,absolute,|,cite,abbr,acronym,del,
ins,attribs,|,visualchars,nonbreaking,template,pagebreak,restoredraft,
visualblocks,|,forecolor,backcolor,fullscreen,|,ltr,rtl,|",
theme_advanced_toolbar_location: "top",
theme_advanced_toolbar_align: "left",
theme_advanced_statusbar_location: "bottom",
theme_advanced_resizing: true,
theme_advanced_path: false,
content_css: "../../Content/Site.css",
template_external_list_url: "lists/template_list.js",
external_link_list_url: "lists/link_list.js",
external_image_list_url: "lists/image_list.js",
media_external_list_url: "lists/media_list.js",
style_formats: [
{ title: 'Bold Text', inline: 'b' },
{ title: 'Red Text', inline: 'span', styles: { color: '#ff0000'} },
{ title: 'Red Title', block: 'h1', styles: { color: '#ff0000'} }
],
charLimit: tinyMiceMaxCharLength,
setup: function (ed) {
ed.onKeyUp.add(function (ed, e) {
updateTinyMiceHtmlCounter(ed, e, inputCopyIdentifier);
});
ed.onLoadContent.add(function (ed, o) {
if (tinyMCE.editors != null && tinyMCE.editors.length > 0) {
var trueValue = "#formText " + " #" + controlName + "Value";
if ($(trueValue) != null && $(trueValue).val() != null) {
tinyMCE.activeEditor.setContent($(trueValue).val());
updateTinyMiceHtmlCounter(ed, o, inputCopyIdentifier);
}
}
});
}
};
tinyMCE.settings = configArray;
tinyMCE.execCommand('mceAddControl', true, controlName);
}
It does many things, which are:
- Setup TinyMCE to the text area entered as the first method parameter. This parameter must be the id of the textarea (
RichText1 and RichText2). The second parameter is used to identify hidden fields (RichText1Value and RichText2Value) which will hold copies of input text in the rich text areas. They are used for validation, as will be explained later. - The different aspects come now, with the events.
- The event onkeyUp does the following, in the method
updateTinyMiceHtmlCounter(...): for every character added or removed in each text area, it counts the number of HTML characters already typed, update the message and, in case this value passes a certain limit, the color of the message is changed. Moreover, every time this event is called, the whole content is copied to the hidden field identified by the parameter inputCopyIdentifier of the method updateTinyMiceHtmlCounter(...). The copying into the hidden field is very important for validation purposes. Validation suing jQuery cannot be done in the rich text area defined by the TinyMCE because it changes it in manners the developer cannot control. Therefore, the safest way to validate is to copy its contents to a hidden field, using it for validation. - The event onLoadContent(...) is responsible for loading data when the TinyMCE is loaded into the page. Thus, every time this event is called, one needs to verify whether there is data to be loaded in the rich text area and do so. Note that this method get values from the hidden fields (
RichText1Value and RichText2Value) in the top of the form, where the HTML contents are displayed. In case these values do exist, they are put into the TinyMCE component. One may believe that an easy solution is to set the values directly via binding in the Index.cshtml. It would be, however, when doing so, the html is not interpreted accordingly TinyMCE render this solution improper.
The last part to be discussed is validation, which done by the method validateForm(), displayed below:
function validateForm() {
$().ready(function () {
$("#formText").validate({
rules: {
RichText1Copy: {
required: true,
maxlength: tinyMiceMaxCharLength
},
RichText2Copy: {
maxlength: tinyMiceMaxCharLength
}
}
});
});
}
As one can observe, this is a straightforward jQuery validation. However, here the validated fields are the hidden fields which receive values from the rich text areas, every time a character is changed, via method updateTinyMiceHtmlCounter(...). As explained before, this is implemented in this fashion because if one were to validate the textareas which were used by the TinyMCE validation would not work because TinyMCE modifies these fields unpredictably. Note here that is validated whether a field is required and the maximum number of HTML characters allowed.
This code may seem complex at the first sight, however, take a moment to understand it and one will conclude that it is rather simple.
Limit by number of HTML characters versus typed characters
One discussion which may arise is the reason for restricting the number of HTML characters, and not the number of typed characters. There are a few reasons for that:
- Counting the number of typed characters is not easy to implement in JavaScript and may lead to performance issues.
- The real limit of characters are HTML ones, not typed ones. Therefore, restricting by typed characters may lead to a situation where there is not enough space to use save data because the number of HTML characters is always higher than the number of typed ones.
- TinyMCE does not provide any easy solution for that, therefore everything would have to be done manually.
Conclusions
Setting up the basic of TinyMCE is straightforward and its documentation is enough to do so. However, other more complex tasks, such as using multiple components, validating and loading data using events were not so simple. Nevertheless, various forums and some investigations allow the author of this article to solve all matters in order to attend various software needs. This is one key strength of TinyMCE. There are various forums and discussion to aid developers overcome difficulties.
Another important feature is that since this is a pure Javascript component, it can be used with various web development technologies. This was already stated here but it is important to emphasize this great aspect.
TinyMCE comes in two flavors: Javascript and jQuery. Oddly enough, this article was written using the JavaScript version, for a simple reason: its documentation is much richer.
With this small application sample one probably has most of its needs addressed, making this component even more easy to use than already is.
Graduated from Universidade Estadual de Campinas (State University of Campinas - UNICAMP) having experience with undergrad research.
Started working as a developer with Java and .NET Web and Desktop applications. Also, developed Eclipse PDE, Perl, PHP and Android applications.
Currently working as a Tech Lead, Architect and ScrumMaster for .NET and Java Enterprise applications.
Main interests: Software Architecture, Technical Leadership, Web and Mobile applications, SCRUM


 General
  News
News  Suggestion
  Question
  Bug
Bug  Answer
  Joke
Joke  Praise
  Rant
Rant  Admin
Admin 


 .
.