Introduction
Developing applications for the Microsoft Azure platform is becoming increasingly easy these days. It is relatively inexpensive for a development team in terms of effort and money to develop an application in this sort of environment; start costs have continuously decreased over the last couple years and currently it is very straightforward to put together a full functional prototype application with no or little deployment cost at all. Also the new integration features like the one with GitHub provide a fantastic set of tools for a team; tasks like configuring automated builds and deployments to the public web site is a question of minutes.
This article discusses the benefits for a development team using the Azure platform, it covers topics like integration with GitHub, automatic build and deployment; data persistence options from using SQL-CE, SQL Express and SQL Azure with EF or/and Nhibernate; development of AzureWebSites and Azure Mobile Services.
Windows Azure Challenge
Current sections available for each of the challenge phases:
Background
I have recently worked in a proof of concept project for a client that may be well a very common scenario for many of you. The client is responsible for the management of dispatches of a very large food shopping centre; they receive large deliveries on daily basis from many different hauliers. The goods are then delivered to the individual shops and at the end of each day a final delivery dispatch must be produced for each of the shops to pay for the daily delivery.
Currently the client only has a financial package system installed for accounting purposes but the rest of the process is done using paper. The client is looking for a system to help them on the delivery side that would enhance the production of shop delivery notes and the automatic feed to their financial system.
Some of the aspects that favored to decide for an application on the cloud were the following:
- The hauliers should produce daily delivery listings, a web application would facilitate the input of those listings by the hauliers themselves.
- Tablets would be assigned to employees for listing validation and sign off of the shop delivery notes. Again an on-line application was preferred than installing a wire-less network to support mobile users.
The Windows Azure platform seemed to be a more adequate solution and cost effective. It eliminates the need for the client to acquire new expertises and it reduces the upfront cost of the project. Azure provides a very reliable service and integrates very well with the tools used by the project development team. A prototype was successfully developed in very little time for demo purposes with no cost whatsoever. As well, the development team was based in a different country that the client, so having a cloud based platform proved very productive in terms of turning around enhancements and defects.
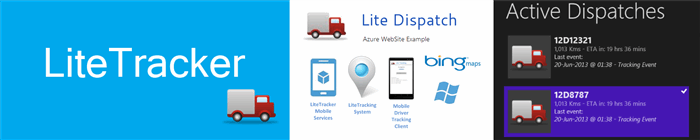
This article example application, LiteDispatch, is based on this project.
Roadmap
I am planning the following stages in the execution of the article so aligns to the challenge schedule:
- Build Web Site Prototype
At this stage a ASP MVC application should be available with some basic functionality to demonstrate the workflow for a haulier to input dispatch details; it would be a prototype so at this point we focus in setting the environment using WebSites in Azure, integrate to a GitHub repository and get some UI functionality in place. It would also discuss how to implement simple authentication using EF and SQL-CE. - Integrate to SQL Azure
This phase discusses about setting a Business Domain and develop a persistence layer using EF. In first instance it would cover integration with SQL-CE and at the end of the article it would demonstrate how to move the database to SQL Azure. - Virtual Machines
This is a new aspect for me, I never use it before in Azure. Couple ideas would be to install SQL-Express and then to see what it takes to integrate it with the Web App. I am also interested in the generation of reports in PDF format, it might well be the ideal problem to resolve using Virtual Machines. - Mobile Access
Two aspects to cover at this stage; firstly, ensure that the web application works correctly in a table. The second aspect is to integrate a server email notification each time a haulier creates a new delivery list.
Solution Artifacts and More
The LiteDispatch is deployed on the following Azure website:
http://litedispatch.azurewebsites.net/
To use the site you need the following credentials for the login screen:
user: codeproject
pwd: litedispatch

The source code can be found at LiteDispatch GitHub repository and the latest source code is available here
Build A Website
Create an account in GitHub and then install GitHub for Windows
Then, from the GitHub client, add a new repository and publish it:
Now, you just need to copy the projects to your local repository, the attached source code in this article might be used for testing purposes. Once you have the application running locally, commit the changes to GitHub:
Create An Azure WebSite Integrated With GitHub
You need to have an account in Azure, if you don't have one then you might want to check out at for the free trial. Once you are in the portal, create a new website by selecting New>WebSite>QuickCreate:
Now, you need to enter your website name and your preferred Azure region, for example:
Once the website is created, go back to the home website page and select "Set up deployment from source code control", then select GitHub, it would request your GitHub credentials:
Then select the repository and the branch that you want to deploy to the Azure WebSite:
At this stage, Azure automatically deploys the latest source code, if everything goes well you should see something like the following under the deployment tab:
Now you should be able to open the website in your browser:
At this stage, if you make any code changes and push the commit to GitHub, you can see within a couple minutes the latest version being deployed in Azure. Not too bad, it probably takes less than 10 minutes to create a free trial account and have your web site running.
The LiteDispatch at this stage uses the following technologies:
- ASP MVC 4
- Forms Authentication using simple membership and role providers
- Entity Framework configured to connect to SQL-CE
I used the Visual Studio MVC4 template to create the LiteDispatch project as it can be noticed on the screenshots, everything in this template seems to work out fine when deployed on Azure. As mentioned before, the solution has the NuGet package restore enabled which works fine in Azure without any additional configuration settings, this is a bonus as it reduces deployment times enormously and the size of the repository as well.
For authentication purposes, I used the Simple Membership in MVC 4. In this way hauliers need to obtain a user and password before they can gain access to the site. A haulier role was created for this sort of users as well.
The default MVC4 Template in Visual Studio is set to use the Simple Membership by default, the web.config is configured so it sets the role and membership managers as follows:
...
    <roleManager enabled="true" defaultProvider="SimpleRoleProvider">
    <providers>
    <clear />
    <add name="SimpleRoleProvider" type="WebMatrix.WebData.SimpleRoleProvider, WebMatrix.WebData" />
    </providers>
</roleManager>
<membership defaultProvider="SimpleMembershipProvider">
    <providers>
    <clear />
    <add name="SimpleMembershipProvider" type="WebMatrix.WebData.SimpleMembershipProvider, WebMatrix.WebData" />
    </providers>
</membership>
</system.web>
The authentication is set to Forms in the web.config:
<authentication mode="Forms">
    <forms loginUrl="~/Account/Login" timeout="2880" />
</authentication>
In the Account controller the Login logic is very straight forward:
[HttpPost]
[AllowAnonymous]
[ValidateAntiForgeryToken]
public ActionResult Login(LoginModel model, string returnUrl)
{
if (ModelState.IsValid && WebSecurity.Login(model.UserName, model.Password, persistCookie: model.RememberMe))
{
return RedirectToLocal(returnUrl);
}
ModelState.AddModelError("", "The user name or password provided is incorrect.");
return View(model);
}
The WebSecurity class is part of the WebMatrix.WebData assembly that manages the Simple membership.
One aspect to notice is the filter applied to the controller: InitializeSimpleMembership. It ensures that the EF context is initialised:
[AttributeUsage(AttributeTargets.Class | AttributeTargets.Method, AllowMultiple = false, Inherited = true)]
public sealed class InitializeSimpleMembershipAttribute : ActionFilterAttribute
{
private static SimpleMembershipInitializer _initializer;
private static object _initializerLock = new object();
private static bool _isInitialized;
public override void OnActionExecuting(ActionExecutingContext filterContext)
{
LazyInitializer.EnsureInitialized(ref _initializer, ref _isInitialized, ref _initializerLock);
}
private class SimpleMembershipInitializer
{
public SimpleMembershipInitializer()
{
Database.SetInitializer<UsersContext>(null);
try
{
using (var context = new UsersContext())
{
if (!context.Database.Exists())
{
((IObjectContextAdapter)context).ObjectContext.CreateDatabase();
}
}
WebSecurity.InitializeDatabaseConnection("SecurityDb", "UserProfile", "UserId", "UserName", autoCreateTables: true);
}
catch (Exception ex)
{
...
}
}
}
}
Currently only the Authentication entities are persisted to the back-end database, the rest of the business instances are not yet in place and instead the screens are using mocked MVC Models instances.
The solution is using EF Code First to manage the persistence and CRUD operations of the UserProfile entity which is declared at the AccountModel.cs file:
[Table("UserProfile")]
public class UserProfile
{
    [Key]
    [DatabaseGenerated(DatabaseGeneratedOption.Identity)]
    public int UserId { get; set; }
    public string UserName { get; set; }
    public string EmailAddress { get; set; }
}
The EmailAddress field is an extended property from the default model so you can see how you can extend the model if required. For example, a property could have been added to provide a link between a user and the haulier that works for.
An EF DbContext is also declared in this file:
public class UsersContext : DbContext
{
public UsersContext()
    : base("LiteDispatch.Security")
{
}

public DbSet<UserProfile> UserProfiles { get; set; }
}
Notice that the passed connection string matches to the one declared on the web.config:
<connectionStrings>
    <add name="SecurityDb" providerName="System.Data.SqlServerCe.4.0" connectionString="Data Source=|DataDirectory|\LiteDispatch.Security.sdf;default lock timeout=60000" />
</connectionStrings>
Besides the Entity Framework default packages, the following were added to the solution so it can use a SQL-CE database:
Once the above packages are installed the web.config is modified to work with SQL-CE as follows:
<entityFramework>
<defaultConnectionFactory type="System.Data.Entity.Infrastructure.SqlCeConnectionFactory, EntityFramework">
    <parameters>
    <parameter value="System.Data.SqlServerCe.4.0" />
    </parameters>
</defaultConnectionFactory>
</entityFramework>
<system.data>
<DbProviderFactories>
    <remove invariant="System.Data.SqlServerCe.4.0" />
    <add name="Microsoft SQL Server Compact Data Provider 4.0" invariant="System.Data.SqlServerCe.4.0" description=".NET Framework Data Provider for Microsoft SQL Server Compact" type="System.Data.SqlServerCe.SqlCeProviderFactory, System.Data.SqlServerCe, Version=4.0.0.0, Culture=neutral, PublicKeyToken=89845dcd8080cc91" />
</DbProviderFactories>
</system.data>
You may also want to install the Visual Studio SQL-CE Toolbox extension:
We are going to cover in great detail the persistence aspects of the application in the next article, but it is worth mentioning that EF Migrations were enable and the database is pre-populate with a couple users: admin and codeproject.
The following functions are available at this stage:
- User Authentication
- New Dispatch Note
- Dispatch Enquiry
- Dispatch Detail View
- Dispatch Detail Print
- Release Notes
User Authentication
We have already covered this aspect in the previous section but there is one aspect to mention: how to generate the database from scratch. The project has the EF Migrations setting enable, we can use the Update-Database -force command on the Package Management Console:
This is handy if you want to create the database and table schema, it also performs a database seed that you can customised. In the LiteDispatch case the Configuration class is used when the Update command is invoked, it creates two roles: haulier and administrator and two users: admin and codeproject:
internal sealed class Configuration : DbMigrationsConfiguration<UsersContext>
{
public Configuration()
{
    AutomaticMigrationsEnabled = true;
}

protected override void Seed(UsersContext context)
{
    WebSecurity.InitializeDatabaseConnection(
    "SecurityDb",
    "UserProfile",
    "UserId",
    "UserName", autoCreateTables: true);

    CreateAdminUser();
    CreateHaulierUser();
}

private void CreateAdminUser()
{
    if (!Roles.RoleExists("Administrator")) Roles.CreateRole("Administrator");

    if (!WebSecurity.UserExists("admin"))
    {
    WebSecurity.CreateUserAndAccount(
        "admin",
        "password",
        new { EmailAddress = "admin.staff@lite.dispatch.com" });
    }

    if (!Roles.GetRolesForUser("admin").Contains("Administrator"))
    {
    Roles.AddUsersToRoles(new[] { "admin" }, new[] { "Administrator" });
    }
}

private void CreateHaulierUser()
{
    if (!Roles.RoleExists("Haulier")) Roles.CreateRole("Haulier");

    if (!WebSecurity.UserExists("codeproject"))
    {
    WebSecurity.CreateUserAndAccount(
        "codeproject",
        "litedispatch",
        new { EmailAddress = "bluewhale.staff@lite.dispatch.com" });
    }

    if (!Roles.GetRolesForUser("codeproject").Contains("Haulier"))
    {
    Roles.AddUsersToRoles(new[] { "codeproject" }, new[] { "Haulier" });
    }
}
}
New Dispatch Note
In this screen the user enters a new dispatch by uploading an excel file that conforms to a given format. A template of this file is available on the screen at the "DownLoad Template" link. Currently the file content is not checked at all as the data is mocked, but the application still checks that the file type is the correct one, as a result this screen only works correctly if the local machine recognises XLSX files.
Once the file is uploaded, an screen is displayed so the user can verify the imported details:
If the dispatch note is confirmed, then the user is taken to the active dispatch screen:
From this screen the user can drill down to see the dispatch details or print it.
Challenge 2 Spot Prize: Easter Egg
Find the LiteDispatch easter egg at the login page, click on the CodeProject logo to see bobs appearing, the more you click the more bobs:
I have used the HTML5 Canvas functionality in conjuction with the KineticJS library. It is the first time I use it, the documentation is good, it was not a question of five minutes to get the animation working but I am happy with the result.
The code can be found at the login.cshtml file, the following is the javascript that gets the animation working:
<script defer="defer" type="text/javascript">
    var stage = new Kinetic.Stage({
        container: 'kinectContainer'

    });
    var layer = new Kinetic.Layer();
    stage.add(layer);

    function addBob() {
        $('#kinectContainer')
            .css("position", "absolute")
            .css("bottom", "0")
            .css("top", "0")
            .css("left", "0")
            .css("right", "0");

        stage.setWidth ($('#kinectContainer').width());
        stage.setHeight($('#kinectContainer').width());

        var imageObj = new Image();
        imageObj.src = '@Url.Content("../../Images/bob.png")';

        var period = 8000;
        var randX = Math.random() * 2 - 1;
        var randY = Math.random() * 2 - 1;
        var centerX = stage.getWidth() / 2;
        var amplitudeX = stage.getWidth() / 2 * randX;
        var centerY = stage.getHeight() / 2;
        var amplitudeY = stage.getHeight() / 2 * randY;
        imageObj.onload = function () {
            var bob = new Kinetic.Image({
                x: 0,
                y: stage.getHeight() / 2,
                image: imageObj,
                width: 64,
                height: 88,
                name: 'bob'
            });
            layer.add(bob);
            var rotDeg = Math.random();
            var animBob = new Kinetic.Animation(function (frame) {
                bob.setX(amplitudeX * Math.sin(frame.time * 2 * Math.PI / period) + centerX);
                bob.setY(amplitudeY * Math.sin(frame.time * 2 * Math.PI / period) + centerY);
                bob.rotateDeg(rotDeg);
            }, layer);

            animBob.start();
        };
    }

    $('#moreBobs').click(addBob);
An aspect that resulted more problematic that I envisaged was to set the div for the Canvas in a full screen mode. I am not sure why but CSS was not working for me so at the end I had to modify the div using jQuery as it can be seen in the code above.
Challenge 3 - Using SQL on Azure
At the end of challenge 2 a prototype of the application was running on an Azure WebSite, it had few screens working and security was available using the Simple Membership components. It even had a basic workflow in place where the haulier could upload a dispatch note file. But in the back-end all this stuff was being stored on the session instance and it had not persistence functionality built into whatsoever. In this section we discuss the persistence components of the application and what it takes to get them working in Azure. It discusses two different implementations: SQL-CE in-line and Azure SQL.
A set of persistence components were developed for this stage on top of the EF classes, in this way the Domain Entities can interact with the persistence back-end seamless but at the same time decoupled from the EF. Among the new persistence components, this section in the article discusses two of them in detail: Unit of Work and Generic Repositories.
In terms of ORM mapping, the EF Code First approach is getting better and better, for simple models like the one in this project, it just does the job extremely well with minimum effort. I am still a pretty much a NHibernate dev and little sceptical that EF would do the job in a medium/large project. Saying so, I keep checking on the EF for the last four years and it is good to see they are getting better and better. There is a good article discussing the two ORM implementations that I recommend to read, it concludes with the following statement:
Nevertheless, the RAD aspect of EF cannot be ignored and is important for small short-running projects where SQL Server is the norm. And for those projects, I would wholeheartedly recommend EF. But for the bigger systems where a NoSQL solution is not an option, especially those based on Domain Driven Design, NHibernate is still the king in town.
There was one aspect that I wanted to get working, I wondered if it was possible to have two EF contexts concurrently working, one is using SQL-CE and the other using Azure SQL. As a result, I set the Security model to use its own context, and then the Domain entities their own one. I was concerned that it could be a nightmare to configure. But I was surprised to see that it did not have much of a trouble once the databases where in place. I had to create and update the database in a sort of manual way to get things running, but as I said, once things are in place I found the connection and data provider settings working extremely and surprisingly well. In relation to the Azure SQL installation, the new portal is extremely easy to use and makes the task very easy to accomplish. As a result, the creation of a database in Azure is tons much easier that it was couple years ago. This section in the article discusses the steps that are required to get your database running in Azure.
Unfortunately I got myself in a little of a trouble with the two database contexts. When I tried to get my database schema deployments using the EF Migrations I found more problems that I originally expected. I cover later in this section in detail how I got around these issues, it might help people with similar requirements.
In summary, it was a nice challenge and it was worthy to see what it takes to get two context working concurrently; not something that I come across everyday but there is always someone than needs to connect to more than one database for some reason.
Contents On This Section
The section discusses the following topics:
Domain Entities
Three domain entities were created to persist the data used on the current web site pages: Haulier, DespatchNote and DispatchLine.
To accommodate the new Domain and persistence requirements, two new projects were added to the solution: Domain and EF. A third project (LiteDispatch.DbContext) was created a later stage in order to resolve the issue I encountered with Migrations.
The domain project comprises the domain entities, models, transformations, the persistence interfaces and base implementation. The EF project comprises the Entity Framework persistence implementation. The domain entities follow some design guidelines that are described in detailed on the WCF By Example article series. The series are based on a solution with a WPF Client in a tier that talks to a WCF Server component. The server side components are designed in a way that can be easily used in other set of projects, for example an MVC project. This persistence layer is designed in a generic way so it can easily accommodate a different set of persistence implementations; currently the series cover four implementations so far: EF, NHibernate, RavenDB and InMemory.
In relation to some of the basic patterns used on the domain entities, the entities are defined so transient instance are not permitted, collections are not exposed directly and all properties have private setters. In this way, the Entity state can only be modified by invoking public methods on the entity instances themselves. It is a pattern that facilitates the persistence and maintenance of the solution. The mentioned series cover in more detail the reasons and the implementation of such a design.
The mappings between Models and Entities are easily achieved using AutoMapper; this is a helper library that I find enormously beneficial and hugely recommendable, if you have not used it before, check it out, I am sure you won't regret it. I just love its fluent syntax and the inbuilt testing capabilities. In this project is being used in two static classes:
public static class EntityToModel
{
public static void Install()
{
    Mapper.CreateMap<DispatchLine, DispatchLineModel>();
    Mapper.CreateMap<DispatchNote, DispatchNoteModel>()
    .ForMember(d => d.HaulierId, m => m.Ignore())
    .ForMember(d => d.HaulierName, m => m.UseValue("Bluewhale"))
    .ForMember(d => d.Lines, m => m.MapFrom(s => s.DispatchLines()));

    Mapper.CreateMap<Haulier, HaulierModel>();
}
}

public static class ModelToEntity
{
public static void Install()
{
    Mapper.CreateMap<DispatchLineModel, DispatchLine>();
    Mapper.CreateMap<DispatchNoteModel, DispatchNote>()
    .ForMember(d => d.Haulier, m => m.Ignore());

    Mapper.CreateMap<HaulierModel, Haulier>();
}
}
Persistence Design and Unit of Work
A generic repository that comprises CRUD operations and a IQuerable method is provided so individual repositories are not required for each entity. To ensure that transactions are well managed, access to the repositories is provided by a repository locator. The repository locator is created by the transaction manager (which is the unit of work component in this solution). Access to the transaction manager is addressed by a factory class. A typical example of using the UoW components is as follows:
public DispatchNoteModel GetDispathNoteById(long id)
{
  return ExecuteCommand(locator => GetDispathNoteByIdImpl(locator, id));
}

private DispatchNoteModel GetDispathNoteByIdImpl(IRepositoryLocator locator, long id)
{
  var instance = locator.GetById<DispatchNote>(id);
  return Mapper.Map<DispatchNote, DispatchNoteModel>(instance);
}

private TResult ExecuteCommand<TResult>(Func<IRepositoryLocator, TResult> command)
    where TResult : class
{
  using (var transManager = Container.GlobalContext.TransFactory.CreateManager())
  {
    return transManager.ExecuteCommand(command);
  }
}
The example above is from the DispatchAdapter class, the controller has a reference to the adapter and exposes the method to retrieve a DispatchNote by Id. The ExecuteCommand is a helper method that gets a new instance of the UoW (TransManager) and executes the logic within the GetDispathNoteByIdImpl method. This last method requires a locator instance that is provided by the UoW. More details on this design pattern can be found on the mentioned series, also, if you have a chance, run the provided source code to see how it works.
Entity Framework Implementation
The EF project is the implementation of the repository and transaction manager for Entity Framework. The WCF by Example - Chapter XVI - EF 5 & SQL CE - AzureWebSites Deployment discusses in detail the different aspects of such implementation but it is worth noting the following aspects: the LiteDispatchDbContext, the ModelCreator and the inner mapping classes.
Database Context
The Entity Framework requires declaring a class that inherits from the DbContext class, in Code First this is extremely important as it is used to build the database schema as models are not defined. This LiteDispatchDbContext class then declares all the aggregate roots in our model and also indicates which customized EntityTypeConfiguration implementations are to be invoked. In order to do so, an instance of DbModelBuilder is passed to the OnModelCreating method. The base constructor passes the connection string declared in the web.config file to be used, in this case: DomainDb.
Model Creator
The Model Creator is declared in the Domain project. The purpose of this class is to declare in a fluent manner the mapping between domain entities and tables in the database. EF can figure out a lot from the entity classes themselves but in some cases, additional information is required so attributes and a Model Creator with the support of EntityTypeConfiguration instances can provide all the help required to get the model right. It is extremely straight forward class, it declares the root of our model aggregation and any class with any specialized mapping. In this case, it declares the Haulier entity as it is the root in the model (it also contains a mapping); and then declares the DispatchNote class as it contains a mapping class so the Model Creator needs to know about it. However, the DispatchLine entity is not required as its mapping does not require any additional configuration, as it is a child of the DispatchNote, the EF automatically includes it:
public class ModelCreator : IModelCreator
{
    #region Implementation of IModelCreator

    public void OnModelCreating(DbModelBuilder modelBuilder)
    {
        modelBuilder.Conventions.Remove<PluralizingTableNameConvention>();
        modelBuilder.Configurations
                    .Add(new Haulier.Mapping())
                    .Add(new DispatchNote.Mapping());
    }

    #endregion
}
Mapping Classes
For navigation of children entities purposes, as the solution uses the EF Code First approach, the solution must contain some sort of model declaration when the classes cannot provide by themselves enough information regarding the schema model. As a result, some entities declare an internal class that it is used by the ModelCreator class; the ModelCreator is then used when the EF database context is instantiated. For example, the Haulier class declares that it contains a collection of dispatch notes and that each DispatchNote has a reference to itself, the Haulier:
Deployment Options
For small applications deployed on Azure WebSites is very interesting to use a SQL-CE database for persistence purposes; it is a single file, which eases the deployment and maintenance, the performance is excellent and it easily integrates with your Domain if you are using and ORM framework like Entity Framework or NHibernate. The development turn around is good and you don't require access to a full SQL Server. Finally but not the least, it comes as a free option or very cheap in any case when comparing to the Azure SQL option.
But if you are working on a medium or larger project, you may want to use Azure SQL. An advantage of this approach is that it can be accessed by multiple applications inside and outside Azure. With SQL-CE, only the application deployed on the Azure WebSite can "talk" to the database. Also, Azure SQL provides excellent resilience and redundancy features that might well be required on your project.
SQL-CE Configurations And Migrations
When we described how to get the Simple Membership working with SQL-CE at the start of this article, we configured the EF so it could talk to a SQL-CE database: a new provider for SQL-CE was configured at that stage. As mentioned before, as a extra challenge at this stage of the contest, I am creating a second database for the domain entities, merely to proof that I can get an application in EF connecting to multiple databases with different providers. The connection string for the Domain when using SQL-CE is as follows:
<add
    name="DomainDb"
    providerName="System.Data.SqlServerCe.4.0"
    connectionString="Data Source=|DataDirectory|\LiteDispatch.Domain.sdf;default lock timeout=60000" />
Couple things to notice on the above connection setting; the name of the connection (DomainDb) is relevant as it is used in the LiteDispatchDbContext class:
And that the database would be located at the App_Data folder within the MVC project.
Setting Migrations
Entity Framework provides the Migration functionality which enables managing delta schema modifications on our database. It provides this feature by persisting version information in a table within the database. In a nutshell there is three basic steps when using migrations: Enable, Add Migration, Update Database.
In this project we have two contexts: Security and Domain. The first one is declared in the Web project and uses the EF in an standard way, as a result you may find that your own project would require very similar steps if you need to enable migrations. The second one, as I found, is not that easy to set properly.
In a nutshell these are the steps to follow to enable migrations and create the database for the first time:
- Enable Migrations
- Add Migration
- Update Database, which creates the database if is the first time
These steps are exactly the same in Azure SQL once we have a database in place. Another advantage of using SQL-CE is that the Migration component creates the database file if it does not exits. All the required steps are commands in the Package Management Console, you can find it on the VS menus under Tools>Library Package Manager>Package Manager Console. I found the following references on the web related to this topic:
Migrations For The Security Context
In first place, set the 'Default Project' to the LiteDispatch.Web project when dealing with migrations for the Security context.
Enable Migrations
Execute the 'Enable-Migrations' command, it creates the Migrations folder and the Configuration class (click on the thumbnails to expand the images):
Then at this point we want to modify the Seed method on the Configuration class so when the database is updated the SecurityDbManager is invoked ensuring that the default roles and users are created if they don't exist.
public class SecurityDbManager
{
  public void InitialiseDatabase()
  {
    WebSecurity.InitializeDatabaseConnection(
      "SecurityDb",
      "UserProfile",
      "UserId",
      "UserName", autoCreateTables: true);

    CreateAdminUser();
    CreateHaulierUser();
  }

  private void CreateAdminUser()
  {
    ...
  }

  private void CreateHaulierUser()
  {
    ...
  }
}
Then, I just need to add the following couple lines to the Migration class:
One thing to notice, if you execute the Enable-Migration command again, the Configuration class is overwritten so you will need to place those couple lines again. That is why I created the SecurityDbManager class in first place, instead of having all that logic in the Configuration class. If you use this approach, ensure that your logic checks whether or not the records need to be created as this logic is executed every time you invoke a database update.
Add Migration
At this point you want to create the first migration, execute the Add-Migration command followed by a name that you can easily identify, in my case I used: 'Add-Migration InitialModel'
This command creates a new class named the same as the migration was named when invoking the command:
namespace LiteDispatch.Web.Migrations
{
    using System;
    using System.Data.Entity.Migrations;

    public partial class InitialModel : DbMigration
    {
        public override void Up()
        {
            CreateTable(
                "dbo.UserProfile",
                c => new
                    {
                        UserId = c.Int(nullable: false, identity: true),
                        UserName = c.String(maxLength: 4000),
                        EmailAddress = c.String(maxLength: 4000),
                        HaulierName = c.String(maxLength: 4000),
                    })
                .PrimaryKey(t => t.UserId);
        }

        public override void Down()
        {
            DropTable("dbo.UserProfile");
        }
    }
}
This was the first time we created the model so the migration class contains all the classes in our model. In the case of the SecurityDbContext, we only have one class/table to create.
Update Database
The last step is to execute the migration so it creates the SQL-CE file, it runs the migration classes and then calls the seed logic that we have declared on the SecurityDbManager helper class. The command to execute is: 'Update-Database'
You can find the database file under the App_Data folder, you should include the database file into the project at this stage. Try to open the database to ckeck out the tables were correctly created, I used the SQL Server Compact Toolbox extension to do so:
As you can see, it created the UserProfile table but it also created a 'system' table called _MigrationHistory. Open it to see that effectively a record was created for the InitialModel database update:
And then we can have a look at the UserProfile table to ensure that the two default user records were also created:
At this stage, if we were to do any changes in the Security classes, we just need to execute another Add-Migration command and then apply the changes invoking an Update-Database. It is quite simple in principle, I am sure it can become more complicate but it is a good start point.
Migrations For The Domain Context
This is the tricky one to set, I found many issues to get this working, in first place is not a simple context, as it does not have a default constructor, it requires to declare a factory class that implements from the IDbContextFactory interface; it resulted that only works well when the DbContext and the interface implementations are declared in the same project. Another issue I found is that EF Migrations does not like projects with more than one context, as a result, I moved the context to its own project. Well, not really, what I did is to create a new DbContext that inherits from the LiteDispatchDbContext and then place this new one in a new project with the only purpose of managing EF migrations.
The new project is called LiteDispatch.DbContext and comprises the context factory DomainContextFactory and the LiteDispatchMigrationsDbContext class:
public class LiteDispatchMigrationsDbContext : LiteDispatchDbContext
{
public LiteDispatchMigrationsDbContext(IModelCreator modelCreator) : base(modelCreator)
{
}
}
public class DomainContextFactory
: IDbContextFactory<LiteDispatchMigrationsDbContext>
{
public LiteDispatchMigrationsDbContext Create()
{
    return new LiteDispatchMigrationsDbContext(new ModelCreator());
}
}
The purpose of the DomainContextFactory class is to help creating a LiteDispatchDbContext instance when a migration is executed. In a similar way to the Security context, the new project also contains a class to help seeding the database, in this case the class is called DomainDbManager:
class DomainDbManager
{
  public IModelCreator ModelCreator { get; set; }
  public DomainDbManager(LiteDispatchDbContext context)
  {
    ModelCreator = context.ModelCreator;
  }

  public void Install()
  {
    EntityToModel.Install();
    ModelToEntity.Install();
    var factory = new TransManagerFactoryEF(ModelCreator);
    using (var transManager = factory.CreateManager())
    {
      transManager.ExecuteCommand(locator =>
      {
        var haulier = locator.FindAll<Haulier>().SingleOrDefault(h => h.Name == "BlueWhale");
        if (haulier != null)
        {
          return Mapper.Map<Haulier, HaulierModel>(haulier);
        }
        haulier = Haulier.Create(locator, new HaulierModel { Name = "BlueWhale" });
        return Mapper.Map<Haulier, HaulierModel>(haulier);
      });
    }
  }
}
The DomainDbManager class ensures that a haulier instance exists with the name 'BlueWhale'. We'll see how we modify the Configuration class to use this class, it is just exactly the same way we saw for the Security context.
Ensure before we start that the 'Default Project' in the PM console is set to the LiteDispatch.DbContext project when dealing with migrations for the Domain context.
Enable Migrations
Just run exactly the same command that we saw before the other context: 'Enable-Migrations':
This command creates the Configuration class that we will modify so the Seed method calls the DomainDbManager class that mentioned above:
internal sealed class Configuration : DbMigrationsConfiguration<LiteDispatchMigrationsDbContext>
{
  public Configuration()
  {
    AutomaticMigrationsEnabled = false;
  }

  protected override void Seed(LiteDispatchMigrationsDbContext context)
  {
    new DomainDbManager(context).Install();
  }
}
Add Migration
As we saw before, at this point we can create the first migration, execute the Add-Migration command: 'Add-Migration InitialModel'. (I used the same name for the migration but it has nothing to do with the one that we created for the Security context in the previous section).
Once the command is done, we can see that a new class is created under the Migrations folder for the InitialModel migration:
If we have a look at the generated class, we can see that all the tables for our entities are created in this class:
public partial class InitialModel : DbMigration
{
    public override void Up()
    {
        CreateTable(
            "dbo.Haulier",
            c => new
                {
                    Id = c.Long(nullable: false, identity: true),
                    Name = c.String(maxLength: 4000),
                })
            .PrimaryKey(t => t.Id);

        CreateTable(
            "dbo.DispatchNote",
            c => new
                {
                    Id = c.Long(nullable: false, identity: true),
                    DispatchDate = c.DateTime(nullable: false),
                    TruckReg = c.String(maxLength: 4000),
                    DispatchReference = c.String(maxLength: 4000),
                    CreationDate = c.DateTime(nullable: false),
                    User = c.String(maxLength: 4000),
                    Haulier_Id = c.Long(nullable: false),
                })
            .PrimaryKey(t => t.Id)
            .ForeignKey("dbo.Haulier", t => t.Haulier_Id, cascadeDelete: true)
            .Index(t => t.Haulier_Id);

        CreateTable(
            "dbo.DispatchLine",
            c => new
                {
                    Id = c.Long(nullable: false, identity: true),
                    ProductType = c.String(maxLength: 4000),
                    Product = c.String(maxLength: 4000),
                    Metric = c.String(maxLength: 4000),
                    Quantity = c.Int(nullable: false),
                    ShopId = c.Int(nullable: false),
                    ShopLetter = c.String(maxLength: 4000),
                    Client = c.String(maxLength: 4000),
                    DispatchNote_Id = c.Long(),
                })
            .PrimaryKey(t => t.Id)
            .ForeignKey("dbo.DispatchNote", t => t.DispatchNote_Id)
            .Index(t => t.DispatchNote_Id);

    }

    public override void Down()
    {
        DropIndex("dbo.DispatchLine", new[] { "DispatchNote_Id" });
        DropIndex("dbo.DispatchNote", new[] { "Haulier_Id" });
        DropForeignKey("dbo.DispatchLine", "DispatchNote_Id", "dbo.DispatchNote");
        DropForeignKey("dbo.DispatchNote", "Haulier_Id", "dbo.Haulier");
        DropTable("dbo.DispatchLine");
        DropTable("dbo.DispatchNote");
        DropTable("dbo.Haulier");
    }
}
Update Database
At this point we are ready to execute the migration which would create the database and the tables. Just execute the same 'Update-Database' command that we discussed for the Security context. Once the command is done, you should be able to see the database in the Web project, beside the database for the Security context:
Open the Domain database, then check that the tables were created and that a Haulier record was created:
Azure SQL Deployment
At this point we have the web application running in Azure using two databases in SQL-CE. In this section we are going to see what it takes to migrate one of those databases to Azure SQL. At the end of the section, the application will connect to one SQL-CE database and one Azure SQL database.
Firstly, we will discuss what it is needed to get an Azure SQL instance in place, we will create a Azure SQL server instance and a database for the Domain context. Then we briefly cover Azure SQL tools and firewall configuration so you can connect to the database from outside Azure. Then, it covers migrations to Azure SQL and how to get application working.
Section Contents
In this section we see what it takes to create a new Azure SQL Server Database.
We need to create a SQL Server database in Azure. In the Portal, select the SQL Database menu on the left side and then click on the "Create A SQL Database" option.
Enter the database details, in this case we named it as 'LiteDispatchDb' and it was indicated that a new SQL Server was required. I used the minimum available size and the Web option, which happens to be more that enough for my application requirements
Then you need to enter the server details, here we cannot indicate which is the server name, Azure will assign a random name to it. But you need to enter user name, password and you preferred location for the server.
The user details are relevant as they are required for connection purposes at later stage.
At this stage we should have in the portal, in the SQL Database area, one new entry for our database installed in a new server, notice that at this point we get for the first time the server name that we just created, similar to the following screen:
Select your new SQL Server and then the 'Configure' option, in this screen you can open the firewall in the Azure side so you can connect to the SQL Server remotely.
It allows to add the current IP address to the 'allowed ip address', if you do so you can connect to your database when you are developing and also, it will allow you to use the Azure SQL tools. Once you added your IP address, just save the new settings by clicking on the Save menu option on the bottom of the screen.
You need to gather the connection details from the database dashboard, there is an option to view them at the Database dashboard.
We are going to use a ADO connection, you will paste those details later in the web.config file
Microsoft provides SQL Server management tools for the Azure SQL Server instances, you can find that home page at http://msdn.microsoft.com/en-us/data/tools.aspx and the downloads here
You need to have Visual Studio install and the download enhances the SQL Server Object Explorer so you can access the Azure Server remotely from your development machine.
You can easily add the Azure SQL Server by opening the 'SQL Server Object Explorer' menu under View. Then to add the Azure SQL Server, just right click on the 'SQL Server' folder.
Enter the Azure SQL Server details, including the user and password that you provided when working on the Portal. If you find issues connecting, ensure that your local IP address was added in the Portal as mentioned above. It is worth noting that some companies may have firewall policies in place that might stop the connection, you may need to talk to your admin if that is the case.
There are few good features that you may find useful, you can register, publish and export Data-tier application (DAC) database. DAC is a logical database management entity that defines all of the SQL Server objects - like tables, views, and instance objects, including logins – associated with a user’s database. A DAC is a self-contained unit of SQL Server database deployment that enables data-tier developers and database administrators to package SQL Server objects into a portable artifact called a DAC package, also known as a DACPAC. A BACPAC is a related artifact that encapsulates the database schema as well as the data stored in the database. You can find more information at this Data-tier Applications link.
There is also a menu option to check out schema differences between two database instances.
Application Settings
In relation to the connection settings, as the solution uses EF Code First, we can connect to the Azure SQL Database using a ADO connection; the portal provides this sort of data in a the link mentioned above so the connection to add to the web.config has the following structure:
<add name="DomainDb"
     providerName="System.Data.SqlClient"
     connectionString="Server=tcp:{server name}.database.windows.net,1433;
                       Database={database name};
                       User ID={your user}@{server name};
                       Password={your password};
                       Trusted_Connection=False;
                       Encrypt=True;
                       Connection Timeout=30;" />
So that is pretty much what it takes to get the application running against a database deployed in an Azure SQL Server if you are using Code First. Now, the only step left is to create the schema and seed some tables as we saw already.
Deploy Azure SQL Database Artifacts - Migrations
As we mentioned at the start of this section, we are going to deploy the context that manages the Domain Entities in an Azure SQL Server database. We had the context configured to run in SQL-CE and we created an initial migration.
In order to create the table schema, we are going to use the Migration function, it just requires the following steps:
- Set connection to point to the Azure SQL Database
- Run an Add Migration
- Execute Database Update
Change the connection to point to the new Azure SQL database as indicated in the previous section. Then in the PM Console execute the following command, remember to set the MVC project as the default project in the PM Console:
Add-Migration AzureUpgrade
Even you have not changed the Entities, you may find that changes are generated. This is a result EF finding out that the new database is an Azure SQL Server, or we should say, a SQL Server 2012. In any case, the changes should be minimal.
At this point we are ready to execute the schema installation. Just execute the following command in the PM Console:
Update-Database
If everything went fine, you should be able to run the application and see that it is correctly retrieving and creating records in the new Azure SQL Database. So it is very easy to migrate the database schema to Azure using the Migrations functionality, even when we upgrade from a SQL-CE to Azure SQL Server. I also like the fact that the migrations produced plain c# code, in some cases, I found very handy to be able to modify this code if required before I run the database update. As long as the schema is compatible with the entities you should not observe any issues.
Post Challenge Notes
Migrations And Maintaining SQL-CE and Azure SQL Server
|
| I realized that it was almost impossible to manage migrations with a single project if I wanted to maintain the SQL-CE and Azure SQL databases is sync. As a result I created a second project to maintain the SQL-CE database. It took me a while to realize the best solution but once in place it makes a lot of sense. In this way I can keep working most of the time offline or do changes locally. Only when I am happy with the latest changes I update the Azure SQL migrations and deploy schema changes with the latest code.
|
Challenge 4 - Virtual Machines
At this stage of the contest, I want to create another solution named LiteTracking. The purpose of this new component is to provide support for a tracking mobile application that would be used by truck drivers. The goal is to monitor in-transit deliveries on real time on the main application, LiteDispatch.
LiteTracking is an stand-alone application that provides an endpoint to a client application so notification messages can be transformed into in-transit information for a new dashboard screen in LiteDispatch. In this way in-transit vehicles can inform the distance and ETA (Estimated Time Arrival) to the final delivery destination.
The client mobile application only needs to provide the following information: truck registration number and current location coordinates. It is assumed that the client's device is GPS capable and has a connection to the internet. The client will initiate the trip by entering the truck registration, then a message is sent to the LiteTracking application. Refresh messages are sent automatically at a given interval time.
The LiteTracking application is deployed on Azure Web Site on IIS. It exposes REST methods using the WebAPI so the truck drivers can notify their current location. Then the application using the given coordinates uses a route service provider to obtain the required information: distance and ETA to destination. Once this data is obtained a confirmation response is generated to the truck driver's client application and a notification message is created for the LiteDispatch component.
This challenge will discuss the following technical aspects related to Azure Virtual Machines:
- How to create a virtual machine instance in Azure
- Configure the VM to host applications on IIS
- Configure the VM to accept external requests
- Enable infrastructure to send request to Route Provider
- Send notifications to Azure WebSite
It also covers the following changes and enhancements:
- Truck Driver Client App - Mobile Mockup
- Bing Map services integration
- Dashboard screen on the LiteDispatch application
- SignalR implementation to enable interactive dashboard
- WebAPI implementation to connect decouple application components
Some screen shots of proposed mobile client application:
| Start page of the client application, it is a very simple application that captures the current coordinates and send them to the application deployed on Azure VM to gather distance and ETA details. |
| When the trip starts the driver enters the truck registration details and sends a notification. |
| Once the message is received, the given coordinates are used to set a route on Bing Maps. Then distance and ETA details are calculated and sent back to the mobile device to acknowledge that the message was received and processed. In the back-end a notification is sent to the LiteDispatch application so the new dashboard screen can be updated. SignalR is used to sync the users' browsers so they don't have to manually refresh the browser. |
Up to this point, the haulier was able to create dispatch notes and enquiry active dispatch notes. With the addition of the LiteTracking application the haulier is also able to supply tracking details. As a result the following functionality will be available at the end of this stage:
The following diagram describes the three applications that the solution comprises at this stage of the contest, it shows how they interact between each other:
The mobile application communicates with the LiteTracking application using REST methods, as a result the VM in Azure needs to be configured to accept external incoming requests, this section describes how to configure ports in your VM so external applications can connect to it. You may find that you could have deployed this sort of functionality in an Azure WebSite or even on Worker Role. But, as it will be shown, if you want to have full control on the environment where you are deploying your application, Virtual Machines becomes the perfect solution.
Create A Virtual Machine in Azure
For hosting the LiteTracking application we are going to create a Virtual Machine in Azure, more specifically a W2008 Server running IIS. The LiteTracking application is just a MVC web application exposing WebAPI endpoints for the client. We will show how to configure the ports so it can be invoked from outside Azure at later stage, for the moment, lets see what it takes to have the server running.
In a nutshell, we need to take the following steps:
- Create VM with W2008 Image
- Configure Server to run IIS
- Smoke test the installation
- Configure ports
Go to the Azure main dashboard in your account and select to create a new VM:
Then indicate name of the Virtual Machine, image (Windows Server 2008 R2 SP1), size (Small), user details and location:
That is all what it is needed to do, just wait 5 minutes and the new server should appear in your dashboard running after is completely provisioned. At this point we want to remote into the new server, to do so, go to the virtual machines menu and select your new server; go to the dashboard and on the bottom menu bar select the "connect" menu option:
This action downloads a RDC file (Remote Desktop Connection), just save it and execute it. It will request your user credentials, the ones you created when the VM was created. If you enter the correct credentials you see that you are just connecting to your server using the standard remote client software, there is nothing special about having the server running in Azure, it is very simple. If you inspect the server at this point, you will see that there is very little running in the machine. You will have to configure the machine from scratch, lets see how much it takes to get the application running.
What I did in the past was to use a classic approach and install roles and so for. You can try that way but instead I am going to explain the quickest way to get things working: the Web Platform Installer (aka WebPI). But before I installed Chrome in the server, just to quickly avoid all the security warnings that IE displays when running in a Windows Server. You may find some of these steps take a little of time, I think is to do with the VM size that I selected, I did not try a bigger size but I suspect that so little memory and one single CPU can only get you so far these days.
The WebPI can be downloaded at: here. Once it is running, you need to select the following two packages:
- IIS Recommended Configuration
- Microsoft .NET Framework 4.0
It takes not time to download the files, the internet connection on the box is excellent. Again the pain is in the installation process itself in this small server. Once all packages are installed you should check that IIS is working correctly, you could check that the roles are properly running. I got myself couple errors to WAS but I think it was just noise as I find not issues later when deploying and testing the application. Maybe the best thing is to install a tester application on the machine, something that I always find very useful is to create a very basic MVC4 project using the default VS template and deploy it to the server to ensure everything is working fine. But in this case I am going to use the LiteTracking application to do so. I am keeping things very simple at this stage, I am publishing the app in my laptop to a local folder and then copy/paste it to the VM machine, so I am not going to try to publish directly to the VM. I have to manually create a Virtual Directory in IIS and then test that the application runs fine when using the browser in the server itself.
So the first step is to get the binaries, you just need to publish into a local folder using VS and then copy the files as I mentioned above. Publishing is very easy from within VS, just right click on the project file and select the publish option. Then just indicate that you want to publish to a file location:
Copy the published folder into the clipboard and then you just need to go back to the remote server session, open an Explore window; navigate to the wwwroot folder and copy the files there, a good practice is to compress the file into a zip file before you do the transfer. I find that sending a single file works out much better:
Then I need to create a new Web Site and a new application pool for .NET 4:
And we set the location to the folder where we copied the binaries:
And I change the default port settings so the web site will be listening at port 8899, this is a very important detail as we will see later when configuring the server firewall:
At this stage we should have things already working, if you open a browser instance and navigate to localhost:8899, you should see the home page of the web site that we just deployed:
Nothing very spectacular but it is promising, let's see if we can get something else working. So lets check if the route service is working. For testing purposes, lets check how far is Paris from Berlin. The Rest method with Paris coordinates is: http://localhost:8899/Api/Tracking/GetRouteDetails?latitude=48.85693&longitude=2.3412&truckRegistration=12D287
|
| Currently the application is set to calculate the distance and ETA from a given location to Berlin. We set Berlin to be the final destination of all trucks. This is obviously something that in a production environment must be enhanced but for the purpose of this contest I wanted to keep things simple as much as possible.
|
As you can see, there is nothing special about getting the Bing Maps Service working in Azure. If it was working in our machine, you are going to find that it works much better in Azure, the performance is always very good and you should not find any issues when invoking the request in the VM to the BingMaps services. Another aspect is to invoke the new service from a client outside Azure. Let see what it takes to expose the service to an external client. In first place we need to gather our VM details, to be more specific the machine DNS name. If the Azure Portal, in the VM Dashboard page you can find the machine DNS details, in my case:
If you try in your local browser to invoke the following Uri: http://litetracking.cloudapp.net:8899/Api/Tracking/GetRouteDetails?latitude=48.85693&longitude=2.3412&truckRegistration=12D287 you see that there is a timeout. The Server in Azure is not accepting the incoming request. So the first thing to do is to enable an endpoint in the Azure Dashboard. Go to the main page for the VM and select the EndPoint menu on the top or select the Add menu on the task bar:
|
| You may want to replace the DNS server name used here (litetracking) by the (litetrackingservices) if you are trying to call the service that I deployed on Azure. As we will see later when discussing the creation of the VM image, I had to restore the machine using a different DNS name to the one I used originally, so the DNS name used here does not exist anymore.
|
Then enter the endpoint details, it is a TCP port and in this case I am using the same port number for routing the public and the VM ports:
At this point we are going to face a tricky one, setting the endpoint in Azure is not enough, by default Windows Server 2008 is set so it does not accept incoming requests, so we need to change the server configuration as well. To do so, open the Server Manager and navigate to the Windows Firewall options:
Go to the inbound rules node and set a new rule for a port, indicate that is a TCP port and the port number: 8899
For the rest options (action and profile), the default values are correct; just give a name to the rule and create it. Once the rule is in place, try again to invoke the REST method from your local browser instance. This time it should work. In general, this is the approach you will need to take in order to expose the Virtual Machine services outside Azure to external clients.
... And Then Couple Days Later
As I mentioned, when I was writing the article I was using a VM named differently to the one that is currently deployed. I also found couple issues when calling the Tracking services from other networks, as a result I did some changes.
Change The Azure VM EndPoint
Using a different port that 80 could be problematic from some locations, luckily Azure VM EndPoints comes to the rescue so I changed the EndPoint as follows:
VM DNS Name
The new VM DNS is different to the one mentioned when this section was written. If you want to test the VM Tracking REST method you want to use the following uri:
http://litetrackingservices.cloudapp.net/Api/Tracking/GetRouteDetails?latitude=48.202541&longitude=16.368799&truckRegistration=12D12321
The truckRegistration value must match one of the entries in the Active Dispatches screen in order to work. If you open the LiteDispatch screen using http://litedispatch.azurewebsites.net/Dispatch/Enquiry you can get a list of the trucks in transit so you can update the truckRegistration parameter accordingly.
And this a short list of coordinates that you may want to try:
| City | Latitude | Longitude |
| Madrid | 40.4203 | -3.70577 |
| Paris | 48.85693 | 2.3412 |
| Rome | 41.903049 | 12.4958 |
| Vienna | 48.202541 | 16.368799 |
| Istanbul | 41.040871 | 28.986179 |
| Moscow | 55.751709 | 37.618023 |
So for example, if we want to see how far and how long a truck in Vienna is from our office in Berlin, the url is: http://litetrackingservices.cloudapp.net/Api/Tracking/GetRouteDetails?latitude=48.85693&longitude=2.3412&truckRegistration=12D12321. And the response is:
|
| I found that Bing Maps is reporting almost double the duration that it does when calculating the route in the browser, I need to investigate what is going on, maybe it requires to pass some additional information.
|
One more thing, I have enhanced the response message so includes an error section in case the truck cannot be found in the LiteDispatch application and it also indicates whether or not the list of active dispatches was updated as a result of processing the tracking request.
Creating An Image
At this point you may consider to create an image of your server, it took a while to install IIS, setting the configuration was not bad but it was a little tedious, to say the least. So lets see what we need to do to create a VM Image for back-up purposes. As we saw, you can use images from the Image Gallery to easily create virtual machines, but you can also capture and use your own images to create customized virtual machines. An image is a virtual hard disk (.vhd) file that is used as a template for creating a virtual machine. An image is a template because it doesn’t have the specific settings that a configured virtual machine has, such as the computer name and user account settings. If you want to create multiple virtual machines that are set up the same way, you can capture an image of a configured virtual machine and use that image as a template. It is also important to be aware that a stopped VM still accounts for CPU usage therefore there is still some charges even it is not used. So there is value is deleting the VM if it is not used, however, creating a virtual image before we do so minimizes the time it would take to re-build a new one.
In first place we need to prepare the VM instance, to do so we need to execute the sysprep command in the the directory to %windir%\system32\sysprep from the command line. In System Cleanup Action, select Enter System Out-of-Box Experience (OOBE) and make sure that Generalize is checked:
The operation takes some minutes but eventually the machine is stopped, in my case it was almost 15 minutes, I was tempted to stop the machine in the dashboard thinking that something went wrong, be patient as eventually the machine should stop by itself. Then a capture action can be invoked:
The VM is deleted after the image is taken, but as we discuss later, it is simple to get it back running. The new image can be found at Virtual Machines under the Images menu:
To re-create our server, we just need to create a new VM and select the "From Gallery/My Images" option this time.
Then you just need to enter the VM details in the same way that we did originally. You may find that you cannot use the same DNS name, it may take sometime before the free up the DNS name of the VM that we deleted, but to be honest, I am not sure even if it is made available eventually. There is a last set of options regarding the "availability set", just leave the default values; you may want to disable the PowerShell remoting option though.
It will take few minutes to provision the machine once more, but when it is finished, just remember to set the endpoint once more in the Azure Dashboard before testing the Route services. I found that I had to remote and open the web site to get it working, maybe it was a timing issue, I am not sure. I need to investigate further how the VM behaves after a re-start.
Conclusions So Far
It is in some ways simple to get a Virtual Machine working in Azure, I just think there are a lot of small pieces to set before I can get to the stuff that I am really interested. For the application I am deploying, there is not doubt that a simple AzureWebSite is a lot more convenient. But it is also true that the VM option is very powerful, in scenarios where full control of the deployment environment is required, a VM is very desirable.
I found very beneficial the possibility of being able to create images for back-up purposes or just for the reason to speed up future installations. It is really nice to see the custom images available in the Gallery. There is only one aspect that concerns me, if you look at the blobs, you can see that Azure creates a blob for your VMs and Images. If you drill down into the containers you can see large blob instances, in my case they were 127 Gb in size. I end up having three blob instances and I am not sure if all of them are used or not. I would like to delete some at some stage. The name convention that is used is not very useful so I guess there is some room for a future improvement in this respect, otherwise I can see situations where things can get tricky if many images and VMs are required.
Put It Together
At this stage we have a new VM running and we deployed the first version of the LiteTracking application. We were able to invoke the service from outside Azure, it goes and deals with BingMap services and returns the route details. Now it is time to get all the pieces together, what we need is to send a notification to the LiteDispatch application that we deployed in AzureWebSites so it can change the state of the dispatch with the route details. In this way, users looking at the in-transit dispatches screen can figure out where the trucks are and if they are about to arrive.
I had a very productive last night and tons of code changes were added to the two applications. In summary, the following enhancements were done:
- LiteDispatch Application
- New TrackingNotification entity
- Changes in the Active Dispatches screen to render duration and distance route details
- New Tracking WebAPI Controller so notifications can be sent from the LiteTracking app
- New Core library so DTOs can be shared between the two apps
- LiteTracking Application
- Send route details to LiteDispatch using REST methods
The following section discusses the more relevant components that were added to the solution during this stage of the contest.
WebAPI Implementation
One of the most interesting aspects about the development done to get the integration working between the two applications is in relation to WebAPI. I had to expose endpoints in the LiteTracking application so any simple client could send the truck coordinates and, as well, the LiteDispatch application required another endpoint for tracking notification messages created when the new LiteTracking processes the truck route messages. I wanted to use REST services so I opted for MVC WebAPI methods instead of for example WCF services.
It is extremely easy to add a WebAPI controller to your MVC application, lets have a look at the controller in the LiteTracking:
public class TrackingController : ApiController
{
  [HttpGet]
  public TrackingResponse GetRouteDetails(string truckRegistration, double latitude, double longitude)
  {
    var response = new TrackingResponse
      {
        Latitude = latitude,
        Longitude = longitude
      };

    ProcessRequest(truckRegistration, latitude, longitude, response);
    return response;
  }
  ...
}
So couple things to notice is that the class inherits from ApiController and we used the HttpGet attibutute on the method. As indicated above, calling this method is easy using a browser as all the parameters can be declared on the uri.
In the LiteDispatch application we also added a new controller so notification messages can be sent when a truck sends its coordinates. The controller is very similar:
public class TrackingController : ApiController
{
  public TrackingController()
  {
    TrackingAdapter = new TrackingAdapter();
  }

  public TrackingAdapter TrackingAdapter { get; set; }

  [HttpPost]
  public TrackingResponseDto CreateTrackingNotification(TrackingNotificationDto dto)
  {
    return TrackingAdapter.CreateTrackingNotification(dto);
  }
}
It has couple things different, HttpPost is used instead to tag the method, and instead of passing primitive parameters we pass a DTO. So in this case it is not that simple to invoke the REST method from a browser. Lets show what is the code in the other side that invokes this method. In the LiteTracking application we have a method called SendNotification that is able to call the REST method as follows:
private void SendNotification(TrackingResponse response)
{
  using (var client = new WebClient())
  {
    client.Headers[HttpRequestHeader.ContentType] = "application/json";
    var notificationDto = new TrackingNotificationDto
      {
        Distance = response.Distance,
        DistanceMetric = response.DistanceMetric,
        Duration = response.Duration,
        DurationMetric = response.DurationMetric,
        Latitude = response.Latitude,
        Longitude = response.Longitude,
        TruckRegistration = response.TruckRegistration,
        Id = Guid.NewGuid()
      };

    var json = Newtonsoft.Json.JsonConvert.SerializeObject(notificationDto);
    var result = client.UploadString(GetTrackingNotificationUri(), json);
    var dto = Newtonsoft.Json.JsonConvert.DeserializeObject<TrackingResponseDto>(result);
    response.NotificationWasCreated = dto.Accepted;
    response.RequestGuid = dto.NotificationId;
    response.DispatchNoteId = dto.DispatchNoteId;
    response.Error = dto.Error;
    var r = dto;
  }
}
So a WebClient instance is created and we set the content type to be JSON. Then an instance of the DTO is created (notificationDto) and it is serialized into JSON data that is used when calling the method. See also how the response is also deserialized using JSON. In this case we use the Newtonsoft library, we will see later how the .NET framework can deserialize a JSON response when we look at the BingMaps implementation.
Following are some links regarding WebAPI development:
|
| You may need to implement a more robust logic around the code calling REST methods in a production solution. You should handle communication exceptions and maybe security aspects.
|
Bing Maps Integration
For tracking purposes we have used Bing Maps to gather route details. Currently the application is set so trucks deliver to an office in Berlin, trucks just need to send their coordinates and the LiteTracking application works out the rest. It gathers route details calling BingMap services and then sends the information to the LiteDispatch application before an acknowledge is sent back to the truck driver's client device.
The integration with BingMaps was relatively simple, again we invoke a REST method and the JSON response is deserialize using the DataContractJsonSerializer helper class. The trick here is the Response class. I obtained this class and its children from the following link: Bing Maps REST Service .NET Libraries. These classes make the problem of navigating through the response object a lot easier. The following code is used to call the BingMaps service:
private Response GetRouteDetails(Uri uri)
{
  var wc = new WebClient();
  var response = wc.OpenRead(uri);
  var ser = new DataContractJsonSerializer(typeof (Response));
  if (response != null)
  {
    return ser.ReadObject(response) as Response;
  }
  return new Response();
}
A main difference with the Newtonsoft approach that we saw before is that the Response class and its children need to be declared as Contract classes using the WCF tags. The Newtonsoft library, instead, can use POCO objects when dealing with JSON messages.
You may not know but you need a BingMap key before you can call the services. You can obtain your own one at: Bing Maps Account Center. Then it is just a matter to stick it to the request as follows:
private void ProcessRequest(string truckRegistration, double latitude, double longitude, TrackingResponse response)
{
  const string query =
    @"http://dev.virtualearth.net/REST/V1/Routes/Driving?o=json&wp.0={0},{1}&wp.1={2},{3}&optmz=distance&rpo=Points&key={4}";

  var origin = new[] {52.516071, 13.37698};
  var uri = new Uri(string.Format(query, latitude, longitude, origin[0], origin[1], GetKey()));

  var bingResponse = GetRouteDetails(uri);
  ...
}
The GetKey() method returns a string from the application settings but you can just replace it by your own key. I found very easy to use the API and I was surprise of the amount of information that is returned. In this example we are only using two fields but there is tons of data returned from the services.
Following are some links that I found useful regarding BingMaps development:
SignalR Implementation
I have added SignalR to the LiteDispatch application in the Active Dispatches screen, the idea was that when a new dispatch note is created by other user, or a tracking notification is received, the screen will automatically refreshed without the intervention of the user. In the past, this sort of functionality was commonly implemented using timers in the client side. But with the SignalR library the server is able to send messages to the client and in this way notify that some state has changed, it happens that this is a very nice feature to have in your toolset. So I never used the library before and I thought this was a great opportunity, in summary, it worked very well for me, I was surprised how little code was required to get it working; it may seems that there is a little of magic going around but it just works very well.
So I have done two implementations, the first one consists on a popular SignalR chat implementation, a button in the screen allows a user to send messages to any other user that has the same screen open in a different session. The second implementation is the one that refreshes dispatch notes as they are created or updated. Let see how they were done.
Chat Implementation
In the Active Dispatches Screen there is a 'Send Message' button that displays a dialog window so the user can enter a the message to send to other users.
You need to add the SignalR package to the web application using NuGet, the installation ensures that the SignalR hubs are properly initialized when the web application starts. Have a look at the HubConfig class and the Application_Start method. In this example shows the client calling a server method, as a result, we declare a customized Signal Hub:
public class LiteDispatchHub : Hub
{
  public void Send(string name, string message)
  {
    Clients.Others.addNewMessageToPage(name, message);
  }
}
There are very few lines of code in that class but there are two very important aspects going on. In first place the Send method is declared so clients can send a message to the server passing the text of the message and the user name. Once the server receives the message what it does it is to invoke the addNewMessageToPage client method. This is where magic takes place, the server methods are well defined but the client methods are dynamic ones and we need to be careful that we tide them up correctly. That is all what we need in the Server side, let see what is needed in the client side.
The Enquiry.cshtml view renders the 'Active Dispatches' screen, at the start of the file, the auto-generated Signal proxy is declared:
@section headSection{
    <script src="~/Scripts/jquery.signalR-1.1.0.js" type="text/javascript"></script>
    <!--Reference the autogenerated SignalR hub script. -->
    <script src="~/signalr/hubs" type="text/javascript"></script>
}
Most of the magic happens when the application starts and generated the hubs script. The following code declares the method in the client side that the server uses in the Send method:
<script type="text/javascript">
var chat = $.connection.liteDispatchHub;
chat.client.addNewMessageToPage = function(name, message) {
alert("Message from: " + name + "\r\r" + message);
};
...
We also have a little bit of code binding the click event in the button so it can invoke the server send method.
$.connection.hub.start().done(function () {
    $('#sendMessage').click(function () {
        var userName = $('#userName').val();
        if (userName == "") {
            $('#userName').val(prompt('Enter your name:', ''));
            userName = $('#userName').val();
        }
        var message = prompt('Message:', '');
        chat.server.send(userName, message);
    });
});
|
| It is worth noting that the server methods are declared lower case in the client side, failing to do so can cause tons of time wasted finding out why the client cannot call the server method. I believe there is an attribute to indicate the method name in the client side in case you want to address this little issue.
|
Synchronization Feature
A common requirement is to ensure a dashboard web page gets automatically update when changes take place on the server side. This changes are normally caused by other users updating the state that is displayed on the page, but it could also be caused by other services in the back-end.
In the case of the LiteDispatch application, both situations take place: users can create new dispatch notes that should be displayed on the screen, but we also have the tracking notifications generated by the LiteTracking system. As a result we have two sort of events: new dispatch and update dispatch.
The mechanism is simple, when the server finds that a dispatch has been created or updated, it notifies all the clients that have the 'Active Dispatch' screen open. Then the client is able to retrieve the dispatch details with the notification details provided by the server. The client calls AJAX methods using jQuery that invoke actions in the controllers rendering partial views, i.e. HTML.
|
| I was able to send complex objects with SignalR all the way to the client, but I did not want to do all the HTML formatting on the client side using JavaScript. If I was using jTable, knockout or kendo, I would have probably used that approach avoiding a second trip to the server.
|
The client side implementation is simple, all the code is in the same Enquiry.cshtml file that we mentioned before. It declares the two client methods: newDispatch and updateDispatch, besides of a little of code to render the dispatch note html retrieved from the server, there is not much else going on. I left the alert as a test mechanism that the call took place.
chat.client.newDispatch = function (dispatchId) {
    alert("A new DispatchNote was created by other user with Id: " + dispatchId);
    $.get('@Url.Action("GetDispatchNoteDetails", "Dispatch")' + '?dispatchId=' + dispatchId, function (html) {
        renderDispatch(dispatchId, html);
    });
};

chat.client.updateDispatch = function (dispatchId) {
    alert("An existing DispatchNote was updated by other user with Id: " + dispatchId);
    $.get('@Url.Action("GetDispatchNoteDetails","Dispatch")' + '?dispatchId=' + dispatchId, function (html) {
        $('#dispatch_' + dispatchId).hide("slow").remove();
        renderDispatch(dispatchId, html);
    });
};

var renderDispatch = function (dispatchId, html) {
    $('#dispatches').prepend(html);
    $('#dispatch_' + dispatchId).hide();
    setDispatchesStyle();
    linksToButtons();
    $('#dispatch_' + dispatchId).show(2000);
};
In the server side, I only had to modify two sections of the code so the server will call the two methods that we just described. For invoking the newDispatch changes were done in the DispatchController; when a new dispatch is created, the client calls the Confirm action, here is where the server calls the client method as follows:
public ActionResult Confirm()
{
  TempData["NotificationMsg"] = "Last dispatch note was confirmed";
  var dispatchModel = LiteDispatchSession.LastDispatch;
  dispatchModel.CreationDate = DateTime.Now;
  dispatchModel.User = WebSecurity.CurrentUserName;
  var savedDispatch = DispatchAdapter.SaveDispatch(dispatchModel);


  var hubContext = GlobalHost.ConnectionManager.GetHubContext<LiteDispatchHub>();
      hubContext.Clients.All.newDispatch(savedDispatch.Id);


  return RedirectToAction("Enquiry");
}
And for the tracking notification, the LiteTracking systems calls the WebAPI CreateTrackingNotification method, so here is where the server invokes the client method as follows:
[HttpPost]
public TrackingResponseDto CreateTrackingNotification(TrackingNotificationDto dto)
{
  var response = TrackingAdapter.CreateTrackingNotification(dto);
  if (response.DispatchNoteId > 0)
  {
    var hubContext = GlobalHost.ConnectionManager.GetHubContext<LiteDispatchHub>();
        hubContext.Clients.All.updateDispatch(response.DispatchNoteId);
  }
  return response;
}
See SignalR In Action
If you want to check out how SignalR works, just follow the next couple steps:
You should see a pop-up window in the Dashboard page that indicates the truck that was updated, after closing the message the dashboard is refreshed and the updated truck goes to the top of the list.
Conclusion
Azure provides an easy way to install and configure Virtual Machines on the web so you can deploy a full set of applications and functionality that might not be easy to replicate in standard web sites. We have seen how you can take full control of the machine installing the operating system software and additional features that you require. Then we got our application running and retrieving information from BingMaps Services using REST methods and with very little effort we were able to send that information to the application deployed on an Azure WebSite in the second stage of this contest. At this point the only aspect left was to expose the new Tracking application running in the Virtual Machine to external clients; so we discussed in detail what configuration settings are required in the Portal and the Virtual Machine to enable such a functionality.
Finally, we demonstrated how you can create an image of our Virtual Machine and how easy is to restore it and get it working using the Azure Portal functionality.
Challenge 5 - Mobile Access
For this challenge I have put together a new application: LiteTracker. This is a Windows Store App that runs on any Windows 8 device, including Windows RT. I wanted to experiment with a particular interesting functionality in Azure: Mobile Services. Since last year I have been looking at the Push Notification feature in Windows 8 and this contest provided the best excuse to get it a chance. Push Notifications are designed for Windows Store apps that runs in Windows 8 or Windows Phone 8. So the last two weeks I put a lot of effort to come alone with what is my first operative Windows Store app using Azure Push Notifications. I has been a very busy time and I am sure there are tons of area for improvement. This section describes the How Tos, what things went well and those that did not went that well.
At this point in the contest we already have a set of applications, the Azure WebSite: LiteDispatch is hosting the core functionality. It provides an entry point to add dispatch notes and display them. In the previous phase a new component hosted in Azure Virtual Machines process incoming tracking notifications sent by truck drivers from their GPS capable mobile devices, this application: LiteTracking, process this information and with the help of Bing Map Services workout route information that is forwarded to the core web application. Last two weeks we discussed how using WebAPI and SignalR we developed a "responsive" dashboard web page around this functionality.
The new application: LiteTracker is an enhanced dashboard for tracking active dispatches, similar to the page developed on the Azure WebSite but with additional features and enhanced user interface. User with tablets will find the application very easy to use, in one single screen a user can follow up all the in-transit trucks. But its best functionality comes with its integration with Bing Maps and Push notifications. With the first one, Bing Map integration, a map shows where the truck is and it is very clear to see how much it will take it to get to its destination. The second one, Push Notifications, in first place the toast notification in Windows 8 ensures the user knows when a truck has sent a new tracking message and check its progress, but the application itself subscribes to the notifications so it can automatically request a refresh of in-transit truck details.
In summary, I think the new application is very appealing, it has an attractive interface and very easy to use but at the same time provides in one single screen all the information that a user needs to know. You may find that this sort of approach is probably successful for many other applications, the content will be different but the technical implementation might be very much the same.
When I started with the development for this phased I assumed that the following business processes will be supported by the current Mobile Services functionality:
- Tracking events are created in the LiteDispatch application
- As a result, the LiteDispatch is responsible for the creation of a Push Notification
- Mobile Services forward this messages to clients
- When an message is received in the client, besides of displaying the standard toast notification, the client application can subscribe to the push notification so it can request a refresh of the in-transit information
In a way, I am trying to use Push Notifications in a similar way we saw when using SignalR to update the 'Active Dispatch' page on the Azure WebSite: the LiteDispatch application. I want to get a 'toast' notification on Windows 8 but I also want to use this notification as a refresh mechanism.
|
| Two new projects were added to the solution for this stage of the contest. You need VS 2012 and Windows 8 to work with these projects as they are Windows Store App assemblies. I have added a link to the article so the source code of the solution at the 5th Challenge is available as well.
You need to download the Bing Maps SDK for Windows Store apps if you want to compiled the attached code for the Windows Store client application.
|
Solution Components And Technical Aspects
As mentioned above, at the end of this stage the solution will comprise the following components:
This section of the article discusses the following related Azure Mobile Service aspects:
- Windows Store Apps - Developer Account
- Dev Center - Application Configuration
- Azure Mobile Services
- Create Service
- Create Tables and Scripts
- Configure Push Notification
- Client Development
- Client Push Notification settings
- Client Push Notification channel
- How to interact with Mobile Service Data in the client side
- Subscription to Push Notification in the client side
- Invoke Mobile Service REST methods from external applications
Other aspects covered in this section:
- Develop a Windows 8 Store App using C#\XAML
- Invoke WebAPI endpoints from W8 Store Apps
- Integration to Bing Maps
Following sections in the article discuss what it takes to get the Mobile Services configured in Azure, then it explains what changes are required in the client to get the Push Notification working and additional features in the Azure Web Site so it can create records in the Mobile Service Data tables using the Mobile Service REST methods. The section ends up discussing specific client aspects like Big Map integration, invoking WebAPI endpoints deployed in Azure WebSites and other related aspects of developing XAML applications for Windows 8.
Get The Infrastructure Running
In order to develop Mobile Applications in Azure and use the Push Notification functionality, you need to sign off for a Developer account with Microsoft. This is required as the application must be configured with application identity credential details provided by the Windows Store. So in order to start working with the set of technologies used in this section, you need to follow the next steps:
- Get a developer account - see the http://msdn.microsoft.com/en-US/windows/ web page for further details
- Register your application at the Window Store app
- Get application credential values from your Windows Store app and apply them to the Azure Mobile Services
- Associate the application with Windows Store using Visual Studio
So there are few steps to take before we can get our hands into the code, in my experience it is a little of a pain to acquire the developer account for the sake of spiking this sort of applications, it is not a terrible expense but I can see many people not trying it just for the fact of not giving away their credit card details. I have not gone through the whole application publishing process but so far I found easy to use the Windows Store portal. It took me a day to get the application working with Notifications, and that is including all the advance aspects that we will see later.
|
| There is one aspect that I would like to mention, when I was getting the developer account, Microsoft provides two types of accounts: individual and business. It was not clear, in terms of functionality, what was the difference between the two options but so far I found that the individual account provides all the functionality that I required.
|
Windows Store App
In relation to registering your application, couple things that you may not know:
- You don't need to have any source code in place to register your application
- Once you declare the application name, you just need to retrieve the client secret details, not further steps are require to start creating the Azure Mobile Service
|
| It is not easy to find out where the application credentials are located within the Windows Store dashboard. Inside of the Services page, look for the link to the Live Services site and then navigate to the Authenticating your service page. There you find the SID and client secret keys that you need to use in the Push section at the Azure Mobile Services dashboard.
|
So inside the Dev Center, in the application dashboard, go to the Services page and find the link to Live Services site:
Inside the Live Services page, navigate to the the Authenticating your service section and copy the tow secret keys, you will need them in the Azure Portal:
At this point, we can create a new Azure Mobile Service, if you are looking for further documentation regarding the Windows Store and Windows Store App development, you may find the following links helpful:
Azure Mobile Services
Setting up a new Mobile Service in Azure is very straight forward. It just requires to introduce couple parameters in the Portal's wizard: the Mobile Service name and the Azure SQL database that will use. This is an aspect to have in mind when considering Mobile Services, the current implementation is based on Azure SQL Server, and this aspect may be sufficient to stop some people from using the services altogether due to the cost of running a SQL Server database instance in Azure. It would be beneficial to see the services can use another set of storage options, tables for example, in a near future.
In my case, I am re-using the same Azure SQL instance that the LiteDispatch application runs, the wizard provides the option to use an existing instance so at least in this way it does not incur in any additional expense if a running instance is available. I did not experience any issues on the other application when taking this approach. The following screen shows the new service instance that was created, I named it litetracker, the same as the Windows Store App:
I would recommend to have a look at the Get Started With Data In Mobile Services at the Azure web site. It discusses in detail how to get working the example Windows Store app project that is available at the Mobile Services dashboard in the Portal. I found it the best way to get familiar with the functionality. The tutorials are easy to follow and helped me to get the application running with very little effort.
There is a key aspect regarding the services that took me a while to figure out. The services are mostly a set of functionality that exposes tables to Mobile Applications for persistence purposes. In a nutshell, the services do so by exposing REST methods around those tables. Scripts and Push Notifications are just additional functionality that works around those basic components.
In a simplified way, Mobile Services is about storing data in the Cloud. Notifications is just a fancy mechanism for the server to indicate to the clients that some data has changed, and you do so by storing data in a table which happens to have a sort of logical trigger (scripts) that uses a server-to-client channel to pass information probably based on the record that was just persisted. One important aspect to consider: you need to use the Mobile Service REST methods so the notification logic contained in the server scripts is executed; just adding records to the table is not sufficient. The server sends the notification in a similar way SignalR works, a channel is created between the server and client. The client uri is a piece of data that needs to be saved somewhere if the client requires the server to send information back to it. If the client initiates the conversation, the uri could be well contained in the request, but if an external event, like the tracking event, the Mobile Services need to be able to retrieve a list of clients that need to be notified. So what we do, when a client starts, it sends its uri to the server so it can be stored in a table that we named Channel.
I found myself at this stage that there seem to be too many small pieces to set and configure to get the notifications working and I felt it could easily get somehow confusing, however, once the design is understood it proves to work well and flexible. I mention this because at one point I thought only Mobile Applications were able to trigger notifications, but I was wrong, this is not the case, you can use any HTTP client that supports JSON to trigger notifications once you are familiar with the Mobile Services API. We will see later how the Azure WebSite LiteDispatch is able to create instances of what is called DispatchEvent using JSON and REST methods.
|
| Mobile Services in fact provide additional components and services like customer API (REST Methods) and Schedulers that you can use to send notifications without having to store records in tables, but you still need to store the client channels to push the notifications. One aspect you may want to look at regarding the channel records in a production environment, is the aspect that currently there is not way to automatic mechanism to purge obsolete channel records in the Data table.
|
Lets try to summarize from the point of Mobile Services what we want to achieve in terms of notifications:
- In first place we want to create a Mobile Service channel between the clients and the server, as we mentioned above, we need to store the client uri in a table. We need to create a new table called
Channel to store those details. Have a look the following link for an easy example of how this is done: Push notifications to users by using Mobile Services - Then we need another Data table called
DispatchEvent so when a tracking event takes place, the LiteDispatch application creates a record in this Data table. - An insert script is created so any clients that registered a channel can get a notification when a new record is create. As well, another script was added to the
Channel table to avoid insert duplicate records when a client starts. - We also need to configure the Push settings with the Windows Application credentials so we can associate client application to the Mobile Service at a later stage.
But before, lets have a look at what the Azure Portal provides out of the box in relation to Mobile Services:
The links with example code are very good and provides a simple way to get something running very quickly, I found them useful to do an initial exploration. The two menus: Data and Push are the two functions used in the following article sections.
Mobile Services - Data
We need to create two tables: Channel and DispatchEvent. Once they are created the Data web page should look something like:
To create a new table, navigate to the Data page and select the Create option on the bottom toolbar, enter the table name and don't modify the default values for the permissions. For the Channel table the dialog window looks like:
Do exactly the same for the other table: DispatchEvent. The following screen shows how the contents of the table after some notifications were created:
|
| When a table is created in Mobile Services, only one column is added to it, a Primary Key column named Id. The Mobile Services dynamically creates new columns as requests to create records are processed. This makes very easy to get things working and flexible for message purposes.
|
Scripts In Mobile Services
When a DispatchEvent is created, we want to generate a notification to the clients. We are going to use a INSERT script to help us to do so. In the portal, select Data and within the DispatchEvent table select the SCRIPT menu. Then replace the default INSERT script with the following code:
Just in case you need the above code, you can use the following:
function insert(item, user, request) {
    request.execute({
        success: function() {
            request.respond();
            sendNotifications();
        }
    });

  function sendNotifications() {
    var channelTable = tables.getTable('Channel');
    channelTable.read({
        success: function(channels) {
            channels.forEach(function(channel) {
                push.wns.sendToastText04(channel.uri, {
                    text1: item.eventType,
                    text2: "Truck: " + item.truck,
                    text3: item.trackingInfo
                }, {
                    success: function(pushResponse) {
                        console.log("Sent push:", pushResponse);
                    }
                });
            });
        }
    });
  }
}
To avoid creating multiple entries in the Channel table, an insert script checks whether or not the record already exists:
function insert(item, user, request) {
    var channelTable = tables.getTable('Channel');
    channelTable
        .where({ uri: item.uri })
        .read({ success: insertChannelIfNotFound });

    function insertChannelIfNotFound(existingChannels) {
        if (existingChannels.length > 0) {
            request.respond(200, existingChannels[0]);
        } else {
            request.execute();
        }
    }
}
Push Notification Mobile Services - Client Credentials
The last thing to configure before we look at the client implementation is to set the Push settings in the portal with the Windows Store application details. You need to add the Windows Application credentials: client secret and package SID from the Windows Store Portal at your application dashboard as we indicated before at the section above regarding the Windows Store.
With this information, you can associate at a later stage the client application using Visual Studio. Use the Push menu on the Mobile Service page to enter the details:
At this point, the Mobile Services are configured and we just need some changes in the new W8 client: LiteTracker to receive the notifications and a few lines in the Azure WebSite application: LiteDispatch so tracking events generate entries in the Mobile Services DispatchEvent table.
Mobile Services REST API - How to invoke notifications from external applications
This section discusses the changes that are required at the Azure WebSite (LiteDispatch) so when a tracking message is received, then it creates a DispatchEvent record in the Data Mobile Services table that we created in the previous section. Just to recap once more what the business process is about:
- Truck driver's mobile device sends GPS coordinates to the Azure Virtual Machine application: LiteTracking
- The coordinates details are processed using Bing Map services to retrieve distance and ETA information
- Tracking details are sent to the Azure WebSite: LiteDispatch
All the above functionality is in place at this stage, what we need now is the following functionality:
- Azure WebSite creates DispatchEvent record in the Mobile Services Data table
- Insert script is invoked and sends a notification to subscribers that created an entry in the Channel Data table
- Toast notification is generated in the client application: LiteTracker
- Client application automatically refreshes the dashboard presenting the latest information available from the Azure WebSite
In this section we cover the fourth item, the one about the Azure WebSite creating a DispatchEvent. As briefly mentioned at the start of this phase section, Mobile Services exposes Data tables using REST methods. The client library is just a set of helpers around sending REST methods to the endpoints in Azure, but you can also use basic HTTP requests in conjunction with JSON messages to call those endpoints. The following links provides extensive documentation regarding Mobile Services REST API and other related topics:
In our case we need to insert a record so I based my changes on the documentation regarding Insert Record Operation. The TrackingAdapter is being used by the controller that gets the Tracking notification that we described at point 3 in our set of business events listed above. The invoked method in the TrackingAdapter now also invokes the CreateDispatchEvent method as shows bellow:
private TrackingResponseDto CreateTrackingNotificationImpl(IRepositoryLocator locator, TrackingNotificationDto dto)
{
...
response = dispatchNote.CreateTrackingNotification(locator, dto, response);
if (response.Accepted)
{
var dispatchEvent = Mapper.Map<DispatchEventBase>(dispatchNote);
CreateDispatchEvent(dispatchEvent);
}
return response;
}
From the DispatchNote that is just amended by the tracking notification, a DispatchEvent instance is created, the implementation of the CreateDispatchEvent method is as follows:
private void CreateDispatchEvent(DispatchEventBase dispatchEvent)
{
  using (var client = new WebClient())
  {
    client.Headers[HttpRequestHeader.ContentType] = "application/json";
    client.Headers.Add("X-ZUMO-APPLICATION", "YOUR_APPLICATION_KEY");
    client.BaseAddress = @"YOUR_MOBILE_SERVICE_URI";

    var json = JsonConvert.SerializeObject(dispatchEvent);
    var result = client.UploadString(GetDispatchEventUri(), "POST", json);
  }
}

private string GetDispatchEventUri()
{
  return "tables/DispatchEvent";
}
So the REST method URI is the case of the LiteDispatch application is https://litetracker.azure-mobile.net/tables/DispatchNote, the request needs to be set so it is a POST type and we need to ensure that we set headers so we specify JSON content type and that the "X-ZUMO-APPLICATION" custom header is set with the application key. The object is then serialized using the JSON library before the request is sent.
The application key is found at the Azure Portal, go to your Mobile Service and check the bottom toolbar, there is an option called Manage Keys, if selected you should get the application and master keys, the following screen shows the one for the LiteTracker Mobile Service instance:
In the case of the LiteTracker Mobile Service, the "YOUR_MOBILE_SERVICE_URI" is https://litetracker.azure-mobile.net/. The dashboard for the service displays this information in the right column.
|
| The above code can be improved in few ways, you may want to change it so it runs asynchronously and ensure that exceptions are well managed. As well, the request URI and application keys should be stored in the application configuration file or similar.
|
After applying the above changes, when a tracking notification is processed, the Azure WebSite invokes the REST method in the Mobile Service and a new DispatchEvent record is created. Then a notification is sent to any client that successfully subscribed to the Mobile Service. The following couple sections cover the changes that are required in the client side to get Push Notification working.
Mobile Services - Client Channel Management
Clients require to indicate Azure Mobile Services that are available so messages can be forwarded to them. The Mobile Services library provides the MobileServiceClient class so clients can easy access Mobile Services API and Data tables. In this way we can persist in Azure the Push Notification client details that can be used for the Mobile Services to forward notifications at a later stage. The MobileServiceClient as mentioned before is just a helper class to access the REST methods exposed by the Mobile Services. In the case of the Windows Store App, the MobileServices class ensures that the Push Notification details are stored in Azure:
internal class MobileServices
{
  public MobileServices()
  {
    MobileServiceClient = new MobileServiceClient(
      "YOUR_MOBILE_SERVICE_URI",
      "YOUR_APPLICATION_KEY"
      );

    AcquirePushChannel();
  }

  public MobileServiceClient MobileServiceClient { get; private set; }
  public PushNotificationChannel CurrentChannel { get; private set; }

  private async void AcquirePushChannel()
  {
    CurrentChannel = await PushNotificationChannelManager.CreatePushNotificationChannelForApplicationAsync();
    var channelTable = MobileServiceClient.GetTable<Channel>();
    var channel = new Channel { Uri = CurrentChannel.Uri };
    await channelTable.InsertAsync(channel);
  }
}
The code above is very straight forward, it is worth to mention how it acquires a handle to the Channel table using the MobileServiceClient.GetTable method and then later it inserts a new instance in the Azure table by invoking the InsertAsyn method. The Channel class is just a POCO class as follows:
public class Channel
{
  public int Id { get; set; }

  [JsonProperty(PropertyName = "uri")]
  public string Uri { get; set; }
}
We mentioned before but it is worth recalling it again, the table in Azure is dynamic so the first time a Channel record is saved, the table is modified and it creates the Uri column, very cool. A MobileServices instance is created when the application starts so the channel, we saw before that the Azure side manages that duplicated are not generated in the Azure Channel table.
These are all the changes required for the application to get a Toast notification when a DispatchEvent is created in Azure. Just check that the application accepts Toast notification, to do so, you need to check the application manifest. Select the Application UI tab and select "All Image Assets", then validate that the option is enable. The following screen shows the configuration screen in Visual Studio:
Mobile Services - Subscribe to Push Notifications
With the code changes we have seen so far, the client application is already capable to get toast notifications when a tracking event takes place. The following screen shows an example:
But it would be nice that the toast notification provides some sort of mechanism so the client application can be automatically refreshed and displays the latest information. The PushNotificationChannel class provides an event handler called PushNotificationReceived that permits to do exactly what we are looking for. When the dashboard page is created, the application subscribes to this event and process it using the following code:
public sealed partial class DispatchNotesPage
{
  public DispatchNotesPage()
  {
    InitializeComponent();
    _mapServices = new MapServices(mapTrucks, BaseUri);
    App.MobileServices.CurrentChannel.PushNotificationReceived += CurrentChannel_PushNotificationReceived;
  }

  private async void CurrentChannel_PushNotificationReceived(PushNotificationChannel sender,
                                                             PushNotificationReceivedEventArgs args)
  {
    await Dispatcher.RunAsync(CoreDispatcherPriority.Normal, RefreshDispatchNoteSummaries);
  }
}
The RefreshDispatchNoteSummaries method creates an HttpClient so it invokes a WebAPI endpoint in the LiteDispatch that retrieves the in-transit dispatch details using the following code:
internal class TrackingServices
{

  public async Task<IEnumerable<DispatchNoteSummary>> GetDispatchNotes()
  {
    const string uriString = @"http://litedispatch.azurewebsites.net/api/tracking/ActiveDispatchNotes";
    var dispatchNoteSummaries = new List<DispatchNoteSummary>();
    using (var client = new HttpClient())
    {
      using (var response = await client.GetAsync(uriString))
      {
        if (response.IsSuccessStatusCode)
        {
          var result = await response.Content.ReadAsStringAsync();
          var dispatches = JsonConvert.DeserializeObject<List<DispatchNoteDto>>(result);
          dispatches = dispatches.OrderByDescending(d => d.LastUpdate).ToList();

          foreach (var dispatchNoteDto in dispatches)
          {
            dispatchNoteSummaries.Add(DispatchNoteSummary.Create(dispatchNoteDto));
          }
        }
      }
    }
    return dispatchNoteSummaries;
  }
}
|
| The WebAPI uses the DispatchNoteDto DTO class to send the data to the client, to facilitate the deserialization in the client side, a good approach, is to use the same class available in the client side. I used a trick quite common in Silverlight projects where a class is used to a client project using links. As a result only one version of the file exists and eliminates the need for maintaining two different files. It is a compromise required when dealing with Windows Store apps that can not have references to other assemblies that have reference to the full .NET libraries.
|
Once the new data is available, the user interface is modified to update the latest changes and it displays the Bing Map showing the route of the truck and tracking details (distance and time). The following screen shows the dashboard screen and describes its main components:
Bing Map - Windows Store App Integration
one interesting aspects on the Windows Store App is the integration with Bing Maps, when a truck is selected the truck is placed in the map using the last coordinates and then the route to the destination is worked out calling the Route REST Bing Map endpoint.
In order to provide that functionality, a service class named MapServices was created, it only exposes one public method that requires to pass a DispatchNoteSummary instance. The implementation of the method is the following:
private async void SetRoute(Location startLocation, Location endLocation)
{
ClearMap();
01
const string request = @"http://dev.virtualearth.net/REST/V1/Routes/Driving?o=json&wp.0={0},{1}&wp.1={2},{3}&rpo=Points&key={4}";
var routeRequest =
new Uri(string.Format(request, startLocation.Latitude, startLocation.Longitude, endLocation.Latitude,
endLocation.Longitude, _mapTrucks.Credentials));
02 var r = await GetResponse(routeRequest);
if (r != null &&
r.ResourceSets != null &&
r.ResourceSets.Length > 0 &&
r.ResourceSets[0].Resources != null &&
r.ResourceSets[0].Resources.Length > 0)
{
var route = r.ResourceSets[0].Resources[0] as Route;
if (route == null) return;
var routePath = route.RoutePath.Line.Coordinates;
var locations = new LocationCollection();
foreach (var t in routePath)
{
if (t.Length >= 2)
{
locations.Add(new Location(t[0], t[1]));
}
}
var routeLine = new MapPolyline
{
Color = Colors.Blue,
Locations = locations,
Width = 5
};
_routeLayer.Shapes.Add(routeLine);
var start = new Pushpin
{
Text = "S",
Background = new SolidColorBrush(Colors.Green)
};
_mapTrucks.Children.Add(start);
MapLayer.SetPosition(start,
new Location(route.RouteLegs[0].ActualStart.Coordinates[0],
route.RouteLegs[0].ActualStart.Coordinates[1]));
var end = new Pushpin
{
Text = "E",
Background = new SolidColorBrush(Colors.Red)
};
_mapTrucks.Children.Add(end);
MapLayer.SetPosition(end,
new Location(route.RouteLegs[0].ActualEnd.Coordinates[0],
route.RouteLegs[0].ActualEnd.Coordinates[1]));
var locationRect = new LocationRect(locations);
03 locationRect.Width += 0.5; locationRect.Height += 0.5;
_mapTrucks.SetView(locationRect);
}
}
Couple observation about the above code. In Line 01 and 02 the uri is set to invoke the REST method in Bing Maps to calculate the route. Line 3 is just a simple way to ensure that the Bing Map windows provides some margin so the start and end points are slightly inside the window rather that besides its borders.
public void RefreshMap(DispatchNoteSummary selectedItem)
public void RefreshMap(DispatchNoteSummary selectedItem)
{
  var location = new Location(selectedItem.Latitude, selectedItem.Longitude);
  if (location.Latitude == 0 && location.Longitude == 0) return;

  SetRoute(location, new Location(52.516071, 13.37698));
  var image = new Image
    {
      Source = new BitmapImage(new Uri(_baseUri, "/images/truck_map.png")),
      Width = 40,
      Height = 40
    };

  MapLayer.SetPosition(image, location);
  _mapTrucks.SetView(location);
  _mapTrucks.Children.Add(image);
}
The SetRoute private helper method is probably the most interesting aspect to look at. It takes the start and end locations and draws the route in the screen map. The operation is asynchronously so it does not block, as a result the truck icon is normally rendered before the route, calculating the route can be an expensive request so rendering the truck as soon as possible is a good trick to provide a more responsive user interface.
Screen Scaling In Windows Store App
Applications that scale automatically on different screen sizes is critical, even for Windows Store App, for example, Windows Surface Pro tables have a resolution of 1920x1080 pixels, but its little brother, the Windows Surface RT only has a resolution of 1366x768 pixels.
In order to provide dynamic user interfaces that automatically accommodates the size and aspect of UI components, XAML Windows Store applications uses the VisualStateManager component to deal with this sort of requirements.
If you look at the DispatchNotesPage.xaml, you find at the end of the file a section for the VisualStateManager, in there, several visual states have been declared:
- FilledOrNarrow
- FullScreenPortrait
- FullScreenPortrait_Detail
- Snapped
- Snapped_Detail
The view states with the "detail" suffix is applied when a truck item has been selected, this is the case when a narrow display is only available, then we may need to hide some of the details until an item is selected.
The DispatchNotePage page inherits from the LayoutAwarePage that comprises a set of helper methods to ensure the ViewState is updated when the screen resolution changes. Within this class there is a region named "Visual state switching" that declares the following methods:
| StartLayoutUpdates | When the page is created it maps the Application View and Visual states for the page invoking this handler. This method's main responsibility is to set visual state on controls. |
| InvalidateVisualState | Invoked to set the VisualStateManager in the page to the new visual state obtained from the screen size. |
| DetermineVisualState | Translates the ApplicationViewState into strings for visual state management within the page. |
Then the page can indicate within the XAML language how the controls change for each of the visual states, for example, when the ViewState is FullScreenPortrait, the following changes are done:
It is a simple mechanism that works well for most cases, in some circumstances additional enhancements are required and some specific behaviour may require dependency properties in controls to achieved the desired effect.
Contest Finale
It has been 10 fantastic weeks, it was a great challenge for me as it provided the best excuse to get to work with tons of functionality that I don't get to work with on daily basis. I have been experimenting with Azure for three years and it is incredible the functionality that is available these days when comparing with the early days. The only thing in common over the years is pretty much the name. I think there is real value for small companies to jump onto this sort of technology and provides services only available to bigger companies couple years ago. I have not had the change to play around with other Cloud platforms but I am very impressed with what I have seen so far when working with Azure.
It has been a busy time the last 10 weeks, there were many very long nights and very little sleep. I wished I had the time to look at some other Azure components, specially the Service Bus, maybe next time :). But I really enjoyed it and I would recommend anyone to spend time with the technology.
I want to thank the CodeProject team for putting together this fantastic challenge; it has been hard for us, the participants, but I cannot imagine the amount of work required to assess the articles every two weeks. Great effort.
The following it is 1 minute and a half video that shows the LiteTracker application running in Windows 8, it simulates two truck notifications and it shows the Toast notifications and how the application refreshes itself. It also shows some of the user interface capabilities and the Bing Map integration:
History
24-Jun-2013 - Fifth Challenge - Article section is complete -- video showing new client app was added 21-Jun-2013 - Fifth Challenge - Azure Mobile Services configuration section was added
19-Jun-2013 - Fifth Challenge - Mobile Services & W8 Store App - scope description for the last stage
17-Jun-2013 - Project wins Challenge 4 award
07-Jun-2013 - Fourth Challenge - Latest Source Code was added to the article -- SignalR is implemented in Azure -- Need further work in challenge article section
06-Jun-2013 - Fourth Challenge - Integration between LiteTracking/BingMaps/LiteDispath is working in Azure using VMs
05-Jun-2013 - Fourth Challenge - Create VMs and Images in Azure - Deploy WebAPI services application
28-May-2013 - Fourth Challenge - Describing the scope for the challenge
25-May-2013 - Third Challenge - Azure SQL Server and schema installation sections were added
21-May-2013 - Third Challenge - Migrations section is complete -- still working on the Azure SQL section
20-May-2013 - Third Challenge - WIP version
12-May-2013 - Second Challenge Spot - Easter Egg effect was added to the login screen
07-May-2013 - Second Challenge section was added to the article: Build A Website
06-May-2013 - Project wins Challenge 1 award
05-May-2013 - Azure Web Site article was added to the series
25-Apr-2013 - Article was created
This member has not yet provided a Biography. Assume it's interesting and varied, and probably something to do with programming.


 General
  News
News  Suggestion
  Question
  Bug
Bug  Answer
  Joke
Joke  Praise
  Rant
Rant  Admin
Admin 


