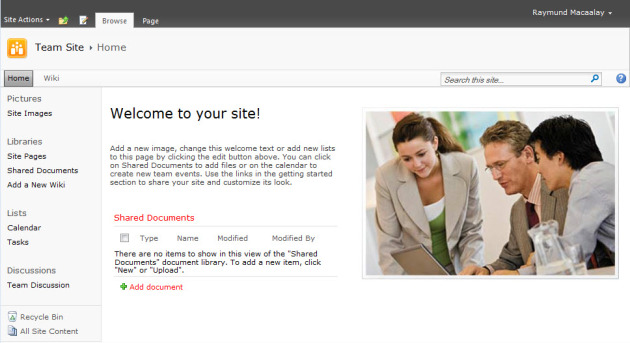
In case someone is wondering out there how to change the branding or design in Sharepoint, well, look no further as I will tell you the important thing you need to do. This will guide you in 13 easy steps how to redesign your Sharepoint 2010 Site.
Step 1
You should have a ready installed SharePoint 2010 site. If you don’t have one, you can download it at Microsoft, the free version is called Microsoft SharePoint Foundation 2010. It is the new version of Microsoft Windows SharePoint Services, but this is for Windows Server 2008.

Step 2
The next thing you need is a Microsoft SharePoint Designer 2010. This is not free and you need a license for it but for those who have MSDN subscriptions, you can find it in your subscriber downloads.
Now open your SharePoint site using the SharePoint Designer 2010 and go to the Navigation Side Bar, choose Master Pages and copy one of the Master Pages already available. You are doing this so that you don’t have to do everything from scratch and just update what you have, the best template to copy is minimal.master or v4.master.

Note you cannot paste it on the side bar, you have to paste it on the content pane.

Step 3
Now it's available on your side bar and click on it. The content pane now will contain the properties of the copied master page. Now click on the Edit File to edit your new master page.

Step 4
Once you click on edit, you can now edit stuff, now if you are a developer (I am assuming you are) everything will look familiar and you can now make your hands dirty and start typing you codes or modifying what’s in there. It is also like the Visual Studio where you can choose code, design and split view.

It's pretty straight forward as long as you know HTML and CSS.
Note if you want to add images or any form of media, you need to add it to library first as you can't upload it here while modifying your codes.

Step 5
Save your work, then set your new master page as your default Master Page by right clicking on your master page on the Side Bar.

Step 6
Go to your browser and refresh your SharePoint site to view you changes, you might have to repeat Steps 4 and 6 until you are satisfied with your design as the Designer would have lines and labels on it and you won't see the exact rendering on your browser. During this process, you do not need to repeat Step 5 as it is already set as the default master.

Step 7
Now you are halfway, and the next thing to do is your theme. This will act as your CSS for the whole site. To create a SharePoint 2010 theme, either you have to create it from scratch or do the copy and modify strategy. That’s what I did! I chose my favourite theme and copied it. To do that, go to Site Actions and choose Site Settings.

Step 8
In Site Settings, click on Site Theme:

Step 9
Now you will be presented with the installed site themes, choose what you like and remember the name. Now click the Theme Gallery.

Step 10
Now you are in the gallery, next is you download a copy for you to edit. Do that by choosing the theme you want and Send To then Download a copy.

Step 11
Now it's editing time, as you have noticed, the one you download is .thmx file and by default, it will open in PowerPoint (you won't be able to edit .thmx file in PowerPoint AFAIK). So you need to download this very handy tool which is free as well, it is called Theme Builder and you can download it from here.
It is a good and easy to use tool which does not need further explanation. Open your file and edit the things you need.

Step 12
Now save your file and upload it back to your SharePoint Site, by going back to the Theme Gallery and choosing add new item.

Step 13
Once it's uploaded, you will now see it on the gallery and click apply. That’s it. You have customized the look of your SharePoint.


 General
  News
News  Suggestion
  Question
  Bug
Bug  Answer
  Joke
Joke  Praise
  Rant
Rant  Admin
Admin 


