In this article, we will understand what is JSON and how to work with it using ASP.NET Web Forms, ASP.NET MVC, WCF and finally Web API.
In this article, we will understand the concept of JSON and then do some labs and learn how JavaScript communicates with different Microsoft technologies (like ASP.NET MVC, WCF, Web API and ASP.NET Web Forms) with the help of JSON.
(It takes a huge effort to write such kind of article. Please comment and vote if this article seems useful for you.)
What Will We Learn Today?
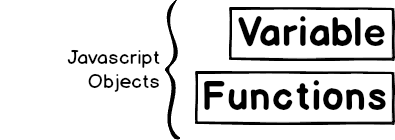
In the world of JavaScript, we have only two things. Variables and functions.
“Variables hold the data and functions are some special actions to be performed.”
 Variables may be of type
 int, string, and float or may be of type object.
“JavaScript objects are simply variables which hold up variables and functions into one unit and bring up encapsulation into life.”
In order to understand JavaScript object it’s not required to create a large ASP.NET MVC or Web Form project. We can do that with a simple HTML file.
Step 1
Open Visual Studio. Click File >> New >> File. Select HTML in the next screen:

Step 2
Create JavaScript object as follows:
<!DOCTYPE html>
<html lang="en" xmlns="http://www.w3.org/1999/xhtml">
<head>
    <meta charset="utf-8" />
    <title></title>
    <script type="text/javascript">
        var Customer =
            {
               Name: 'Anan Kumar', Address: 'USA'
            };
    </script>
</head>
<body>
</body>
</html>
Step 3
Access the Properties inside JavaScript object using “dot (.)” syntax as follows:
alert(Customer.Name);
Step 4
Say Cntr+S, Provide some meaningful name and save the file.
Step 5
Open the HTML file using your favorite user and test the application.
Output
Arrays – Defined as collection of elements of same type. Good news is even array of JavaScript object is possible.
Step 1
First step is going to be the same as above.
Step 2
Next step is create a JavaScript object array as follows and access it:
var Customers =
    [
        {
            Name: 'Anan Kumar', Address: 'USA'
        },
        {
            Name: 'Rajav Kiran', Address: 'UK'
        },
        {
            Name: 'Pappu Dabbawala', Address: 'USA'
        }
    ];

alert(Customers[0].Name);
Step 3
Save, execute and test page.
In the above image, a man and a dog are trying to talk to each other. Will they understand each other? The answer is simply No. Both of them have their own way of transferring messages. What one knows, the other can’t understand.
What’s the Solution?
The only solution is to have some common standards. If both of them can pass messages to each other in a format which both can understand, the problem can be solved.
Look around. Every time we see two different heterogeneous systems talking to each other, we will see some common standard.
We talk with our friends not only just using a common known language (like English) but also using proper grammar. When we want to talk with our computer, we write “Programs” (we know how to write a program and the compiler knows how to read it).
XML, commonly known as Extensible markup language, is a standard we represent the data/messages which can be passed across. In this internet world, communication plays an important role. Especially communication between two heterogeneous systems.
XML is simply a standard format in which data and messages will be represented and transferred across. Every system/technology knows about XML and can understand XML.
Simple Example of XML Format?
Let's say we have “Customer information (Customer Name, Address and Age)” and we want to transfer that information across the internet or may be transferred from one technology to another. First step will be representing customer information in XML format which will be as follows:
<Customer>
  <CustomerName>Russel Fernandes</CustomerName>
  <CustomerAddress>New York </CustomerAddress>
  <CustomreAge>56</CustomerAge>
</Customer>
Representing multiple customers using XML?
<Customers>
   <Customer>
       <CustomerName>Russel Fernandes</CustomerName>
       <CustomerAddress>New York </CustomerAddress>
       <CustomreAge>56</CustomerAge>
   </Customer>
   <Customer>
        <CustomerName>Rajesh Mishra</CustomerName>
        <CustomerAddress>India</CustomerAddress>
        <CustomreAge>59</CustomerAge>
    </Customer>
</Customers>
What are the Problems or Disadvantages of XML?
There are two major disadvantages with XML.
- Difficulties in XML Parsing - For some light weight technologies like JavaScript, XML parsing is not very easy. Once it gets the XML string emitted from other technologies, it gets the values (data) inside it with the help of custom logic.
- More Fat – Look at the structure of the customer data represented as XML in the above example. We can easily see many unnecessary tags attached to it. XML is comparatively heavyweight compared to JSON about which we will speak next.
| |
JSON, commonly known as JavaScript Object notation, is another standard for exchanging data between two different technologies.
How to Represent Data in JSON?
This is the best part - it’s the same like JavaScript object.
var JsonCustomerString = '{"Name": "Anan Kumar", "Address": "USA"}';
How to Represent Collection of Data in JSON?
Nothing new compared to JavaScript object.
var JsonCustomerString = '[{"Name": "Anan Kumar", "Address": "USA"},
{"Name": "Rajav Kiran", "Address": "UK"},{"Name": "Pappu Dabbawala", "Address": "USA"}]';
Is it the Same as JavaScript Object?
Not, it just a format in which we can represent data whereas JavaScript object is a variable which actually holds our data. There is no direct relation between JavaScript object and JSON. JSON is called as JavaScript object notation because JSON's structure looks like JavaScript object.
What are the Advantages of JSON?
- JSON is very simple. It’s just a key value pair. In XML, as we saw earlier, we end up with writing too many other things. JSON is light weight compared to XML
- Just like XML, it's platform independent. Almost all modern technologies has the ability to read and understand it.
- Data represented in the form of JSON can be easily transformed into JavaScript object and thus it will be easier for JavaScript to handle that data.
Step 1
Create a new HTML file just like the above.
Step 2
Define two JSON strings as below.
Simple Json string:
var JsonCustomerString = '{"Name": "Anan Kumar", "Address": "USA"}';
Json string containing collection of customers:
var JsonCustomerCollectionString = '[{"Name": "Anan Kumar", "Address": "USA"},
{"Name": "Rajav Kiran", "Address": "UK"},{"Name": "Pappu Dabbawala", "Address": "USA"}]';
Step 3
Convert JSON String to JavaScript object using JSON.parse method in JavaScript.
var Customer = JSON.parse(JsonCustomerString);

var Customers = JSON.parse(JsonCustomerCollectionString);
Step 4
Write the following code to access the elements in the JavaScript Object.
alert(Customer.Name);

alert(Customers[0].Name);
Step 5
Save, Execute and Test the page.
Note: In real life scenario, this kind of JSON string will be emitted by different server side technologies like ASP.NET Web Form, ASP.NET MVC, WCF, ASP.NET Web API, PHP, Java, etc.
The best part is that some server technology automatically handles the conversion part. For example, when JavaScript object is directly passed from client side, first it will be converted to JSON string automatically and when received at server side, it will be automatically converted to native type. It may happen vice versa.
From here, one lab will be dedicated for one kind of Microsoft technology which will emit JSON string. From JavaScript using jQuery, we will consume this JSON string and with it as a JavaScript Object.
We have a custom C# class created with us called Customer.
namespace JSONExamples
{
    public class Customer
    {
        public string CustomerName { get; set; }
        public string Address { get; set; }
    }
}
In ASP.NET Web Forms, we will make use of HTTP handlers.
Step 1. Create a Web Application Project
Click File>>New>>Project. Select ASP.NET Empty Web Application project from the dialog box.
Step 2. Create HTTP Handler
Right click the web Form project created and click Add>>New Item. Select Generic Handler (with ashx extension), Name is CustomerWebForm.ashx and say OK.
Step 3. Modify Process Request and Emit JSON String
Open the newly created ashx file and inside ProcessRequest function, do the following things:
- Create a
Customer class object and assign values to its properties:
Customer customer = new Customer()
{
    CustomerName="Raju Mishra",
    Address="UP"
};
- Create JSON string of the above object using
System.Web.Script.Serialization.JavaScriptSerializer.
JavaScriptSerializer serializer = new JavaScriptSerializer();
string JsonCustomerString=serializer.Serialize(customer);
- Change the Content type of Response from
text/plain to text/json.
context.Response.ContentType = "text/json";
- Write the Converted string to Output stream:
context.Response.Write(JsonCustomerString);
Step 4. Create Client Code for consuming JSON Data
- Add new item to project. This time, it will be a simple aspx web form.
Right click the project. Click>>Add New Item. Select Web Form, name it CustomerClient.aspx and say ok.
- Download jQuery from the Nuget Package or from Jquery.com and reference it in the page.
<script src="Scripts/jquery-2.1.1.js"></script>
- Create a simple input button in the webform and attach JavaScript
onclick event to it as follows:
<input type="button" name="BtnClickMe" value="ClickMe" onclick="DisplayJSON();" />
- In the
head section, create a script tag and add the following script into it:
<script type="text/javascript">
    function DisplayJSON()
    {
        $.getJSON("CustomerWebForm.ashx").done(function (d)
        {
            alert(d.CustomerName);
        });
    }
</script>
Step 5. Execute and Test
Press F5 and execute the application.
Click the “Click me” button and check the output.
Step 1. Create Handler for Post Request
In the same project, create one more handler called CustomerPost.ashx.
Step 2. Get the Post Data in Process Request
Write the following code inside ProcessRequest:
string JSONCustomerString = context.Request.Form["Customer"];

JavaScriptSerializer serializer = new JavaScriptSerializer();
Customer customer=serializer.Deserialize<Customer>(JSONCustomerString);

context.Response.ContentType = "text/plain";
context.Response.Write("Customer received from client side : "+customer.CustomerName);
Step 3. Create Client Code for Posting JSON Data
- Add one more button inside same aspx page created in the last demo.
<input type="button" name="BtnPostMe" value="Click To Post" onclick="PostJson();" />
- In the
head section, add the following JavaScript code.
function PostJson()
{
     var customer={CustomerName:"ClientCustomer",Address:"Cient Address"};
     $.post("CustomerPost.ashx", "Customer="+JSON.stringify(customer)).done(function (d)
     {
        alert(d);
     });
 }
Step 4. Execute and Test the Application
Press F5 and execute the application. Click the “Click To Post” button and check the output.
Now you know:
- how to make a communication between JavaScript and Web Forms
- how to pass data between two technologies
Now let’s do the same thing with ASP.NET MVC.
Step 1. Create MVC4 Web Application Project
Click File>>New>>Project. Select ASP.NET MVC4 Web Application. From the project template, select Empty.
Step 2. Create Controller and Action Method
- Create a
Controller called JsonTestController. - Create an action method called
Index as follows:
public ActionResult Index()
{
    return View();
}
- Create an action method called
JsonData. - In that action method, create object of
customer class and assign values to its properties. - Call
Json method available in the Base class “Controller”. Json method will create JsonResult object that serializes customer object to JSON.
public ActionResult JsonData()
{
    Customer customer = new Customer()
    {
        CustomerName = "Abram",
        Address = "Russia"
    };
    return Json(customer ,JsonRequestBehavior.AllowGet));
}
Step 3. Create Client Code for Consuming JSON Data
- Right click the Index Action, select Add View and create a view called
Index.
- Do the same thing which we did in Web Form project.
i. Reference jQuery in the view
ii. Create a input button and set its onclick property to “DisplayJSON();”
iii. Create a DisplayJSON JavaScript function in the head as follows:
function DisplayJSON()
{
    $.getJSON("@Url.Content("~/JsonTest/JsonData")").done(function (d)
    {
        alert(d.CustomerName);
    });
}
Step 4. Execute and Test Application
Press F5 and execute the application. Execute Index View. Click the “ClickMe” button.
Step 1. Create Action Method for Post Request
In the same controller, create one more Action method as follows:
public string JsonPost(Customer customer)
{
    return "Customer received from client side : " + customer.CustomerName;
}
Step 2. Create Client Code for Posting JSON Data
- Add one more button inside same aspx page created in last demo:
<input type="button" name="BtnPostMe"
value="Click To Post" onclick="PostJson();" />
- In the
head section, add the following JavaScript code:
function PostJson()
{
    var customer = { CustomerName: "ClientCustomer", Address: "Cient Address" };
    $.post("@Url.Content("~/JsonTest/JsonPost")", customer).done(function (d)
    {
        alert(d);
    });
}
Note: When working with ASP.NET MVC, it’s not required to explicitly convert JavaScript object to Json String and vice versa. It internally get handled.
Look and compare both server and client code of Web Forms with MVC. MVC had made things simpler.
Step 3. Execute and Test the Application
Press F5 and execute the application. Click the “Click To Post” button and check the output.
Our next server side technology will be WCF Rest. So let's get the ball rolling.
Step 1. Create WCF Project
Click File>>New>>Project. Select WCF and the WCF Service Application. Name the Project as WCFJSON and say ok.
Step 2. Remove Unnecessary Files
Remove IService1.cs and Service1.svc from the project.
| |
Step 3. Create New Service
Right click the project. Say Add >> New Item. Select WCF Service. Name is as JsonTest and say ok.
It will create two things in the project. IJsonTest.cs which is our service contract and JsonTest.svc which is our Service.
Step 4. Create Operation Contract
Open IJsonTest.cs and a method called GetJSONData inside it as follows:
[OperationContract]
Customer GetJsonData();
Step 5. Implement Operation Contract
Open JsonTest.svc and implement GetJsonData method as follows:
public Customer GetJsonData()
{
    Customer customer = new Customer()
    {
        CustomerName = "benazir bhutto",
        Address = "Pakistan"
    };
    return customer;
}
Step 6. Create a Rest End Point
- Open the web.config file
- Navigate to
System.ServiceModel section:
<system.serviceModel>

…

</system.serviceModel>
- Inside it, add new
Services Tag. Inside Services, add Service Tag and point it to the service we created.
<system.serviceModel>
  <services>
    <service name="WCFJSON.JsonTest" >
…
    </service>
  </services>
- Inside
service, configure endpoint with WebHttpBinding as follows:
<endpoint binding="webHttpBinding" address="Rest" contract="WCFJSON.IJsonTest"
behaviorConfiguration="MyRestBehavior"></endpoint>
Step 7. Mark the Operation Contract WCF Rest Operation
Add WebInvoke attribute to the GetJsonData as follows:
[WebInvoke(Method="GET",ResponseFormat=WebMessageFormat.Json,
BodyStyle=WebMessageBodyStyle.Bare,
    UriTemplate="GetJsonTestData")]
public Customer GetJsonData()
{….
Step 8. Create a Client Code for Consuming JSON Data
- Create a simple HTML File called WCFRestClient.HTML and reference jQuery in it.
Note: For demonstration purposes, we are keeping the HTML file inside the same WCF project.
- Just like previous labs, add one button (called “Click Me”) in the HTML page which will invoke a JavaScript function called
DisplayCustomer which will look like follows:
function DisplayJSON()
{
    $.getJSON("http://localhost:10647/JsonTest.svc/Rest/GetJsonTestData").done(function (d)
    {
        alert(d.CustomerName);
    });
}
Step 9. Execute and Test
Press F5. Navigate to WcfRestClient.html. Click the “Click Me” button.
Step 1. Create New Operation Contract
In the same service contract, create one more operation contract called PostJsonData as follows:
[OperationContract]
string PostJsonData(Customer customer);
Step 2. Implement the Service Contract
public string PostJsonData(Customer customer)
{
    return customer.CustomerName;
}
Step 3. Mark the Operation Contract WCF Rest Operation
Add WebInvoke Attribute to the implemented Operation contract. Make sure to set method to “POST”.
[WebInvoke(Method = "POST", ResponseFormat = WebMessageFormat.Json,
           RequestFormat=WebMessageFormat.Json,
UriTemplate = "PostJsonTestData")]
public string PostJsonData(Customer customer)
Step 4. Create a Client Code for Posting JSON Data
We will utilize the same HTML file created in last lab (Get WCF Demo).
- Add a one more input button and onclick of that button, invoke a JavaScript button called PostJSON.
- This time, we cannot use jQuery’s “
$.post” method because for WCF Rest, we have to set request content type to “application/json” and which is not supported by “$.post” function. We will use core jQuery Ajax function $.ajax as follows:
function PostJSON()
{
    var Customer = { CustomerName: 'Fernandese', Address: 'Delhi' };
    $.ajax({
        type: "POST",
        url: "http://localhost:10647/JsonTest.svc/Rest/PostJsonTestData",
        data: JSON.stringify(Customer),
        contentType: "application/json; charset=utf-8",
        dataType: "json",
        success: function (data, status, jqXHR)
        {
            alert(data);
        },
        error: function (xhr)
        {
            alert(xhr.responseText);
        }
    });
}
Step 5. Execute and Test the Application
Press F5 and execute the application.
As we know, WCF Rest lets us create HTTP services. The main intent behind WCF was to support SOA. For HTTP services in the Microsoft world, we have ASP.NET Web API.
We will talk about Web API and WCF Rest in detail in a future article. For now, let’s concentrate on communication between ASP.NET WebAPI and JavaScript.
Step 1. Create Web API Project
Open Visual Studio. Click File>>New>>Project. Select ASP.NET MVC4 Web Application. From the Template selection dialog box, select WebAPI and Say OK.
Step 2. Remove All Unnecessary Files
Remove all existing Controllers, Views and CSS files from the project.
Step 3. Create API Controller
- Right click the controller, click Add>>Controller.
- In the Add Controller dialog box, enter controller name it as “
JsonController”. - Select “Empty API Controller” Template.
- Click OK.
Step 4. Create Action Method
In the JsonController, you will find the base class is APIController.
Create a method called GET in the controller as follows:
public Customer Get()
{
    Customer customer =  new Customer()
    {
        CustomerName="Rajesh Oja",
        Address="Nepal"
    };
    return customer;
}
Step 5. Create Client Code for Consuming Json Data
- Create a new controller called
TestingController. Make sure base class is Controller this time. It should not be ApiController. - Create an action method called
Index as follows:
public ActionResult Index()
{
    return View();
}
- Right the action method and say add view. Keep View name as “
index” and say Ok. - In the newly created view, reference jQuery.
- Now create a simple input button and on click of that, invoke a JavaScript function called “
DisplayJSON” which looks like follows: - In the
head section of View, add a script tag and create DisplayJSON function as follows:
function DisplayJSON()
{
    $.getJSON("@Url.Content("~/api/Json")").done(function (d)
    {
        alert(d.CustomerName);
    });
}
Step 6. Execute and Test the application
Press F5 and execute the application.
Step 1. Create a Post Action
In the JsonController created in the above step, add a new method as follows:
public string Post(Customer customer)
{
    return customer.CustomerName;
}
Step 2. Create a Client Code for Positing JsonData.
- In the same Testing view, add one more input button, call it “Click to Post”.
- In the onclick of this button, invoke a JavaScript function called “PostJSON”.
- In the head section of the
View, inside script tag, add “PostJSON” method as follows:
function PostJSON()
{
    var Customer = { CustomerName: 'Karan Kumar', Address: 'Karnataka' };
    $.post("@Url.Content("~/api/Json")", Customer).done
    (
        function (d)
        {
            alert(d);
        }
    );
}
Step 3. Execute and Test the Application
Finally, we are done with most of the Microsoft technologies.
If you want to kick start with Jquery, play with the below video:
In this article, we learned about Json, its advantages and how JSON makes communication between the JavaScript world and different Microsoft world simpler.
Hope you enjoyed reading this. Your comments, votes and suggestions motivate us to write more stuff like this.


 General
  News
News  Suggestion
  Question
  Bug
Bug  Answer
  Joke
Joke  Praise
  Rant
Rant  Admin
Admin 


