Background
I think due to price strategy, Chromecast devices will be present almost in any TV. This is good reason to provide additional benefits from using your website for visitors with Chromecast device. In this article, I will assist you with first steps on integrating cast API into your site code. Please feel free to provide your comments to this article with tips and tricks from your own experience.
Prerequisites
In order to start coding, you need:
- Chromecast device itself
- TV or Display with HDMI input
- Google Chrome for best debugging experience
- Installed Google Cast extension for Chrome
- Know your device serial number (present on a box above bar code and on device itself
- know URLs for staging and live versions of the website
Configure your Chromecast for Development
Device whitelisting
In order to develop for Chromecast - you need to whitelist your device. Please navigate to this link, choose "Request Whitelisting" link. Provide Google with your email address, device serial number and two(2) URLs pointing to the location of your receiver app HTML page, typically one for Q&A and one for production, on your server. You should expect to receive the answer in 24-48hours. If it is not in case, repeat your request in 5 days.
Configure Chrome Cast Extension Settings

Install Cast extension from Google Chrome store:
|
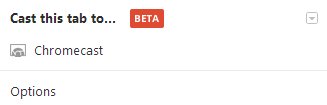
Choose options:
|

Click four(4) times on a top blue icon:
|

Under Developer Settings, register your live and staging website domains. Good idea to list there http://localhost/ as well.
|
Wait for Device Whitelisting Confirmation
In a day or two, you will receive an email like:
Thank you for your interest in developing for Chromecast.

Please use the following Developer ID when communicating with Google in the future:
6F9619FF-8B86-D011-B42D-00CF4FC964FF

Your AppID(s) are:
6F9619FF-8B86-D011-B42D-00CF4FC964FF -> http://www.yoursite.com/chromecast/rcvr/receiver.html
The GUID is the unique ID of your application that you will be using both on receiving and sending parts.
Integration Endpoints
Chromecast integration consists of two parts:
Sender
HTML page opened in client browser, that has information about content to be casted. In order to notify, that page supports casting, include data attribute cast-api-enabled into opening HTML tag.
<html data-cast-api-enabled="true">
Google defines Cast Chrome Sender API: The set of data objects and functions available to web pages that have been whitelisted for the Chrome Sender API.
Receiver
HTML5 single page application which is loaded by Chromecast device once casting is initiated. Include API file script reference into your receiver page: http://www.gstatic.com/cast/js/receiver/1.0/cast_receiver.js. Note: API version is subject to change. Description of the API available for receiver page can be found at this link.
Debugging Receiver Application
You might ask: how can I find out why my receiver application is not working on Chromecast device? Fortunately, device enabled for development opens port 9222 for remote debugging:

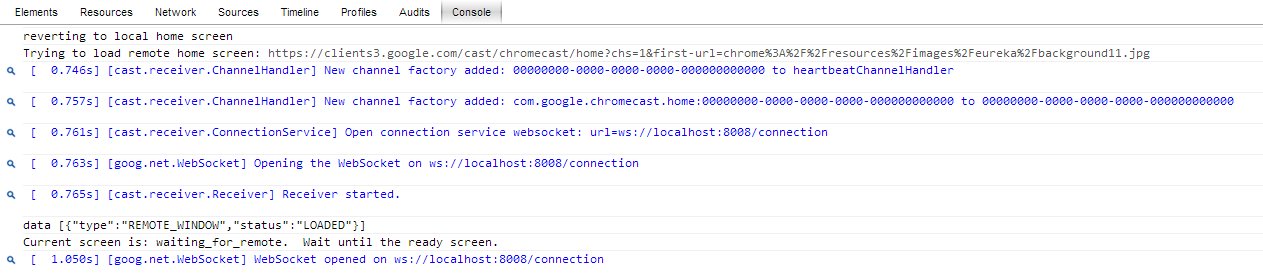
You can set breakpoints in your receiver page code, output trace information into console using console.log. Additionally, you can control level of the cast API tracing information by calling cast.receiver.logger.setLevelValue function.
cast.receiver.logger.setLevelValue(0);
Simple Demo Application
Let me demonstrate how website can cast some video file using chromecast. Let's consider most easy case: ability to play video file.
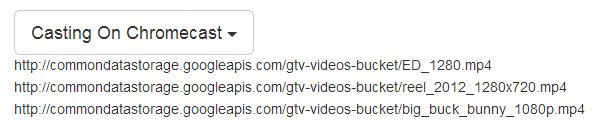
By clicking on video file, playback is started on a selected device.
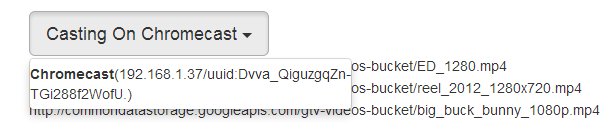
If there is more than one device - I provide the possibility to select which one should be used.
By clicking on media URL, playback is started on selected chromecast device.
Receiver Single Page Application
As a minimum, you should expect following media formats to be supported by Chromecast device with minimum coding efforts:
- Video codecs: H.264 High Profile Level 4.1, 4.2 and 5, VP8
- Audio decoding: HE-AAC, LC-AAC, CELT/Opus, MP3
- Containers: MP4/CENC, WebM, MPEG-DASH, SmoothStreaming
In this case, minimum receiver's application code is below:
cast.receiver.logger.setLevelValue(0);
  var ns= cast.receiver.RemoteMedia.NAMESPACE;
  var receiver = new cast.receiver.Receiver(
      'd6d488e8-7b35-4834-a4c9-935d660ab65c', [ns],
      "",
      5);
  var remoteMedia = new cast.receiver.RemoteMedia();

  remoteMedia.addChannelFactory(
      receiver.createChannelFactory(ns));

  receiver.start();

  window.addEventListener('load', function() {
    var elem = document.getElementById('vid');
    remoteMedia.setMediaElement(elem);
  });
and corresponding HTML view consists of Loading indicator and HTML5 video element only:
<video id="vid"
          style="position:absolute;top:0;left:0;height:100%;width:100%">
</video>
<div id="status" style="display:none;
font-size:300%; position:absolute;top:40%;left:40%;">
     LOADING....
</div>
I have used cast.receiver.RemoteMedia class - default implementation of RAMP protocol handler. Some time ago had the description in a bit clear format- on this Github link you can find the historic version of the Google Cast messages explained.
What this application does - once it receives supported media link - it starts playing the video file on paired HTML5 media element. By calling remoteMedia.setMediaElement method - we tell RemoteMedia instance to use our video element for playback.
Important note: It should be placed on exactly the same location that you've registered during device whitelisting.
Sender Application - Integrate into Your Existing Site
If HTML tag contains data attribute cast-api-enabled="true", the content script checks for this attribute and injects and initializes the API. The API sets the variable cast.isAvailable to true and posts a MessageEvent to the host page’s window object of the form:
{source: "CastApi", event: "Hello", api_version: [, ]}
Here, api_version is the API version that is supported. The version is a 2-element array of integers, starting with an initial version of [1, 0]. When Google commits backwards-incompatible changes to the API, the major version number will be incremented. For backwards-compatible changes, Google will increment the minor version number.
In my demo app, I have two portions of code: consumer (i.e. website) and chromecast API helper module that hides specifics of chromecast API and provides three methods: ready, init, play. Consumer first subscribes for ready callback, by calling ready(callback function) method. Once helper module indicates, that it's ready to communicate with Chromecast, consumer calls init method and passes information about itself:
var defaultCastAPIConsumer = {
applicationID:'',
setReceivers: function(){},
getCastingDevice: function(){}
};
After this, it can initiate playing media URL on device by calling play(mediaurl).
Cast API Integration Portions
In my example, I've used Promise pattern to define CastAPIReady promise, that I resolve once API is ready.
if (window.cast && window.cast.isAvailable) {
    CastAPIReady.resolve();
} else {
  window.addEventListener("message", function(event) {
    if (event.source == window && event.data &&
    event.data.source == "CastApi"
    && event.data.event == "Hello"){
        CastAPIReady.resolve(event);
    }
  });
};
Once API is ready, it is a good idea to check whenever TV is on (i.e., are there any working Chromecast devices. Typically, you have to add listener for chromecast devices. Documentation defines this method as "Adds a listener function that with the current list of receivers that supports the given activity type. When added, the listener will be called immediately with the current list, and whenever the list of receivers changes." I am passing received applicationID for my website as a first parameter. If callback contains one device - you can use it for playback without prompt. If there are two or more devices - a good idea is to ask the visitor what device should be used.
castApi.addReceiverListener(consumer.applicationID, onReceiverList);
In order to start playback, we have to call API's launch method in order to launch our activity on receiver. Receiver can be busy with another cast, thus we have to 'book' it first. We also need to prepare request to load new media into the receiver application. This can be done with cast.MediaLoadRequest. We are interested in src field - url of media file to open, passed in the constructor + setting autoplay property to true - so the playback is started immediately.
function castMedia(mediaurl) {

          var result = new $.Deferred();
          var currentReceiver = castAPIConsumer.getCastingDevice();
          var launchRequest = new cast.LaunchRequest
            (castAPIConsumer.applicationID, currentReceiver);
          launchRequest.parameters = '';

          var loadRequest = new cast.MediaLoadRequest(mediaurl);
          loadRequest.autoplay = true;

          castApi.launch(launchRequest, function(status) {
            if (status.status == 'running') {
              castApi.loadMedia(status.activityId,
                                      loadRequest,
                                      result.resolve);
            } else {
                result.reject(status);
            }
          });

         return result;

        }
Points of Interest
Although SDK is still in beta, potential of this cheap HDMI gadget is too big to ignore it in your websites. Please visit Cast API reference here for more details.
Sample Code
Sample code is present at the top of this article, and is available on the Github.
History
- 1.0 - Initial version of the article - notes on preparing environment + draft example that demonstrates launching of the playback on a device. No sophisticated API nor error handling.


