Introduction
In our previous article, "Building and Querying secure SSO services Using Axis and Flex", we wrote about creation of infrastructure for accessing Axis2 web services from Flex applications using Single Sign-on technique. The system, described in the previous article transfers data between different servers. These data contain private information, which services return to clients and a security token granted to the authorized user, which is logged into identity provider server. Since the transferred data goes unencrypted through HTTP, an attacker can:
- read your
private data, returned by a service - pass its own fake data to your client application, instead of a service data
- use your security token to read data from all the services you are authorized to access
This article will give you hints on how to secure these connections with SSL encryption that will highly minimize the possibility of such unauthorized actions.
A few words on what this article is not:
- This is not a standalone article and it is recommended to read it only if you were interested in the previous one.
- This article is not a detailed guide on how to create a production environment nor does it describe how to configure and use trusted SSL certificates.
The aim of that article is to demonstrate, how all of the connections, made by our example system, could be configured to use SSL encryption. We will also thoroughly examine the connections to ensure that they are secure.
To provide you with a working example, we will use self-signed SSL certificates. Note that usage of self-signed certificates will not safeguard you from the possible "man-in-the-middle" attack (look at When are self-signed certificates acceptable). In production environments, you should use valid certificates, like those from commercial or free Certification Authorities (look at www.sslshopper.com website, which contains a lot of information on this topic).
Prepare the Environment
We assume that you have read the previous article and performed all the steps described there to establish a working environment with:
- up and running OpenSSO identity provider on which example roles are defined.
- configured Axis2 installation with example services (
MathService and StringService) deployed there. The PermissionChecker_mapping.properties file contains the mappings between the example identity provider roles and the example services permissions. - example client application (
SSOWSPrototype), available on a Web Server.
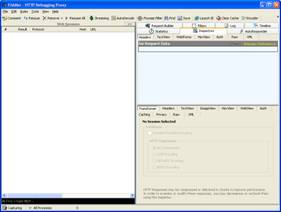
Additionally, we will use a Fiddler application to inspect the connections.
For simplicity in this and in the previous articles, we assume that we do all the tests on a single developer machine. That means all the applications are running and a client application is hosted on that machine in a same tomcat instance. Fiddler application is also executed on that machine. If you will plan to make a real environment which will be different from the one described above, you are on your own, but we hope that the information presented here will make this task easier for you.
Analyze the Areas to Secure
First, we need to analyze data exchange process and define connections we need to secure. In our infrastructure, the following connections are made:

- Connection between the client and a service provider
- Connection between the client and identity provider
- Connection between the service and identity provider
Our aim is to make them all to work with SSL encryption.
Enable SSL Support on Tomcat Server
First, we need to configure tomcat server on which our applications are running to support SSL.
We will create a self-signed certificate now (on production environments, you should use a valid certificate instead). To generate a certificate keystore and a self-signed certificate itself, we will use java keytool:
%JAVA_HOME%\bin\keytool -genkey -alias tomcat -keyalg RSA
In the displayed console application, specify a keystore password (the default one should be "changeit"). For the rest of the settings, specify any data you wish. This command will create a new file, in the home directory of the user, named ".keystore".
Now we will enable SSL support in tomcat server. Go to /conf/server.xml file in the tomcat installation and uncomment the SSL HTTP/1.1 Connector entry. For simplicity, we will use the 443 port, which is a default for https protocol, instead of a 8443 port. The entry should look like this:
<Connector port="443" protocol="HTTP/1.1" SSLEnabled="true" maxThreads="150"
scheme="https" secure="true" clientAuth="false" sslProtocol="TLS"
keystoreFile="${user.home}/.keystore" keystorePass=" changeit "/>
Note: If you used non-default password during keystore creation, then replace the keystorePass value with the correct password. If you moved the generated keystore file from the user home directory to another location, then you’ll need to define this location in keystoreFile attribute.
Prepare Server-side Java to Work with Fiddler
Since we will be using Fiddler to inspect connections, we need to make some changes in the configuration so the server-side. Java will perform calls through the Fiddler and we will be able to see all the server-side requests.
First, we need to tell the server-side Java to use Fiddler as a proxy. For that, we add the following string to the beginning of tomcat startup file (catalina.bat on Windows), where we specify address and port of the machine, where Fiddler will be running (in our case, this is 127.0.0.1:8888):
set CATALINA_OPTS=-DproxySet=true -Dhttp.proxyHost=127.0.0.1 -Dhttp.proxyPort=8888
-Dhttps.proxyHost=127.0.0.1 -Dhttps.proxyPort=8888
Even when the proxy is defined, the server-side Java will not call the proxy for localhost. That is why in our further configurations, we will use a fake domain name, instead of a localhost. Let it be, for example, "www.ssoinaction.org". To make it possible for our system to recognize this domain name, we will add an appropriate mapping using Fiddler (we will go to Fiddler Tools -> HOSTS menu for that). Since Fiddler and all of the services are running on the same local machine, the mapping will look like: 127.0.0.1 <a href="http://www.ssoinaction.org/">www.ssoinaction.org</a>
Another thing is that the Fiddler monitors secure connections by supplying its own self-signed SSL certificate to the client (we will talk about this later on). Therefore we need to make our service-side client (which connects to identity provider) be able to accept that self-signed certificate. To achieve this in our test environment, we will define an all-trusting certificate manager (note that you should not use such a hack on production). Since we need to install that manager on tomcat bootstrap, we will put the required code into javax.servlet.ServletContextListener. The CertFix class, which implements this interface, is available in the source project (in order to compile it, you will need to add servlet-api.jar, located in lib folder of tomcat installation, to the project build path). We should pack compiled project classes into jar file and place that jar into /webapps/axis2/WEB-INF/lib folder of tomcat installation. To register the listener, we should add the following to /webapps/axis2/WEB-INF/web.xml file under <web-app> tag:
<listener>
<listener-class>CertFix</listener-class>
</listener>
Secure Client to Service Connection
Now, we need to make Flex client application to be able to access the service using SSL. The only thing we need for that is to load an application itself from a secure https link. If you want the Flex client application to be downloaded from http instead, you will need to make some additional changes in server configuration files (look at Using HTTPS).
Ensure that Fiddler is running. Since we work with SSL, we will enable "Decrypt HTTPS traffic" option in Fiddler (this setting could be found in Tools -> Fiddler Options -> HTTPS) so we will be able to see the actually transferred data. The interesting thing is that the method Fiddler uses to decrypt SSL traffic is a good example of a "man-in-the-middle", we mentioned before. Fiddler passes its own SSL certificate to the client, decrypts the supplied data, encrypts it with a server certificate and sends it to the server then (the good thing is Fiddler is not an attacker).
To load a Flex application, we open a browser. Since we are running Fiddler on the same machine, it automatically works as proxy for the browser (if you want to run a browser on a different machine, you will need to manually define the Fiddler as a proxy for the browser).
Now, since our application is located on a Tomcat server for which we already enabled https, we can use the following URL:
https://www.ssoinaction.org/flex-client/SSOWSPrototype.html
If our server certificate is a self-signed (this is our case), Fiddler will display a message about an incorrect certificate, and we should accept it.
After that, the browser will display a message that the certificate is a self-signed certificate. This is by the way an exact place, where an attacker can make a trick with us in case self-signed certificates are used. It can pass its own self-signed certificate, and then we will work with the traffic being fully decrypted and controlled by an attacker.
Note that you will receive this screen even when your server uses a trusted certificate - this is because Fiddler supplied its own self-signed certificate to the browser. But, since we trust Fiddler and are working in a test environment, we accept the certificate. Our client interface opens.
Now, we will contact the Math service using our client. To make this connection secure, we will change the call from http to https by replacing http://localhost:8080 with https://www.ssoinaction.org in a Math web service URL field. For convenience, you can also get the sources of the client, replace the service URLs in the sources (look for a mx:TextInput elements with an id="wsdlUrl" attribute) and recompile the client application.
Now, we input some numbers and click on "=" sign.
Since we are not authorized yet, the log-in dialog appears.
To analyze what happened behind the scenes, let us look at Fiddler. In a "Web sessions" area of Fiddler application, there is our call to Math service wsdl and it uses HTTPS.
But as you see, there is also another call available, which goes to URL http://www.ssoinaction.org:8080/axis2/services/<br />MathService.MathServiceHttpSoap11Endpoint/ and it is insecure.
This is because when client calls wsdl file, it does not receive actual service data, but a service configuration. This configuration contains the URLs from where to obtain the actual data. In our example services, wsdl file is not defined explicitly, but generated automatically. Let us go to Fiddler and look at the https://www.ssoinaction.org/axis2/services/MathService?wsdl URL response contents. In order to see the contents of the call, switch to "Inspectors" tab and enable "Raw" view for Response (we may see that data since we enabled the "Decrypt HTTPS traffic" traffic option in Fiddler settings). There, you will see something like the following:
<wsdl:service name="MathService">
   <wsdl:port name="MathServiceHttpSoap11Endpoint"
	binding="ns:MathServiceSoap11Binding">
      <soap:address location="http://www.ssoinaction.org:8080/axis2/services/
	MathService.MathServiceHttpSoap11Endpoint/"/>
   </wsdl:port>
   <wsdl:port name="MathServiceHttpSoap12Endpoint" binding="ns:MathServiceSoap12Binding">
      <soap12:address location="http://www.ssoinaction.org:8080/axis2/
	services/MathService.MathServiceHttpSoap12Endpoint/"/>
   </wsdl:port>
   <wsdl:port name="MathServiceHttpEndpoint" binding="ns:MathServiceHttpBinding">
      <http:address location="http://www.ssoinaction.org:8080/axis2/services/
	MathService.MathServiceHttpEndpoint/"/>
   </wsdl:port>
</wsdl:service>
As we see, all the generated endpoints use http protocol. That means even when we call the service wsdl using https, the wsdl contains http-style links to service data and as a result, this data will be transferred insecurely.
So, we need to configure the internals of wsdl generation to work with SSL, so it will contain https-style urls.
First, we will configure Axis2 to support https. Open /webapps/axis2/WEB-INF/conf/axis2.xml file from the tomcat installation folder and add a new transport receiver:
<transportReceiver name="https"
	class="org.apache.axis2.transport.http.SimpleHTTPServer">
    <parameter name="hostname">https://www.ssoinaction.org</parameter>
</transportReceiver>
After that, we need to tell Axis, that our service will use https transport. Open the /META-INF/services.xml file, located in a /webapps/axis2/WEB-INF/services/MathService.aar archive and add the following under the <service> element:
<transports>
	<transport>https</transport>
</transports>
Do the same for the String service.
After that, restart the tomcat server, reopen the client in a browser and contact the Math service again by clicking on "=" sign. Look at the Fiddler now.
As you see, both calls to the service now go through HTTPS.
Secure Client and Service to Identity Provider Connections
Look at the response contents of the second HTTPS call to the service. In that call, since we are not authorized yet, service returned an error. Provided soap message among other data contains identityProviderUrl (wsdl of this service identity provider). As you see, it is unsecure, so we need to configure OpenSSO service to use HTTPS. We will do this the same way as we secured the connection with a Math and String service.
First, we will secure OpenSSO wsdl url by going to /webapps/axis2/WEB-INF/spring-webapp.xml and changing the identityProviderUrl to https, so it looks like:
<property name="identityProviderUrl"
value="https://www.ssoinaction.org/opensso/identityservices?wsdl"/>
Secondly, we will secure the actual service data transfer by going to /webapps/opensso/WEB-INF/wsdl/IdentityServices.wsdl file and changing IdentityServicesImplService address location so it looks like:
<service name="IdentityServicesImplService">
   <port name="IdentityServicesImplPort"
	binding="tns:IdentityServicesImplPortBinding">
      <soap:address location="https://www.ssoinaction.org/opensso/
		identityservices/IdentityServices"></soap:address>
   </port>
</service>
From now, the client application will interact with identity provider through SSL. Since the Math and String services access the identity provider using the same identityProviderUrl from a spring-webapp.xml file, as a client does, the connection from the service to identity provider will also become secured.
Proceed with a Final Test
As we have all the things configured, we may proceed with the final security check now.
To make it more strict, we will completely disable HTTP connector of Tomcat server, so the only accepted connection would be an SSL call. Go to /conf/server.xml file of the tomcat server and comment out the 8080 connector:
This will ensure that if we made a mistake and some of the connections are still unsecure, our test will fail, since it is not allowed now to get the data from a server in insecure way.
Now we restart a tomcat server and open the client application using the steps we already did until we get the login dialog. We will then authorize using a "test" user we created in the previous article. After a successful login, we will finally receive the calculation result from a Math service.
Let us look at Fiddler to see what connections were made.
Client application called the Math service, and the service told us we need to authorize on identity provider (first two calls). Client authorized us on identity provider (next two calls) and then called the Math service again to receive the calculation result (call number 5). Math service in turn contacted the identity provider service to check that we are allowed to proceed with "addition" operation (last two calls).
As we may see, all these connections are secure now.
Resources
History
- This is the first revision of this article.
IntexSoft (Intellectual Export Software) is dynamic software development company offering high quality cost-effective IT services to customers worldwide. We develop custom software across a range of industry, such as Media Production, Product Information Management, Translation Management.
The company possesses high expertise in J2EE, Adobe Flex/AIR and also in software integration with products like Adobe Indesign Server, Quark Xpress Server, Across Server and others.
Founded in 1999, our development centre is located in Grodno, Belarus - historically the most technically advanced region in the former USSR.
This member has not yet provided a Biography. Assume it's interesting and varied, and probably something to do with programming.


