This is a copy of the post I made on the Intel site here. For the duration of the contest, I am posting a weekly blog digest of my progress with using the Perceptual Computing items. This weeks post shows how Huda has evolved from the application that was created at the end of the third week. My fellow competitors are planning to build some amazing applications, so I’d suggest that you head on over to the main Ultimate Coder site and follow along with their progress as well. I’d like to take this opportunity to wish them good luck.
Executive Summary
The judges will be pleased to know that this blog entry is a lot less verbose than previous ones. This isn’t because there’s not a lot to talk about, but rather because I’m concentrating on writing a lot of code this week, and I’ve hit a real roadblock with regards to the gesture camera. Code that was working perfectly well last week has suddenly stopped working. This means that I’ve got some serious debugging to do here to find out why the gesture code is no longer displaying the cursor on the screen – this doesn’t happen all the time, but it’s happened often enough for me to be concerned that there’s an underlying problem there that needs to be sorted out.
As part of my remit is to help coders learn to write code for the Perceptual SDK, I will be continuing writing about the coding process, so I apologise to the judges in advance – there’s nothing I can do to alleviate the detail of explanation. If they wish to skip ahead, the summary talks about where we are today and what my plans are for next week, and here are some screen shots. Unlike my previous blogs, I’m not going to be breaking this one down on a day by day basis. There’s a lot that needs to be done, and it doesn’t break down neatly into days.
For those who want to know the result, don’t look away now. I found and fixed the issue with the gesture code. It’s all a matter of patient debugging and narrowing down areas where there can possibly be problems.
I’ve been wondering how best to train people in how to use Huda, and this week I’ve hit on the solution. I’m going to let Huda teach you. By the end of the week, I added in voice synthesis, and I think I can use this to help provide context. The type of thing I have in mind is, say you bring up the filters, Huda will tell you that a swipe left or right will cycle through the filters, and the thumbs up will add the filter to the currently selected image. The beauty is, now that I have the code in place to do the voice synthesis, I can easily add this type of context.
Voice recognition is an area of the Perceptual SDK that has a long way to go. It just isn’t accurate enough and, for that reason, I’m dropping support for it from Huda. I had the commands “Open Filter” and “Close Filter” in the application, and no matter what I tried, it kept turning Open Filter into Close Filter. Yes, it recognises a few words, but given that the accuracy is so hit and miss, I can’t leave it in there. So, I apologise to you right now – voice control is out. I had to take this decision this week because there are certain things I was using it for that I have to find other ways to accomplish these things and I really don’t have the time to keep mucking around with this.
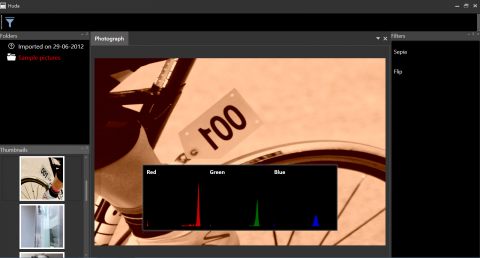
If you don’t want to read the rest of the post, this is what Huda looks like now:
Woe to the Interface
It’s going to be a busy week this week. The more I play with the interface, the more I find it clunky and unpolished, and this is incredibly frustrating. While I know that I’m a long way from polishing the interface, I can’t help but think that I’m missing a trick or two here. The biggest thing that I have issues with is the concept of showing the folders and selecting the images. So, the first thing I’m going to do is to unify the two parts; this should make it obvious that the picture selection and folder selection actually belong together. Part of my thinking here is that I want it to be apparent to anyone who has used a photo editing application before that this is still a photo editing application. While it’s fine to play about with an interface, there still has to be a certain level of familiarity; there has to be a feeling of comfort in using the application, otherwise the user will end up being overwhelmed and will give up on the application. While the contest is about working with Perceptual computing and features of the ultrabook, it’s important that I don’t lose sight of the fact that this must be an application that people can use.
Once I’ve got this in place, I want to address the selection of “things to do to the photograph”. By this, I mean that I want to put some form of toolbar into place to trigger options. Don’t worry that I’m throwing sections of the UI together – I’m not. What I will be doing here is giving the user obvious trigger points – I can use this to bridge the gap between traditional photo editing applications and Huda. There has to be some familiarity for the user here, so I’ll be providing that today.
You may think that this is going to take a lot of work, and in other languages you may well be right, but I’m using MVVM and WPF. As the different parts of the interface are loosely coupled controls, it’s a simple matter for me to move the controls into other containers, and they will still work. The only change I’m going to make is to keep the images showing regardless of whether or not the user has opened a folder.
With the basics of the “toolbar” in place, I now have something that feels more natural for using gestures with. I’m going to hook the filter selection into both touch and gestures, and do something a little bit fancy for displaying the list of filters. What I’ll do is move the filters into a carousel, and use the swipe left/swipe right to move backwards and forwards through the list.
I’m concerned about the speed of loading of various items when things are selected, so I will be moving things out onto background threads.
The interface is really starting to firm up now. It’s starting to feel that little bit more polished to me, but there is more that I can do with it.

Don’t worry that all the filters have the same name and appearance right now. This is purely a visual that will be changed soon – I need to come up with some good iconography for these. It’s strangely satisfying swiping your hand left and right to rotate through this list. My final action on this end will be to introduce a gesture that actually applies the filter. The thumbs up seems oddly appropriate to me.
The Big Reveal
After a frenzy of activity on the actual interface, I want to address one of the central concepts of Huda; namely, the ability to filter the image, and not touch the underlying image. This is where I give up the secret of Huda – it’s all a massive con. If you remember, I promised that the underlying image would not be touched. I’ve had people get in touch with all sorts of wild theories on how I was going to do this – from the person who thought I was going to use steganography to hide this information in the picture to someone who thought I was going to convert the file into a custom format and put something in place to fool image editors into thinking that the type was still the original file format.
If I were to tell you that the solution to this problem was incredibly straightforward, and blindingly obvious, would this surprise you? Well, here it is. Here’s how it’s done…. Did you catch that? Yes, it’s all smoke and mirrors. What Huda does is actually not modify the original image at all – instead, we maintain an index of all the files that we’ve edited in Huda, along with the details of all the edits that have been performed, and these can be played again and again and again. In other words, when you open a file up in Huda, it goes to the index first to see if you’ve previously opened it. If you have, it gets the image transformations and reapplies them there and then. It’s as simple as that. Of course, this does rely on you not moving photos around, but I do have some plans in place for a post contest version of Huda to take care of that as well. Anyone for hashing?
Transformers – Robert’s in Disguise
A judgely warning – this section is going to be intense. I’m sorry, but there’s no way around the fact that we need to write some code, and there needs to be some explanation of it. It’s going to be quite dry, so I won’t blame you if you want to skip to the bit at the end.
As a first pass for the transformations that I want to apply, I decided that I needed to declare a common interface that all my transformation classes would apply. It’s a very simple interface, but as I want all my transformations to be serializable, I’ve made sure that it implements ISerializable by default.
using System.Windows.Media.Imaging;
using System.Runtime.Serialization;
namespace Huda.Transformations
{
    public interface IImageTransform : ISerializable
    {
        int Version { get; }
        BitmapSource Transform(BitmapSource source);
    }
}
At this point, it’s merely a matter of creating some simple transformations that use this functionality. Being the nice chap that I am, and to give Nicole some coding kudos that she can drop into casual conversation, I’ll show you all the classes I’m using for transformation. First of all, here’s the image crop routine:
using System.Windows.Media.Imaging;
using System.Windows;
using System.Runtime.Serialization;
using System;
namespace Huda.Transformations
{
    [Serializable]
    public class CropImage : IImageTransform
    {
        public CropImage()
        {
            Version = 1;
        }
        protected CropImage(SerializationInfo info, StreamingContext context) : this()
        {
            Version = info.GetInt32(Constants.Version);
            Left = info.GetInt32(Constants.Left);
            Top = info.GetInt32(Constants.Top);
            Width = info.GetInt32(Constants.Width);
            Height = info.GetInt32(Constants.Height);
        }
        public int Version
        {
            get;
            private set;
        }
        public int Left { get; set; }
        public int Top { get; set; }
        public int Width { get; set; }
        public int Height { get; set; }
        public BitmapSource Transform(BitmapSource source)
        {
            Int32Rect rect = new Int32Rect(Left, Top, Width, Height);
            source = new CroppedBitmap(source, rect);
            return source;
        }
        public void GetObjectData(SerializationInfo info, StreamingContext context)
        {
            info.AddValue(Constants.Version, Version);
            info.AddValue(Constants.Left, Left);
            info.AddValue(Constants.Top, Top);
            info.AddValue(Constants.Width, Width);
            info.AddValue(Constants.Height, Height);
        }
    }
}
There’s a lot of code in here that you’ll see in other classes, so I’ll just explain it once and you should easily be able to follow how I’m using it in other locations. The first thing to notice is that I’ve marked this class as Serializable – you need to do that if you want .NET to do its mojo when you save things. You’ll see that there are two things inside the class that say CropImage; these are the constructors that are used to create the object. The second one is the special constructor, and is the reason that I had IImageTransform implement ISerializable. .NET knows, when it sees this interface, that you want to read and write out the values in the class yourself. There are many, many reasons that I want to do this, but the main reason is because of what happens if you just let the runtime try and figure this stuff out itself – it’s not very performant because of the way it has to map things together. By taking control of this myself, I make the job easy. If you see how I use info.GetInt32 (there are many other methods for reading other types of data), it’s apparent what type of data the property is – we must always make sure we get it right, otherwise unpredictable and nasty things can happen.
At the bottom of the code, there’s a matching method called GetObjectData that just writes the items to the serialization stream. It’s important to make sure that you use the same names for the items in the constructor that you did in this method. The property names don’t have to match these names, but the names themselves do.
The Version currently does nothing, but if I have to add features to any of these classes, I can use this to work out which properties should be present, so the saving and reading of the data carries on seamlessly. It’s always a good idea to design your serialization with this firmly in mind.
The Left, Top, Width and Height properties must be set before we attempt to call Transform. If we forget to set them, all that will happen is that the rectangle that’s created will be 0 pixels in size, and we wouldn’t want a zero pixel crop.
The Transform method is where the “clever” stuff actually happens. I bet you thought there would be more to it. All it does is create a rectangle based on the size and location set in the properties, and then it uses the inbuilt CroppedBitmap class to actually perform the crop.
See! I told you that was easy. Next, I’ll show you what the FlipImage transformation looks like:
using System;
using System.Windows.Media.Imaging;
using System.Windows.Media;
using System.Runtime.Serialization;
namespace Huda.Transformations
{
    [Serializable]
    public class FlipImage : IImageTransform
    {
        public FlipImage()
        {
            Version = 1;
        }
        protected FlipImage(SerializationInfo info, StreamingContext context)
        {
            Version = info.GetInt32(Constants.Version);
            HorizontalFlip = info.GetBoolean(Constants.Horizontal);
        }
        public int Version { get; private set; }
        public bool HorizontalFlip { get; set; }
        public BitmapSource Transform(BitmapSource source)
        {
            source = new TransformedBitmap
                (source, new ScaleTransform(HorizontalFlip ? -1 : 1, HorizontalFlip ? 1 : -1));
            return source;
        }
        public void GetObjectData(SerializationInfo info, StreamingContext context)
        {
            info.AddValue(Constants.Version, Version);
            info.AddValue(Constants.Horizontal, HorizontalFlip);
        }
    }
}
I won’t explain this code, as it’s largely the same as the CropImage code. If you’re interested in why I didn’t put things like the Version and Transform into an abstract base class, please let me know and I’ll cover attempt to answer it in the comments. At this point, the judges are screaming for mercy and begging me to stop, so I’ll try not to go too far into philosophical architectural debates.
The ResizeImage transformation is an interesting one (well, interesting if you’re into that type of thing), and the Transform code is more complex than other transformations. To save you having to fight with this yourself, here it is:
using System;
using System.Windows.Media.Imaging;
using System.Windows.Media;
using System.Windows;
using System.Runtime.Serialization;
namespace Huda.Transformations
{
    [Serializable]
    public class ResizeImage : IImageTransform
    {
        public ResizeImage()
        {
            Version = 1;
        }
        protected ResizeImage(SerializationInfo info, StreamingContext context)
            : this()
        {
            Version = info.GetInt32(Constants.Version);
            Width = info.GetInt32(Constants.Width);
            Height = info.GetInt32(Constants.Height);
        }
        public int Version
        {
            get;
            private set;
        }
        public int Width { get; set; }
        public int Height { get; set; }
        public BitmapSource Transform(BitmapSource source)
        {
            Rect rect = new Rect(0, 0, Width, Height);
            DrawingVisual visual = new DrawingVisual();
            using (DrawingContext ctx = visual.RenderOpen())
            {
                ctx.DrawImage(source, rect);
            }
            RenderTargetBitmap resized = new RenderTargetBitmap(
                Width, Height, 96, 96, PixelFormats.Default
                );
            resized.Render(visual);
            return resized;
        }
        public void GetObjectData(SerializationInfo info, StreamingContext context)
        {
            info.AddValue(Constants.Version, Version);
            info.AddValue(Constants.Width, Width);
            info.AddValue(Constants.Height, Height);
        }
    }
}
The constants we’d use:
namespace Huda.Transformations
{
    public class Constants
    {
        public const string Left = "Left";
        public const string Right = "Right";
        public const string Top = "Top";
        public const string Bottom = "Bottom";
        public const string Width = "Width";
        public const string Height = "Height";
        public const string Horizontal = "Horizontal";
        public const string Version = "Version";
    }
}
I have been asked how the gesture hookup behaves. Well, imagine you were tracking mouse moves to see which items were under the cursor, you might want to create a Blend Behavior that looked something like this:
using System;
using System.Collections.Generic;
using System.Linq;
using System.Text;
using System.Windows;
using System.Windows.Interactivity;
using System.Windows.Input;
using System.Windows.Controls;
using System.Diagnostics;
using System.Timers;
using System.Windows.Media;
using LinqToVisualTree;
using System.Windows.Threading;
namespace Huda.Behaviors
{
public class GestureMovementBehavior : Behavior<TreeView>
{
private bool inBounds;
private Timer selectedTimer = new Timer();
private TreeViewItem selectedTreeview;
private TreeViewItem previousTreeView;
protected override void OnAttached()
{
Window.GetWindow(AssociatedObject).MouseMove += GestureMovementBehavior_MouseMove;
selectedTimer.Interval = 2000;
selectedTimer.AutoReset = true;
selectedTimer.Elapsed += selectedTimer_Elapsed;
base.OnAttached();
}
void selectedTimer_Elapsed(object sender, ElapsedEventArgs e)
{
selectedTimer.Stop();
Dispatcher.Invoke(DispatcherPriority.Normal,
(Action)delegate()
{
if (previousTreeView != null)
{
previousTreeView.IsSelected = false;
}
previousTreeView = selectedTreeview;
selectedTreeview.IsSelected = true;
});
}
protected override void OnDetaching()
{
Window.GetWindow(AssociatedObject).MouseMove -= GestureMovementBehavior_MouseMove;
base.OnDetaching();
}
void GestureMovementBehavior_MouseMove(object sender, MouseEventArgs e)
{
Point pt = e.GetPosition(Window.GetWindow(AssociatedObject));
Rect rect = new Rect();
rect = AssociatedObject.RenderTransform.TransformBounds(
new Rect(0, 0, AssociatedObject.ActualWidth, AssociatedObject.ActualHeight));
if (rect.Contains(pt))
{
if (!inBounds)
{
inBounds = true;
}
if (selectedRectangle == null || !selectedRectangle.Contains(pt))
{
GetElement(pt);
}
}
else
{
if (inBounds)
{
selectedTimer.Stop();
inBounds = false;
}
}
}
private Rect selectedRectangle;
private void GetElement(Point pt)
{
IInputElement element = AssociatedObject.InputHitTest(pt);
if (element == null) return;
TreeViewItem t = FindUpVisualTree<TreeViewItem>((DependencyObject)element);
if (t != null)
{
if (selectedTreeview != t)
{
selectedTimer.Stop();
selectedTreeview = t;
selectedRectangle = selectedTreeview.RenderTransform.TransformBounds(
new Rect(0, 0, t.ActualWidth, t.ActualHeight));
selectedTimer.Start();
}
}
else
{
selectedTimer.Stop();
selectedTreeview = null;
}
}
private T FindUpVisualTree<T>(DependencyObject initial) where T : DependencyObject
{
DependencyObject current = initial;
while (current != null && current.GetType() != typeof(T))
{
current = VisualTreeHelper.GetParent(current);
}
return current as T;
}
}
}
With only a minimal amount of change, that’s exactly the Behavior that you hook up to a treeview.
And there you have it – code to do some basic transformations. The other filters that I apply will all follow this pattern, so it’s an incredibly trivial thing for me to put in place – and, more importantly, this provides the core functionality for me to save out the filters along with details of the files they apply to. All of a sudden, this application is starting to come together.
This Week's Music
- Deep Purple – Purpendicular
- Elbow – Build A Rocket Boys
- David Garrett – Rock Symphonies
- Crash Test Dummies – God Shuffled His Feet
- Nickelback – All The Right Reasons
- Jethro Tull – Aqualung Live
- Creedance Clearwater Revival – Creedance Clearwater Revival
- Deep Purple – The Battle Rages On
- Caitlin – The Show Must Go On
Status Update
I’ve reached the end of the week and it’s worth taking stock of where I’ve reached. The harsh reality right now is that I won’t be delivering a fully-featured photo editing application at the end. Before the alarm bells start ringing, this is exactly what I expected. The aim for this competition is not to release the next Photoshop at the end of week 7. This would be a physical impossibility, given how I’m incorporating none Photoshop features. I am confident, however, that I will deliver what I was aiming at from the very start – a non destructive gesture and touch driven photo editing application. For this reason, I am only going to incorporate a limited number of filters. Don’t worry though, if you want to use Huda, I will continue developing it once the contest has finished. Your investment in using it will not be wasted.
Right now, Huda is limited to only editing a single image at a time. If I have time, before the end of the contest, I will give Huda the ability to edit multiple photos. Over the next week, I’m going to be tackling the reordering of items in the list, fleshing out that toolbar and also having the interface behave a little bit differently when it’s in tablet or desktop mode. Right now, the design has all been based on a tablet experience – but let’s see what we can do for the desktop users. Oh, and I should have the first draft of the voice context in place as well.
A developer for over 30 years, I've been lucky enough to write articles and applications for Code Project as well as the Intel Ultimate Coder - Going Perceptual challenge. I live in the North East of England with 2 wonderful daughters and a wonderful wife.
I am not the Stig, but I do wish I had Lotus Tuned Suspension.


