Here I’ll show you how to use the trained models you’ve obtained to complete the deep fake pipeline by swapping the transformed faces.
Deep fakes - the use of deep learning to swap one person's face into another in video - are one of the most interesting and frightening ways that AI is being used today.
While deep fakes can be used for legitimate purposes, they can also be used in disinformation. With the ability to easily swap someone's face into any video, can we really trust what our eyes are telling us? A real-looking video of a politician or actor doing or saying something shocking might not be real at all.
In this article series, we're going to show how deep fakes work, and show how to implement them from scratch. We'll then take a look at DeepFaceLab, which is the all-in-one Tensorflow-powered tool often used for creating convincing deep fakes.
In the previous article, we talked about Google AI Platform and how to train your models there with some help from Docker containers. In this article, I’ll launch a new notebook (I did this in Kaggle but you can do it locally if your computer is GPU enabled) and take the resulting models trained previously, using them to swap faces in the src frames to finally merge them and recreate the original video but this time we’ll obtain our final deep fake.
If you trained your models in a Kaggle Notebook and you plan to stay in this platform, use its output as the input of the one that we’re going to create. If you trained your models in AI Platform and you plan to work on Kaggle, import them as you would normally import a dataset, and if you plan to work locally then move the models to your Notebook directory. Keep in mind that your machine needs to have a GPU, otherwise it will crash when trying to load the models.
In my case, I used the last notebook’s output as the input of the one that I’ll launch in Kaggle to wrap up the project. An important element you need to get is the shape_predictor_68_face_landmarks.dat file. Download it now before you continue.
Transforming the src Faces into dst Faces
What we’ll do in the following lines is extract the frames from the src video, extract the faces from the frames, use those faces to get the transformed dst faces, and then insert them into the src frames. Then we simply chain them together to obtain the deep fake video.
Let’s start by importing the required libraries:
import numpy as np
import pandas as pd
import keras
import tensorflow
from tensorflow.keras.models import load_model
import gc
import matplotlib.pyplot as plt
import cv2
import os
import dlib
from IPython.display import clear_output
Now we need to create some directories where we’ll save the resulting images along this notebook:
!cd /kaggle/working/
!mkdir frames
!mkdir results
!mkdir transformed
!mkdir final
!ls /kaggle/working/
__notebook__.ipynb final frames results transformed
Now, it’s time to extract the src frames and store them according to their sequence. To do so, we’ll save them with ascending numbers as file names in a particular directory:
input_path = '/kaggle/input/presidentsdataset/presidents/trump1.mp4'
output_path = '/kaggle/working/frames/'

def extract_frames(input_path,output_path):
    videocapture = cv2.VideoCapture(input_path)
    success,image = videocapture.read()
    count = 0
    while success:
        cv2.imwrite(output_path+"%d.jpg" % count, image)
        success,image = videocapture.read()
        count += 1
    print('Frames extraction has ended')
    return count

frames = extract_frames(input_path,output_path)
Frames extraction has ended
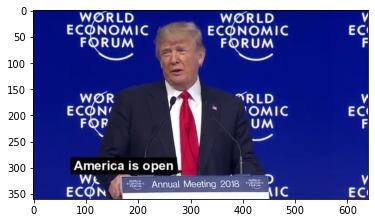
Let’s take a look to how a frame looks:
%matplotlib inline
plt.figure()
image = cv2.imread('/kaggle/working/frames/120.jpg')
image = cv2.cvtColor(image, cv2.COLOR_BGR2RGB)
plt.imshow(image)
plt.show()
It’s time now to extract the faces from the src frames and save them with the same name as their respective frames. We’ll use the MTCNN library as we did before to extract the faces:
!pip install mtcnn
from mtcnn import MTCNN

def extract_faces(source,destination,detector):
    counter = 0
    for dirname, _, filenames in os.walk(source):
        for filename in filenames:
            try:
                image = cv2.imread(os.path.join(dirname, filename))
                image = cv2.cvtColor(image, cv2.COLOR_BGR2RGB)
                detections = detector.detect_faces(image)
                x, y, width, height = detections[0]['box']
                x1,y1,x2,y2 = x-10,y+10,x-10 +width + 20,y+10+height
                face = image[y1:y2, x1:x2]
                face = cv2.resize(face, (120, 120), interpolation=cv2.INTER_LINEAR)
                plt.imsave(os.path.join(destination,filename),face)
                clear_output(wait=True)
                print("Extraction progress: "+str(counter)+"/"+str(len(filenames)-1))
            except:
                pass
            counter += 1
Extraction progress: 1701/1701
Let’s take a look at one of the extracted faces:
%matplotlib inline
plt.figure()
image = cv2.imread('/kaggle/working/results/120.jpg')
image = cv2.cvtColor(image, cv2.COLOR_BGR2RGB)
plt.imshow(image)
plt.show()
The image:

Now that we have all the faces extracted and saved in their respective directories, let’s transform all of them to get their dst version. Remember that the goal here is to get dst faces with the facial gestures from src faces. To load the autoencoder models, issue these commands:
autoencoder_a = load_model("/kaggle/input/deepfakes-model-training/autoencoder_a.hdf5")
autoencoder_b = load_model("/kaggle/input/deepfakes-model-training/autoencoder_b.hdf5")
Use autoencoder_a's encoder and autoencoder_b’s decoder to transform the faces:
encoder_a = keras.Model(autoencoder_a.layers[1].input, autoencoder_a.layers[1].output)
decoder_b = keras.Model(autoencoder_b.layers[2].input, autoencoder_b.layers[2].output)
Now let’s create the function that will transform the actual faces:
def face_transform(source,destination,encoder,decoder):
counter = 0
for dirname, _, filenames in os.walk(source):
for filename in filenames:
try:
image = cv2.imread(os.path.join(source, filename))
image = cv2.cvtColor(image, cv2.COLOR_BGR2RGB)
image = image.astype('float32')
image /= 255.0
image = encoder.predict(np.array([image]))
image = decoder.predict(image)
image = cv2.normalize(image, None, alpha = 0, beta = 255, norm_type = cv2.NORM_MINMAX, dtype = cv2.CV_32F)
image = image.astype(np.uint8)
plt.imsave(os.path.join(destination,filename),image[0])
counter += 1
clear_output(wait=True)
print("Transformation progress: "+str(counter)+"/"+str(len(filenames)))
except:
print('exception')
Pass
And run it by issuing:
face_transform('/kaggle/working/results/','/kaggle/working/transformed',encoder_a,decoder_b)
Transformation progress: 1701/1701
Let’s plot the transformed image corresponding to the previous face shown:
%matplotlib inline
plt.figure()
image = cv2.imread('/kaggle/working/transformed/120.jpg')
image = cv2.cvtColor(image, cv2.COLOR_BGR2RGB)
plt.imshow(image)
plt.show()
Once you have your transformed dst faces saved with the respective name of their corresponding src faces, it’s time to start the face swapping.
Swapping Faces from src Frames With dst Faces
There are several ways to perform a face swapping operation. You can use your own script or use an existing script to save you several hours of work. At the end, you’ll likely get the same results as with your DIY solution, since most of these algorithms are based on the same principle (Delanuay triangulation applied to face swapping). There are three popular scripts that I’ve researched: FaceSwap by Wuhuikai, FaceSwap by Satya Mallick faceswap by Matthew Earl.
We’ll use the last one because it implements partial face swapping, which worked better for us during testing. Depending on the results that you obtain during face transformation, you might find that another method will fit better for you, so give all of them a try! For now, let’s start with the actual code:
Cloning the suggested repo to the notebook’s /working directory:
!git clone https://github.com/matthewearl/faceswap.git
Keep in mind that we’ll use the shape_predictor_68_face_landmarks file that I mentioned before. It’s a model used by dlib library to detect the region that contains the faces in our frames.
Now we need to make some modifications to the script to make it executable in our notebook. To do so, load the faceswap.py file with the python magic command %load ./faceswap/faceswap.py
Automatically, the file will open in that notebook cell and allow you to modify it.
Once it opens the file, look for the PREDICTOR_PATH variable and modify it to the one that points to your shape_predictor_68_face_landmarks.dat file. In my case, I’ve modified it to PREDICTOR_PATH = '../input/shape-predictor-68-face-landmarksdat/shape_predictor_68_face_landmarks.dat'.
Secondly, we need to modify the last line in order to save the resulting face swap output image into the folder that we need with the name that we require. To do so, comment the last line, and add this below it:
cv2.imwrite(sys.argv[3], output_im)
Finally, to rewrite the file, delete the python magic command %load ./faceswap/faceswap.py that appears commented at the top of the file and replace it with %%writefile ./faceswap/faceswap.py
Run the cell, and if everything goes well, you should get a message saying the file has been overwritten. If you’re having doubts about how to modify the file and what the final outcome should look like, check out the notebook of this article.
It’s time to swap faces using the modified script. I’ve coded a function that will do the heavy lifting for us:
def massive_face_swap(source,destination,output):
    counter = 0
    for dirname, _, filenames in os.walk(source):
        for filename in filenames:
            current_src = os.path.join(dirname, filename)
            current_dst = os.path.join(destination, filename)
            current_out = os.path.join(output, filename)
            !python /kaggle/working/faceswap/faceswap.py {current_dst} {current_src} {current_out}
            clear_output(wait=True)
            print("Swap progress: "+str(counter)+"/"+str(len(filenames)-1))
            counter += 1
Run it by passing the relative paths of the transformed faceset, the frames, and where you want to save the frames with swapped faces:
massive_face_swap('./transformed','./frames','./final')
Swap progress: 1700/1700
Let’s plot a sample:
%matplotlib inline
plt.figure()
image = cv2.imread('/kaggle/working/final/150.jpg')
image = cv2.cvtColor(image, cv2.COLOR_BGR2RGB)
plt.imshow(image)
plt.show()
To compare it with the original frame:
plt.figure()
image = cv2.imread('/kaggle/working/frames/150.jpg')
image = cv2.cvtColor(image, cv2.COLOR_BGR2RGB)
plt.imshow(image)
plt.show()
Not bad, huh? However, here you’ll notice that there are certain imperfections in the faces’ transformation and swapping. In deep fakes creation, it can happen because the faceset is too small, or because you didn’t train the models for enough iterations. In our case, and as I mentioned before, we trained it for 2700 epochs, but usually these models require to be trained for more than 15000 iterations.
These are some of the best frames that we could obtain:
Now that you’ve seen how complex the last steps have been, it’s time to put all together and generate our deep fake.
Video Rebuilding: Getting our Deep Fake Video
To finally get our long-awaited deep fake, we simply need to reconstruct the video with the resulting frames instead of the original ones. To do this, with some help of openCV, run these lines of code:
frames = []
for i in range(1701):
    image = image = cv2.imread(os.path.join('/kaggle/working/final', str(i)+'.jpg'))
    height, width, layers = image.shape
    frames.append(image)
frames = np.array(frames)
videomaker = cv2.VideoWriter('/kaggle/working/deepfake.avi', cv2.VideoWriter_fourcc(*'DIVX'), 25, (width,height))

for frame in frames:
    videomaker.write(frame)

videomaker.release()
Once the execution has ended, you can see your deepfake.avi (mine is here) at /kaggle/working if that’s the directory that you defined. That’s all for now! I hope these steps were helpful for you in this DIY approach to deep fake creation. In the final article we’ll explore DeepFaceLab as an alternative to our last approach. I hope to see you there!
Sergio Virahonda grew up in Venezuela where obtained a bachelor's degree in Telecommunications Engineering. He moved abroad 4 years ago and since then has been focused on building meaningful data science career. He's currently living in Argentina writing code as a freelance developer.


