Here I’ll deep dive into creating our Docker container for the training of our deep fake models and submitting the job onto Google AI Platform.
Deep fakes - the use of deep learning to swap one person's face into another in video - are one of the most interesting and frightening ways that AI is being used today.
While deep fakes can be used for legitimate purposes, they can also be used in disinformation. With the ability to easily swap someone's face into any video, can we really trust what our eyes are telling us? A real-looking video of a politician or actor doing or saying something shocking might not be real at all.
In this article series, we're going to show how deep fakes work, and show how to implement them from scratch. We'll then take a look at DeepFaceLab, which is the all-in-one Tensorflow-powered tool often used for creating convincing deep fakes.
In the previous articles, we talked about autoencoders for deep fakes and what’s required to make them work. If you’re just joining me, I most recently explained the prerequisites and then jumped into the code for container creation and submitting to Google Cloud Platform, so please don’t skip it, otherwise the steps outlined here may not work as expected. In this article, I’ll show you how to create, test, and submit the container referenced. Let’s get into it!
Our Docker Container’s Structure
In our case, our Docker container isn’t complex and contains only a few files:
/deepfakes
|
| -- Dockerfile
| -- config.yaml
| -- model.py
| -- task.py
| -- data_utils.py
- Dockerfile states the necessary guidelines to use the proper image, install the prerequisites for our training to run smoothly, copy the files to the Docker image, and define the entrypoint for this container. You can find the Dockerfile basics for AI Platform here.
- config.yaml contains the information required to define the training tier. It’s essentially a file that states how much computing resources you’ll need to train your models. You can find the steps on how to build this file, understand, and define the tier you need to use here. If you plan to implement GPU based training, you can find the pricing here.
- task.py handles everything related to the model training workflow. It calls the required functions to get the arguments passed through the CLI, unzip, preprocess, and split the data obtained from the GitHub repository. It sets the GPUs up, builds the model, starts the training and saves the resulting autoencoders in Google Storage.
- model.py contains only a function that builds our model and returns it once it’s been compiled.
- data_utils.py contains the necessary functions for data loading, dataset creation and model saving.
Let’s get into actual code! But first, create a folder in your machine that will contain all of them.
Coding the Dockerfile
As I mentioned in the Docker Containers Overview article, this file states everything required to build up our container. This is the Dockerfile required to make this container executable in Google AI Platform:
FROM gcr.io/deeplearning-platform-release/tf2-gpu.2-3
WORKDIR /root

RUN pip install pandas numpy google-cloud-storage scikit-learn opencv-python
RUN apt-get update; apt-get install git -y; apt-get install -y libgl1-mesa-dev
RUN git clone https://github.com/sergiovirahonda/DeepFakesDataset.git

COPY model.py ./model.py
COPY data_utils.py ./data_utils.py
COPY task.py ./task.py

ENTRYPOINT ["python","task.py"]
The first line indicates that we’re going to use the TensorFlow 2 GPU powered image which is Ubuntu based. The second line defines which is going to be the working directory. Lines three and four install the required dependencies. Line five clones the repo where our raw dataset is contained, and from lines six to eight we copy the .py files that will be required for model training. Finally, we indicate that the training process starts on the task.py file and that it must be interpreted with Python. Copy and paste those commands into your Dockerfile.
Defining the config.yaml File
This file will depend on your needs. If you want to accelerate your training process, it may become more complex, but for our case this is how the file looks:
trainingInput:
    scaleTier: CUSTOM
masterType: standard_gpu
I’m using a single standard GPU machine, but you could add more if required and implement distributed training.
Coding the task.py File
As I mentioned before, this file will handle everything related to a training job. It’s the container entry and calls all the peripheral files and functions:
import tensorflow as tf
from tensorflow.keras.callbacks import ModelCheckpoint
import argparse
import data_utils
import model
import sys
import os
from google.cloud import storage
import datetime
def train_model(args):
X_train_a, X_test_a, X_train_b, X_test_b = data_utils.load_data(args)
print("Num GPUs Available: ", len(tf.config.experimental.list_physical_devices('GPU')))
tf.config.set_soft_device_placement(True)
tf.debugging.set_log_device_placement(True)
autoencoder_a = model.autoencoder_model()
autoencoder_b = model.autoencoder_model()
print('Starting autoencoder_a training', flush=True)
checkpoint_1 = ModelCheckpoint("autoencoder_a.hdf5", monitor='val_loss', verbose=1,save_best_only=True, mode='auto', save_freq="epoch")
autoencoder_a.fit(X_train_a, X_train_a,epochs=args.epochs,batch_size=128,shuffle=True,validation_data=(X_test_a, X_test_a),callbacks=[checkpoint_1])
print('Training A has ended. ',flush=True)
print('Starting autoencoder_b training', flush=True)
checkpoint_2 = ModelCheckpoint("autoencoder_b.hdf5", monitor='val_loss', verbose=1,save_best_only=True, mode='auto', save_freq='epoch')
autoencoder_b.fit(X_train_a, X_train_a,epochs=args.epochs,batch_size=128,shuffle=True,validation_data=(X_test_b, X_test_b),callbacks=[checkpoint_2])
print('Training B has ended. ',flush=True)
print('Proceeding to save models into GCP.',flush=True)
data_utils.save_model(args.bucket_name,'autoencoder_a.hdf5')
print('autoencoder_a saved at GCP Storage', flush=True)
data_utils.save_model(args.bucket_name,'autoencoder_b.hdf5')
print('autoencoder_b saved at GCP Storage', flush=True)
def get_args():
parser = argparse.ArgumentParser()
parser.add_argument('--bucket-name',
type=str,
help='GCP bucket name')
parser.add_argument('--epochs',
type=int,
default=10,
help='Epochs number')
args = parser.parse_args()
return args
def main():
args = get_args()
train_model(args)
if __name__ == '__main__':
main()
Keep in mind that if you decide to increase the number of training machines and use multi GPUs, you need to adopt a strategy for this. A very common one is MirroredStrategy.
Coding the model.py File
I already went through the model developing a few articles before, and this file essentially recycles the code necessary to build our autoencoders. It only contains a function that returns our model already compiled:
from tensorflow.keras.models import load_model
from tensorflow.keras import Model
from tensorflow.keras import layers
from tensorflow.keras import optimizers
import tensorflow as tf
import numpy as np
def autoencoder_model():
input_img = layers.Input(shape=(120, 120, 3))
x = layers.Conv2D(256,kernel_size=5, strides=2, padding='same',activation='relu')(input_img)
x = layers.MaxPooling2D((2, 2), padding='same')(x)
x = layers.Conv2D(512,kernel_size=5, strides=2, padding='same',activation='relu')(x)
x = layers.MaxPooling2D((2, 2), padding='same')(x)
x = layers.Conv2D(1024,kernel_size=5, strides=2, padding='same',activation='relu')(x)
x = layers.MaxPooling2D((2, 2), padding='same')(x)
x = layers.Flatten()(x)
x = layers.Dense(9216)(x)
encoded = layers.Reshape((3,3,1024))(x)
encoder = Model(input_img, encoded,name="encoder")
encoder.summary()
decoder_input= layers.Input(shape=((3,3,1024)))
x = layers.Conv2D(1024,kernel_size=5, strides=2, padding='same',activation='relu')(decoder_input)
x = layers.UpSampling2D((2, 2))(x)
x = layers.Conv2D(512,kernel_size=5, strides=2, padding='same',activation='relu')(x)
x = layers.UpSampling2D((2, 2))(x)
x = layers.Conv2D(256,kernel_size=5, strides=2, padding='same',activation='relu')(x)
x = layers.Flatten()(x)
x = layers.Dense(np.prod((120, 120, 3)))(x)
decoded = layers.Reshape((120, 120, 3))(x)
decoder = Model(decoder_input, decoded,name="decoder")
decoder.summary()
auto_input = layers.Input(shape=(120,120,3))
encoded = encoder(auto_input)
decoded = decoder(encoded)
autoencoder = Model(auto_input, decoded,name="autoencoder")
autoencoder.compile(optimizer=optimizers.Adam(lr=5e-5, beta_1=0.5, beta_2=0.999), loss='mae')
autoencoder.summary()
return autoencoder
Coding our data_utils.py File
Our last file is called by task.py to preprocess the data cloned from the GitHub repository and return it splitted but also to save the model onto our Google Cloud Storage bucket:
import datetime
from google.cloud import storage
import pandas as pd
import numpy as np
from sklearn.model_selection import train_test_split
from sklearn import preprocessing
import os
import zipfile
import cv2
import sys

def load_data(args):
    sys.stdout.write("Starting data processing")
    print('Current directory:', flush=True)
    print(os.getcwdb(), flush=True)
    entries = os.listdir('/root/DeepFakesDataset')
    print(entries)
    print('Extracting files', flush=True)

    file_1 = '/root/DeepFakesDataset/trump.zip'
    file_2 = '/root/DeepFakesDataset/biden.zip'
    extract_to = '/root/DeepFakesDataset/'

    with zipfile.ZipFile(file_1, 'r') as zip_ref:
        zip_ref.extractall(extract_to)

    with zipfile.ZipFile(file_2, 'r') as zip_ref:
        zip_ref.extractall(extract_to)

    print('Files extracted', flush=True)

    faces_1 = create_dataset('/root/DeepFakesDataset/trump')
    print('First dataset created', flush=True)
    faces_2 = create_dataset('/root/DeepFakesDataset/biden')
    print('Second dataset created', flush=True)

    print("Total President Trump face's samples: ",len(faces_1))
    print("Total President Biden face's samples: ",len(faces_2))

    X_train_a, X_test_a, y_train_a, y_test_a = train_test_split(faces_1, faces_1, test_size=0.20, random_state=0)
    X_train_b, X_test_b, y_train_b, y_test_b = train_test_split(faces_2, faces_2, test_size=0.15, random_state=0)

    print(X_train_a.shape)
    print(X_train_a[0])

    return X_train_a, X_test_a, X_train_b, X_test_b

def create_dataset(path):
    images = []
    for dirname, _, filenames in os.walk(path):
        for filename in filenames:
            image = cv2.imread(os.path.join(dirname, filename))
            image = cv2.cvtColor(image, cv2.COLOR_BGR2RGB)
            image = image.astype('float32')
            image /= 255.0
            images.append(image)
    images = np.array(images)
    return images

def save_model(bucket_name, best_model):
    print('inside save_model, about to save it to GCP Storage',flush=True)
    bucket = storage.Client().bucket(bucket_name)
    print(bucket)
    blob1 = bucket.blob('{}/{}'.format(datetime.datetime.now().strftime('model_%Y%m%d_%H%M%S'),best_model))
blob1.upload_from_filename(best_model)
Building and Pushing the Docker Image to Google AI Platform
We’re really close to finishing! There are just a few more commands. Keep up the good work!
Launch a terminal window, browse to the folder where the files for your container are stored and run the following:
docker build -f Dockerfile -t $IMAGE_URI ./
This command will take a few minutes to complete. It will initiate the Docker image download and follow all the instructions stated in the Dockerfile. At the end, it will create the container in your local registry.
To push the Docker image to GCP, run docker push $IMAGE_URI. It will take a few minutes to complete. Essentially it will push the image you just built onto the GCP registry so you can use it later to initiate the training job, which is the next thing we’re going to do. Once the push process has ended, it’s time to finally submit the job to get our models trained.
By the way, if you’re having issues with pushing your image to GCP, this resource could help you a lot to find out what’s going on.
Submitting and Monitoring the Training Job onto Google AI Platform
To submit the training job to AI Platform, issue the following command, where the only thing you need to adjust is the --epochs parameter. Set it to the number of iterations that you require to reach a good metric number. Remember that the higher the epochs number, the better your autoencoders will be. Once you hit enter, it should show that the job has been submitted correctly.
gcloud ai-platform jobs submit training $JOB_NAME --region $REGION --master-image-uri $IMAGE_URI --config config.yaml -- --epochs=10000 --bucket-name=$BUCKET_NAME
To monitor your training job and understand what’s going on up there, issue the command gcloud ai-platform jobs describe $JOB_NAME which will automatically return the URL where the training logs can be seen. An alternative is to use the training jobs page and select the job you’ve submitted. Keep in mind that the process can take several hours, or even more if you train your models on a single instance with only one GPU. Once the training has ended, you should find the models’ files in the bucket that you created before.
Finding and Downloading your Trained Models in the GCS Bucket
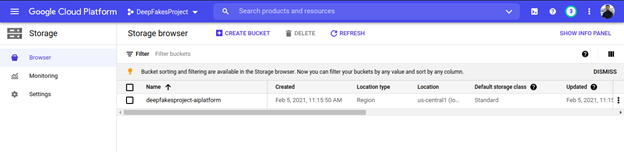
It’s time to finally download what you’ve been waiting so long for. Open up the GCP console, use the left hand side panel to find Storage, and voila! Your bucket with the models trained is inside:
Each model and its related files will be saved in different folders:

And inside you’ll find the respective .hdf5 file that you can download and then load from anywhere else:
Finally, to download everything, just select them all and click the "Download" button. The download process will start automatically. If you’re sure you don’t need to train further, then go ahead and shut down the project to avoid additional charges in your billing account:
We’ve reached the end of this article. I hope you were able to obtain the same results as me! In the next article, I’ll show you how to use the trained models you’ve obtained to complete the deep fake pipeline by swapping the transformed faces. See you there!
Sergio Virahonda grew up in Venezuela where obtained a bachelor's degree in Telecommunications Engineering. He moved abroad 4 years ago and since then has been focused on building meaningful data science career. He's currently living in Argentina writing code as a freelance developer.


