Here we’ll combine the Core ML version of the YOLO v2 model with the video stream capturing capabilities of our iOS app, and add object detection to that app.
This series assumes that you are familiar with Python, Conda, and ONNX, as well as have some experience with developing iOS applications in Xcode. You are welcome to download the source code for this project. We’ll run the code using macOS 10.15+, Xcode 11.7+, and iOS 13+.
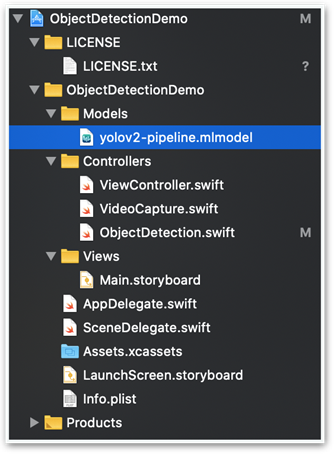
Adding Model to Our Application
The first thing we need to do is to copy yolov2-pipeline.mlmodel (which we have saved previously to the Models folder of our ObjectDetectionDemo iOS application) and add it to project files:
Running Object Detection on Captured Video Frames
To use our model, we need to introduce a few changes to our code from the previous article.
The startCapture method of the VideoCapture class needs to accept and store a Vision framework request parameter, VNRequest:
public func startCapture(_ visionRequest: VNRequest?) {
    if visionRequest != nil {
        self.visionRequests = [visionRequest!]
    } else {
        self.visionRequests = []
    }

    if !captureSession.isRunning {
        captureSession.startRunning()
    }
}
Now let’s add the ObjectDetection class with the following createObjectDetectionVisionRequest method:
createObjectDetectionVisionRequest method:
public func createObjectDetectionVisionRequest() -> VNRequest? {
    do {
        let model = yolov2_pipeline().model
        let visionModel = try VNCoreMLModel(for: model)
        let objectRecognition = VNCoreMLRequest(model: visionModel, completionHandler: { (request, error) in
            DispatchQueue.main.async(execute: {
                if let results = request.results {
                    self.processVisionRequestResults(results)
                }
            })
        })

        objectRecognition.imageCropAndScaleOption = .scaleFill
        return objectRecognition
    } catch let error as NSError {
        print("Model loading error: \(error)")
        return nil
    }
}
Note that we use the .scaleFill value for imageCropAndScaleOption. This introduces a small distortion to the image when scaling from the captured 480 x 640 size to the 416 x 416 sizethe model requires. It won’t have a significant impact on the results. On the other hand, it will make further scaling operations simpler.
The introduced code needs to be used in the main ViewController class:
self.videoCapture = VideoCapture(self.cameraView.layer)
self.objectDetection = ObjectDetection(self.cameraView.layer, videoFrameSize: self.videoCapture.getCaptureFrameSize())

let visionRequest = self.objectDetection.createObjectDetectionVisionRequest()
self.videoCapture.startCapture(visionRequest)
With such a framework in place, we can execute the logic defined in visionRequest each time a video frame is captured:
public func captureOutput(_ output: AVCaptureOutput, didOutput sampleBuffer: CMSampleBuffer, from connection: AVCaptureConnection) {
    guard let pixelBuffer = CMSampleBufferGetImageBuffer(sampleBuffer) else {
        return
    }

    let frameOrientation: CGImagePropertyOrientation = .up
    let imageRequestHandler = VNImageRequestHandler(cvPixelBuffer: pixelBuffer, orientation: frameOrientation, options: [:])
    do {
        try imageRequestHandler.perform(self.visionRequests)
    } catch {
        print(error)
    }
}
With the above changes, the yolov2_pipeline model is used on each captured frame, then the detection results are passed to the ObjectDetection.processVisionRequestResults method. Thanks to the model_decoder and model_nms components of the pipeline model we have implemented previously, no decoding logic is required on the iOS side. We simply read the most likely observation (objectObservation) and draw the corresponding box on the captured frame (calling the createBoundingBoxLayer and addSublayer methods):
private func processVisionRequestResults(_ results: [Any]) {
    CATransaction.begin()
    CATransaction.setValue(kCFBooleanTrue, forKey: kCATransactionDisableActions)

    self.objectDetectionLayer.sublayers = nil
    for observation in results where observation is VNRecognizedObjectObservation {
        guard let objectObservation = observation as? VNRecognizedObjectObservation else {
            continue
        }

        let topLabelObservation = objectObservation.labels[0]
        let objectBounds = VNImageRectForNormalizedRect(
            objectObservation.boundingBox,
            Int(self.objectDetectionLayer.bounds.width), Int(self.objectDetectionLayer.bounds.height))

        let bbLayer = self.createBoundingBoxLayer(objectBounds, identifier: topLabelObservation.identifier, confidence: topLabelObservation.confidence)
        self.objectDetectionLayer.addSublayer(bbLayer)
    }
    CATransaction.commit()
}
Drawing Bounding Boxes
Drawing boxes is relatively simple and not specific to the Machine Learning part of our application. The main difficulty here is to use a proper scale and coordinate system: "0,0" means the upper left corner for the model but it means lower-left for the iOS and the Vision framework.
Two methods of the ObjectDetection class will handle this: setupObjectDetectionLayer and createBoundingBoxLayer. The former prepares the layer for the boxes:
private func setupObjectDetectionLayer(_ viewLayer: CALayer, _ videoFrameSize: CGSize) {
    self.objectDetectionLayer = CALayer()
    self.objectDetectionLayer.name = "ObjectDetectionLayer"
    self.objectDetectionLayer.bounds = CGRect(x: 0.0,
                                     y: 0.0,
                                     width: videoFrameSize.width,
                                     height: videoFrameSize.height)
    self.objectDetectionLayer.position = CGPoint(x: viewLayer.bounds.midX, y: viewLayer.bounds.midY)

    viewLayer.addSublayer(self.objectDetectionLayer)

    let bounds = viewLayer.bounds

    let scale = fmax(bounds.size.width  / videoFrameSize.width, bounds.size.height / videoFrameSize.height)

    CATransaction.begin()
    CATransaction.setValue(kCFBooleanTrue, forKey: kCATransactionDisableActions)

    self.objectDetectionLayer.setAffineTransform(CGAffineTransform(scaleX: scale, y: -scale))
    self.objectDetectionLayer.position = CGPoint(x: bounds.midX, y: bounds.midY)
    CATransaction.commit()
}
The createBoundingBoxLayer method creates the shapes to draw:
private func createBoundingBoxLayer(_ bounds: CGRect, identifier: String, confidence: VNConfidence) -> CALayer {
    let path = UIBezierPath(rect: bounds)

    let boxLayer = CAShapeLayer()
    boxLayer.path = path.cgPath
    boxLayer.strokeColor = UIColor.red.cgColor
    boxLayer.lineWidth = 2
    boxLayer.fillColor = CGColor(colorSpace: CGColorSpaceCreateDeviceRGB(), components: [0.0, 0.0, 0.0, 0.0])

    boxLayer.bounds = bounds
    boxLayer.position = CGPoint(x: bounds.midX, y: bounds.midY)
    boxLayer.name = "Detected Object Box"
    boxLayer.backgroundColor = CGColor(colorSpace: CGColorSpaceCreateDeviceRGB(), components: [0.5, 0.5, 0.2, 0.3])
    boxLayer.cornerRadius = 6

    let textLayer = CATextLayer()
    textLayer.name = "Detected Object Label"

    textLayer.string = String(format: "\(identifier)\n(%.2f)", confidence)
    textLayer.fontSize = CGFloat(16.0)

    textLayer.bounds = CGRect(x: 0, y: 0, width: bounds.size.width - 10, height: bounds.size.height - 10)
    textLayer.position = CGPoint(x: bounds.midX, y: bounds.midY)
    textLayer.alignmentMode = .center
    textLayer.foregroundColor =  UIColor.red.cgColor
    textLayer.contentsScale = 2.0

    textLayer.setAffineTransform(CGAffineTransform(scaleX: 1.0, y: -1.0))

    boxLayer.addSublayer(textLayer)
    return boxLayer
}
Application in Action
Congratulations – we have a working object detection app, which we can test in real life or – in our case – using a free clip from the Pixels portal.

Note that the YOLO v2 model is quite sensitive to image orientation, at least for some object classes (the Person class, for example). Its detection results deteriorate if you rotate the frame before processing.
This can be illustrated using any sample image from the Open Images dataset.
Exactly the same image – and two very different results. We need to keep this in mind to ensure proper orientation of the images fed to the model.
Next Steps?
And this is it! It was a long trip, but we have finally got to its end. We have a working iOS application for object detection in live video stream.
If you’re trying to decide what to do next, you’re limited only by your imagination. Consider these question:
- How could you use what you’ve learned to build a hazard detector for your car? If your iPhone were mounted on the dashboard if your car, facing forward, could you use what you’ve learned to make an app that would detect hazards and warn the driver?
- Could you build a bird detector that would alert a bird enthusiast when their favorite bird has landed at their bird feeder?
- If you have deer and other pests that roam into your garden and eat all of the vegetables you are growing, could you use your newly-acquired iOS object detection skills to build an iOS-powered electronic scarecrow to frighten the pests away?
The possibilities are endless. Why not try one of the ideas above - or come up with your own - and then write about it? The CodeProject community would love to see what you come up with.
Jarek has two decades of professional experience in software architecture and development, machine learning, business and system analysis, logistics, and business process optimization.
He is passionate about creating software solutions with complex logic, especially with the application of AI.


 General
  News
News  Suggestion
  Question
  Bug
Bug  Answer
  Joke
Joke  Praise
  Rant
Rant  Admin
Admin 


