This article demonstrates the basic application setup done for React and Redux application. However, we will be hooking up Redux with React in an upcoming article.
Introduction
This article is intended for beginners who wish to understand the environment setup for React and Redux application and get to know the nitty-gritty of the application building blocks that are getting created using the templates. For example, to create a React application, we can directly execute create-react-app in the terminal with the help of node but we may not understand the basic application completely as we are not aware of all those packages that have been added to our package.json file. Let's demystify the concepts with the help of simple book store application.
Background
Around a year ago, we adopted a new framework based on react and redux library and unfortunately in my team no one was much aware of that. So to learn, people started creating simple applications with ready to use templates but no one knew what packages were included in the simple application and how the application could be modified with different scripts or what a webpack could do to our application. To learn more on React basics, navigate to this page.
Prerequisites
Install NodeJS and Visual Studio Code into your development machine.
Setting the Base Environment
To create reactjs starter application, Facebook has provided a starter template to setup a basic React development environment. So let's create our book store application by issuing the below command:
npx create-react-app book-store
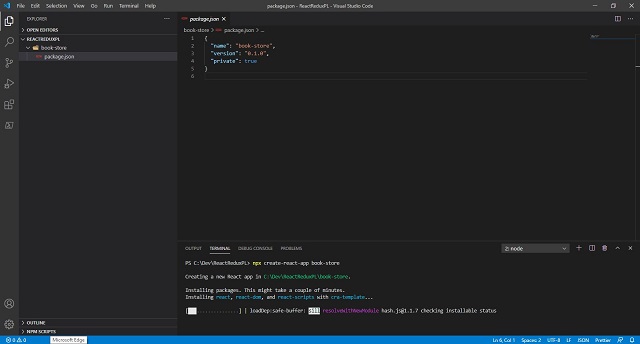
Once it is done, we will be able to see the folder structure as below. We can see the files and the dependencies added into package.json and there are few things that are made hidden for us. If you want to see it, you can try npm eject. However, we don't need to see it as anyways, we are going to setup everything ourselves.

Now in the terminal, we can dive into the application directory where our package.json resides and run the application:
cd book-store

npm start
And we can see the application running on port 3000. So this is how we setup Reactjs development environment with ready to use starter template.
Alternatively, to setup Reactjs with Redux, we can directly hit npx create-react-app book-store --template redux and it will add Redux dependencies with proper file structure.
Demystifying Generated Application
So now let's start to setup our environment from scratch. The very first step would be to delete everything from src folder that got generated. Or we can create entirely new folder src and a package.json.
Below are the dependencies that I am going to add to my book store application.
"dependencies": {
"@reduxjs/toolkit": "^1.4.0",
"@testing-library/jest-dom": "^4.2.4",
"@testing-library/react": "^9.5.0",
"@testing-library/user-event": "^7.2.1",
"react": "^16.13.1",
"react-dom": "^16.13.1",
"react-redux": "^7.2.1",
"react-scripts": "3.4.3",
"redux": "^4.0.5",
"bootstrap": "^4.3.1",
"immer": "~2.1.3",
"prop-types": "^15.7.2",
"react-router-dom": "^5.0.0",
"react-toastify": "^4.5.2",
"redux-thunk": "^2.3.0",
"reselect": "^4.0.0"
}
Now let's dwell into understanding and adding required dependencies.
What is Redux?
So here is the definition of Redux from Redux site Redux is a pattern and library for managing and updating application state, using events called "actions". When and where it is used can also be found in Redux website here.
I am not going through definitions as the scope and intention of this article is basically to uncover what has been used in generated application and how we can add on our own to understand for better clarity.
Adding Redux
To add Redux into our application, we can hit the below commands:
npm install redux

npm install react-redux
It is also imperative to understand what all dependencies are used to run the application and which all are needed for the development. To add a dependency, we can issue the following commands:
npm install <package-name> [--save-prod]

npm install <package-name> --save-dev
The flag --save-prod will add your installed package into "dependencies" section and --save-dev will create new section named "devDependencies"
First thing first, let's add index.html and index.js file:
Let's add some basic HTML boiler plate code:
<!DOCTYPE html>

<html lang="en">
  <head>
    <meta charset="utf-8" />
    <title>Book Store</title>
  </head>
  <body>
    <div id="app"></div>
  </body>
</html>
import React from "react";
import { render } from "react-dom";

function HelloWorld() {
  return <p>Hello World!!!</p>;
}

render(<HelloWorld />, document.getElementById("app"));
Configuring and Understanding webpack
Webpack is bundler to minify js and facilitate adding various plugins and allowing us to add rules as per the file extensions.
Now let’s add webpack and configure in our app.
Create a file with name webpack.config.dev.js for dev environment and start adding below code. This is just naming convention that is preferred to identify webpacks for dev, production or any other environment we need.
So first, we will use commonJS syntax to import webpack, path and "html-webpack-plugin".
const webpack = require("webpack");
const path = require("path");
const HtmlWebpackPlugin = require("html-webpack-plugin");
process.env.NODE_ENV = "development";
Adding output:
output: {
   path: path.resolve(__dirname, "build"),
   publicPath: "/",
   filename: "bundle.js",
 },
Adding dev server configuration:
devServer: {
   stats: "minimal",
   overlay: true,
   historyApiFallback: true,
   disableHostCheck: true,
   headers: { "Access-Control-Allow-Origin": "*" },
   https: false,
 },
Now we will add the HtmlWebpackPlugin that we imported.
plugins: [
    new HtmlWebpackPlugin({
      template: "src/index.html",
      favicon: "src/favicon.ico",
    }),
  ],
Module specifies what all rules we need to add for various file extensions. So let's add the module now as below:
module: {
  rules: [
    { test: /\.(js|jsx)$/, exclude: /node_modules/, use: ["babel-loader"] },
    { test: /(\.css)$/, use: ["style-loader", "css-loader"] },
  ],
},
In the above rules configuration, I have added rule for .js and .jsx wherein all files of that extension within node_modules folder will be excluded and babel-loader will allow transpiling our JS and JSX files using babel. Similarly, we can add style-loader and css-loader for injecting CSS to DOM and importing CSS to our components subsequently. There are other loaders available too like sass-loader less-loader json-loader etc. which we can use as per our requirements. But for now, to keep it simple, I am not going to use other loaders.
Finally, our webpack.config.dev.js should look like this:
Configuring Babel
Babel is a JavaScript compiler which facilitates the following to support all new browsers:
- Transpile modern JS(ES5, ES6 and etc.)
- Compile JSX to JS
If you want to play around with babel and understand how JSX is tranpiled, you can navigate to https://babeljs.io/ and try it out. 😊
So let's begin adding babel configuration in package.json and add a preset. So the question now is what are preset??
Here is the answer:
A preset in babel can be described as a set of plugins used to support particular language features. Some presets Babel uses by default like ES6,javascript, jsx...
"babel":{
   "presets":["babel-preset-react-app"]
 }
FYI. we can also configure babel in .babelrc file.
Adding Scripts
Now let's setup scripts to start our book store application.
"scripts": {
    "start": "webpack-dev-server --config webpack.config.dev.js --port 3000"
  },
Like we added start to run the application, we can add multiple scripts to include running test cases or debugging or may be just compiling.
Now, if we try to start the application via npm start, we see an error for linting.
Configuring ESLint
Linting is very important to configure as we can get the errors understandable and easy to fix. So let's configure eslint into our application. Again, we can setup this in two ways. Either in .eslintrc file or to better have handhold in package.json file.
"eslintConfig": {

    "extends": [
      "eslint:recommended",
      "plugin:react/recommended",
      "plugin:import/errors",
      "plugin:import/warnings"
    ],
    "parser": "babel-eslint",
    "parserOptions": {
      "ecmaVersion": 2018,
      "sourceType": "module",
      "ecmaFeatures": {
        "jsx": true
      }
    },
    "env": {
      "browser": true,
      "node": true,
      "es6": true,
      "jest": true
    },

    "rules": {
      "no-debugger": "off",
      "no-console": "off",
      "no-unused-vars": "warn",
      "react/prop-types": "warn"
    },

    "settings": {
      "react": {
        "version": "detect"
      }
    },
    "root": true
  }
}
Once added properly, you should be able to see something like below:
Let's try running again and after it is successfully compiled, we can navigate to http://localhost:3000.
Finally it's “Hello World”.
Summary
So in this article, we saw how actually we can create a React application development environment by knowing what actually a package.json is composed of. And what all dependencies have been added to make the application structure better. Next, we will be creating a simple book store application and configuring Redux with React.
History
- 28th October, 2020: Initial version


 General
  News
News  Suggestion
  Question
  Bug
Bug  Answer
  Joke
Joke  Praise
  Rant
Rant  Admin
Admin 


 for sure.