In this tutorial, we will show you how to get started with Raygun, and how to use each of the above tools to monitor your application and ensure that your customers have the best, most error-free experience that you can provide for them.
Raygun’s suite of tools are a lifesaver for developers who are looking for a solution to monitoring their customer-facing applications for issues. With Error Tracking and Crash Reporting, Real User Monitoring (RUM), and Application Performance Monitoring (APM) tools available, powerful steps can be taken to locate and eradicate errors before they become issues for users.
Customer-centric teams are always striving to lessen the friction for and burden on their customers, and catching and stopping problems immediately and troubleshooting quickly are a large part of that equation.
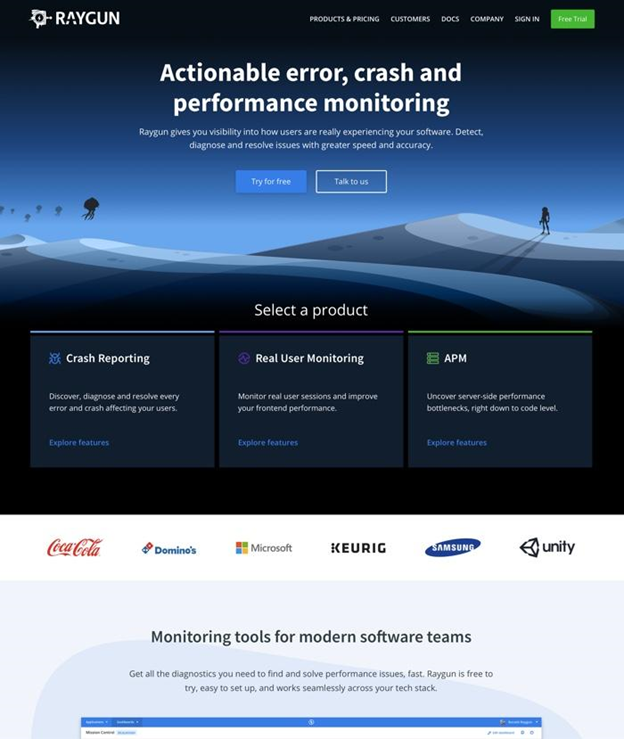
Raygun provides six tools to assist developers in dealing with errors, crashes, and performance monitoring:
In this tutorial, we will show you how to get started with Raygun, and how to use each of the above tools to monitor your application and ensure that your customers have the best, most error-free experience that you can provide for them.
Get Started with Raygun

Raygun offers a free 14-day trial, during which you can experiment with all three products, so there is no reason not to just sign up and try it out. In this tutorial, we’ll use the example of a demo React app.
Set up demo React app
For this example, we can use the demo React photo application SnapShot. It is incredibly easy to get started with. You can follow along using any application, especially a React one, which will have the same instructions as ours does, but if you wish to use the same application we are here, you can do so with the following steps:
- Download the code from GitHub.
- If you prefer to use your own Flikr account for a set of demo images, in the src/api folders, create a config.js file, and inside, write
export const apiKey = "YOUR_FLIKR_API_KEY";. - Open a terminal inside the src folder and do a yarn install to download dependencies
- Finally,
yarn start to start the server and locally serve the site.
For all of the client-side parts of this tutorial, you will need the Raygun library included in your application. First, let’s add it to our index.html to include it from the CDN:
<script type="text/javascript">
  !function(a,b,c,d,e,f,g,h){a.RaygunObject=e,a[e]=a[e]||function(){
  (a[e].o=a[e].o||[]).push(arguments)},f=b.createElement(c),g=b.getElementsByTagName(c)[0],
  f.async=1,f.src=d,g.parentNode.insertBefore(f,g),h=a.onerror,a.onerror=function(b,c,d,f,g){
  h&&h(b,c,d,f,g),g||(g=new Error(b)),a[e].q=a[e].q||[],a[e].q.push({
  e:g})}}(window,document,"script","//cdn.raygun.io/raygun4js/raygun.min.js","rg4js");
</script>
Next, you’ll need to add a configuration script that tells Raygun what service you are enabling, and presents an API key to identify your application.
<script type="text/javascript">
  rg4js('apiKey', 'YXpPX23Gc6DJCykzoWByg');
</script>
You’ll want to replace the API key with your own, which you can get from your Application Settings screen.
Lastly, if you wish to enable user tracking, insert a user tracking snippet at the end of the previous one, making it now look similar to this:
<script type="text/javascript">
  rg4js('apiKey', 'YXpPX23Gc6DJCykzoWByg');
  rg4js('setUser', {
    identifier: '662607004',
    isAnonymous: false,
    email: 'ronald@raygun.com',
    firstName: 'Ronald',
    fullName: 'Ronald Raygun',
});
</script>
Once you have everything working, you can connect the user tracking variables to the currently logged in user profile, adding their name, email, or ID to these fields rather than the placeholders. This can be useful to pair errors with users in some cases.
Error Tracking
Error/crash reporting work by inserting some JavaScript code that looks for errors, captures them, and sends them to Raygun. Additionally, you automatically have real-time alerts of crash reports as well.
In order to enable error tracking, you’ll want to insert a line into your Raygun configuration block, just after the apiKey line:
rg4js('enableCrashReporting', true);
This lets Raygun know that you wish to track Crash Reporting from this application.
See it in Action
Now, let’s see the crash reporting in action! Raygun suggests that we insert a line in one of our application’s pages to throw an error.
throw new Error('Congratulations! Raygun is set up and capturing errors');
In the case of our demo react app, we’ve put this line right in the middle of our App.js, to see what kind of error that throws. We also copied it into our index.html (inside of script tags) in the hopes of getting a “congratulations” message as intended. If we look at the Crash Reporting tab for our application in Raygun, we see the error chart pick both entries up.
There they are! Let’s click into the first item. We get a screen that is filled with information.
This report tells us what was broken, when it was, what type of exception it was, and in which file and line, if possible. It notes what URL was being requested, how many users have been affected by this error, over what time period, and allows comments to be collated under the report as fact-finding occurs or fixes are implemented.
The ability to see which users have been affected can not only help with locating the error (narrowing it down based on places that user has been and permissions they have), but it is also potentially a chance to be proactive in customer support or to rectify any potential errors or issues that your customers may be experiencing (whether or not they are aware of it). It can also provide signals regarding what to communicate to the customers about outages or issues and which are minor fixes that have not affected any (or many) customers.
In the upper right corner, there is a status that can be manually updated, indicating whether the error is an active issue, resolved, ignored temporarily, or permanently ignored. It can also be assigned to a member of your Raygun account’s team, if you have more than one user on your team, allowing you to hand off users to the most relevant responder.
This is a huge amount of information, especially when you are looking for an unknown problem, and could substantially shave down the time needed to locate and respond to errors in your code.
Crash Reporting Settings
There are also several settings that can be toggled for crash reporting. The most handy, perhaps, is the ability to turn on and off the live refresh in the dashboard. From here, you can also make mass changes to status, or delete, errors by their status.
Crash Reporting Inbound Filters
Inbound Filters in the crash reporting product allow you to filter incoming reports based on their IP address, the machine name, version of the product, or other metadata information. You can use those filters to discard data from particular versions, machines, or other sources. This can be particularly useful when trying to isolate reports from only a production environment, for example, while still allowing development environments to connect to Raygun. It can also keep you on the safe side of monthly rate limits for your plan.
Real User Monitoring (RUM)
Raygun’s Real User Monitoring (RUM) feature helps you to answer your biggest questions about your app’s performance and its impact on end-user experiences.
- Get instance-level performance insights into every user session.
- Retrace user sessions and see their experience with each page for faster error resolution.
- Prioritize performance improvements impacting the most people.
Set Up Real User Monitoring
To set up real user monitoring, we need two additional items. The first is a line that enables RUM:
rg4js('enablePulse', true);
You can add this just after the apiKey row you already added. Next, you also need to add an event tracking line inside your router’s route change callback. To do this in our current demo app, we will have to change a few things:
import React, { Component } from "react";
import PhotoContextProvider from "./context/PhotoContext";
import { HashRouter, Route, Switch, Redirect } from "react-router-dom";
import Header from "./components/Header";
import Item from "./components/Item";
import Search from "./components/Search";
import NotFound from "./components/NotFound";
import { withRouter } from 'react-router'
import rg4js from 'raygun4js';
class App extends Component {
constructor(props) {
super(props);
this.props.history.listen((location, action) => {
rg4js('apiKey', 'CjoU0A4Kie1DAyEzLRh7Jg');
rg4js('trackEvent', { type: 'pageView', path: location.pathname });
});
}
handleSubmit = (e, history, searchInput) => {
e.preventDefault();
e.currentTarget.reset();
let url = `/search/${searchInput}`;
history.push(url);
};
render() {
return (
<PhotoContextProvider>
<HashRouter basename="/SnapScout">
<div className="container">
<Route
render={props => (
<Header
handleSubmit={this.handleSubmit}
history={props.history}
/>
)}
/>
<Switch>
<Route
Exact path="/" render={() => <Redirect to="/mountain" />}
/>
<Route
path="/mountain" render={() => <Item searchTerm="mountain" />}
/>
<Route path="/beach" render={() => <Item searchTerm="beach" />} />
<Route path="/bird" render={() => <Item searchTerm="bird" />} />
<Route path="/food" render={() => <Item searchTerm="food" />} />
<Route
path="/search/:searchInput" render={props => (
<Search searchTerm={props.match.params.searchInput} />
)}
/>
<Route component={NotFound} />
</Switch>
</div>
</HashRouter>
</PhotoContextProvider>
);
}
}
export default withRouter(App);
In the App.js, we have imported withRouter as well as rg4js. We added a constructor and a listener to listen for events that Raygun will track. Lastly, we added the use of withRouter in the last line of the file. In the index.js file, we have imported BrowserRouter and used it. Now we have set up routing in our app in case we need that, and tracking of routing events for Raygun.
import React from 'react';
import ReactDOM from 'react-dom';
import './index.css';
import App from './App';
import * as serviceWorker from './serviceWorker';
import { BrowserRouter, Route } from 'react-router-dom';
ReactDOM.render(
<BrowserRouter>
<App />
</BrowserRouter>,
document.getElementById('root')
);
serviceWorker.unregister();
See Real User Monitoring in Action
Now, we already have some RUM results on our overview page. You can see that the main SnapShot page is the only one that has been called, since of course it is currently a one-view app. You can see here that there are metrics for the most requested pages, most viewed virtual pages, slowest and most requested, slowest by client time, and slowest by service time.
You also get a listing of most requested XHR, and the time spent on those requests. This is particularly handy for improving the user experience for your customers, as you can easily pinpoint large files or high latency issues and attempt to resolve those as quick wins to speed up performance of your app.
You can also drill down into the details of the page at hand by clicking on it.
The detailed view for a page will give you historical data for that page over time, other requests made in order to serve this page, and the latest slowest requests for this page - and which user it was that was making it. Again, this is a fantastic performance improvement data point, as you will be able to start to correlate trends on which customers are loading the slowest, and this may in turn help inform decisions such as where to put another CDN node or in what region to host another server.
There are also many other entire tabs in the RUM product. You can monitor data from the lens of sessions, users, browsers, and more. Users is of interest, as here you can chart “user satisfaction”. This metric is based on load time for users overall. You can also see under the “Live” tab a map of live sessions, as well as the latest crashes and which users are experiencing those.
Give our free 14-day trial a try to see Application Performance Monitoring in action.
Application Performance Monitoring (APM)
Although our React demo application does not have a backend, Raygun has a solution for monitoring server-side performance as well. With the Application Performance Monitoring product, you will be able to uncover server-side performance bottlenecks, right down to code level. This rounds out the offerings, of course, because not all performance issues are client-side. With APM, you will quickly and efficiently be able to handle either - or both.
Deployment Tracking
With Raygun Deployment Tracking, you can ship faster and with confidence. You can monitor every deployment by integrating Raygun with your deployment system, or automating calls to Raygun’s Deployments API endpoint.
Once Raygun is seeing deployments, you will be able to see data in the error and performance charts that correlate to versions and deployments. This will help you to see which deployments are negatively impacting the health of your application, or the experience of your customers.
Additionally, this provides yet another metric that you can use to troubleshoot issues, knowing that it was introduced during a particular deployment, or to assign fix tasks to the relevant engineers for this particular deployment.
Deployment tracking will also give you the tools to be proactive about your bug fixes and performance tweaks. You’ll be able to watch the statistics trend downwards after you introduce a fix (or not, and you still have work to do).
User Tracking
In the User Tracking tab, you’ll see a list of all of the users that have been tracked using the user tracking snippet we set up at the beginning. In this demo, it’s just Ronald Raygun, but if you’ve connected that snippet to user session information in your app, you’ll see a wider variety of results here.
This gives you a window through which to see the impact of your app’s errors, crashes, or loading speed on your users. If you do a deep dive into any particular user, you’ll see a more detailed panel for that user. It tells you all of the information that has been gleaned about them, including the following items (and more):
- A summary of their user experience
- Number of sessions
- Average length of sessions
- Average number of pages viewed
More importantly, it also gives you a picture of how many errors that user has been exposed to, and how many of those are still unresolved. This information could be vital to customer service representatives, who could see firsthand which problems the user might be experiencing, click through into the issues, see who they are assigned to, read the comments on the issues, and have better answers for the customer when they have questions.
Try our free 14-day trial to see how real user session information can speed up resolution.
Dashboards
Raygun has available customizable dashboards for you to use to monitor and report on the data you are receiving back from your applications. They can contain a number of widgets, providing you with real time visibility into your application’s status and performance.
With these metrics, charts, lists, and more available in one easy dashboard, it is easy to demonstrate to colleagues and stakeholders how your team's software is performing. And you can set up multiple dashboards, adding widgets from only one specific application or set of applications, or combining data into large aggregated reports - whatever you desire.
Conclusion
Raygun, in a sense, is a glue that can link together the parts of your application or multiple applications, and off you application monitoring, crash and error reporting, troubleshooting, issue tracking, real-time status updates for your services, and customer service aids. And Raygun’s many integrations to things like Jira, Slack, Zendesk, PagerDuty, and other services make this even easier, as you can give the people who need only particular pieces of information the data they require right in the applications they already use.
By surfacing errors and performance constraints as they happen and providing details on reproducing and resolving them, Raygun equips engineering teams to improve the overall application quality in a short period of time.
Give a free trial a try and see what Raygun can tell you about your applications.
Jeff works full time as a technical writer for a tech startup, and occasionally does contract writing for various blogs and publications (including Raygun.com). Jeff is a content creator, tech geek, developer, husband, father, gamer, productivity nut, and thinker.


