This article will explain how the Animation Editor allows you to add Cartoons to any MP4 video recording. Relying heavily on the classSprite which I developed in one of my previous articles, this project will enable you to make fun & educational videos you can show to your friends or post on-line.
Introduction
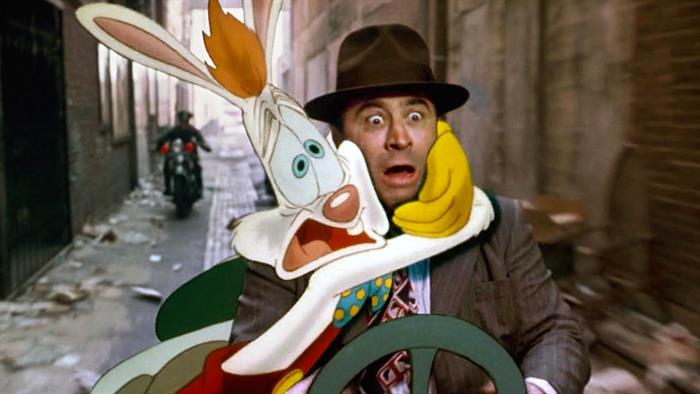
Scene from movie "Who Framed Roger Rabbit". Thanks to this Hollywood gem, our beloved and colorful friends need no longer be vilified and marginalized in secluded ToonTown ghettoes as they once were.
If there is anybody who does not include Who Framed Roger Rabbit in their list of seminal films that not only changed an industry but revolutionized the way cartoon characters are accepted in our communities, then they have never seen Who Framed Roger Rabbit. And that's forgiveable, I understand, not everybody is gifted with cinephilic genes that help one discern the finer experiences of the modern world. But even if you haven't seen a cartoon walk amongst us before, now you can. Just have a look at this video and see what happens when a drunken Winnie the Pooh tries to make trouble at my place. (They may not all be villains, but sometimes they can be A$$h*les).

Screen shot of the Animation Editor
Making videos with cartoons has kept me busy these past few months while I fine-tuned this project. There are still many things left undone but I'm at a cross-road in the project right now where its stable and feature-filled enough to let anyone make videos so I felt that I had to stop and publish what I have before I continue implementing newer and greater whistles, gizmoes and widgets for it.
My most recent projects include:
- Covid-19 Hand-Washing Info-clip which took about a week to put together back in April when this app was still in its infancy and it boggles my mind how I managed to put this video together despite all the problems that the Animation Editor had at the time. This was my first foray into live-video/animation creation. And you can see that the sound is a little off & the video motion is choppy.
- Winnie the Pooh although the source video's lighting is poor and the actor motion is choppy - this one still makes me laugh
- Bugz N' Mick is a simpler project - there isn't much live-actor motion involved but the choppinessity was still present. And, I must admit, I was a little lazy in making the Bugz Bunny/Mickey Mouse sprite.
- Push-Ups I just love the music to this one - who doesn't love a good polka. Still chopppy though.
- UFC's Rose Namajunas I was ok to watch myself in grainy, choppy videos ... but not Rose Namajunas. That was just unacceptable. So at this point, I spent a month refining how the video is captured, using time-stamps to ensure all frames are drawn at the correct time. Recording all frame images to a file before capturing it all in a video by pulling each final screen image off the HardDrive and splashing it on the screen at precise time stamped schedules... made drastic improvements despite many failures along the way.
- Winnie the Pooh Meets Betty Boop - and finally, after making Rose-Bursts in the previous one and implementing many many changes to the project I had to make another video that involved actual sprites to make sure all was in working order... two weeks later and here we are.
Loading a Sample Project
You can download all the files that were required to make the Winnie the Pooh Meets Betty Boop video here (you'll need to expand the entire zip file onto your c:\ drive in a new directory which you'll have to create c:\AnimationEditor so that when you load the Winnie Meets Betty Boop.xml file, it will run properly). The image below shows the directory that needs to be created and where the files need to be for the .xml project file to load and work properly.
You can see that there are two files with the file extension .bin in the image of the working directory above. Both of these files are binary-streams of frame images and the time stamps that go with them. The first file is the result of the Animation Editor playing the source MP4 video on a WindowsMediaPlayer and taking screen-shots of the video as it plays then storing those images onto the Winnie Meets Betty Boop half speed.bin file(named after the MP4 it samples). The other .bin file is the final recording of the video which is generated by using the source images from the first .bin file and drawing all the necessary sprites on those images before they are stored in the separate Winnie Meets Betty Boop_record.bin which takes its name from the name of the project.
The MP4 files are as follows:
- Winnie Meets Betty Boop SOURCE.MP4 - was the file recorded using my phone - unedited
- Winnie Meets Betty Boop AUDIO.MP4 - is the edited audio file (still an MP4 just used for its audio)
- Winnie Meets Betty Boop half speed.MP4 - the audio-file slowed to half-speed
- Winnie Meets Betty Boop Screen Capture.MP4 - is a recording of the project's WinnieMeetsBettyBoop_record.bin file played at double speed and captured using 3rd party Video Screen Recording application
The .vProj file was generated using VSDC's Video Editor to produce the final result.
Aside from all those files, you only need worry about the two sprite files for Winnie and Betty and the all-important .xml file which the Animation Editor uses to keep track of your project.
General Overview
The entire process used by the Animation Editor is generally known in colloquial terms as "A COMPLETE HACK". Because there is no easy way to use C# to edit/access/read single images in an MP4 (I've looked and found nothing, if there is a way, I'd be grateful to know it) breaking the MP4 video into individual workable images is a bit of a wrestling match. Here's a general overview of how the Animation Editor works.
There are several steps involved in making a video:
- A source video is needed - record one yourself with a camera or download a video you like
- It's best if the source video is the exact length of the output video so that you can use its audio in the final product. Save this as your audio file (or don't, do what you like).
- Once you have this Audio-File, you can improve the quality of the output video by slowing this source file to half or quarter speed and save it as a separate file (not destroying your Audio-File). You can do this using free 3rd party software to edit the video. VSDC is a very good product and they have a suite of tools available.
- The Animation Editor then plays the MP4 video on a
WindowsMediaPlayer and records as many frames as it can. Better hardware gives better results. My laptop is adequate but a gaming-PC would be better. - The Animation Editor now has a binary-stream file on the harddrive that contains the sequence of images it captured in the previous step with a time stamp for each frame. These frames are then processed so that each time-stamp is subtracted from its predecessor and the difference is tied to that image. This way, each frame has a time stamp which tells the animator how long it needs to wait after drawing one frame before drawing the next. These frames carry their respective delay times with them when they are shuffled, copied or when the sequence of frames is otherwise altered by the user during editing.
- User adds sprites to the video with the Animation Editor's tools until the video pixie editing is completed.
- Animation Editor then draws and positions all of pixies to produce the end-result sequence of images which it records in a separate binary-stream '..._record.bin' file.
- When you are ready to use a 3rd party Video Screen Capture app and produce an MP4 of your project, set the video-playback-speed of the recording to counter the speed of your source video using the context-menu 'Scene->playback-set_speed' option (if you're working with a half-speed source video -> double the recording speed, or at quarter-speed set it to 4.0). Use your 3rd party app to video Screen Capture your computer's screen and tell the Animation Editor to Play the recorded version of your project at the speed you've set. This will produce an MP4 video of your project.
- Use the Screen Video Capture you just recorded in Step 8 and do the final editing with the Video Editor you used to create the Audio-File and your half-speed video. Include the sound from your Audio-File, add whatever titles you think best, then let the credits roll.
The results you get will depend on your hardware (as well as your creativity). I'm working with a laptop and I'm getting decent results at Half-Speed source video but if you have a faster machine, you could do even better. The TimeStamps for each frame in the output _record.bin file are different from the TimeStamps of your original source video's .bin file in that, the original one keeps a delay time between frames attached to each frame while the _record.bin file keeps track of the time since the beginning of the video so there is no accumulated error while playing back the final project. Also, the _record.bin file has two TimeStamps for each frame. The first is equivalent to the original delay time recorded when the MP4 was originally converted to a binary stream (the accumulated frame-delays are used as time-stamps for the record file regardless of any user created variations during time-line editing) and the other timestamp is the product of this first time-stamp multiplied by the Playback-Speed you've set using the context-menu's 'Scene->playback-set_speed' option mentioned above. Since the altered speed is reflected as a time-stamp written directly into the file before you tell the editor to playback your animation the speed setting doesn't have to be a multiple of 2 (which coders may be inclined to assume for internal binary register shifting purposes since your computer can multiply and divide by 2 exceptionally quickly). The time-stamps for the final playback speed are altered relative to the source video and set before the Animation Editor plays the recording. So none of that math is done on the fly during playback, and all the frames are lined up, ready to go with a single start time to compare to before putting the next frame on the screen. This way, the playback of your animation only needs to put the first image on the screen and do-nothing-loop while comparing the next loaded video-frame's time stamp to the current time and splash the next image on the screen when that time has elapsed, load up the following frame from the binary-stream and do it again.
Using the Animation Editor
N.B.: The Pixie Draw Sequence mentioned below and referred to only briefly in the video was actually called the "Sprite Draw Sequence" at the time of the film's shooting. This egregious error in propriety and lack of adherence to normal standards of acceptable social etiquette grievously harmed the writer's sense of code-decency for which he most truly apologizes. Please accept the video's mis-labelling of the infamous Draw Pixie Sequence list as an error in judgment due to lack of sleep. Thank you.
View a short YouTube video about this project.
You'll first need to acquaint yourself with the classSprite which I covered in a previous article. You do not need to read all the articles in the series but you will need to familiarize yourself with the Sprite Editor 2017 - Build and Edit Animations article and know how to use sprites in order to make the best of the Animation Editor.
Once you have your sprites drawn and ready, load the Animation Editor.
Step 1: Loading an MP4 into the Animation Editor
load MP4
Move the mouse cursor over the TimeLine at the bottom of the screen. Right-click the mouse to summon the context menu attached to the Time-Line and select Load->MP4 as seen in the image above. The Animation Editor will load the MP4 file you select into a WindowsMediaPlayer and play the video. Then it will take pictures of your computer screen as fast as it can until the video is completed. Since the Animation Editor needs its full concentration and your project's results depend on the optimal use of your machine for this operation, it's best if you stop all other applications from running before proceeding. Shut down the WiFi, so your Windows OS doesn't decide to choose this moment to upgrade itself. Then let her rip.
Once this operation is complete, you will have two timelines to contend with.... and that's ok.
The TimeLine is the TimeLine and its called the TimeLine for a reason. That reason is... because its your project's TimeLine.
Although the other timelines (lower-case, please) are also timelines, they're just not the ones you'll be drawing your pixies onto. If you haven't noticed, you can zoom-in/zoom-out of any timeline you like by using the mouse wheel over top it. Click on any timeline and you will see the image appear on the screen. You can use the mouse to select multiple frames and watch a loop of those frames then, using the context menu with the right-mouse button, you can cut, copy & paste as you would with any editor. These timelines are really just a series of indices that point to a common list of images in the .bin files you're working with. Even if you alter the entire timeline, you're not actually altering the .bin files. You're only shuffling the sequence of indices that point to the frames in the .bin file but the .bin file remains the same, only the data stored in your project's .xml file is altered. You can look at the .xml file (as shown below) of any of the Animation Editor's saved projects and see the TimeFrames in the TimeLine each have a file path as well as an index, that number refers to the index of the .bin frame in that file. All .bin files sourced by your project must be located where they were when they were first loaded or your project will not load properly. You don't need to actually know any of this to work with the Animation Editor. Just remember that any changes you make towards your output video TimeLine here will not reflect the Audio-File you saved earlier ... whether you want to change your source video's frame sequence or not really only depends on what you're intending to do but just remember that if you're planning on using the original video's audio, you'll need to keep your timeline intact.
So, select all the frames from the bottom timeline (named default until you give it a new name) and copy. Then click on the TimeLine above it and context-menu your way to 'Paste'.
Once you've done this, you'll have the original video ready in your project's TimeLine waiting to be drawn upon.
Step 2: Creating Pixies
If you've read my article Sprite Editor 2017 - Build And Edit Animations you'll know what a sprite is. The definition I got from Wikipedia says: "In computer graphics, a sprite is a two-dimensional bitmap that is integrated into a larger scene, most often in a 2D video game..." It goes on but that's the gist of it. Only, with the Animation Editor, you can have several different creatures (e.g., animated cartoons) on the screen at a time and each one would technically be a sprite but if, let's say, you wanted to have a fun-house mirrors scene of Daffy Duck or a clone episode of Marvin the Martian, then you'll need to draw several different versions of the same sprite on the screen. A single instance of the classSprite will do this for you but you'll need to keep track of all the different clones on the screen. Each image will have to have its own values of size, angle, location, animation, animation frame and so forth for each video-frame (this information is stored in a class called classPixieFrame). So, instead of saying 'sprite' when referring to these different images of the same character, Animation Editor calls them 'Pixies'. Pixies, in folklore, are pretty much the same as sprites and fairies. In computer science, there is something called a Pixie Renderer which apparently is a "photorealistic raytracing renderer for generating photorealistic images, developed by Okan Arikan in the department of Computer Science at The University of Texas At Austin". In Animation Editor, however, it's nothing of the sort. I just needed a way to describe what is going on without confusing sprite for sprite when I mean pixie. Maybe later, I'll come up with a reason to use the term 'fairy' but we're not there yet.
So, each character on the screen is a Pixie which is drawn using an instance of the Sprite class.
Each TimeFrame a given pixie is drawn in will include the information needed to draw that pixie on the screen for that one TimeFrame. That information is in a class called classPixieFrame. Each Pixie points to an instance of a classSprite which tells the animator what image to put on the screen when you specify which of that sprite's angle, animation & animation-frame you intend to put on the screen. You can have as many sprites as you like but you'll only need one instance of any given sprite for as many pixies as you want to include in your project which have the same sprite images. You can have a dozen Donald Ducks on the screen, if that's your thing. Although each one will be a distinct Pixie, they will all be drawn using the same Donald Duck instance of the sprite class.
Clear? ... you'll get used to the idea.
To create a Pixie, you just click on the Pixie button near the top of your Scene Editor next to the Pixie ComboBox and select 'New' from the context menu that pops up beneath your mouse. A form will appear asking you to type in the name of your new pixie, just type in the name you want to give it and click 'ok'. At this point, the Scene Editor's appearance will change slightly. The Pixie ComboBox will turn Red, usually a bad sign but here it only means that this new Pixie has not been assigned a sprite. To help you pick a sprite for your pixie, the Sprite List is brought forward and is drawn over top of the Pixie Draw Sequence list, as shown below:
If the sprite you want to attach to this Pixie does not yet appear on your list, you'll have to load it from the hard-drive (or create a Text-Sprite if that's what you're looking for). Just click the 'New' button in the blue Sprite List area and load the sprite you need. Once the sprite has been added to the list of available sprites loaded into memory, double clicking on it will bind it to the currently selected Pixie in the combo box above.
N.B. Note that changing a Pixie's sprite may cause the Animation Editor to crash if you try to then draw an animation or animation frame which the new sprite does not recognize.
N.B. when you're loading an existing project, although the Pixie ComboBox may appear to have selected a pixie for you to work with, you need to use the combo-box to confirm this selection before getting started. This is only true when you first load the .xml project file or create a new pixie and only needs to be done once after either of those events. If you do not click on the Pixie combo-box to confirm your selection the Path Editor's interface below may not function properly. Its a bug, I know, but its relatively minor and you'll just have to live with it for now.
Once you've named your new Pixie and assigned it a sprite, you're ready to go and can push the Sprite List back to its hidey-hole behind the Pixie Draw Sequence which you'll likely be using soon enough.
Step 3: Generating Paths
Each Pixie is tied to a single Sprite.
And each instance of the sprite class has one or more sprite animations.
And each sprite animation has one or more sprite animation frames.
Your Pixie's appearance on the screen for each and every video-frame it appears in, however, is described not only by its sprite, sprite animation & sprite animation frame but also by its size, angle and location.
All this information, for each video-frame it appears in, is stored in the Pixie's PixieFrame.
Each video TimeFrame in the project's TimeLine (as seen in the XML file) has a list of PixieFrames which describe all the pixies in each TimeFrame.
To edit any pixie's PixieFrame for any given video-TimeFrame, you can use the Frame Editor interface:
- Select the video-TimeFrame you want to edit (either scrolling along with the mouse-wheel over the main screen, using the TimeLine to jump to the frame you want, or with the main-screen context-menu's 'Frame' option).
- Select a Pixie that is already drawn in the specified TimeFrame from the pixie combo box above.
- Use the Frame Editor interface to change what values you will.
But this can only happen if the Pixie you're dealing with already has a PixieFrame in the selected video-TimeFrame of your TimeLine.
Here's where the Path Editor comes in.
A Path, in the context of the Animation Editor, is a means of generating Pixie Frames for a series of video-TimeFrames in your project's TimeLine. You set the variables you want (start/end values for location, size and angle, as well as the selected sprite animation and sprite animation frame) then you click 'Generate Frames'.
To do this, you must:
- be certain you've selected the correct Pixie (click that combo box again to be sure)
- set the start frame
- select a sprite-animation
- choose a start sprite animation frame index (default is 0)
- select the end frame to either correspond with the end of the sprite's animation (I usually use one less than the complete animation and get good results) or loop that same animation as often as you like until you reach a specific video-TimeFrame in your project TimeLine
- There are two handy features called: Follow Previous and Precede Next. Both of these features have their own buttons in the Path Editor and allow you to seamlessly transition from one animation to the next without having to reposition, resize or set the angle of your sprite so that the start of this path will exactly match the size, angle and location of that same pixie on the video-frame that precedes the start of this new path (while also taking in consideration the
UseRelativeTo Limbs of either end of your path). Their names are self-explanatory to know the difference between them but you must be certain to set the Path's start frame correctly before using the Follow Previous option and, likewise, the end-frame value must be set before using the Precede Next feature. - set the angle and size of your Pixie for the start and end frames. You can see the results of these changes by clicking the pt Start and pt End buttons described below and cycle back between steps 7, 8 & 9 until you're happy with your Pixie's start/end angle, size and locations.
- set the path's Angle Delta (change in angle over the length of the Pixie's new path) and your pixie will rotate as many degrees between the start and end frame
- if you need to set your pixie's start/end locations, you can do that in several ways. The pt Start and pt End buttons allow you to use the mouse-cursor to position your Pixie anywhere on the screen. When you use the mouse to position your Pixie on the screen, the video-image will be resized and a red rectangular box will appear on the screen. The red rectangular box indicates where the screen ends in the resized image so that you can place a Pixie start/end location outside the bounds of the visible screen and allow the pixie to enter/exit the frame at your leisure.
- click on the Set Fields button to prompt the list of fields you wish the path to alter (generally check all options until you're familiar with the Animation Editor and are certain you only wish to alter certain portions of your TimeFrames's PixieFrame values for the selected Pixie).
- when you're happy with your selections, click the Generate Frames button and cycle through your path to see the results. You can make changes to you path and repeat the operation as often as you like but should remember to save your project frequently in order to avoid data-loss should the Animation Editor get angry and decide to walk off the job (labour negotiations are in progress but software union representatives are holding fast for better retirement options than endentured code-reuse ... strike action is unlikely but may occur while this project is still being developed. Should your local union take to the pickets and walk off the job, you'll at least have a blueprint of your project and can force them back-to-work at any time).
4. Pixie Draw Sequence
Although each TimeFrame in your project's Timeline includes a list of PixieFrames for each pixie that appears on the screen, that list of Pixie frames is generated by simply adding one Pixie at a time to your animation for any given TimeFrame but it doesn't tell the Animation Editor in what sequence to draw them. So you need to tell the Animation Editor in which order you want those pixies to be drawn. This is similar to how the Sprites themselves are drawn by the sprite class where each Animation Frame collates together a list of sprite-limbs and only after it has figured out where each limb goes does it begin to draw them in a DrawSequence that is specific for that one animation frame. By doing this, both in the sprite class and here in the Animation Editor, you can decide which images appear in front of or behind other images. Its important in the Sprite Class to draw the profile of a character with the arm furthest from the camera first so that it is then partially covered by that same character's other limbs and chest or whatever. And so here also you can choose to set a specific order in which you want your Pixies on any given TimeFrame image to be drawn so that the visible action can better tell the story you're trying to relate. For this reason then, we now come to what is called the Pixie Draw Sequence. The Pixie Draw Sequence itself is relatively straight forward, whatever Pixie appears in a given frame has a a PixieFrame and has itself included somewhere in the Pixie Draw Sequence. To change the order of this draw sequence, you need only use your mouse to select one of the pixies in the draw sequence and mousewheel it up or down depending on where you want to see it on the screen.
If you look at the image below, however, you'll notice that Obelix is holding two romans in his favourite choke-hold technique. So if we wanted to draw this using the (old - up until most recent article update two weeks ago) Sprite class you'd be hard pressed to work with the sprites and have to do a song and dance in order to get Obelix's body behind the two romans while at the same time drawing Obelix's arms in front of those two same romans. To do this, you could either disjoint his arms as two separate sprites and do the math to draw them where they need to be or, alternately, you could make the romans 'limbs' that are attached to Obelix which you could then draw behind his arms in any given Sprite Animation Frame's draw sequence. In either case, it was a hassle.
So, I looked at this and decided I needed to do something about it and came up with a quick and easy solution. The Sprite Class's Draw_Animation_Frame() now has an overload which allows you to specify a list of limbs which are to be drawn separately from the rest of the body.
That function then:
- creates a new list of all the sprite's limbs.
- It then creates sublists of limbs that are attached to the sprite limbs that were specified by the calling function and removes them from the first general list of limbs.
- When it has as many sub-lists as it had limbs specified by the calling function, it then assembles the sprite and readies it to be drawn
- Instead of drawing the entire sprite onto a single bitmap, it draws only the limbs of each list exactly where they would be on a normal completed sprite bitmap but instead on their own individual bitmap of the same size as the bitmap that would have contained all the sprite's limbs
- Then it returns all these bitmaps to the calling function in the same order that the calling function had specified the limbs it wanted.
So, essentially, in the case of Obelix here what you would do, is tell the classSprite that you need three images in order to draw what we see below: one of the body without either arm and two of the arms themselves. To do this, you would make a list of three limbs: LeftShoulder, RightShoulder and MasterLimb. So all the limbs that are attached to the LeftArm (leftForearm & LeftHand) would be drawn on a separate bitmap exactly where they would appear in the completed sprite bitmap. So also would the rightArm, rightForearm and RightHand when you include the RightArm in the list sent by the calling function. And finally, the body and all limbs that were not attached to the limbs specified (left/right arms) would be drawn onto the third bitmap and all three bitmaps would then be sent back to the calling function in a list. They're all the same size and you need only calculate where the first one belongs and you know where they all belong. Armed with that, you draw Obelix, you draw the romans and then you draw Obelix's arms and you're done.
If you've had a chance to watch the Winnie The Pooh Meet Betty Boop video, you'll notice that Winnie gets beat up and winds up with a black eye. Don't worry, he deserved it and Betty let him run away before she got carried away with him. There are several ways to draw Winnie the Pooh with a black eye. The easiest might have been to only draw him with a black eye in certain specific animations, or have twice as many animations as you need with half of them showing the black-eye the other half without. But, instead of doing that, all of Winnie's animations have him drawn with a black eye (with the exception of one that involves a certain middle finger which instigates the trouble).
Look at the image below:
Here, you can see a sequence of two TimeFrames of the Winnie the Pooh Meets Betty Boop video. In the first one, you'll notice that the 'black-eye' is drawn first (behind Winnie's swollen head) in the Pixie Draw Sequence while in the second frame the 'black-eye' is drawn after Winnie's bruised ego. You may say that drawing an extra bitmap the same size as Winnie really slows things down, and you'd be right, but for reasons I'll explain later... that really doesn't matter. This is a quick solution to creating animation videos (as opposed to video games where speed is most essential) where we have the luxury of creating all the images we want in our own sweet time and can therefore take short-cuts to getting the results we're looking for. Winnie had a black-eye all along, he just thought he could hide it behind his right ear, is all.
The interface to do this is not overly difficult. Select a Pixie in the Pixie Draw Sequence and use the right mouse button to summon its context menu. You will be given three options to either:
- Delete Master Limb (removes entire pixie for this one frame)
- Delete A Series Master Limb (delete entire Pixie in a Series of TimeFrames)
- Draw Limb Separately (which will provide you with a list of limbs to choose from)
When you've selected the limb you want to draw separately, you need merely set the Pixie Draw Sequence in whatever order you want and get what you need.
5. Recording Your Video
When you click on the Scene button located beneath the File button near the top of the Scene Editor, you will be given the option to play the Animation or Record your project. Either selection will display the sequence of frames you have drawn onto the video screen. However, when you simply run the Animation, what the Animation Editor is doing is re-creating each TimeFrame from scratch. It loads the background source image along with all the PixieFrame information for a specific TimeFrame in your project's TimeLine and then it draws the various pixies and their sprites in the pixie location, size and angle described in each Pixie's PixieFrame and when it has done all that work it throws the image on the screen. The Animation Editor will try to schedule each frame according to the delay time that is attached to each background video frame but it may require more time to draw the animations than the time delay required for smooth video playback. To rectify this problem, the Animation Editor gives you the option to produce all the images and store them to the harddrive in a separate '_record.bin' file along with a time stamp for each frame which you can alter to speed-up or slow-down your final project. Since during Playback the Animation Editor needs only to load a single image from the hard-drive (which it would normally do to load the background video frame from the source .bin file before drawing all the sprites anyway) and splash it on the screen without doing any work, it results in a much smoother animation. Also, because the timestamps for each _record.bin file's frames do no reflect the time delay between two juxtaposed frames but rather the time delay since the beginning of the animation playback, there is no accumulated error which accrues when you measure time from one frame to the next. The final Playback version of your project should run much more smoothly, especially if it involves drawing many large and complicated sprite images on the screen at any time.
You may want to first use the context menu's ToggleView->Frame->FrameIndex & ToggleView->Frame->FrameTimeStamp options to remove the TimeFrame Index and TimeStamp information normally printed at the bottom right of your video screen before recording your project.
When you're ready to record, click on the Scene button near the top and select Record from the menu option that appears. The Animation Editor will cycle through all the TimeFrames and draw all the Pixies on each frame using the PixieFrame information that you've created while editing your project. When the Animation Editor has completed this work, a new file will have been created in the project's working directory and that file will then be detected when you click the Scene button again and provide you with the option to either Playback your project or Playback - set speed. Click Playback to watch your animation.
If there are Live-action actors in your source video and you've lengthened your source background video in order to improve performance during the Loading of the MP4 stage at the beginning of this project, then you'll want to speed up the recording so as to generate a smooth video animation that runs at the same speed as your source Audio File. In this way, you can dub the audio-file over top your animation and match the original sound track to your animated project before you add the Looney-Tunes sound-effects using your 3rd party video editor. As mentioned earlier, the Recorded project has two time-stamps for each frame. The first will not change until you edit your background video sequence and record your project again. After first recording your project, both of these timestamps are identical but you can change the second one by using the video screen's context menu's Scene->Playback set speed option which will multiply the speed value you enter here with the first time stamp of each frame to produce the 2nd time stamp of that same frame. During playback, the recorded animation's start time is compared with each frame's altered timestamp to ensure that your video runs as smoothly as it was captured and at whatever speed you set it to so long as your hardware can keep up. There is no sense in setting this value too high if your computer cannot load the image off the harddrive and put it on the screen fast enough to keep up. This operation is still hardware dependent and no frames will be dropped so the final output will depend on your computer's processing and harddrive access speeds.
Once you're satisfied with your animation, you will have to use a 3rd party Video Screen Capture app in order to screen capture your animation and save it as an MP4. When you do this, you will have to start the Video Screen Capture app before you launch the animation's recording and then wait until the recording has played out before you stop the Video Screen Capture. The resultant MP4 will therefore need to be edited to cut out the front and back end of this operation before you can successfully dub your source audio track.
The Code
I started this project on March 31st, 2020. We had just recently started Coviding here in New Brunswick, Canada and I gave it no thought until about ten minutes in when I realized, "hey, wait a minute. This is a huge project." All my other projects have been on hold ever since and I have no regrets. It took three and a half months to get to this point and there is much more to go. Initially, the data was stored in XML files as a series of paths. Then, after the first Covid Hand Washing video two weeks later, I resorted to the timelines and timeframes that are currently in use. At that point, many of the current features were already included but consistently failed or resulted in crash-n-burn scenarios. Gradually, as I developed more video projects, new features appeared while bugs slowed migrated into the code equivalent of a Roach Motel. The timestamps were not yet being used though they were being recorded and the results were systematically choppy-er than they are now. Improvements were slow as I created more videos and found myself so obsessed with whatever video-project I was working on that I was putting up with bugs that I had started the video project to help me find and fix. At that point, I was making entire videos before settling down to correct the bugs that I had discovered. Progress happened but it was slow. I changed that habit when I was working on the Rose-Bursts video and dedicated myself to improving the screen-capture method and solving all bugs as they appeared. Many interface issues that were good-enough-for-me were not up-to-snuff for this open-source publishing so lots of those have been found and fixed in the last week or so.
I developed many of the techniques used in this app while I was working on the Sprite Editor. Since working on the Animation Editor, there were some things that needed to be implemented in the class Sprite, so I took the time to improve that project and uploaded those changes last week or so. One of the most important changes to the classSprite which definitely needs to be mentioned here, is the class's draw_Animation_Frame() that was explained above with regards to the Pixie Draw Sequence.
public Bitmap draw_Animation_Frame(ref classSpriteData cSpriteData)
{
List<classSprite_Limb> lstLimbsSource = new List<classSprite_Limb>();
lstLimbsSource.Add(cCostumeInfo_Default.cLimb_Master);
List<Bitmap> lstBmp = draw_Animation_Frame(ref cSpriteData, lstLimbsSource);
if (lstBmp.Count > 0)
return lstBmp[0];
else return null;
}
public List<Bitmap> draw_Animation_Frame(ref classSpriteData cSpriteData,
List<classSprite_Limb> lstLimbSources)
{
...
}
This function now has an override. As you can see above, the class now draws a List of bitmaps instead of just the one. You can give the class a list of limbs and it will produce images of those limbs that are the same size as the original. This way, you can dis-joint a sprite's arms or legs from their master-limbs and draw the different parts in whatever order you like by using the Pixie Draw Sequence.
There were a lot of issues along the way but by jumping back and forth between this project and making/fixing features in the Sprite Editor made it easier because my head was in it the whole time. Of course, I was pleased to see the results of my video projects as I went along despite all the trouble which working with a buggy unfinished Animation Editor entailed, which was motivation in itself.
What's Next
- I was thinking of bundling the Sprite class with a wrapper and making a new kind of sprite using actors and video capture. Similar technique as those that are used here, only the Sprite Editor would isolate the actor in front of a white wall and much editing would be required by the user in order to consistently locate the actor's center of mass and key limbs for each frame of any animations created.
- With regards to the Animation Editor itself, I have plans to move away from video background (while keeping it as an option for the user) and introduce cartoon-land background, midground and foreground. By tracking Pixie locations relative to some common toon-town-world center of axis (rather than a point on the screen), I can then introduce camera POV and a camera that pans and zooms all over cartoon-land in a safe Covid-free environment. I've got plans in my head for this and making animated cartoons sounds like a fun project, so I'll probably be working on that soon.
Right now though, I'm just thinking of finishing this article and putting the computer away (sort of) for a week or two so I can work on another art-project using my GridMethod app (Albrecht Durer, most likely). But I'll be back with more updates for this project, probably a separate article as this one is quite long. Until then, why don't you invite Jessica Rabbit over to your place to Quarantine and Chill, Roger won't mind. Meanwhile, I'll work on some things while Betty Boop keeps the ill-repute rabble of toon-town away.
History
- 16th July, 2020: Originally published
Christ Kennedy grew up in the suburbs of Montreal and is a bilingual Quebecois with a bachelor’s degree in computer engineering from McGill University. He is unemployable and currently living in Moncton, N.B. writing his next novel.


 General
  News
News  Suggestion
  Question
  Bug
Bug  Answer
  Joke
Joke  Praise
  Rant
Rant  Admin
Admin 


