In this tutorial, we are going to take a look at different RenderTargets. We focus on four Render Target types, each having its own purpose.
The example code is hosted at Github.
Table of Contents
Introduction
Direct2D is introduced to phase out the dated GDI+ in 2009 and is supported on Windows 7 or newer. This is the first in an introductory Direct2D tutorial series. In this tutorial, we are going to take a look at various RenderTargets. Think RenderTarget as a canvas to draw on. We focus on four Render Target types listed below. Each for its own purpose.
HWND Render Target- Device Context (DC) Render Target
- Bitmap Render Target
- Windows Imaging Component (WIC) Render Target
HWND Render Target
The first Render Target is HWND based. Before we can use Direct2D, two namespace must be introduced: D2D1 and Microsoft::WRL for accessing Direct2D class and ComPtr (a smart pointer for COM object).
using namespace D2D1;
using namespace Microsoft::WRL;
To simplify the factory creation and access, the factories are put in FactorySingleton.
class FactorySingleton
{
public:
    static ComPtr<ID2D1Factory> GetGraphicsFactory();
    static ComPtr<IWICImagingFactory> GetImageFactory();
    static void DestroyImageFactory();
private:
    static ComPtr<ID2D1Factory> m_GraphicsFactory;
    static ComPtr<IWICImagingFactory> m_ImageFactory;
};
GetGraphicsFactory() will create the graphics factory if its pointer is nullptr.
ComPtr<ID2D1Factory> FactorySingleton::GetGraphicsFactory()
{
    if (!m_GraphicsFactory)
    {
        D2D1_FACTORY_OPTIONS fo = {};

#ifdef DEBUG
        fo.debugLevel = D2D1_DEBUG_LEVEL_INFORMATION;
#endif

        HR(D2D1CreateFactory(D2D1_FACTORY_TYPE_SINGLE_THREADED,
            fo,
            m_GraphicsFactory.GetAddressOf()));

    }
    return m_GraphicsFactory;
}
We'll use MFC to demonstrate the Direct2D code. A MFC dialog class to hold ID2D1HwndRenderTarget object named as m_Target and three functions.
class CD2DHwndRTDlg : public CDialogEx
{
    ComPtr<ID2D1HwndRenderTarget> m_Target;

    void CreateDeviceResources();
    void CreateDeviceIndependentResources();
    void Draw();
};
In this first tutorial, we will not use any resource and therefore shall not create any, so CreateDeviceResources() and CreateDeviceIndependentResources() shall be empty. Draw() clears the dialog window to a corn blue colour.
void CD2DHwndRTDlg::CreateDeviceResources()
{
}

void CD2DHwndRTDlg::CreateDeviceIndependentResources()
{
}

void CD2DHwndRTDlg::Draw()
{
    m_Target->Clear(ColorF(0.26f, 0.56f, 0.87f));
}
All the drawing occurs in the overridden OnPaint(), if m_Target is nullptr, we create it with the graphics factory's CreateHwndRenderTarget(). After m_Target is created, CreateDeviceResources() shall be called to create the device dependent resource that is tied to the m_Target. As mentioned before, in this tutorial, we do not have any resource. Before any drawing is done, we first checked whether our window is occluded (meaning blocked by other window), if it is, drawing is skipped. All drawing must be done between the BeginDraw() and EndDraw(). When EndDraw() returns D2DERR_RECREATE_TARGET, we reset m_Target to nullptr and called Invalidate() which will pump WM_PAINT message which in turns cause the OnPaint() to be called again. When m_Target is found to be nullptr, it will be created once more.
void CD2DHwndRTDlg::OnPaint()
{
CDialogEx::OnPaint();
if (!m_Target)
{
CRect rc;
GetClientRect(rc);
D2D1_SIZE_U size = D2D1::SizeU(
rc.right - rc.left,
rc.bottom - rc.top
);
HR(FactorySingleton::GetGraphicsFactory()->CreateHwndRenderTarget(
RenderTargetProperties(),
HwndRenderTargetProperties(GetSafeHwnd(), size),
m_Target.ReleaseAndGetAddressOf()));
CreateDeviceResources();
}
if (!(D2D1_WINDOW_STATE_OCCLUDED & m_Target->CheckWindowState()))
{
m_Target->BeginDraw();
Draw();
if (D2DERR_RECREATE_TARGET == m_Target->EndDraw())
{
m_Target.Reset();
Invalidate();
}
}
}
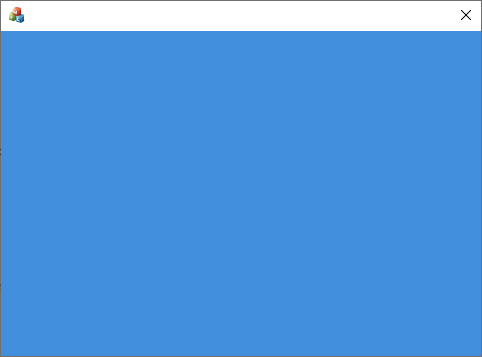
This is our corn blue window.
Device Context (DC) Render Target
Next, we take a look at Device Context Render Target. The reader may ask since we have HWND Render Target, why do we need a DC Render Target? That is a very good question. HWND Render Target does not render correctly on a scrollable window while DC Render Target has no problem rendering while the window is scrolling. Other than that, there is no reason to use a DC RT over a HWND RT. This time, m_Target is a generic ID2D1DCRenderTarget object.
class CD2DDeviceContextRTDlg : public CDialogEx
{
    ComPtr<ID2D1DCRenderTarget> m_Target;

    void CreateDeviceResources();
    void CreateDeviceIndependentResources();
    void Draw();
};
DC RT is created with CreateDCRenderTarget() of the graphics factory. Before any drawing is done on a DC RT, a valid DC must be bound with BindDC(). DC is not checked to be occluded since generic m_Target does not provide the CheckWindowState().
void CD2DDeviceContextRTDlg::OnPaint()
{
if (!m_Target)
{
D2D1_PIXEL_FORMAT pixelFormat = D2D1::PixelFormat(
DXGI_FORMAT_B8G8R8A8_UNORM,
D2D1_ALPHA_MODE_PREMULTIPLIED
);
D2D1_RENDER_TARGET_PROPERTIES props = D2D1::RenderTargetProperties();
props.pixelFormat = pixelFormat;
HR(FactorySingleton::GetGraphicsFactory()->CreateDCRenderTarget(&props,
m_Target.ReleaseAndGetAddressOf()));
CreateDeviceResources();
}
CPaintDC dc(this);
CRect rc;
GetClientRect(rc);
m_Target->BindDC(dc.GetSafeHdc(), &rc);
m_Target->BeginDraw();
Draw();
if (D2DERR_RECREATE_TARGET == m_Target->EndDraw())
{
m_Target.Reset();
Invalidate();
}
}
Bitmap Render Target
We can use Bitmap RT to provide double buffering to DC RT. m_BmpTarget is additional RT (which will do all the drawing) while m_Target blit its bitmap to the window.
class CD2DBmpRTDlg : public CDialogEx
{
    ComPtr<ID2D1DCRenderTarget> m_Target;
    ComPtr<ID2D1BitmapRenderTarget> m_BmpTarget;

    void CreateDeviceResources();
    void CreateDeviceIndependentResources();
    void Draw();
};
m_BmpTarget's Clear() must be called between its BeginDraw() and EndDraw().
void CD2DBmpRTDlg::Draw()
{
	m_BmpTarget->BeginDraw();
	m_BmpTarget->Clear(ColorF(0.26f, 0.56f, 0.87f));
	m_BmpTarget->EndDraw();
}
Before m_Target creates m_BmpTarget, its DC must be bound with BindDC(). GetBitmap is called on m_BmpTarget to get its internal bitmap for m_Target to DrawBitmap() onto the window.
void CD2DBmpRTDlg::OnPaint()
{
CRect rc;
GetClientRect(rc);
CPaintDC dc(this);
if (!m_Target)
{
D2D1_PIXEL_FORMAT pixelFormat = D2D1::PixelFormat(
DXGI_FORMAT_B8G8R8A8_UNORM,
D2D1_ALPHA_MODE_PREMULTIPLIED
);
D2D1_RENDER_TARGET_PROPERTIES props = D2D1::RenderTargetProperties();
props.pixelFormat = pixelFormat;
HR(FactorySingleton::GetGraphicsFactory()->CreateDCRenderTarget(&props,
m_Target.ReleaseAndGetAddressOf()));
m_Target->BindDC(dc.GetSafeHdc(), &rc);
HR(m_Target->CreateCompatibleRenderTarget(m_BmpTarget.ReleaseAndGetAddressOf()));
CreateDeviceResources();
}
Draw();
ComPtr<ID2D1Bitmap> bitmap;
m_BmpTarget->GetBitmap(bitmap.GetAddressOf());
m_Target->BindDC(dc.GetSafeHdc(), &rc);
m_Target->BeginDraw();
m_Target->DrawBitmap(bitmap.Get());
if (D2DERR_RECREATE_TARGET == m_Target->EndDraw())
{
m_Target.Reset();
Invalidate();
}
}
Windows Imaging Component (WIC) Render Target
Lastly, we have Windows Imaging Component Bitmap Render Target for saving the drawing onto an image format such as JPEG and PNG. In FactorySingleton, we have GetImageFactory() which creates the image factory when it is checked to be nullptr. We also have DestroyImageFactory() to destroy the image factory.
ComPtr<IWICImagingFactory> FactorySingleton::GetImageFactory()
{
    if (!m_ImageFactory)
    {
        CreateInstance(CLSID_WICImagingFactory, m_ImageFactory);
    }
    return m_ImageFactory;
}

void FactorySingleton::DestroyImageFactory()
{
    if (m_ImageFactory)
    {
        m_ImageFactory.Reset();
    }
}
WIC needs COM runtime, so we have to call CoInitialize() and CoUninitialize() to initialize and deinitialize COM runtime. Because image factory is a singleton which in turn is a global variable: it may be destroyed only after COM runtime is deinitialized. To prevent that, we call DestroyImageFactory() before CoUninitialize() to make sure the global COM object (image factory) is destroyed first.
CD2DWicRTApp::CD2DWicRTApp()
{
	HR(CoInitialize(nullptr));
}

CD2DWicRTApp::~CD2DWicRTApp()
{
	FactorySingleton::DestroyImageFactory();
	CoUninitialize();
}
In the dialog class, m_Target is a generic ID2D1RenderTarget object which would be backed by the WIC bitmap. This time, we are not going to paint the window but onto the WIC bitmap via m_Target and save the image on disk with SaveAs().
class CD2DWicRTDlg : public CDialogEx
{
ComPtr<ID2D1RenderTarget> m_Target;
ComPtr<IWICBitmap> m_WicBitmap;
void CreateDeviceResources();
void CreateDeviceIndependentResources();
void Draw();
void PaintAndSaveImage(PCWSTR filename);
void SaveAs(ComPtr<IWICBitmap>& bitmap, PCWSTR filename);
};
We call PaintAndSaveImage() with a path to the new image file.
BOOL CD2DWicRTDlg::OnInitDialog()
{
PaintAndSaveImage(L"C:\\temp\\sample.PNG");
return TRUE;
}
m_WicBitmap is created with image factory through CreateBitmap() and then m_Target is created from graphics factory's CreateWicBitmapRenderTarget() with m_WicBitmap as its first argument. After drawing is done, SaveAs() is called to save the image.
void CD2DWicRTDlg::PaintAndSaveImage(PCWSTR filename)
{
CRect rc;
GetClientRect(rc);
if (!m_Target)
{
D2D1_PIXEL_FORMAT pixelFormat = D2D1::PixelFormat(
DXGI_FORMAT_B8G8R8A8_UNORM,
D2D1_ALPHA_MODE_PREMULTIPLIED
);
D2D1_RENDER_TARGET_PROPERTIES props = D2D1::RenderTargetProperties();
props.pixelFormat = pixelFormat;
HR(FactorySingleton::GetImageFactory()->CreateBitmap(rc.right, rc.bottom,
GUID_WICPixelFormat32bppPBGRA,
WICBitmapCacheOnLoad,
m_WicBitmap.ReleaseAndGetAddressOf()));
HR(FactorySingleton::GetGraphicsFactory()->CreateWicBitmapRenderTarget(m_WicBitmap.Get(),
RenderTargetProperties(), m_Target.ReleaseAndGetAddressOf()));
CreateDeviceResources();
}
m_Target->BeginDraw();
Draw();
if (D2DERR_RECREATE_TARGET == m_Target->EndDraw())
{
m_Target.Reset();
Invalidate();
}
else
{
SaveAs(m_WicBitmap, filename);
}
}
void CD2DWicRTDlg::SaveAs(ComPtr<IWICBitmap>& bitmap, PCWSTR filename)
{
CString filename_lower = filename;
filename_lower = filename_lower.MakeLower();
CString ext = filename_lower.Right(4);
GUID guid = GUID_ContainerFormatPng;
if (ext == L".png")
guid = GUID_ContainerFormatPng;
else if (ext == L".jpg")
guid = GUID_ContainerFormatJpeg;
ext = filename_lower.Right(5);
if (ext == L".jpeg" || ext == L".jpg+")
guid = GUID_ContainerFormatJpeg;
ComPtr<IStream> file;
HR(SHCreateStreamOnFileEx(filename,
STGM_CREATE | STGM_WRITE | STGM_SHARE_EXCLUSIVE,
FILE_ATTRIBUTE_NORMAL,
TRUE, nullptr, file.GetAddressOf()));
ComPtr<IWICBitmapEncoder> encoder;
HR(FactorySingleton::GetImageFactory()->CreateEncoder(guid,
nullptr, encoder.GetAddressOf()));
HR(encoder->Initialize(file.Get(), WICBitmapEncoderNoCache));
ComPtr<IWICBitmapFrameEncode> frame;
ComPtr<IPropertyBag2> properties;
HR(encoder->CreateNewFrame(frame.GetAddressOf(), properties.GetAddressOf()));
HR(frame->Initialize(properties.Get()));
UINT width, height;
HR(bitmap->GetSize(&width, &height));
HR(frame->SetSize(width, height));
GUID pixelFormat;
HR(bitmap->GetPixelFormat(&pixelFormat));
auto negotiated = pixelFormat;
HR(frame->SetPixelFormat(&negotiated));
HR(frame->WriteSource(bitmap.Get(), nullptr));
HR(frame->Commit());
HR(encoder->Commit());
}
We have reached the end of the first tutorial. I hope you have a clear understanding of what each Render Target type is used for. The example code is hosted on Direct2D tutorials.
History
- 25th May, 2020: Initial version
Articles in the Series


 General
  News
News  Suggestion
  Question
  Bug
Bug  Answer
  Joke
Joke  Praise
  Rant
Rant  Admin
Admin 


