Have you ever wanted to gen up a quick Web API to run some server side functionality? Follow this article and you'll have a working Web API and understand how to use vanilla JavaScript to post your JSON to it via XMLHttpRequest (AJAX).
Background
Recently, while easing into using a .NET Core Web API, I discovered that I wasn't sure of the correct way to post data to a Web API via the XMLHttpRequest (XHR) object.
I wasn't sure about:
- how to add the data to the XHR object so that it would show up in the post body.
- how to ensure the Web API would automatically transform the posted JSON into my target domain object.
I was getting all kinds of errors and I couldn't tell if I had the client side wrong or the Web API side wrong, or both. I discovered that both were wrong, but I also discovered that it is quite difficult to find a definitive answer to this even though you'd think it was a common pairing (plain JavaScript XHR posting to Web API).
What this Article Covers
- Creating a .NET Core Web API project (via command-line) - I use Visual Studio Code running on Ubuntu Linux
- Adding a Web API method which can be posted to
- Altering the Web API application so it will serve an index.htm file (for testing our Web API)
- Setting up a simple index.htm and main.js file that we use to post to the Web API
- Configuring an
XMLHttpRequest (XHR) to post JSON to the Web API
Introduction
I'm assuming you already have the latest copy of Visual Studio or Visual Studio Code on your machine.
Of course, you'll also need to ensure you have the latest version of .NET Core installed too. If you need that, you can go to https://dotnet.microsoft.com/download^.
I'm running Visual Studio Code on Ubuntu Linux so I do everything from the command-line but if you're running on Windows and using Visual Studio, you can create the .NET Core Web API using a wizard. The command-line really isn't difficult with .NET Core though and you'll probably find it quite satisfying.
Create the New Project
To get started, take the following steps:
- Open a Console (or terminal).
- Navigate to a directory where you want to create a new project.
- Type the following command:
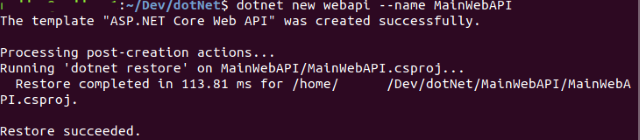
dotnet new webapi --name MainWebAPI
A New Folder Will Be Created
When you type that command and hit <ENTER>, it will create a new subfolder named MainWebAPI and add all of the project files into the directory.
If it was successful, you will see something like the following:
If you get some kind of error that the command is not recognized, then you probably do not have the .NET Core SDK installed. To determine the version of the .NET you have installed, you can try the following command:
dotnet --version
Mine replies with 3.1.202.
If all of that went well, then you have a very basic Web API that runs on top of .NET Core.
Run the Web API Project
Let's make sure that the project will compile and run. It's very easy.
First of all, just change directory into the newly created project directory: cd MainWebAPI
Next, type: dotnet run
.NET will build and start the Web API.
It'll look something like the following:

Just Build the Project
By the way, if you had just wanted to build the project, you could've typed: dotnet build
See the Web API in Action
To see the Web API do something, you can hold your CTRL button and click the link (https://localhost:5001) that is displayed in the console window. When you do, your default browser will open the link.
But it's not very amazing because you haven't made a call to any Web API method.
You'll just see a blank web page.
One Web API Method Via Get
However, there is one method that you can call via the GET. Try this URL: https://localhost:5001/WeatherForecast/^.
That calls the default Get method on the WeatherForecastController* class. That method just generates some random WeatherForecast* domain objects and then sends them to the client as JSON.
* I'll show you both of these classes in just a moment when we look at the code.
You'll see something like one of the following two images in your browser (depending upon how your browser renders the JSON).
Now that you've seen the code run, let's take a look at the code and begin altering the WeatherForecastController so that we can post JSON to it and have it turn our JSON into a domain object automatically.
Visual Studio Code
I'm going to be using Visual Studio Code (VSC) throughout this article, but you can still use Visual Studio if you prefer.
Go ahead and start Visual Studio Code (VSC) and then we'll open the project.
Open a Folder
To load the project in VSC, you:
- go to the main menu
- choose the [File...]menu item
- choose the [Open Folder...]
- Navigate to the folder that was created when we created the project and select it
When you follow those steps, you'll see something like the following:
Highlighted Areas
I've highlighted a few areas in VSC so we can talk about them.
Toolbar
The first section is the toolbar which includes a few icons.
File View
The currently selected one is highlighted in white and indicates that File View is displayed. You can see that in the second section there is a list of files. However, if you choose one of the other icons, this section will change.
Debug View
During this article,we will also use the Debug item to show you how you can step through your Web API code using VSC. The Debug item is indicated by the .
However, to use the debugger in VSC you have to make sure that you have the C# Extensions plugin installed and running.
Plugins View
The plugins view is indicated by the .
You can see that section 4 of the VSC overview image that I provided above is actually VSC warning me that the C# Extension plugin needs to be added to the project so we can debug the code. If you see that and click the [Yes] button, then it will add it to the project. However, you may not see that if the extension hasn't been added to your system.
Also, that pop-up tends to disappear quickly. That's okay though, because you can click the Plugins icon and add the plugin to your system and project any time.
Here's what it looks like once it is installed and activated:
Main Editor Area
Finally, you can see that the main editor area (area 3 on the VSC image above) is currently displaying notes about the current version of VSC. This is the area where each file will display when you choose them from the File Viewer area.
Now that you are more familiarized with VSC, let's start looking at the WeatherForecastController.
Examining the WeatherForecastController
Opening a File in a SubDirectory
Make sure you are on File View. Next, in the File View, find the Controllers directory. It will have a down right-arrow (great-than sign) pointing at the Controllers name. That's indicating a folder that is currently collapsed. Click on the Controllers folder and select the WeatherForecaseController.cs that appears, and it will display in the editor area.
Controller: Application Logic Layer
I'm not going to explain every aspect of the Controller code. You can think of the controller in general as the application logic layer. Here's the basics of what happens.
A user requests an action (function or method) on a Controller by sending an HTTP Command (GET, POST, PUT, etc.^) to the named Controller (described by the URL) on the server.
Note: In this article, we will only deal with the POST command.
As developers, we can write code in the Controller method that runs application logic that provides specific functionality. It's really that simple.
The Get method that the project template included in the Controller looks like:
[HttpGet]
 public IEnumerable<WeatherForecast> Get()
 {
     Console.WriteLine("in get...");
     var rng = new Random();
     return Enumerable.Range(1, 5).Select(index => new WeatherForecast
     {
         Date = DateTime.Now.AddDays(index),
         TemperatureC = rng.Next(-20, 55),
         Summary = Summaries[rng.Next(Summaries.Length)]
     })
     .ToArray();
 }
It's probably obvious, but the [HttpGet] method decorator tells the compiler to make this method available via HTTP Get.
This method simply generates an array of five WeatherForecast objects (domain objects) and returns them. They will be serialized to JSON automatically and that is what we saw in the browser earlier.
Our Main Challenge
The challenge here is how to post data to the WeatherForecast Controller so that it will be automatically deserialized into a WeatherForecast object.
First of all, let's add the most basic Post method to our controller.
[HttpPost]
public String Post(){
    Console.WriteLine("in post...");
    return "It worked!";
}
First of all, notice that we changed the decorator to [HttpPost] so that this method will fire when the user posts to the URL http://localhost:5001/WeatherForecast.
Default Post Method
This internal method name is Post() but externally there is no action (method name) shown so that means when the user posts directly to the Controller, this is the default action (method that will run) which will occur.
There is a way to provide an external name that can then be supplied on the WeatherForecast controller URL and I will show you that in a moment.
Secondary Challenge: Client Side Post Creation
Now, we have the challenge of testing the Post() method on the WeatherForecast controller. Since we can no longer use the browser just to navigate to the URL (simple HTTP Get), we need some other way to invoke an HTTP Post from the client.
First Easiest Post Test
The first and probably easiest way to do a Post to the controller is to download PostMan and set it up. There are other tools, but PostMan is probably the easiest one and it is free.
Go to https://www.postman.com/downloads/^, get the free utility and install it for your system.
Once you do and you start it up, we can try posting to our controller.
Walkthru: PostMan Request
The PostMan User Interface is a bit jumbled but it's easy enough to create a new request and I will walk you through it.
Create a New Request
The first thing you want to do is create a new request. To do that, you can choose the [New] button and choose [Request] when the menu appears. Or, you can click the [Create a Request] option. Both of these are shown highlighted in red, in the next image.
Once you choose one of those options, you will see a new form. In the image, you can see that I've also dropped the list of HTTP Actions to show you that is where you can select which one you will use when submitting the request. First, we'll try the simple Get.
PostMan: Configuration Change
However, before we make our first request, you need to make one change to the PostMan default settings. If you do not, then all of your requests will fail because PostMan does not support self-signed certificates.
If you do not change the setting, then you will see an error like the following (notice blue highlighted text for error).
HTTPS: Self-signed Certificates Not Supported
To fix that, you simply go to File...Settings... in PostMan and turn off the option highlighted in red (shown here still turned on) - SSL certificate verification.
Once you do that and close the Settings window, you can proceed and it will work.
Go ahead and select the Get command from the drop list.
Next, add the following URL and then press <ENTER> or click the [Send] button.
Once you do that, you'll see similar results to what we saw before (in the browser), but just formatted in the way PostMan formats things.
Keep in mind that was the result of calling the default Get() action on the WeatherForecast controller. I mention this as a way to remind you that we did not add any action name (specific) method on the URL.
Post to WeatherForecastController
Now, let's simply change the HTTP Verb to Post in PostMan and try again.
Here's the new and very basic result:
That is all great, but what we want to do is post some JSON to the controller and have it automatically transform the JSON into our domain object (WeatherForecast).
Posting JSON: Attempt 1
The first thing we need to understand is what the target domain object looks like. What properties does it have?
We can take a look at the WeatherForecast class back in VSC.
WeatherForecast Class Analysis
It's a very simple class. Here's the entire code listing for that class.
using System;

namespace MainWebAPI
{
    public class WeatherForecast
    {
        public DateTime Date { get; set; }

        public int TemperatureC { get; set; }

        public int TemperatureF => 32 + (int)(TemperatureC / 0.5556);

        public string Summary { get; set; }
    }
}
It's really just made up of four properties (although one of them does run a function to get its value).
DateTemperatureC // (temp in Celsius)TemperatureF // (calculated temp in Fahrenheit)Summary // text-based summary of the weather
JSON: Name / Value Pairs
Since we know that JSON (JavaScript Object Notation) is simply name value pairs which define an object, we can create our own WeatherForecast (with data) very easily. Here's the one we'll use for our tests.
{"Date":"2015-05-03", "TemperatureC":37,"Summary":"Our weather data"}
Notice that since the TemperatureF is calculated from the TemperatureC, I don't even include that property in our JSON.
Brackets: Think Object - Quick JSON Summary
Here's a quick way to think about what you see in the JSON. The curly brackets indicate the start and end of an object. Each value before a colon indicates a property name and each value after a colon indicates a property value. Each name/value pair are separated by commas. Each property name must match a property in our target class.
That's it, so let's try it out using PostMan.
Change WeatherForecastController Post Method
We have to make one change in our default Post() method in our WeatherForecastController. We have to make sure it is expecting to receive a WeatherForecast object.
Let's open up WeatherForecastController in VSC and make the change.
We'll also change the method to return an Int32 and we'll return the TemperatureF so that you can see that the value is generated. This also provides us with a somewhat usuable Web API method (though a bit contrived) because you can send in a WeatherForecast object where you know the Celsius temperature and the method will return the temperature in Fahrenheit.
Here's the altered default Post() method.
[HttpPost]
public Int32 Post(WeatherForecast wf){
    Console.WriteLine("in post...");
    return wf.TemperatureF;
}
Make Changes and Run
Once you make those changes, then go back to your console and:
- close the program if it was already running (press CTRL-C to end the session)
- build and run the application again --
dotnet run will build and run the app again - Copy the JSON we created above
- Go back to PostMan
- Click the [body] tab (see next image)
- Select the [raw] (next image) radio button
- Paste the JSON into the editor area.
- Click the [Send] button.
When you do all of those steps, you will see the following result (error).
Note: I used one image to show multiple steps and the result.
Error Explanation
It's a bit confusing, but that bottom portion is the result after posting our JSON to the Controller. We didn't get the expected response (TemperatureF), but instead we got some JSON that is describing the problem.
It's difficult to tell that an error even occurred and where the error occurred.
Console.WriteLine of Post() Method Doesn't Run
Keep in mind that our default WeatherForecastController has a Console.WriteLine() call that attempts to output a message. That should output some text to our console window where the application is running, but if you look, there is no output. That provides us with a clue that our method never ran.
Unsupported Media Type
The real clue to what happened is the Error 415 and the message "unsupported media type". It is still cryptic though and if you're just starting out, you'll really wonder what it all means. After much searching and reading, you'll find that it means that the server doesn't know what type of data we are posting to it and it doesn't like that.
Fix the Problem with an HTTP Header
We can tell the server the type of data we are sending by adding an HTTP Header to our Post action.
The server wants to know what type of data you are sending so it can properly use the data. Let's go add the proper HTTP Header to our PostMan Post action and try again.
HTTP Headers: Name / Value Pairs
HTTP Headers are metadata (data sent with the actual data to describe the data) which are sent along with the data. To add a name / value pair to the PostMan headers, we just need to:
- select the Headers tab (see next image)
- add a new header named :
Content-Type (type this in the list under Key (same as Name)) - add a new value for the added Key:
application/json
That Key and value are both predefined values that are described by the HTTP specification which the server will understand.
Now, when you post again, the server will understand that incoming content is JSON and should be handled as JSON.
After you've made those changes, go ahead and click the [Send] button in PostMan again and this time, you will get a valid result. 98 Fahrenheit is the same temperature as 37 Celsius (the value we sent into the WeatherForecastController in our JSON).
You can also tell that the WeatherForecastController Post() method did indeed run because back in your console window, there is some output from the call to Console.WriteLine():
Automatic Convert to Domain Object: Amazing!
Also, think about how amazing it is that underlying .NET Core Web API automatically converted our JSON into our domain object (WeatherForecast).
You can tell that it did that automatically because our default Post() method simply takes a parameter of type WeatherForecast and we referenced a property of the object in our return statement:
return wf.TemperatureF;
Wrapping Up Part 1
I hope you found Part 1 of this article series instructional and that it revealed a few of the trickier elements (HTTP Headers, HTTP Post and using PostMan) in a clear way.
However, since this article is already so long, I've decided to put the rest of the article in Part 2.
Now that we understand that we need...
- JSON data added to the
Post body - Special
Content-Type header added to the Post action
...that will make it much easier to understand how we are going to use AJAX (XMLHttpRequest object) via JavaScript to post data to our Web API controller.
Using the Code
- Download the zip file.
- Unzip to your Dev directory (there is an outer folder named MainWebAPI that contains all files and subfolders).
- Open console and change directory to \MainWebAPI.
- Run command
/> dotnet run. - The application will build and start the web server.
History
- 20th May, 2020: Part 1 submitted


 General
  News
News  Suggestion
  Question
  Bug
Bug  Answer
  Joke
Joke  Praise
  Rant
Rant  Admin
Admin 


