In this article, I'm going to explain how to get started with your first ASP.NET CORE web application using Visual Studio for Mac.
Introduction
This article explains the steps to create an MVC Core web application for Mac users. Please make sure to install Visual Studio for Mac.
One of the most important prerequisites is .NET Core. It's automatically installed when you install Visual Studio for Mac.
I will cover the following subjects:
- Create new MVC Core web application
- Install Nuget packages
- Create EF data models
- Initialize data
- Migration
- Adding a controller
- Adding a view
Background
Before reading this article, you need to understand the MVC architecture. Here is a suggested reference from Microsoft website (MVC tutorial).
Using the Code
I have used Visual Studio 2019 for Mac Version 8.3.6 and .NET Core 3.0.
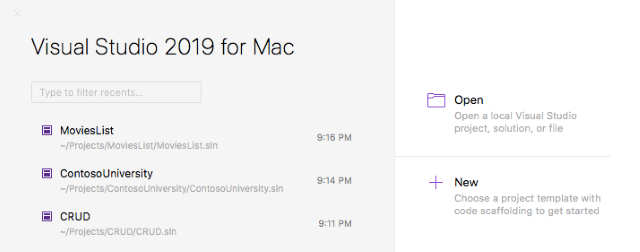
From Visual Studio, click on New:
Select Web Application (Model-View-Controller). Then click Next.

Select the Target Framework .NET Core 3.0 or later version. Then click Next.
Name your solution. Then click on Create.
To add EF Core supported to your solution, you need to install the database provider.
For our solution, we need the following Nuget Packages:
Microsoft.EntityFrameworkCore.Design
Microsoft.EntityFrameworkCore.Sqlite
Microsoft.EntityFrameworkCore.SqlServer
How to Install the Above Packages?
From Main Menu, click on Project > Manage Nuget Packages.
Search for Target Package, then click Install and make sure to select Version 3.0 (to match .NET Core version).
Repeat the two steps with the remaining packages.
3. Create EF Data Models
EF (Entity Framework) Core can serve as an object-relational mapper (ORM) enabling you to work with the database as .NET object.
In this step, we will create a model class for each table.
We will add a class for each table. For test solution, we will add two tables. Right click on Models folder, then Add -> New Class.
Table #1: Hospitals
The first class represent the Hospitals table.
You can define the primary key by naming the column like hospitalid or id directly. It will be set as the primary key.
[Stringlength(100)] attribute: can be applied to the string property of an entity class used to specify the maximum characters allowed for a string property.[Required] attribute: can be applied to one or more properties in an entity class. EF will create a not null column in a database table for a property on which the required attribute is applied.
Using System;
Using System.ComponentModel.DataAnnotations;

Namespace CRUD.Models
{
    Public Class Hospitals
    {
        Public Int Hospitalid { Get; Set; }
        [Stringlength(100)]
        [Display(name = "Hospital Name")]
        Public String Hospitalname { Get; Set; }
        [Required]
        [Stringlength(100)]
        [Display(name = "Decision Maker")]
        Public String Decisionmaker { Get; Set; }
        [Required]
        [Stringlength(100)]
        [Display(name = "Email")]
        Public String Email { Get; Set; }
        [Required]
        [Stringlength(100)]
        [Display(name = "Phone")]
        Public String Phone { Get; Set; }
    }
}
Table #2: Hospitaldetails
The second class represent the Hospitaldetails Table.
We define the one to many relationship between the hospitals and hospitaldetails table by adding (hospitalid) column as foreign key to the hospitaldetails class.
Hospitals: is the navigation property it defined on the principal and-or dependent entity that references the related entity.
To know more about navigation property and EF relationships, please follow this tutorial.
Using System;
Using System.ComponentModel.DataAnnotations;

Namespace CRUD.Models
{
    Public Class Hospitaldetails
    {
       Public Int Hospitaldetailsid { Get; Set; }
       Public Int Hospitalid { Get; Set; }
       Public Hospitals Hospitals { Get; Set; }

        Public Int Available { Get; Set; }
        Public Int Unavailable { Get; Set; }
    }
}
Adding Database Context Class
Right click on the Solution Name and create New Folder. Name it Data.
Right click on the Data folder and add two classes (CRUDContext.cs & Dbinitialize).
CRUDContext.cs
The formula for naming the Context class is ("Solution Name" followed by "Context").
Using System;
Using Microsoft.EntityFrameworkCore;
Using CRUD.Models;

Namespace CRUD.Data
{
    Public Class Crudcontext : Dbcontext
    {
        Public Crudcontext(dbcontextoptions<crudcontext> Options)
           : Base(options)
        {
        }

        Public Dbset<hospitaldetails> Hospitaldetails { Get; Set; }
        Public Dbset<hospitals> Hospitals { Get; Set; }

        Protected Override Void Onmodelcreating(modelbuilder Modelbuilder)
        {
            modelBuilder.Entity<Hospitals>().ToTable("Hospitals");

            modelBuilder.Entity<HospitalDetails>().ToTable("HospitalDetails");
        }
    }
}
Adding Connection String
Open appsettings.json file and modify it as follows (in the code, the modification on the file set as bold text).
- Adding a name from the connection string.
- Adding database name which is in our solution CRUD.db.
{
  "Logging": {
    "Loglevel": {
      "Default": "Information",
      "Microsoft": "Warning",
      "Microsoft.Hosting.Lifetime": "Information"
    }
  },
  "Allowedhosts": "*",
  "Connectionstrings": {
    "Crudcontext": "Data Source=CRUD.db"
  }
}
Dbinitialize.cs:
I have initialized the table with a demo data by creating a class and define a new object of the Hospitals table.
Using System;
Using CRUD.Models;

Namespace CRUD.Data
{
    Public Class Dbinitializer
    {
        Public Dbinitializer()
        {
        }

        Public Static Void Initialize(crudcontext Context)
        {
         Var Hospitals = New Hospitals[]
          {
            New Hospitals{ Hospitalid=12, Hospitalname="hospital A" ,
            Decisionmaker="dr Saad ",
                Email="hospitala@moh.sa", Password="123456",
                Phone=" ",  Services="service 1"},
            New Hospitals{ Hospitalid=11, Hospitalname="hospital B" ,
            Decisionmaker="dr Mohammad ",
                Email="hospitalb@moh.sa", Password="123456",
                Phone=" ",  Services="service 2" }
          };
           Foreach (Hospitals H in Hospitals)
           {
               context.Hospitals.Add(h);
           }
           context.SaveChanges();
        }
    }
}
I placed my project at (Users > Projects > Myproject named CRUD).
I have used the terminal to apply the migration as below.
From Terminal Window, I wrote the following cmd command to get into the right path.
- cd projects, then Enter
- cd solution name, then Enter
- cd src, then Enter
- cd ls, then Enter
- cd solution name, then Enter
- cd ls, then Enter
After that, you can now write the migration command which is:
Dotnet EF Migrations Add Initialcreate
You can change the name of the migration.
You will notice a new folder created that belongs to the solution named Migrations and database file named crud.db.
The migrations folder contains a class named 20200412210335_initialCreate.cs generated automatically.
HospitalsController.cs:
To handle all the methods that will be applied to the hospitals model.
Right click on Controller folder > Add New Class.
- Using
CRUD.Models namespace: to allow using the Hospitals model class - Using
CRUD.Data namespace: to allow using the Crudcontext class Index() action: to return index viewCreate() action: return create viewCreatehospital action: to retrieve input data from user and create the new hospitalUpdate() action: to return update viewUpdatehospital action: to retrieve input data from user and apply the modifications on the selected hospital
Using System;
Using System.Linq;
Using Microsoft.AspNetCore.Mvc;
Using CRUD.Data;
Using CRUD.Models;
Namespace CRUD.Controllers
{
Public Class Hospitalscontroller : Controller
{
Private Readonly Crudcontext _Context;
Public Hospitalscontroller(crudcontext Context)
{
_Context = Context;
}
Public Iactionresult Index()
{
Var Hospitalslist = _context.Hospitals.ToList();
Return View(hospitalslist);
}
Public Actionresult Create()
{
Return View();
}
[Httppost]
Public Actionresult Createhospital(hospitals Hospitals)
{
_context.Hospitals.Add(hospitals);
_context.SaveChanges();
Return Redirecttoaction("index", "Hospitals");
}
Public Actionresult Update(int id)
{
Return View(_context.Hospitals.Where(s => s.HospitalsID == id).First());
}
[Httppost]
Public Actionresult Updatehospital(hospitals Hospital)
{
Hospitals D = _context.Hospitals.Where
(s => s.HospitalsID == hospital.HospitalsID).First();
d.HospitalName = hospital.HospitalName;
d.DecisionMaker = hospital.DecisionMaker;
d.Email = hospital.Email;
d.Phone = hospital.Phone;
d.Password = hospital.Password;
d.Services = hospital.Services;
_context.SaveChanges();
Return Redirecttoaction("index", "Hospitals");
}
}
}
Right click on the View Folder and Add New Folder. Name it Hospitals.
Right click the Hospitals folder > Add New > MVC View Page.
Add three MVC View Page for each action in the Hospitalscontroller class.
Index: displays the Hospitals dataCreate: creates new HospitalUpdate: modifies the data for existing Hospital
index.cshtml
@Model IEnumerable<CRUD.Models.Hospitals>

<Section >
        <Div >
            <H3 >Manage Hospital</h3>
        </Div>

        <Div >
            <Table Id="example1" >
            <Thead>
            <Tr>
                <Th>hospitalsid</th>
                <Th>hospitalname</th>
                <Th>decisionmaker</th>
                <Th>email</th>
                <Th>phone</th>
                <Th>password</th>
                <Th>services</th>
            </Tr>
            </Thead>
            <Tbody>
                @Foreach (Var Item in Model)
                {
                    <Tr>
                    <td>@Html.DisplayFor
                    (modelItem => item.HospitalsID)</td>
                    <td>@Html.DisplayFor
                    (modelItem => item.HospitalName)</td>
                    <td>@Html.DisplayFor
                    (modelItem => item.DecisionMaker)</td>
                    <td>@Html.DisplayFor
                    (modelItem => item.Email)</td>
                    <td>@Html.DisplayFor
                    (modelItem => item.Phone)</td>
                    <td>@Html.DisplayFor
                    (modelItem => item.Password)</td>
                          <td>@Html.DisplayFor
                          (modelItem => item.Services)</td>
                    <Td><a href="Hospitals/Update/@item.HospitalsID">Update
                    </a></td>
                    </Tr>
                }
            </Table>
        </Div>
</Section>
Create.cshtml:
@model CRUD.Models.Hospitals

<Section >
    <Form  Method="post" Action="createhospital">
        <Div >
            <Label For="hospitalname" >Hospitalname</label>
            <Input Type="text"
            Name="hospitalname" Placeholder="hospitalname">
        <Div >
            <Label For="decisionmaker" >Decisionmaker</label>
            <Input Type="text"
            Name="decisionmaker" Placeholder="decisionmaker">
        </Div>
               <Div ">
            <Label For="email" >Email</label>
            <Input Type="email"
            Name="email" Placeholder="email">
        </Div>
                <Div >
            <Label For="phone" >Phone</label>

            <Input Type="text" Class="form-Control"
            Name="phone" Placeholder="phone">
        </Div>
        <Div >
            <Label For="password"
            Class="col-Sm-2 Control-Label">password</label>
            <Input Type="password" Class="form-Control"
            Name="password" Placeholder="password">
        </Div>
        <Div >
            <Label For="services" >Services</label>
            <Input Type="text"
            Name="services" Placeholder="services">
        </Div>
        </Div>
        <Div >
        <Button Type="submit" ">Cancel</button>
        <Button Type="submit" ">Create</button>
        </Div>
    </Form>
    </Div>
</Section>
update.cshtml:
@Model CRUD.Models.Hospitals;

<Section >
    <Div >
    <Form  Method="post" Action="/hospitals/updatehospital">
        <Div >
            <Label For="hospitalname" >Hospitalname</label>
            <Input Type="text"
            Name="hospitalname" value="@Model.HospitalName">
        </Div>
        <Div >
            <Label For="decisionmaker" >Decisionmaker</label>
            <Input Type="text" Name="decisionmaker"
            Placeholder="decisionmaker" value="@Model.DecisionMaker">
        </Div>
              <Div >
            <Label For="email" Class="col-Sm-2 Control-Label">email</label>
            <Input Type="email"  Name="email"
            Placeholder="email" value="@Model.Email">
        </Div>
        <Div >
            <Label For="phone" >Phone</label>
            <Input Type="text"  Name="phone"
            Placeholder="phone" value="@Model.Phone">
        </Div>
             <Div >
            <Label For="password" Class="col-Sm-2 Control-Label">password</label>
            <Input Type="password"  Name="password"
            Placeholder="password" value="@Model.Password">
        </Div>
        <Div >
            <Label For="services" Class="col-Sm-2 Control-Label">services</label>
            <Input Type="text"  Name="services"
            Placeholder="services" value="@Model.Services">
        </Div>
        <Input Type="hidden" Name="hospitalsid" value="@Model.HospitalsID"/>
        </Div>
        <Div >
        <Button Type="submit" >Cancel</button>
        <Button Type="submit" >Update</button>
        </Div>
    </Form>
    </Div>
</Section>
References
History
- 16th May 2020: Initial version
This member has not yet provided a Biography. Assume it's interesting and varied, and probably something to do with programming.


