In this article, an explanation has been given about how to schedule to run WebJobs. There is a step by step guide to creating and deploying webjobs, and also how to create Azure logic apps.
Background
We have all used and worked on the Azure Scheduler which helps in creating the jobs that run in the cloud. This Azure Scheduler would automatically schedule and runs the defined actions. Staring from 30th September 2019, Azure Scheduler has been Retired and Azure Logic Apps is replacing Azure Scheduler.
Now with this article, I will try to explain how we could schedule to run the WebJobs.
Create and Deploy WebJobs
To create and deploy webjobs, we can achieve it in two ways:
- Manual Deployment
- Deployment using Visual Studio
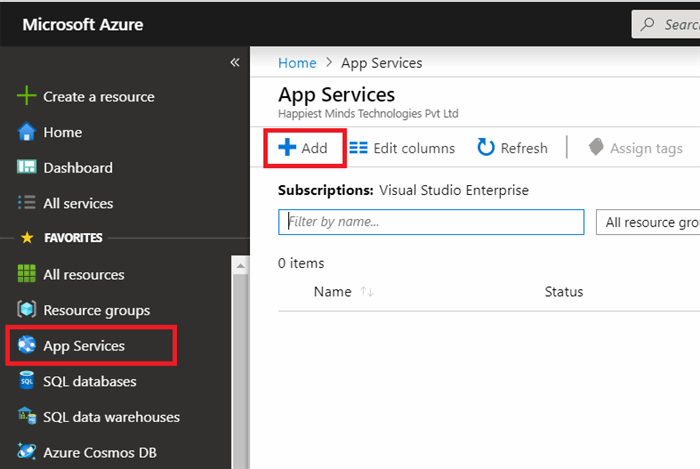
For all the above deployments, we need an Azure App service. Below are the complete steps to create an App service.
- Select the App Service from the left navigation bar, then click on the top Add button as shown below:
- After clicking on the Add Button, the below window will open and then on the window, fill up the information like Subscriptions name, resource group (default / create), App service name, runtime stack.

- After completing all the necessary Actions click on Review + Create which would take few moments to create the App Service as below:
- Create Webjob from the above App service created.
- Click on the Test-App-Webjobs App service and then type in
Webjobs in the search window as shown below:
- Click on the webjobs and the following would be promoted to create a new webjob.
- On click of the Add, fill out the below screen to create the Webjob on the App services.
- From the above image, provide the Webjob name which is "
Test-Webjob". - On File Upload option, upload the zip which you would have built (using console app / webjob)
- On Type, there are two options:
- Continuous: Job starts immediately when the WebJob is created and runs on all instances.
- Triggered: Job starts only when it gets triggered manually or on a schedule and it runs on a single instance.
- Triggers: Again, this has two options:
- Scheduled: There would be a schedule when the web jobs will run.
- Manual: the web job must be triggered by API or by manually.
- CRON Expression: This expression is composed of six fields:
{second}{minute}{hour}{day}{month} {day of the week}
Example: If we want to schedule a job at 1 AM, then we would schedule it as "0 0 1 * * *".
- On OK button, the web job will be created.
- After creation of the webjob, the below image will be shown:
- We can run the webjobs manually by clicking on the "Run" option and it can be used to test for run issue or error in the application.
Create Azure Logic Apps
Now, I am going to show how to schedule the above webjobs using Logic Apps.
- Go to Azure portal and search/ type Logic App. Click on the Logic Apps as shown in the below image:
- The below window "Azure Logic App" will popup or open.
- Provide the Logic App Name in position 1 that needs to be unique, which means that we cannot have any logic app with the exact same name.
- Select the Subscription type in the Subscription dropdown.
- Select an existing resource group or new resource group in position 3.
- Select a location from the dropdown at position 4.
- Click on Create button to create the Logic App.
- After click on the button, the below screen would be shown with the App created.
- On click of the "Test-Logic-App", the below screen would be shown to select trigger, for this, we are going to choose "Recurrence" as marked below:
- On selecting the Recurrence, the below screen would be shown with the Recurrence step as default.
- Give the Recurrence time and add required values as per your requirement. From the above, I have taken a sample to trigger the webjob every day at 9 AM.
- Click on the New step to configure the Webjob using HTTP Post Activity as shown below:
- Following properties would be shown in the window:
- Copy the required values to the properties and click on Save button.
- Logic app is created.
- Now test the app by clicking on the Run Trigger and look for Run history for the results.
- Now the application would trigger the webjobs as per the schedule.
History
- 27th February, 2020: Initial version
This member has not yet provided a Biography. Assume it's interesting and varied, and probably something to do with programming.


