Note: You can evaluate the ready-to-use web-application being discussed in this article by visiting the following link http://ec2-18-225-37-56.us-east-2.compute.amazonaws.com/.
Introduction
The readers of this article will find out how to use Clarifai API for Node.js to quickly and easily create and deploy a simple image classifier that allows to recognize and classify various images from multiple categories. As an example of using Clarifai API, we will implement a lightweight web-application performing a vehicle images classification. Specifically, the web-application being discussed, can be used for performing the classification of vehicles logically divided into two main categories such as either “trucks” or “luxury cars”. Generally, the main purpose of this article is to provide specific guidelines and walkthroughs, necessary to get started with building our own image recognition engine by using Clarifai API, including the aspects of creating one or multiple models consisting of a corpus of “useful” concepts and images that can be used for training the Clarifai cloud-based services AI to recognize our custom visual content and perform prediction and classification based on the model being trained. Specifically, we will learn how to use all of these Clarifai cloud-based solution features programmatically by interacting with Clarifai image recognition services via high-end API gateway. In this article, we will also introduce an algorithm that allows us to implement an image classification engine based on using the specific Clarifai image recognition services, providing a high-quality prediction and classification experiences.
Step 1: Before We Begin…
There’re at least two things that must have been done prior to creating and developing an image recognition web-application such as either creating Clarifai account or setting up a development environment by installing Node.js and MySQL Server developer tools.
Creating a Clarifai API Account
The first thing that we have to do is to sign up for the Clarifai API image and video recognition as a service, create a simple application and obtain a proper value of Clarifai API Key to be able to use https://api.clarifai.com/v2/ API gateway’s end-points in our Node.js web-application being created. To do that, we must visit http://www.clarifai.com/ website and create a regular free account using a user name and e-mail credentials. Since the registration is completed, the very first Clarifai application with a specific API key is automatically created under the Clarifai workspace. We can customize an existing or create another application with a new value of API key at this point.
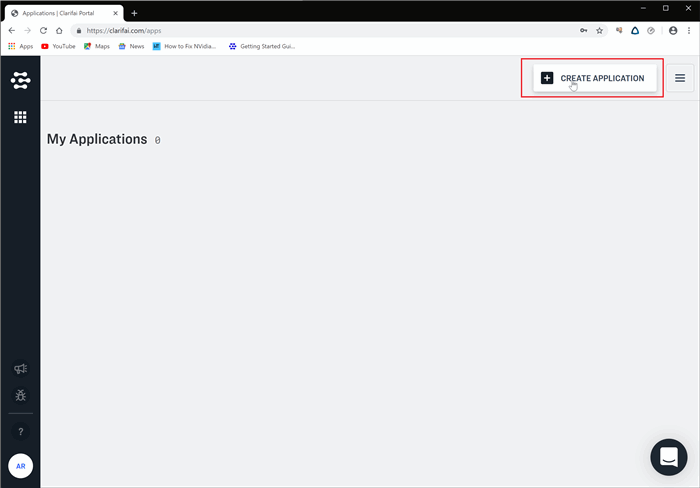
To do that, we must toggle Create Application button at the top of our Clarifai workspace page as its shown in the figure below:
After that, the Create an application dialog will appear on screen:

Here, we must enter an app’s name and click on the Create button to create a new application.
Since the new Clarifai application has been successfully created, we must obtain an API key for this application by exploring the Application Details as shown in the figure below:
In the application’s details page, we must copy out the value of the app’s Clarifai API key to the clipboard and use it in our web-application being created:
Finally, after completing these steps mentioned above, we can feel free to use the Clarifai API app that we have just created.
Installing Node.js and MySQL Server
After creating a Clarifai account and specific image and video processing application, we must properly setup a development environment by installing Node.js and MySQL server. We basically need Node.js for creating our image classification web-application. We will also need the MySQL server installation to deploy a database containing a corpus of images with “useful” concepts. Please use the following links to download and install Node.js and MySQL Server:
After we have installed Node.js, we must also install the Clarifai module to have an ability to use Clarifai API in our web-application being created. To do this, we must use Node.js package manager (NPM) by running the following command in the Node.js command prompt:
npm install --save clarifai
Finally, to create our very first web-application in Node.js, we must all install express.js module and use the express-generator to create an initial web-application:
npm install --save express

npm install -g express-generator
To create a web-application, we must create and change to an empty directory and run the following command:
express --ejs --view=ejs --force .
Finally, since we’ve already setup the development environment, we can now start creating our image classification web-application.
Step 2: Image Classification
Image classification is a complex problem, the solution of which basically relies on performing an image recognition. In this paragraph, we will discuss about the algorithm that allows us to perform a trivial image classification based on involving the Clarifai AI image recognition engine. A ready-to-use web-application, performing a vehicles images classification is available for download at https://github.com/arthurratz/clarifai_api-demo. The following project also includes the dataset of images that can be used for training specific models and make predictions based on the input image submitted by a user.
The image classification itself is the process during which we're determining the probability of an input image to belong to a specific class based on the image recognition and then performing a simple search to find a class with the highest probability, assuming that the input image is in this particular class. To perform a quality image classification, we will normally need to implement the image recognition process that basically relies on creating and training multiple models for each particular class. Specifically, we will create a separate model for "trucks" and "luxury cars" vehicles classes, respectively. Each class is associated with a corpus of vehicles images. For each of these classes, we will perform exactly the same. We will upload the images for each class as well as create and train a specific model used for image recognition. After these models have been created and trained, we will iterate through each class and perform a prediction, determining the probability of an input image to belong to specific class. Finally, we will perform a linear search to find a class with the maximum probability of the input image to belong to this particular class. The result of performing the image classification is mostly the name of the class and specific value of probability the input image belongs to.
Step 3: Creating And Training Models
Creating and training models is a very essential step of the image classification process discussed in this article. Specifically to the image classification problem, in this case, we've basically dealt with creating and using the multiple of models, each one representing a particular class of vehicles being classified. To do this, we will use the specific Clarifai API functionality discussed in the next paragraphs.
Uploading Images With Concepts
Before creating and training specific models and using them for image classification, we need to upload a corpus of images with "useful" concepts to our Clarafai application. Normally, we're uploading a set of images and creating a model for each specific class of vehicles. This is typically done by implementing the following code:
router.post('/train', function(req, res, next) {
  var params = JSON.parse(
    require('fs').readFileSync('mysql.json'));
  var con_sql = mysql.createConnection(params);
  con_sql.connect((err) => {
    if (err) throw err;
    let query_classes = "SELECT class_id, class_name \
           FROM clrfai_imagebase.classes";
    con_sql.query(query_classes, (err, classes) => {
        if (err) throw err;
        classes.forEach(async (class_row, index) => {
            let class_id = class_row["class_id"],
                class_name = class_row["class_name"];
            let query_images = "SELECT * FROM clrfai_imagebase.images \
                WHERE class_id = \'" + class_id + "\'";
            await con_sql.query(query_images, async (err, images) => {
                if (err) throw err;
                var image_urls = images.map((image) => { return { url: image["image_url"],
                      concepts: [ { id: class_name, value: true } ] }; });

                app.inputs.create(image_urls);

                await app.models.create(
                    "vehicles_class" + (index + 1),
                    [
                        { "id": class_name }
                    ]
                );

                app.models.train("vehicles_class" + (index + 1));
            });
        });
      });
  });
});
In this code, we're basically creating a connection to images database and executing a query to retrieve a resultant set of classes. Then, for each particular class, we're retrieving an array of images and associate each "image" in the array with a "concept" that exactly corresponds to a specific "class". Each image in the array belonging to an entire class will have the same value of positive concept parameter. To upload a batch of images, retrieved from the database, we must invoke app.inputs.create(image_urls) method that accepts an array of image urls as a single argument. The following array is an array of objects, in which each object contains an image url and a concept-id. A concept object has two parameters such as either a concept-id and the value that indicates whether this concept is positive or negative.
Creating Models
Since we've successfully uploaded all images belonging to a current class, we need to invoke app.models.create(...) method to create a specific model. During this code execution, a model is created for each particular class and an array of images associated with it. To create a model, we need to pass the following parameter values to the method mentioned above. The first argument of this method is a name of the model being created. As for the value of this string-based parameter, the following code generates a unique model name which is vehicles_class1, vehicles_class2, ... Another parameter of this method is concept-id for an entire class of images. In this case, the value of concept-id is a string value of the actual class name.
Training Models
Finally, after we've created a model, we must also launch the model training process by invoking app.models.train(...) method, accepting a single argument of the model name previously generated. As we've already discussed, we normally need to proceed with the following process for each particular class and a set of images.
Step 4: Prediction
Since we've already created and trained the specific models, now we can use them for performing an image classification. According to the image classification algorithm introduced in this article, we will perform a prediction of a concept for an input image by using each of these models being previously created. We will actually determine the value of probability of the input image to belong to a particular class by using a specific model being trained. This is typically done by implementing the following code:
router.post('/predict', async function(req, res, next) {

  var params = JSON.parse(
    require('fs').readFileSync('mysql.json'));
  var con_sql = mysql.createConnection(params);
  await con_sql.connect((err) => {
    if (err) throw err;
    let query_classes = "SELECT * \
           FROM clrfai_imagebase.classes";

    Jimp.read(req.body["url"])
      .then(async (image_buf) => {
        await image_buf.grayscale().getBuffer(Jimp.AUTO, (err, data) => {
          if (err) throw err;
          con_sql.query(query_classes, async (err, classes) => {
            if (err) throw err;
            var predict_results = [];
            for (let index = 0; index < classes.length; index++) {
                 var buf = Buffer.from(data).toString('base64');
                 await app.models.predict({ id: "vehicles_class" + (index + 1),
                    version: '' }, {'base64': buf}).then(
                    (response) => {
                      predict_results.push(response["outputs"][0]["data"]);
                    },
                    (err) => { console.log(err); }
                  );
            }

            var prob_max = Math.max.apply(Math,
              predict_results.map((obj) => { return obj["concepts"][0]["value"]; }));
            predict_results = predict_results.filter((result) =>
              { return result["concepts"][0]["value"] == prob_max; });

            res.send(JSON.stringify({ "class": predict_results[0]["concepts"][0]["name"],
                  "prob": predict_results[0]["concepts"][0]["value"]}));
          });
        })
     });
   });
});
After we've determined the probability for each particular class, then we have to find a class with the highest value of probability for the input image being classified. As the result, the following class being found is the class to which the input image would the most likely belong to it. To perform a prediction for each particular class, we must invoke the following method app.models.predict(...) that accepts three main arguments such as either a string-based model identified or the Clarifai app version-id and a base64 buffer containing an input image. As a result of executing the following method listed above, we will receive a result of prediction in the JSON-format. Then we will need to extract the value of data object containing a concept and the probability value for the current input image. Since we basically deal with more than one class and model, we're obtaining the value of concept-id and probability for each particular class and append them to the resultant array.
After we've predicted a concept of an input image for each particular class in the array, we must execute the following code to determine the maximum probability and the actual value of class, the input image belong to, by executing the following code:
var prob_max = Math.max.apply(Math,
predict_results.map((obj) => { return obj["concepts"][0]["value"]; }));

predict_results = predict_results.filter((result) => \
{ return result["concepts"][0]["value"] == prob_max; });
The following code above, first finds the highest value of probability for each object and then filters out an object with the highest value of probability from the array.
Conclusion
While exploring and using Clarifai API, I was totally impressed that the image and video recognition problem could never be solved as simple as that. The entire task of image recognition and thus classification, including the AI image recognition engine training can be accomplished by executing just a couple of API methods. That's actually why I believe that the Clarifai API can be actively used for even more complicated tasks rather than solely the image classification.
History
- 1st June, 2019: Initial version
I’m software developer, system analyst and network engineer, with over 20 years experience, graduated from L’viv State Polytechnic University and earned my computer science and information technology master’s degree in January 2004. My professional career began as a financial and accounting software developer in EpsilonDev company, located at L’viv, Ukraine. My favorite programming languages - C/C++, C#.NET, Java, ASP.NET, Node.js/JavaScript, PHP, Perl, Python, SQL, HTML5, etc. While developing applications, I basically use various of IDE’s and development tools, including Microsoft Visual Studio/Code, Eclipse IDE for Linux, IntelliJ/IDEA for writing code in Java. My professional interests basically include data processing and analysis algorithms, artificial intelligence and data mining, system analysis, modern high-performance computing (HPC), development of client-server web-applications using various of libraries, frameworks and tools. I’m also interested in cloud-computing, system security audit, IoT, networking architecture design, hardware engineering, technical writing, etc. Besides of software development, I also admire to write and compose technical articles, walkthroughs and reviews about the new IT- technological trends and industrial content. I published my first article at CodeProject in June 2015.


