I will appologize for the length up front, but I didn't have time to split it up into multiple articles.
Contents
Software Configuration Management (SCM) is a concept most developers have not had to deal with working individually or within smaller development groups. SCM is a pretty nebulous concept that is often defined in multiple ways, and distributed across various groups and processes differently; however each distinct aspect of SCM is related to other aspects of SCM. SCM typically tries to manage the following aspects:
- Requirement/Defect/Feature Identification, Tracking and Reporting
- Architecture, Design, Construction, and Debugging Components
- Unit, Integration, System, Regression, User Acceptance, White Box and Black Box Testing
- Packaging Components
- Deploying Packages
These aspects are typically managed within the following processes:
- Issue Management
- Process Management
- Release Management
- Build Management
- Quality Assurance
- Configuration Management
- Change Management
Within smaller groups, changes to dependant applications are often communicated verbally and dealt with as the changes come, however, with larger development groups, these changes can be harder to communicate to everyone affected. Therefore, a good understanding of Version Control and adherence to proper setup to enable continuous integration is a basic foundation to enabling multiple projects to succeed.
The scope of this document is to walk through project setup and referencing to help alleviate hurdles with source control management or change management as it relates to .NET applications without going through elaborate build scripts, pre-build and post-build scripts, or path dependencies.
It is assumed:
- A live TFS 2008 server and Build server is setup is available.
- Working knowledge of checking in and checking out from TFS.
- Working knowledge of branching and merging in TFS.
- Basic knowledge of C#
For this walkthrough, we will setup two solutions. One is a shared library to simulate common code that is used by multiple projects. The other is an application that will utilize the shared library.
We will also setup branching and merging to control which applications use the shared library. Often, people will just make a reference to the shared library. Visual Studio will copy the output to the build folder and it will work. The problem arises when you have to update that shared library with 5, 10, or more applications, but you are not sure what code base is used by which version of the DLL.
One of the deficiencies of Visual Studio, is that it does not automatically update the version in the Assembly before the build.
Create a new class library project called Library1 within a solution called LabelLibrary. Be sure to create a directory for the solution.
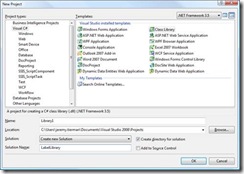
Add a second class library called Library2 to the solution.

Add an additional class to Library1 called Class2. The class design for these examples does not matter, but add some code to compile.
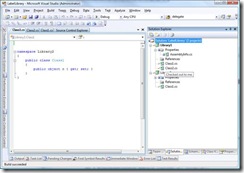
Build the release and debug configurations of the solution.
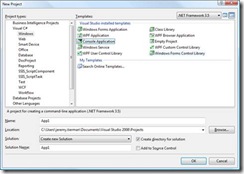
- Create a new console application project called App1 within a solution called App1. Be sure to create a directory for the solution.
- Add references to the debug versions of the DLLs from Library1 and Library2 of LabelLibrary.
- Add some code to reference the classes created in the Libraries.

- Build and Check in.

CruiseControl.Net is another alternative to using TFS as a build server, although it lacks the process guidance features of TFS.
- Create a Build Definition for each solution.

- Try to name it the same as the solution file.
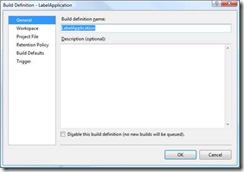
- Select the source control folder of the solution.
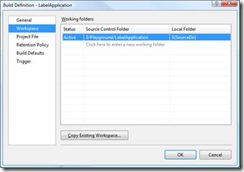
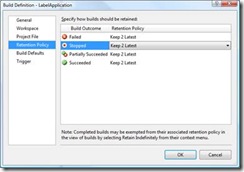
Sometimes the Build server complains that the mapping is already used. You need to log in to the build server as the build server username and password and reset the mappings in the Source Control Workspace. - Be sure to set the retention policy to something reasonable.
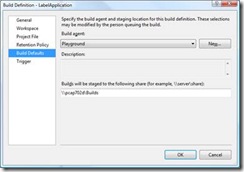
- Setup a share for the successful builds to be copied to. This is where testing will get the files to do quality assurance
- Set build to build for each check in. This may or may not result in more builds.

Simple Version Control
Now that the projects are setup, the application and library projects need to be modified to use the build server and its products. The application will reference the release products generated from the library.
- Show all files in the library projects and select Include in Project from the context menu for the Release folders under bin. This will store your built DLL's with the project. When the build kicks off, these DLL's will be updated with the label created by the build server.
- Check in changes. Your source control explorer may look like the following:
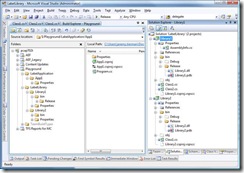
- Create a folder under the application folder of App1 called Dependencies.
- Right click on each of the Release folders that were checked in and Branch.
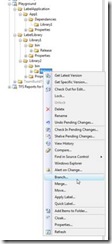
- Select Label from the Branch from version drop down, and select the last build label.
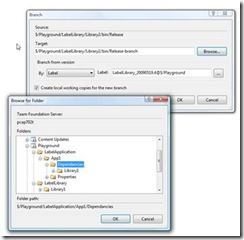
- Browse for the Dependencies folder created earlier and type in the name of the original project. Ex: Library2
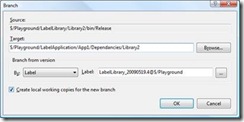
- Repeat for the other library project.
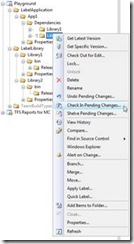
- Check in the branch operation.
- Open the application project, remove the references to the DLLs from the project folder of the libraries.
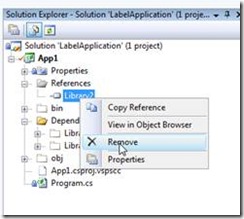
- Re-add the references to the DLLs in the Dependencies folder instead of the ones you manually pointed to originally.
- Check in the project. The Build server should kick off and build the application successfully.

Simulate Projects Working Independently
Off the teams go. With different priorities, goals, bugfixes, requirements, or when "OLD" code gets updated, bad things are bound to happen.
- Open the LabelLibrary solution and rename a class name. This is a sure fire way of making dependent applications break
- Don't forget to check out the Release folder since it was checked in last.
- Rebuild both Release and Debug and Check in.
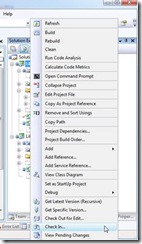
- The Build server will automatically rebuild the application on the server and label your build of the shared library.
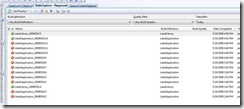
The build server is only verifying the code compiles, tests (not shown) are run and the result is copied to the folder specified in the build definition. Remember that the dependent projects are branched from your build in the project, not the build server's build. - Queue a build for the App1 solution to see if it still works. The build server didn't rebuild this one since we didn't check it out.
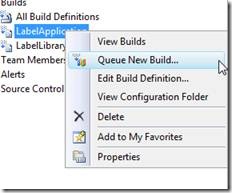
- It still works!

Let's update the App1 project with the new version of the shared library.
- Select each folder that was branched earlier and select merge from the context menu.

- Notice that the target branch is already populated with the path for the earlier branch!
- Click Next and select Label.

- Click the elipses to find the last build of the shared library.

- Click close and finish.

- Check in the changes.

- The build server will automatically detect the changes and build the application.

- Obviously it failed because we renamed the class!

Lets' Fix It
- Open the App1 solution and fix the references to the new class name.
- Check in! We should build it locally to verify that our changes work.
![clip_image008[4] clip_image008[4]](/KB/work/SCM_TFS/clip_image0084_thumb.jpg)
- The build server automatically notices changes and attempts rebuilding it.
![clip_image010[4] clip_image010[4]](/KB/work/SCM_TFS/clip_image0104_thumb.jpg)
![clip_image012[4] clip_image012[4]](/KB/work/SCM_TFS/clip_image0124_thumb.jpg)
- Success!!
Now we can improve, enhance, refactor, and eliminate shared libraries independently of other dependent applications/
Reliable Version Control
Now, every time we release an application, our debug version of our library is referenced in our released application!! If we referenced the release version, we can't debug it easily. How can we setup our projects so it knows which build to use?
Debug And Release - How Not to Do it!
You might think we can simply...
- Add the Debug folder or the Release folder as well to the project and check it in.
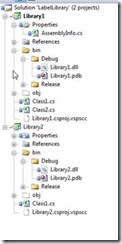
- Then re-branch the built DLL's to the application solution.
- Check in...
- Re-reference the debug and release versions in their respective configurations...
Even changing the default alias!! Doesn't work...
Debug And Release - The Best Way
Setup the Build Project for the Shared Libraries
- Open the LabelLibrary solution and add an empty project called Build. This will contain the build products of the other projects in the solution.
I wish adding a solution folder would work. - Change the build path of the both Library projects to ..\build\Debug and ..\build\Release for each configuration.
- Rebuild the Library projects in both configurations.
- Show all folders of the build project.
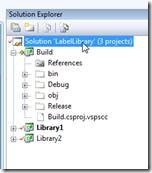
- Include the Debug and Release folders in the project and check in. This will cause an automatic rebuild and label from the build server.
Reference Your Application to a Specific Build
- Branch the Build project folder to a sub folder called LabelLibrary of the Dependencies folder of the App1 project folder. Be sure to select the latest label.
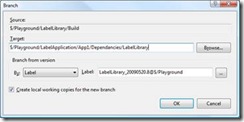
- Check in the branch.
- Open the App1 solution.
- Delete the references to the old libraries and add new references to the libraries in the new folder structure of the Dependencies folder.
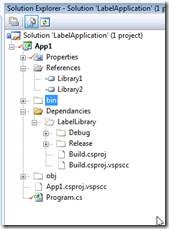
Some might note that we could have used Reference paths for the project to pickup where the DLL's are, but note that the reference paths are only for the current user and are not checked in.
Reference Debug to Debug and Release to Release
- Open the project file in notepad or select Edit Project File from the Context Menu.
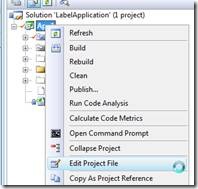
- Click continue...

- Modifiy the HintPath element to use $(ProjectDir) and $(Configuration) as noted below.

- Save and Reload the project
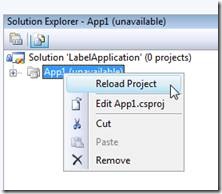
- Notice that when you change your configuration, the references also change!!
Finally!!
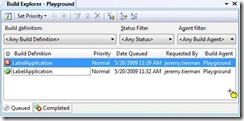
- Check in and watch it build!!!
History
2009-12-30 Published on CodeProject.com
2009-08-14 Published on my blogsite http://jeremy-notes.blogspot.com
This member has not yet provided a Biography. Assume it's interesting and varied, and probably something to do with programming.


