Introduction
Welcome to PresentationWindows! PresentationWindows is a window class library like no other, and introduces three window classes:
WndProcWindow, which derives from Window,
AeroWindow, which derives from WndProcWindow,
and MagnifyWindow, which derives from AeroWindow.
WndProcWindow is like a regular window, but simply adds a WndProc() function for easy interop. This is the least feature rich class in this library.
AeroWindow is like a regular window, but has a WndProc function AND lets you set the glass frame extension with simple dependency properties. It also lets you specify the resize border extension, and optionally put controls in the title bar area of the window (like firefox, IE and opera).
MagnifyWindow includes all of the features of the previous two window classes, but adds yet another feature. It provides automatic support for magnification, providing a "magnifying glass" on the window that follows your cursor, magnifying everything it touches. this takes advantage of the high-quality vector graphics in wpf to scale the content without loss of quality. The magnifier automatically shows and hides itself when you set the MagnifyAmount property to your desired magnification factor.
Here's the magnifier in action:
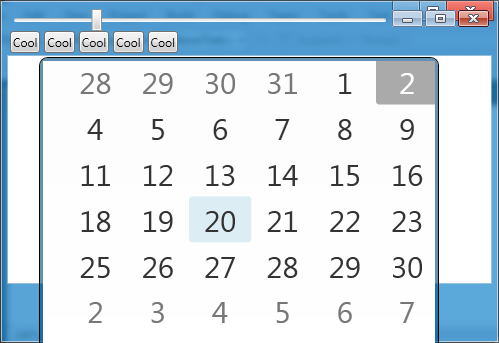
This works on any windows version XP and above, and the following screenshots showcase many different visual styles:

Background
It's a simple task: you want to make your application look nicer by extending the aero glass frame. You might have tried it in Windows Forms, but the text is unreadable on the controls, and it requires a lot of tricks to make it work. You then might try WPF, which would work nicely because this is the kind of thing that WPF is cut out for.
Now you have a choice: You can PInvoke the raw API to extend the glass frame, or you can use the WindowChrome class provided with the WPF ribbon. The API works, but (hopefully sooner rather than later) you might find out that it doesn't take differences in DPI into account, meaning that the glass won't be extended all the way if your DPI is higher than the default.
WindowChrome takes the DPI into account, but by using it, you forfeit all of the title bar stuff that the OS normally provides. Then there is the issue of the basic and classic themes, which need their own implementation to work because desktop composition is disabled in those scenarios.
There are tutorials on how to overcome these problems yourself manually, but they are difficult and time consuming. I have looked, but there doesn't seem to be any library that wraps all that functionality into a professional library that you can initiate in XAML. Until now, that is.
Using the code
Using the code is really simple. The only things you need to do are:
1: Add a reference to the class library
2: Add a XAML namespace reference in your MainWindow.xaml file (see below) and tell the XAML to create an instance of one of the PresentationWindows classes instead of a regular Window.
3: Change your MainWindow class in MainWindow.xaml.cs (or .vb) to derive from one of the PresentationWindows classes.
The following example shows how to set up a MagnifyWindow, with the magnification factor set to 2.
<presentation:MagnifyWindow
        xmlns="http://schemas.microsoft.com/winfx/2006/xaml/presentation"
        xmlns:x="http://schemas.microsoft.com/winfx/2006/xaml"
        xmlns:presentation="clr-namespace:PresentationWindows;assembly=PresentationWindows"
        xmlns:local="clr-namespace:My_Calendar" x:Class="My_Calendar.MainWindow"
        Title="MainWindow" Height="350" Width="525" MagnifyAmount="2" FrameExtension="0,20,0,0">
    <Grid>

    </Grid>
</presentation:MagnifyWindow>
The AeroWindow class has a number of new properties, including the following:
FrameExtension (default="0,0,0,0") - This is a special property of type "WindowFrameThickness", and specifies the amount to further extend the window frame on each respective side. The type "WindowFrameThickness" works like a regular Thickness, but also has a definition for "Full" extension (Which extends the window frame completely, like the gadgets window), and allows to have some sides of the window to have no frame at all (e.g., FrameExtension="*,0,*,15" leaves only the window chrome for the top and bottom). This is property is the most important new property in this library.
CaptionHeight (default="Default") - This is another special property of type
CaptionHeight. This should be set to the desired height of the title bar, or "Default".
ResizeBorderExtension (default="Full") - This is also of type
WindowFrameThickness, and works like the FrameExtensionProperty, but is for how far the "Resize Border" (Defined as the area on the window where the user can drag to resize the window) is extended.
AlwaysShowBasicFrame (default="False") - Set to "true" to force the window to act as if Desktop Composition (Windows aero) is always disabled. What it actually does is use the basic version of the window frame instead of the aero border.
TitleBarContent (Default=null) - This is a special property that specifies what should be shown in the title bar of the window. The actual content will only be shown if a different template is specified, as the default template doesn't show this content.
The
MagnifyWindow type also adds a new property:
MagnifyAmount (Default=1) - This property specifies how much the "magnifying glass" magnifies the content. When this property is set to 1, no glass is shown. But when it is set to a different value, a magnifying glass is shown on the window (see screenshot above). This glass follows the mouse, magnifying everything in its path. The window chrome in the background is not magnified, and when the aero border is used, the basic caption buttons are turned on so they are usable.
Also, you may have noticed that to use
TitleBarContent, you need to specify a different template. I have included a static class named "Templates" that you can get these from. There are four templates here:
AeroWindowNormalTemplate
AeroWindowTitleBarContentTemplate
MagnifyWindowNormalTemplate
MagnifyWindowTitleBarContentTemplate
These should be self-explanatory. You can set these in XAML by adding the following property in the window definition:
Template="{x:Static presentation:Templates.MagnifyWindowTitleBarContentTemplate}"
Points of Interest
In the traditional Window class, you wouldn't really set the Template property, because WPF handles that for you, and you wouldn't just style a window the same way you would style a button.
AeroWindow (and all its derived types) is different. You can XAML out a template for the window that affects its appearance, and use binding and parts to make it properly work with the basic and classic theme, and use correct system sizes.
While doing this, I have learned how to write templates in code. All of the four default templates are actually written with code.
Traditionally, windows visual styles are not a part of WPF, as the buttons are vector styled, and are separate from the windows visual style system. If I tried that here, keeping the correct window styles would be a nightmare, so I got a little hacky. The basic window borders are drawn with visual styles in mind, by using the Windows Forms visual style classes. It's about perfect, but the one downside is that you don't get the high quality vector scaling, since this is stored as a bitmap in Windows.
Also, in Windows 8, people might be telling you that Aero is gone. That is simply not true, and in fact, there's no way to turn it off! The only thing about aero that are gone are the transparent windows and flip 3d. The window frame still works the same way. Thus, this works in Windows 8, and adds a nice touch of your favorite color to your window (see screenshot).
History
November 2, 2012 - Added screenshots.
November 3, 2012 - Added more instructions.
I really enjoyed making this library and this article. Please give me some feedback! Thank you.
This member has not yet provided a Biography. Assume it's interesting and varied, and probably something to do with programming.


