An Advanced Visual Studio LightSwitch Application
Dec 8, 2011
5 min read
C#
.NET
Visual-Studio
Architect
Dev
Beginner
Intermediate
Advanced
C#
Visual-Studio
Silverlight
C#4.0
VS2010
by defwebserver
Contributor
- Download LSHelpDesk (note, you need the Silverlight Toolkit installed to run the sample)
Yes, This is a LightSwitch Application
LightSwitch is a powerful application creator. However, at times, you may need to have full control over the user interface, the program flow, and functionality. I have created a sample LightSwitch application that has the following advanced features:
- The user interface is entirely composed of custom Silverlight controls
- A Silverlight Theme is used
- Custom Search is implemented
- Custom Paging is implemented
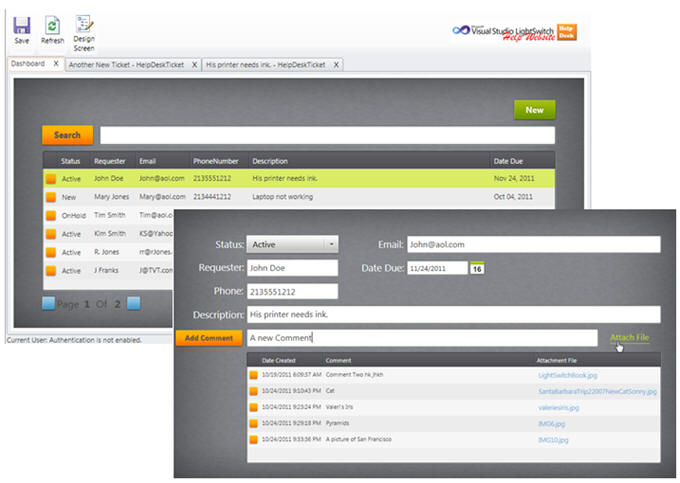
- File Management
- Files can be uploaded and attached to Help Desk Ticket Comments
- Files can be retrieved and displayed
- When a Help Desk Ticket is deleted, any associated files are deleted
However, let me first answer the questions required of the LightSwitch Star Contest:
What does your application/extension do? What business problem does it solve?
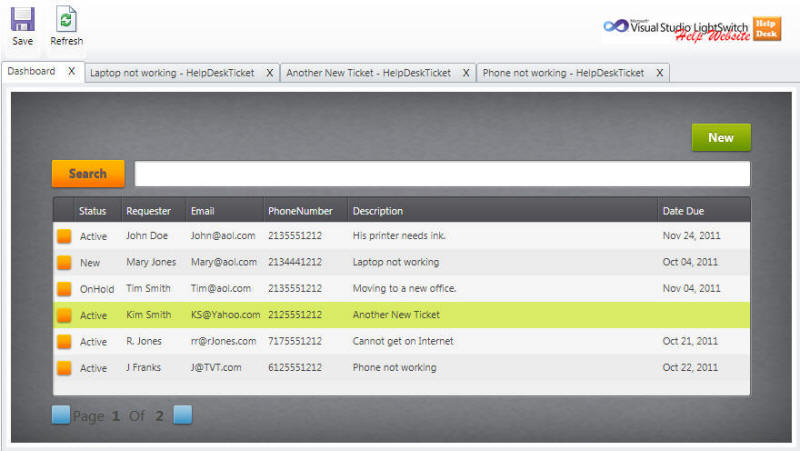
This application allows a company to create and track Help Desk Tickets.
How many screens and entities does this application have?
Two screens and two entities.
Would this application still be built if you didn’t have LightSwitch? If yes, with what?
I started to build this in normal Silverlight part-time using MVVM. I ran out of time, because it was taking more time than I had for the project.
How long did this application take to actually build using LightSwitch?
About 4 hours. The pure LightSwitch parts only took about an hour.
Does this application use any LightSwitch extensions? If so, which ones? Did you write any of these extensions yourself? If so, is it available to the public? Where?
This project uses the Minimum Shell Extension.
How did LightSwitch make your developer life better? Was it faster to build compared to other options you considered?
Massively faster!
You Can Do Anything In LightSwitch That You Can Do In Silverlight
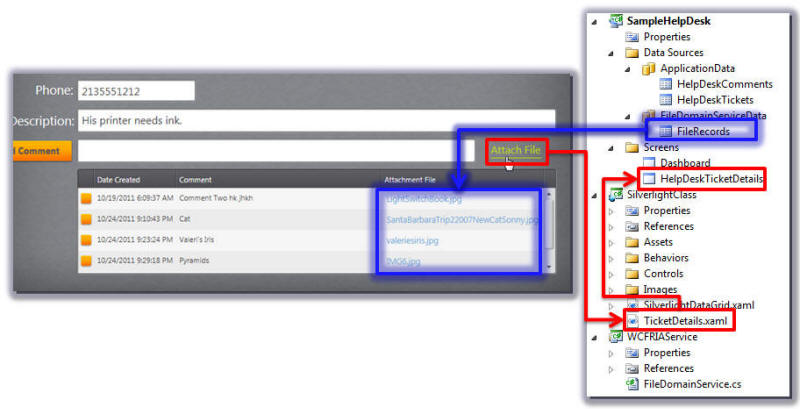
LightSwitch creates Silverlight applications. It also allows you to use your own Silverlight controls.
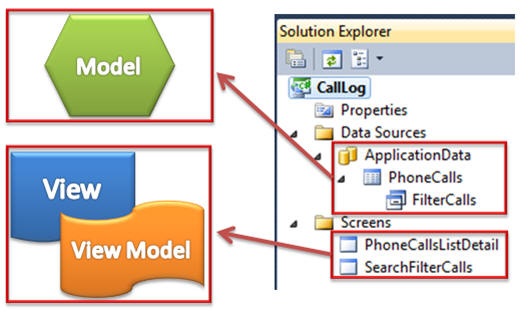
LightSwitch uses MVVM, so you must use bindings to provide data and communicate with your Silverlight controls.
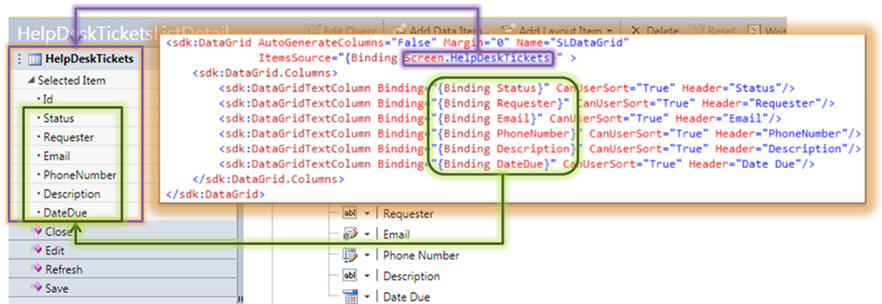
The image above shows how the binding in the Silverlight datagrid is bound to the LightSwitch Screen that it is placed on.
You can read more about using Silverlight Custom Controls with LightSwitch here: http://lightswitchhelpwebsite.com/Blog/tabid/61/tagid/2/Custom-Controls.aspx
Silverlight Themes
The look of the application is primarily achieved by using normal Silverlight Themes. In this example, I used the JetPack Theme.

The Theme consists of the .xaml files in the Assets directory of the Silverlight project, and two additional background images.
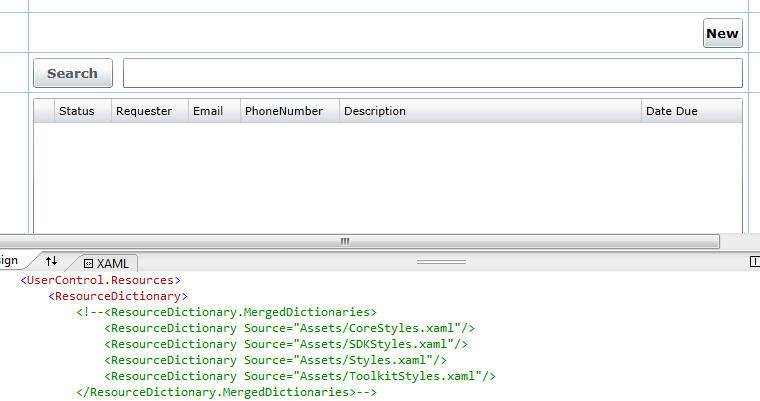
If we comment out that code, we see that the UI is simply composed of normal Silverlight controls.
Custom Search
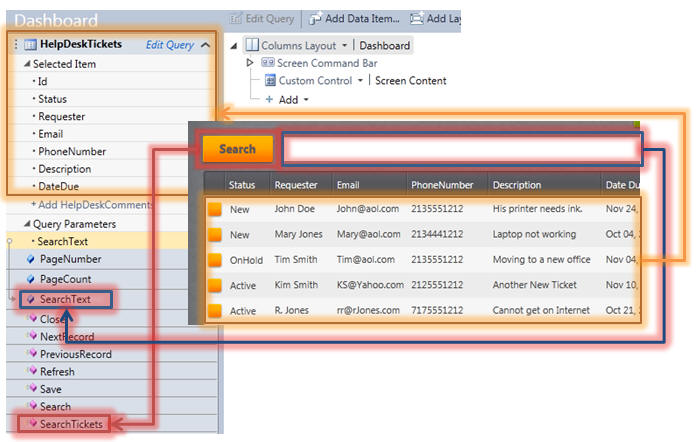
The custom search is composed of a TextBox bound to the SearchText property (that is bound to the Query Parameter in the HelpDeskTickets collection) and a Search button to trigger the search.
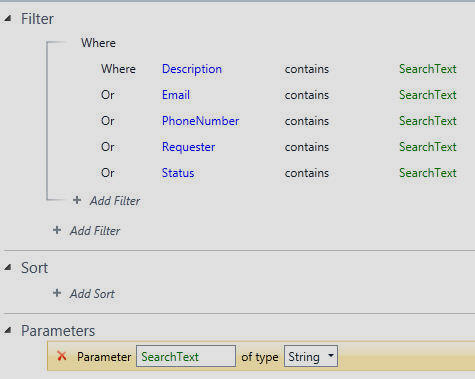
The filter on the HelpDeskTickets collection defines the search.
When the Search button is pressed, the following code is run:
        private void btnSearch_Click(object sender, RoutedEventArgs e)
        {
            // Get a reference to the LightSwitch DataContext
            var objDataContext = (IContentItem)this.DataContext;

            // Get a reference to the LightSwitch Screen
            var Screen =
                (Microsoft.LightSwitch.Client.IScreenObject)objDataContext.Screen;

            // Call the Method on the LightSwitch screen
            Screen.Details.Dispatcher.BeginInvoke(() =>
            {
                Screen.Details.Methods["SearchTickets"]
                    .CreateInvocation(null).Execute();
            });
        }
This calls the SearchTickets method that simply refreshes the HelpDeskTickets collection, which executes and applies the search filter.
Custom Paging
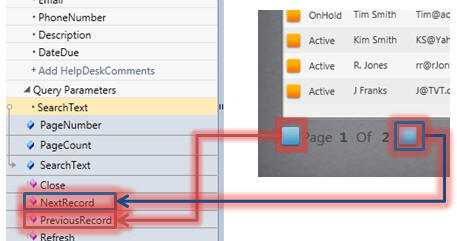
To enable custom paging, the Silverlight control contains buttons that raise the NextRecord and PreviousRecord methods.
The paging code is very simple:
         partial void PreviousRecord_Execute()
        {
            if (HelpDeskTickets.Details.PageNumber > 1)
            {
                HelpDeskTickets.Details.PageNumber--;
            }
        }

        partial void NextRecord_Execute()
        {
            if (HelpDeskTickets.Details.PageNumber < HelpDeskTickets.Details.PageCount)
            {
                HelpDeskTickets.Details.PageNumber++;
            }
        }
File Management
File Management is implemented using a combination of ASP.NET pages and WCF RIA Services.
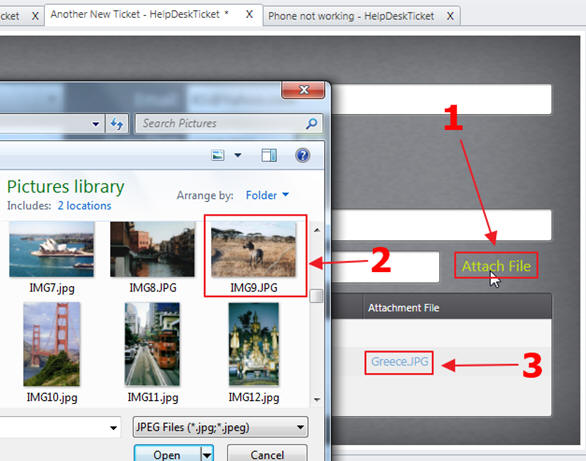
The File Management code allows you to upload a file and attach it to a comment, view the file by clicking on it in the datagrid, and deleting the files if the associated comment is deleted.
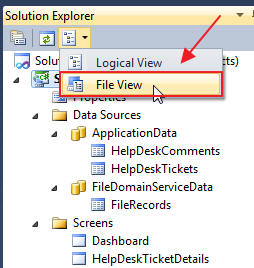
In the Visual Studio Solution Explorer, we can switch to File View...
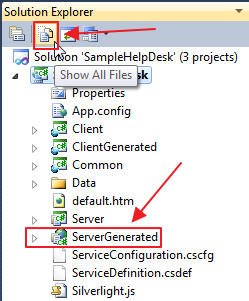
Then select Show All Files to display the ServerGenerated project.
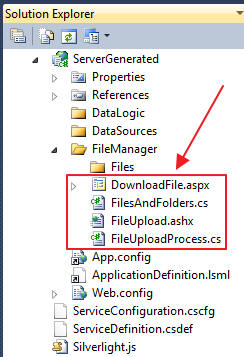
We place a FileUpload.ashx file handler to upload files, and we use a Download.aspx file to display uploaded files.
We now need to add the files to the build file, so that LightSwitch will include them in the build.
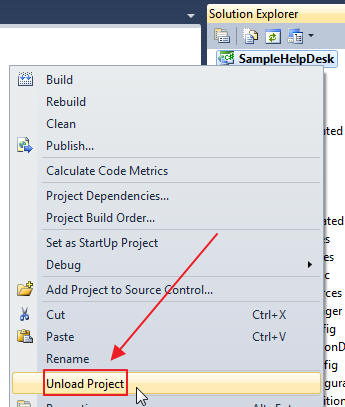
We right-click on the LightSwitch project and select Unload Project.
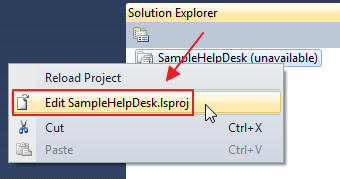
We edit the .lsproj file.
We add entries to the file (the code behind will automatically be compiled and deployed so we only need to add the .aspx and .ashx files).
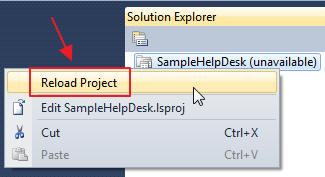
We then Reload Project.
The following code is used by LightSwitch to call the Download.aspx file to download a file:
        public void DownloadFile(string strFileName)
        {
            Dispatchers.Main.Invoke(() =>
            {
                HtmlPage.Window.Navigate(new Uri(string.Format("{0}",
                    String.Format(@"DownloadFile.aspx?FileName={0}",
                    strFileName)), UriKind.Relative), "_new");
            });
        }
When a file is deleted, the following method in the custom WCF RIA Service deletes the file:
        public void DeleteFile(FileRecord objFileRecord)
        {
            // Look for the file
            var objFile = (from LocalFiles in _LocalFiles
                           where LocalFiles.FileName == objFileRecord.FileName
                           select LocalFiles).FirstOrDefault();

            if (objFile != null)
            {
                string strFileDirectory = GetFileDirectory();
                File.Delete(Path.Combine(strFileDirectory, objFile.FileName));
            }
        }
Custom Shell
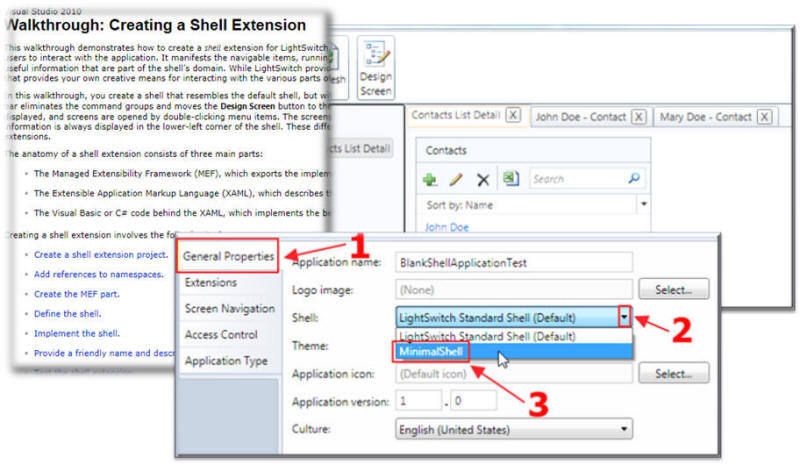
Microsoft has a Walkthrough: Creating a Shell Extension that will show you how to make a simple Shell Extension. I used that to create the Minimal Shell Extension.
The purpose of the Shell Extension, is to allow me to fully control the look of the application and to remove the LightSwitch menu. The features are:
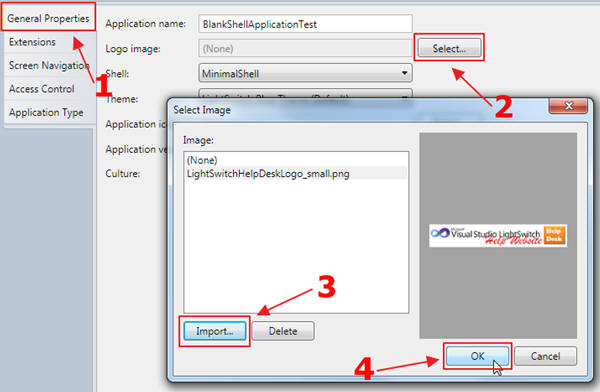
It allows a 200x50 logo to be displayed in upper right corner of Shell.
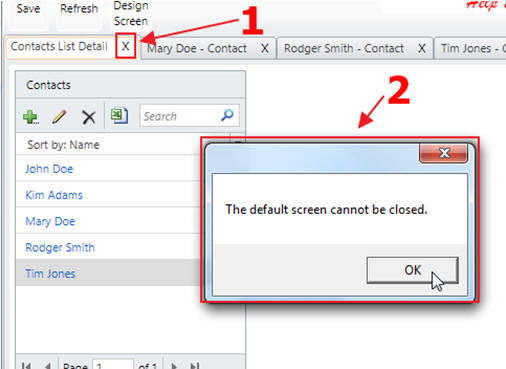
The Default tab cannot be closed.
I have a full walk-through covering the Shell Extension here:
- http://lightswitchhelpwebsite.com/Blog/tabid/61/EntryId/68/Creating-a-Minimal-LightSwitch-Shell.aspx
LightSwitch Extras Theme

When we use the LightSwitch Extras JetPack Theme, it formats the tabs and the background properly.
LightSwitch Is Up To The Task
I hope this project demonstrates that LightSwitch is capable of handling any of your projects with a 90%+ savings in code and time.
There are a ton of tutorials, tips, blogs, and forums at:

History
- 14th December, 2011: Initial version
License
This article, along with any associated source code and files, is licensed under The Code Project Open License (CPOL)