Introduction
Microsoft .NET controls give developers the leverage they need to build modular solutions. A developer can design custom controls from a myriad of existing controls and embed the custom control into a Windows Form or another control. With some additional code, one can also embed those controls in a Web Form. Writing an extra, simple library beyond those changes will allow you to run that control in a Java application or applet.
"Why would anyone want to embed .NET controls inside Java?" you may be asking. Being able to solve complex problems with a single language for one solution is often impossible - especially when dealing with legacy applications. COM made solving such problem easier by allow solutions to be written in multiple languages and in a module fashion. One developer who is proficient in Visual Basic can write a component in VB while another developer proficient in C++ can write a component using ATL. This modular architecture also lets developers work side-by-side in a single project, as well as allow for better versioning since minor changes in one "module" do not require recompiling and redistributing the entire solution. When my company's parent company said they wanted our .NET components to be embedded in their legacy Java application, I knew that a good modular architecture and COM interoperability were the way to go.
This tutorial will cover many things, including properly exposing .NET controls as COM objects for release, basic ATL (Active Template Library) classes necessary for instantiation and control, basic information about Java Native Interfaces (JNI), and wrapping the .NET control in Java using the aforementioned technologies.
While our destination for the .NET control is a JavaBean, I hope you will see many places throughout this tutorial where information can lead you to branch your solution and arive at a different destination. For instance, once you learn how to instantiate the .NET control in C/C++ using ATL, you could then create a simple Win32 or MFC Windows application to host the control.
In any case, I'm sure you will find this tutorial helpful in understanding proper COM implementation in .NET for Runtime-Callable Wrappers (CRW), and instantiating the control as a COM object using C/C++ and ATL.
Prerequisites
Before traveling down a difficult path, it is important to understand basic concepts and to have various frameworks and tools installed on your computer.
- You will need the Microsoft .NET Framework Software Development Kit (SDK).
- You will need the Sun Java Developer Kit (JDK). I recommend Java 1.4.0.
- Optionally, you may wish to use a .NET Integrated Development Environment (IDE), such as Microsoft Visual Studio .NET.
- Optionally, you may wish to use a Java IDE. I recommend Sun ONE Studio 4 CE, formerly Forte for Java CE. It's free, powerful, co-bundled with Java 1.4.0, and written by the people who wrote Java.
Basic Concepts
If you think you've never dealt with COM before, you'd probably be mistaken. COM has been an integral part of Windows since Windows 95. Everything from the Desktop to the task bar, the menus to the toolbars, and so much more revolves around COM. But what is COM? COM stands for the Component Object Model, which means that you can builds pieces of code in a certain way in which all pieces can work together. For instance, the Microsoft Common Controls that include the ubiquitous text box, label, etc. are COM objects. When you're programming in VB6, almost everything you use is a COM object. COM also presents a natural client/server architecture where the client provides functionality that the server consumes. Internet Explorer is a classic example where the WebBrowser control (IWebBrowser2 interface) provides browsing functionality and the application that contains the menus, toolbars, explorer bars, status bar, etc. consumes that functionality.
Before I get too deep into COM, however, just keep in mind that COM objects can be used in practically any language. Every COM object implements IUnknown (just like every .NET class implicitly extends System.Object) which contains three methods: AddRef, QueryInterface, and Release. AddRef and Release increment and decrement the reference count for a DLL. When it's first used, the DLL is loaded into memory. Upon successive instantiation, AddRef is called and the reference count is incremented. When a server is done with the client, Release is called and the reference count is decremented. When the reference count reaches zero (0), the COM object destroys itself. QueryInterface is used to check for and get a particular interface that the COM object might also implement, such as IObjectSafety, IPeristStorage,, and many, many others.
So, since we have a means to host a control in practically any language, using COM seems like the logical choice for hosting a control in Java that isn't natively Java. Since we can also expose .NET controls as COM objects, this solution becomes even more attractive.
But how do you embed COM objects in Java? Java Native Interface, or JNI, are a means for Java to use native methods, typically in a C++ application. Since we're dealing with C++, we can easily instantiate the COM object. JNI methods are called in a DLL from Java native methods, which then can create a Window to host the COM control in and attach the Window to a Window handle, or an HWND. Since every Window in Windows has an HWND, we need only get an HWND from Java through an undocumented method and we can do practically anything - including hosting our .NET control exposed as a COM object in a Java application or applet!
Building Our .NET Control
To begin, lets start with a simple .NET User Control. Since the scope of this tutorial does not necessarily include hosting such controls on the Web, I will not discuss certain things that are necessary for Web hosting of User Controls. A tutorial covering specific constraints of such an effort will be ported later.
Create a new Windows Control Library (C# will be used in this example, although it could easily be ported to VB.NET) and call it "COMTest". After the project is created, rename UserControl1.cs to MyCOMObject.cs. Do this both for the filename (select the file itself and check the PropertyGrid) and for the control (select the control itself and check the PropertyGrid). Go ahead and throw some controls on there. It doesn't matter much what you put on the control for this tutorial and I only have you name it as I mentioned above because the name will be coming up quite a bit and I don't want to get too vague.
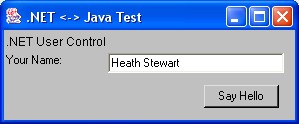
See the demo project for a sample .NET control. It's a basic user control that takes an input value and display a "Hello" message back to the user. This is a simple enough example. I would like to add an event, however, so that the containing control knows when the inner button is clicked and can get the value from the text box. I will implement a simple event (not even resembling the EventHandler delegate) and expose the text of the box.
To do so, add a public property called UserName as Type String:
[Category("Data")]
[Description("The name displayed in the \"Your Name:\" text box.")]
public string UserName
{
    get { return this.NameBox.Text; }
    set { this.NameBox.Text = value; }
}
Also, above the class, add the following public delegate:
public delegate void HelloClicked();
This is a simple event delegate that is easy to handle in practically any situation where the EventArgs class and child classes would be hard to represent.
We then add a protected On<Event> method and the event itself to the code, and raise the event by calling the protected On<Event> method inside our Button.Click handler.
[Category("Action")]
[Description("Occurs after the \"Say Hello\" button is clicked.")]
public event HelloClicked Clicked;

protected virtual void OnClicked()
{
    if (this.Clicked != null)
        this.Clicked();
}
Finally, add the following in the set accessor of the UserName property after setting the value, which will call the protected method above that raises the Clicked event:
OnClicked();
The final code is in the COMTest folder of the demo project. We will add the rest of the code contained in the class when we add the COM interop functionality in the next section. The code as it exists now, however, is fully embeddable in other .NET controls.
Exposing the Control as a COM Component
Believe it or not, very little is need to expose this .NET control as a COM object. But before I get into that, I want to explain a few things about interop.
First, we don't want to let the .NET compiler to generate a class interface - the interface that COM servers actually "talk" to - because of many problems including versioning and VTABLE ordering, which is the order of the functions that appear in the VTABLE, which contains information about the class itself. If we allow the .NET compiler to do this, it is hard to maintain a consistent class interface since the method orders could be changing and COM servers expect functions to be at certain addresses. This is known as dispatching. Using the IDispatch interface, servers can find out methods available in a COM client and their respective index in the VTABLE. If this method location changes, our COM server will call the wrong method!
Second, we need to make our COM object strongly named, which means we must generate a public key for the assembly and give the assembly some assembly-level attributes. This allows us to insert the .NET control in the Global Assembly Cache (GAC), which means faster load times, especially if we add it as a native assembly (ngen -i <Assembly>).
Let's take the easy part first: strongly naming the assembly. First, run "sn -k KeyFile.snk" in the project directory. Second, open the AssemblyInfo.cs file and make sure that the AssemblyTitle, AssemblyVersion, and AssemblyKeyFile attributes are filled in. We can also define a GUID here, which will be the GUID identifying the type library, which I'll talk more about later. My AssemblyInfo.cs file ended up looking like this:
using System.Reflection;
using System.Runtime.CompilerServices;
using System.Runtime.InteropServices;

[assembly: AssemblyTitle("My COM Test")]
[assembly: AssemblyDescription("COM Test Library")]
[assembly: AssemblyConfiguration("")]
[assembly: AssemblyCompany("CodeProject")]
[assembly: AssemblyProduct("COMTest")]
[assembly: AssemblyCopyright("Copyright 2002")]
[assembly: AssemblyTrademark("")]
[assembly: AssemblyCulture("")]
[assembly: AssemblyVersion("1.0.*")]
[assembly: AssemblyDelaySign(false)]
[assembly: AssemblyKeyFile(@"..\..\KeyFile.snk")]
[assembly: AssemblyKeyName("")]
[assembly: Guid("B58D7C8C-2E2D-4aa6-8EAF-CF7CB448E353")]
You can generate a GUID from the Tools meno of VS.NET using the "Create GUID" tool, or run "guidgen" from the command-line / Run prompt.
Now, we'll do the slightly harder part, although it isn't too bad. I would also like to mention that you should use the ComVisibleAttribute on any Type that you don't want exposed as COM objects. These typically include modal forms and internal user controls that are used within your project only, such as modal dialogs that open from the control that you're exposing as COM. To do this, simply use ComVisible(false) on any class, struct, or interface. This is also exlusive, so that you can use this attribute on the assembly-level and use the "true" parameter for any class you want to expose. I don't use this method because I want to expose almost everything in this project since it only contains my COM component. For example, I do use the ComVisibleAttribute on my delegate so that it doesn't appear as a COM object itself:
[ComVisible(false)]
public delegate void HelloClicked();
Anyway, back to the class interface. The class interface is what the COM client actually uses. It knows the interface that contains the functionality it wants to use, as well as the CLSID (class identifier, a globally unique identifier, or GUID) of the class that implements it. Using this approach, the COM client knows nothing about the location, language, or implementation of a control (COM server), only that it contains certain functionality. In essence, a simple text diagram of a call from a COM client to a server would look like this:
client --> [interface --> server]
The client calls a method on the interface, but the runtime is marshalling that call to a class that implements the interface.
So, when we generate our class interface, we'll want to expose any methods, properties, or events that the COM client may use. First, we'll define our event interface, which contains only events we want to expose. In this case, that's only the Click event. Attributes are also attached and will be explained after the code fragment.
So, open the code for MyCOMObject.cs and put the following at the top after the namespace declaration:
[Guid("70B9F4F4-0285-4aae-B64E-DE57BDBF49C5")]
[InterfaceType(ComInterfaceType.InterfaceIsIDispatch)]
public interface DMyCOMObject
{
    void Clicked();
}
The GuidAttribute is another GUID for the interface only. Prefixing the COM object name with the letter "D" is a standard naming convention for event interfaces. The InterfaceTypeAttribute declares this interface as a dispatch interface (dispinterface), which are typically event interfaces.
Next, we expose several inherited properties and methods used for drawing the control and the UserName property so that they can all be accessed from COM clients.
Guid("CAE73FF2-2D47-4677-B8EA-3E0FF12E4B0D")]
[InterfaceType(ComInterfaceType.InterfaceIsDual)]
public interface IMyCOMObject
{
    Color BackColor { get; set; }
    Color ForeColor { get; set; }
    int Top { get; set; }
    int Left { get; set; }
    int Width { get; set; }
    int Height { get; set; }
    IntPtr Handle { get; }
    bool Visible { get; set; }
    void Show();
    void Hide();
    void Refresh();
    void Update();

    string UserName { get; set; }
}
Again, we define a GUID for this interface and prefix the interface with the letter "I", which is common for both interfaces in general and for class interfaces, which you should remember contain the properties and methods exposed from the COM object. The first many are inherited from System.Windows.Forms.Control, while the last one is for MyCOMObject itself.
Finally, we add a GuidAttribute to the MyCOMObject class, as well as some other attributes like so:
[Guid("F65B3579-FEAA-4da5-BABA-1B9D195307FF")]
[ComSourceInterfaces(typeof(DMyCOMObject))]
[ClassInterface(ClassInterfaceType.None)]
[ProgId("COMTest.MyCOMObject")]
public class MyCOMObject : System.Windows.Forms.UserControl, IMyCOMObject
{
}
The ComSourceInterfaceAttribute defines the event interface(s) for this COM object. The ClassInterfaceAttribute tells the compiler not to generate a class library for this class, but to instead use the implementing interfaces, which you will noticed we added IMyCOMOBject as an interface this class implements. Finally, we add a ProgId, which is an easy way to refer to this control. There are version-independent ProgId's like the one above, and version-dependent ProgId's such as "COMTest.MyCOMObject.1.0", which .NET actually adds to the registry based on the AssemblyVersionAttribute value (major.minor only).
The final code can be found in the COMTest folder of the demo project.
Now open the Project properties, make sure "Register for COM Interop" is "true" for all builds, and build your project. If you wish to build your project from the command line, you can run the following command using regasm.exe:
regasm.exe /codebase COMTest.dll
If you have given your assembly a strong-name (signed with a private key and given a version number), you can add the assembly to the Global Assembly Cache and run regasm.exe to register the assembly so that clients use the version in the GAC and don't depend on the codebase of your assembly:
gacutil /i COMTest.dll
regasm.exe COMTest.dll
Writing the Java Application
Before actually writing the JNI wrapper, we need to generate a header from a Java class. Since this Java class does not exist yet, the next logical step is to create our Java class. For simplicity, I'll develop a simple java.awt.Frame-based application that hosts our .NET user control. In my real-world example that I designed to help our company win the contract with our parent company (the guys with the legacy Java application), I actually used JavaBeans. You could also use Java Applets, although you'd just be creating extra work to embed a .NET user control in a web page for a platform that already supports .NET user controls in web pages. I live either of these problems as an exercise for the user, though.
So, lets develop a simple Frame-based Java application. Lets just go ahead and throw it in the same project directory as our COMTest project. Location is important in this example, since VS.NET or regasm do not properly associate the type library with the COM library. If you locate your .java file in a separate place or use packages (I did for our solution, but I leave that out as well for simplicity), you'll be responsible for translating the paths when we use them later.
I went ahead and created a simple Java source file with some native methods that allow me to resize the control and change the background and foreground colors easily. The finished Java source file can be found in the demo project, but the key lines of code are shown below:
import java.awt.*;
import java.awt.event.*;
public class JavaTest extends Canvas {
static {
System.loadLibrary("JNITest");
}
public native void initialize();
public native void destroy();
public native void setCOMSize(int width, int height);
public native void setCOMBackground(long rgb);
public native void setCOMForeground(long rgb);
}
The methods above marked as native are methods that Java will call from the Java environment into the native environment, which is C++ in this case. The methods initialize() and destroy() are called from within addNotify() and removeNotify(), which Java calls when it attaches windowed controls to native resources, such as the ubiquitous HWND. Within those overrides, we call initialize() and destroy(), which actually get called in the JNI wrapper we'll discuss shortly.
The maintainence code is pretty straight forward so I won't spend much time on that. However, I will mention that I added a WindowAdapter (saves developers from having to implement every methods of a WindowListener) so that I can safely clean-up resources when the frame is closing. Also, without this code, the frame won't actually close - even if you click the "X" button on the Window frame!
The other important piece of code is the ComponentAdapter (again, saves coding versus a ComponentListener), which I receive resize events from. I choose to implement my resize code in this manner rather than overriding every overloaded setBounds() method from java.awt.Canvas, which this class extends. This makes for less code but doesn't resize the control as the user resizes the frame that contains the control. The control is only resized once the user releases the edge of the Window, thereby "committing" the new Window size. You may do it either way - just make sure that the method you call isn't the native method, but a method that instead does its thing in Java then calls a native method. This is true in any case, actually.
So, the only thing left to do is compile the Java class. From the directory that contains the JavaTest.java file, run the following:
javac JavaTest.java
You'll end up with three class files (two from or nested declarations). We will then generate a JNI header from the main class file for use in our JNI wrapper below. To do so, type the following in the same command line:
javah -jni -classpath "%CLASSPATH%;." -o JNITest.h JavaTest
This makes sure that the current directory is included in our CLASSPATH and that we generate a JNI-style header named JNITest.h from the JavaTest class we previously compiled. For brevity, I'll not list that header file here since it contains a lot of information. Essentially, though, you should see a bunch of method signatures that match the following pattern:
JNIEXPORT void JNICALL Java_JavaTest_<METHODNAME>
  (JNIEnv *, jobject[, additional params]);
If you review the JNI documentation, you'll see that "Java" is always the first word in the function signature. It is important to keep this signature. The second to n-1 words are the package name members and the class. The last word is the method. As far as parameters go, the first and second are always present; the first represents the Java environment, while the second represents the object whose methods you're handling natively. Any other parameters depend upon your parameters specified in the method in the Java source file. We'll go over what to do with these in the next section.
Writing the Wrapper: Java Native Interfaces
Before we get too in-depth, let me explain a little about type libraries. Type libraries (.tlb files, or typelibs) contain information about a COM object or objects useful during development. This helps drive the Intellisense technology that make Visual Studio so easy and powerful to use! This also helps preprocessors generate header information so that COM servers can compile and link against the proper functions when using dual interfaces.
So, since VS.NET was nice enough to generate a typelib for us, we can now add a Win32 DLL project to our solution and use the typelib in a COM server that is also our Java Native Interface wrapper, or JNI wrapper.
Right-click on the solution and add a new C++ Project, specifically a Win32 project. In the wizard, click on "Application Settings" and select "DLL" to create a dynamic link library. Click "Finish" and you should see the new project added to your solution.
Double-click on stdafx.h and add the following #includes at the bottom: atlbase.h and atlwin.h (in that order). You may also right-click on the project and add an existing file, that file being the header file we generated with "javah" from our Java class file above. This just keeps the file reference in your project for easy reference while maintaining its location.
You'll also want to modify VS.NET's configuration and change your VC++ project settings:
- Click on the Tools->Options menu in VS.NET.
- Find "Projects/VC++ Directories", and add the "jdk1.4.0\include" directory (depending on your JDK installation directory).
- Click OK to close the dialog.
- Right-click on your VC++ project and select "Properties".
- In "Configuration Properties/General", set "Use of ATL" to "Dynamic Link to ATL" and change "Character Set" to "Use Unicode Character Set". This is needed in JNI since both .NET and Java use Unicode strings.
- Click on "Linker/Input" and add "jawt.lib" to the "Additional Dependencies" setting.
- Click OK to close the dialog.
Now, open your JNITest.cpp file and add the following #includes to the top after "stdafx.h":
#include "..\COMTest\JNITest.h"
#include <win32\jawt_md.h>
You'll also want to add a #import, a MS VC++ extension that allows you to import and use a typelib. Since this is generated during preprocessing, you'll have to compile your project before you can actually use it. Include the following after the #includes we added from above:
#import "..\COMTest\bin\Release\COMTest.tlb" raw_interfaces_only named_guids
using namespace COMTest;
You'll also notice that C++ uses namespaces. This is actually somewhat standard. You find this a lot when using the Active Template Library, or ATL. The namespace used above is the namespace you defined in your .NET class, replacing periods (.) with underscores (_). You can rename this using additional #import options if you like (see MSDN for more details).
Now go ahead and compile your C++ project so that the preprocessor can generate a .tlh file, which is a header file generated from the typelib using the options you specified in the #import statement (see MSDN for more details). You can go ahead and take a look at what this header file contains in the "Release" directory of the C++ project directory. It's just a header file like any other, but you may find it interesting. It contains all the interfaces, methods and GUIDs of every COM object exposed in your .NET user control project. Since you now have interface declarations for your COM object, lets add a few global variables we'll need for following code. After your "using namespace COMTest;" statement, add the following lines:
static HWND m_hWnd = NULL;
static CAxWindow *m_axWindow = NULL;
static CComPtr<icomtest> m_spMyCOMObject = NULL;
static OLE_COLOR m_BackColor = NULL;
static OLE_COLOR m_ForeColor = NULL;
</icomtest>
Now all that's left to do is implement the JNI methods defined in the JNI header we generated previously. The logical place to start coding our JNI wrapper is the method that instantiates the COM object through a Runtime Callable Wrapper (RCW). One thing to keep in mind while doing this is that JAva calls native methods, so you can't call the Java class through those native methods, nor can you call methods in the Java library while in the body of a method within the same thread as the current call. For this reason, you must create a new thread to actually instantiate the COM control. Your Java_JavaTest_initialize() method should like the following:
JNIEXPORT void JNICALL Java_JavaTest_initialize(JNIEnv *env, jobject canvas)
{
JAWT awt;
JAWT_DrawingSurface *ds;
JAWT_DrawingSurfaceInfo *dsi;
JAWT_Win32DrawingSurfaceInfo *dsi_win;
jboolean result;
jint lock;
awt.version = JAWT_VERSION_1_3;
result = JAWT_GetAWT(env, &awt);
assert(result != JNI_FALSE);
ds = awt.GetDrawingSurface(env, canvas);
assert(ds != NULL);
lock = ds->Lock(ds);
assert((lock & JAWT_LOCK_ERROR) == 0);
dsi = ds->GetDrawingSurfaceInfo(ds);
dsi_win = (JAWT_Win32DrawingSurfaceInfo*)dsi->platformInfo;
m_hWnd = dsi_win->hwnd;
if (m_hWnd != NULL)
_beginthread(initCOMTest, 0, NULL);
ds->FreeDrawingSurfaceInfo(dsi);
ds->Unlock(ds);
awt.FreeDrawingSurface(ds);
}
This part of the code almost never changes. The concept is simple: every window in Windows has a handle called an HWND. Java surfaces such as frames and controls are no different, they're just not exposed in Java directly. The Java Runtime Environment, or JRE, does create an HWND for each window, so all you're doing above is getting that handle, assigning it to a glocal variable within your JNI wrapper, and passing control to a new thread while the current thread finishes executing the current method and cleans-up resources. In order for this code to compile, you must declare the function that actually instantiates the COM object: initCOMTest(). You should either define this method before Java_JavaTest_initialize() or add a forward-declaration statement before it. I choose to define the method before Java_JavaTest_initialize(), which you'll see when I display all code together. For now, however, your code for initCOMTest() should look like:
void initCOMTest(void *argv)
{
if (m_axWindow == NULL)
{
CoInitialize(NULL);
m_axWindow = new CAxWindow(m_hWnd);
if (m_axWindow != NULL)
{
HRESULT hr = S_OK;
hr = m_axWindow->CreateControl(
CT2OLE(TEXT("COMTest.MyCOMObject")),
NULL, NULL);
if (SUCCEEDED(hr))
{
hr = m_axWindow->QueryControl(IID_IMyCOMObject,
(LPVOID*)&m_spMyCOMObject);
if (FAILED(hr))
{
m_spMyCOMObject = NULL;
m_axWindow->DestroyWindow();
return;
}
if (m_BackColor != NULL)
m_spMyCOMObject->put_BackColor(m_BackColor);
if (m_ForeColor != NULL)
m_spMyCOMObject->put_ForeColor(m_ForeColor);
}
}
}
MSG msg;
while (GetMessage(&msg, NULL, NULL, NULL))
{
TranslateMessage(&msg);
DispatchMessage(&msg);
}
_endthread();
}
The first thing we do is initialize COM with CoInitialize(). We'll unload COM in the function definition for Java_JavaTest_destroy(). We then create an ATL CAxWindow class using the global HWND m_hWnd. If that succeeds, we add a our .NET COM object to the CAxWindow using the ProgID we defined earlier. If the control was added successfully, we get a CComPtr<IMyCOMObject> reference to the control and set the background and foreground colors. After that, we start the message loop (otherwise the control disappears immediately since no message pump is active) and signal the thread that we're finish when the message loop is broken (when the control is being destroyed). We must clean a few of these things up when the object is destroyed, so we handle the Java_JavaTest_destroy() method next:
JNIEXPORT void JNICALL Java_JavaTest_destroy(JNIEnv *env, jobject canvas)
{
    if (m_axWindow != NULL)
    {
        delete m_axWindow;
        m_axWindow = NULL;
    }

    CoUninitialize();
}
The method makes sure that the CAxWindow is properly destroyed and unloads the COM library and COM objects. The rest of the methods are fairly straight forward so I won't describe each one in detail. For the rest of the code listed below, however, keep in mind that .NET marshals System.Drawing.Color as OLE_COLOR, which can be type-cast from a long.
The completed code can be found in the demo project.
Running the Example
Now that you've completed a .NET component exposing a COM object, a Java application, and a JNI wrapper, you're ready to run your example. If you have a background in Java, you're in luck. If not, there's some simple things to learn about Java that make its class loader interesting.
If you've specified a package (similar to a namespace in .NET), you should've created a directory structure to match it, such that com.codeproject.examples.Class1 would be in a directory com\codeproject\examples\Class1.java. When you compile it with "javac", you type the path to the Java source file. When you load and execute the class with "java", you use the package and class name syntax. In this example, however, I didn't specify a package to make it easy. So, to run your application, perform the following steps:
- Copy JNITest.dll from the JNITest project's Release directory to the COMTest project directory.
- Open a command prompt (cmd.exe or command.com, depending on your operating system).
- Change directory to your COMTest project directory.
- Run the following command:
java -Djava.library.path="%PATH%;." JavaTest
If Java complains that it can't find the class JavaTest, your CLASSPATH environment variable may not include the current directory. The permanent fix is to change your CLASSPATH environment variable (according to your operating system) to include ".", which means the current directory. A temporary fix is to run the following command:
java -Djava.library.path="%PATH%;." -cp .;%CLASSPATH% JavaTest
The -D command-line parameter defines (or redefines) a Java environment variable. In this case, we include the current directory in the PATH environment variable, because the current directory contains our JNITest.dll. Because we used System.loadLibrary() in our Java app, Java will attempt to load the referenced library from the PATH (as Windows does for executables). If JNITest.dll was in our PATH, you would not need to include the -D command-line parameter. If you don't want to include the library in your PATH and know that it will be in a particular location at all times, you can use System.load(), which takes a path to a library. With the high maintainence required for the latter, I recommend the former approach.
You should see a Java window popup and shortly thereafter your .NET User Control. Fill-in your name and click the button.
Summary
To summarize the concept above, you need only do the following:
- Create a .NET User Control or controls, with or without dependencies.
- Expose some classes, structures, and / or enumerations as COM objects with explicit class interfaces and - optionally - event dispatch interfaces.
- Generate and register a type library for your compiled .NET User Control / COM component (VS.NET does this for you if you set the project properties correctly).
- Write a Java class that has native methods and explicitly calls functions (that will be marshalled to your COM component) native methods to resize the containing control, along with other similar methods.
- Generate a C++ header file from your compiled Java class.
- Implement the C++ header in a C++ class file, instantiating the .NET/COM component via ATL (or straight COM, if you desire).
- Compile and run your Java application.
If you think about the solution, it's really not that complicated. COM bridges the gap between .NET and Java, and both frameworks use a method of communicating with native modules which COM glues together. Similar approaches can be used with other languages and frameworks, too.
In a perfect world, we'd either have one great language with which to develop, or work on projects completely separate from projects written in other languages. Unfortunately, it's not a perfect world and you may be faced with such challenges. I hope that what you learned above will help you not only integrate rich .NET User Controls in Java applications, but teach you (via example) how to integrate .NET with other languages and frameworks.
Principal Software Engineer currently working on Azure SDKs at Microsoft. My opinions are my own. I work on a number of OSS projects for work and personally in numerous languages including C++, C#, JavaScript, Go, Rust, et. al. See a problem, fix a problem (or at least create an issue)!
Avid outdoor adventurer 🏔️❄️👞🚴♂️, husband, father.


 General
  News
News  Suggestion
  Question
  Bug
Bug  Answer
  Joke
Joke  Praise
  Rant
Rant  Admin
Admin 


 )
) ) when controlling

