Introduction
This project describes an approach for constructing a hardware emulation of a segmented seven element LED display. This is the same sort of numeric LED used in microwave ovens, cheap alarm clocks, and even in some not so cheap aircraft. It is most commonly used to display things such as time, radio frequencies, how much money you have deposited into a soda machine, or just how much it is going to cost to fill up the gas tank.
Whilst it is not of any particular value to display numeric values with an LED emulation within the context of a modern software application, the control does offer some value in situations where you may wish to build a simulation of an actual piece of hardware.
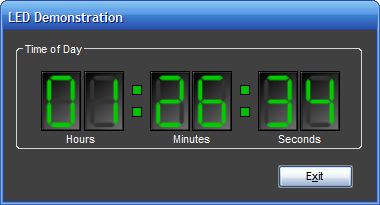
Figure 1: LED Control Demonstration
Getting Started
In order to get started, unzip the attachment, and load the solution into Visual Studio 2005. Examine the Solution Explorer, and note that the solution contains two projects:

Figure 2: The Solution Explorer Showing the Project Files
The LED display project is a Windows Control Library, and it contains a single user control entitled, “LED”; as might be expected, this LED.vb control contains the class that defines the custom LED control. Note also that the project contains a resources folder; the resources used within this project include the images needed to display the LED’s numeric values (0 through 9).
The second project, LED User, is a demonstration project that consumes the control. This project contains a single Windows Form class entitled, “frmDemo.vb”. This form contains six LED controls which are updated every 1000 milliseconds to display the current time of day (see Figure 1).
The Code: LED.vb
The LED control is a user control, and as such has a visual designer; the size of the control is set to 40 pixels wide and 60 pixels tall, a picture box control is dropped onto the container and it is set to dock to the full extent of the container.
To supply the correct visual representation of the numeric values, I merely used ten image files, one for each digit from zero to nine. I used a common drawing package to define a 40 pixel by 60 pixel drawing, gave it a slight gradient background that was mostly black, and I defined a green filled polygon of the correct size and shape to support building each segment of the seven segment LED display. To generate each number, I just ghosted out the unused LED segments by setting their fill to a dark gray color. I did this to make the segment still lightly visible, much as it is in an actual LED display. Naturally, this fill color (green) could have been any color, and if you are simulating a red, or amber, or cyan LED, you would want to use that color instead of green. I used green because green is the color the human eye is most adept at perceiving, and because it is a color commonly used in military applications where the use of night vision imaging systems is required (greens in the 450 nanometers of wavelength range do not impair use of the NVIS devices).
To embed the necessary images into the document, I opened up “My Project” from the solution, opened the “Resources” tab, and used the interface to load each of the ten images used to supply the numeric readouts used by the control. Once added to the project, you will notice that a folder entitled “Resources” is added to the project; if you look inside the folder, you will see each of the image files. Selecting any of the image files contained in the folder will reveal its properties in the property grid control; I selected all of the images and set the build action property to “embedded resource” although the images can still be retrieved without performing this last step.
Figure 3: My Project – Adding Image Files to the Control’s Resources
With the control added, and the image files packed into the control library’s available resources, the only thing left to do is to write the small bit of code necessary to drive the display of the correct image in response to setting the current numeric value for the control.
The Embed class contains only the following code:
Public Class LED

    Private Sub LED_Load(ByVal sender As Object, _
            ByVal e As System.EventArgs) Handles Me.Load
        SetNumber(0)
    End Sub

    Public Sub SetNumber(ByVal num As Integer)
        Select Case num
            Case 0
                pbxLED.Image = My.Resources.zero
            Case 1
                pbxLED.Image = My.Resources.one
            Case 2
                pbxLED.Image = My.Resources.two
            Case 3
                pbxLED.Image = My.Resources.three
            Case 4
                pbxLED.Image = My.Resources.four
            Case 5
                pbxLED.Image = My.Resources.five
            Case 6
                pbxLED.Image = My.Resources.six
            Case 7
                pbxLED.Image = My.Resources.seven
            Case 8
                pbxLED.Image = My.Resources.eight
            Case 9
                pbxLED.Image = My.Resources.nine
            Case Else
                pbxLED.Image = My.Resources.zero
        End Select
    End Sub

End Class
As you can see, the code required to drive the display is trivial. The class contains no imports, and is declared publicly. The load event handler initializes the LED emulation to display the numeric value of zero; it does this through a public subroutine entitled SetNumber, which in turn accepts a single integer argument representing the number that the control should display.
The SetNumber subroutine performs a Select Case on the integer value passed into the subroutine, and depending upon which number is passed in, it selects and loads the appropriate image into the control’s picture box control using the images contained in the control’s resources.
To make the control a bit more robust, you should evaluate the integer passed into the subroutine to make sure that it is greater than or equal to zero, and less than or equal to nine.
That pretty much wraps up the control. Once an instance of the control is created, the control’s SetNumber subroutine is used to continuously update the numeric value shown in the control.
The Code: frmDemo.vb
The demonstration project contains a single form class (frmDemo) which is used as a test bed for trying out the new LED control. To make for a more interesting demonstration, the demo uses six LED controls arranged to look like a digital clock. These six LED controls are arranged into pairs inside a group box, with colons placed between each pair. The colon is simply two small panels, sized and arranged between each pair such that each stacked pair of panels looks like a colon; the same approach could be used to place other non-updatable design elements such as a decimal point if one were to use a similar control to display, for example, a UHF radio frequency. The background color of the panel is set to green so that it appears to match the LED control (see figure 4).
Figure 4: Demo Form Control Arrangement
The demo form also contains a timer; the timer’s interval is set to 1000 milliseconds and it is enabled; the bulk of what happens in this demonstration piece happens on the timer’s tick event, and on each 1000 millisecond interval, the values for each LED are set based upon the current time of day.
The class contains the following code:
Public Class frmDemo

    Private Sub Timer1_Tick(ByVal sender As System.Object, _
            ByVal e As System.EventArgs) Handles Timer1.Tick

        Dim hrs As String
        Dim mins As String
        Dim secs As String

        Dim hours() As Char
        Dim minutes() As Char
        Dim seconds() As Char

        Dim hr1 As String
        Dim hr2 As String
        Dim mm1 As String
        Dim mm2 As String
        Dim ss1 As String
        Dim ss2 As String

        hrs = Now.Hour.ToString()
        mins = Now.Minute.ToString()
        secs = Now.Second.ToString()

        hours = hrs.ToCharArray()
        minutes = mins.ToCharArray()
        seconds = secs.ToCharArray()

        If hours.Length > 1 Then
            hr1 = hours(0)
            hr2 = hours(1)
        Else
            hr1 = "0"
            hr2 = hours(0)
        End If

        If minutes.Length > 1 Then
            mm1 = minutes(0)
            mm2 = minutes(1)
        Else
            mm1 = "0"
            mm2 = minutes(0)
        End If

        If seconds.Length > 1 Then
            ss1 = seconds(0)
            ss2 = seconds(1)
        Else
            ss1 = "0"
            ss2 = seconds(0)
        End If

        Led1.SetNumber(Convert.ToInt32(hr1))
        Led2.SetNumber(Convert.ToInt32(hr2))
        Led3.SetNumber(Convert.ToInt32(mm1))
        Led4.SetNumber(Convert.ToInt32(mm2))
        Led5.SetNumber(Convert.ToInt32(ss1))
        Led6.SetNumber(Convert.ToInt32(ss2))

    End Sub


    Private Sub btnExit_Click(ByVal sender As System.Object, _
            ByVal e As System.EventArgs) Handles btnExit.Click

        Me.Dispose()

    End Sub

End Class
The demo class is declared publicly, and it contains no imports. The timer’s Click event handler captures the current time into three string variables, and the current time is split up into hours, minutes, and seconds. The hours, minutes, and seconds are converted into character arrays, and the character array values are checked and then used to set the hours, minutes, and seconds for each of the associated LED controls. The only other code in the class is used to dispose off the form when the user clicks the Exit button.
That concludes the discussion of the design and code of this application.
Summary
The project demonstrates a simple approach to building a user control that may be used to emulate LED hardware. This design provides an example of one way in which a simple .NET application could be used to provide an emulation of an actual piece of hardware. You could take the example of the clock provided, and improve upon it to do something like building an emulation of a VCR or an LED clock; who knows, with a little time and effort, maybe you could turn your $17000 laptop into a $12 alarm clock.
This member has not yet provided a Biography. Assume it's interesting and varied, and probably something to do with programming.


 General
  News
News  Suggestion
  Question
  Bug
Bug  Answer
  Joke
Joke  Praise
  Rant
Rant  Admin
Admin 


