Introduction
You may have applications where you have a centralized server system that serves many client applications, and the entire system is built end to end in .NET. When it comes to migration, it is a far more common requirement to move the server side software to J2EE or Linux, but not so common for the clients. However, if you are using a system where you have Windows Forms clients that communicate with each other via a Windows server, you may think that you cannot migrate the server -- the good news is that you are wrong to think so, as Windows Forms clients can communicate very effectively with migrated server side applications using a variety of technologies.
In this article, you will step through building a simple TCP/IP server in C# that runs on Windows using the .NET runtime, which you will then migrate to J2EE using Visual MainWin for J2EE modification, before finally installing it on Linux. Additionally, you will create a Windows Forms client which will run on Windows and communicate with the Linux based server without any modifications.
Getting Started
To begin, you will need to get your hands on a copy of Visual MainWin for J2EE, which you can download from here. This is a plug-in for Visual Studio .NET that allows you to recompile your MSIL code into Java bytecode which will run on your JVM on your target Operating System (in this case, Linux). Be sure to get your activation key from the email address you specified when downloading, and activate your Visual MainWin for J2EE installation with it.
Now you are ready to build the server application. Create a new Visual C# console application in Visual Studio .NET. You should call this application "MainsoftChat".

Figure 1. Creating a new Console Application in Visual Studio .NET
Visual Studio .NET will create a new project for you containing a class called "Class1.cs". Remove this class, and add a new one called "ChatServer.cs". The download contains the complete source code for ChatServer.cs and its supporting helper classes.
The Main method on ChatServer looks like this:
static void Main(string[] args)
{
if (args.Length<2)
{
System.Console.WriteLine("Please pass 2 arguments:" +
" 1 for IP address, 1 for Port to listen on.");
}
else
{
localHost = Dns.Resolve(args[0]).AddressList[0];
myPort = Convert.ToInt32(args[1]);
System.Console.WriteLine("Server Started, listening on: " +
localHost.ToString() + ":" + myPort);
myThread = new Thread(new System.Threading.ThreadStart(DoListen));
myThread.Start();
}
}
The application is designed to accept two parameters: one for the IP address of the machine that the server is running on, and one for the port on which it will listen. Note that the IP could have been automatically determined using the .NET DNS.Resolve functionality, but this isn't always reliable, especially when running on Linux, as it will often return the 127.0.0.1 address for the machine, and we want to use the "exterior" IP address that the machine exposes.
The Main routine then spawns a new Thread with the DoListen() function which is the heart of this application.
private static void DoListen()
{
myListener = new TcpListener(localHost, myPort);
myListener.Start();
Client x;
do
{
TcpClient s = myListener.AcceptTcpClient();
String strServerIP =
IPAddress.Parse(((IPEndPoint)myListener.LocalEndpoint).
Address.ToString()).ToString() ;
x = new Client(s);
x.Connected+= new ConnectedHandler(OnConnected);
x.Disconnected+= new DisconnectedHandler(OnDisconnected);
x.IncomingMessage+=
new IncomingMessageHandler(OnIncomingMessage);
tmpClients.Add(x.ID,x);
}
while(true);
}
This function sets up a new TcpListener which listens on the IP and port that were specified and starts listening. Once a connection is made, the AcceptTcpClient function will fire and the TcpClient "s" will be initialized. Event delegates are then set up to handle connections, disconnections, and incoming messages from this client.
The application maintains two hashtables of clients; there is a temporary hash in which a client lives between its initial connection on the TCP level and its final connection, by issuing its name (using the IRC "nick:" parlance) to the chat server. Once it has told the server its name, it is assigned to the main hash.
Whenever the client sends a message, the OnIncomingMessage function fires, and the various supported commands such as "says" are processed. See the code in the download for more details.
From Visual Studio .NET, you specify the command line parameters by right clicking on the project in Solution Explorer and then selecting Properties. On the "Debugging" entry in the Configuration Properties folder, you will then see a "Command Line Arguments" entry. Enter the IP address of your machine and the port you want to use, separated by a space here. See Figure 2 for an example.

Figure 2. Setting the Command line arguments.
When you execute the application, you'll see a window like this:
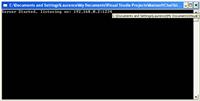
Figure 3. The server running on Windows using the .NET Runtime.
To move this to Linux is very straightforward. If you have Visual MainWin for J2EE installed on your machine, you can right click on the project in Solution Explorer and select "Generate J2EE Project". This will launch a wizard that will create a J2EE version of this application for you. The wizard will analyze the C# project and its references and will create a Visual MainWin C# for the J2EE project.
See Figures 4 and 5 to see the Wizard in action:

Figure 4. The Generate J2EE Project wizard step 1.
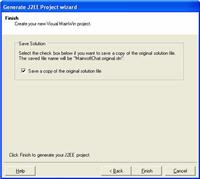
Figure 5. Second and final step of the Generate J2EE Project.
Once it is done, you will see two projects in your solution. The new one will be prefixed with ".J2EE", so it will be called "MainsoftChat.J2EE". This J2EE project refers to the source files referred by your original MainsoftChat C# project, so you can compile from this solution the same sources to both .NET and to J2EE. This may be very valuable to maintain a single code-base for both .NET and J2EE.
Set this to be your startup project (right-click and select "Set as Startup project"). Also, change the command line arguments for this project as you did before. Now execute the project by pressing F5. You'll see how the application runs on Java in Figure 6.
At this point, the Visual MainWin for J2EE plug-in is taking the MSIL code generated by the .NET compiler and cross compiling it into Java byte code. This byte code is then run within your Java virtual machine using Mainsoft's mono-based implementation of the .NET framework dependencies. Figure 6 shows the application running, with the full Java command line so that you can see how it executes. To get this full command line when you execute an application, check out the developer zone Knowledge Base.

Figure 6. Executing the server in Java.
Now that we have it running in Java, it's very straightforward to run it in Linux.
First, on your Linux box, you'll have to make sure that you have all the JAR files that are needed to support Visual MainWin applications. You'll find these on your Windows box in the \Program Files\Mainsoft\Visual MainWin for J2EE\jgac\vmw4j2ee_110 directory. Create a directory on your Linux box (I recommend /opt/vmwj2ee, as the scripts that you can download with this article are configured for that directory) and copy all the JAR files into it.
If you don't have it already, make sure that you have either the JRE or the JDK installed on your Linux box, and that the $JAVA_HOME and $CLASSPATH variables are set up correctly. I prefer to do this within the java.sh or alljava.sh files found in /etc/profile.d.
Add these lines to the bottom of either export JAVA_HOME=/opt/java/j2sdk1.4.2_10 or wherever you installed the SDK:
CLASSPATH=$JAVA_HOME:$JAVA_HOME/lib:/opt/vmwj2ee/
export CLASSPATH=$CLASSPATH
So then, whenever you sign into your system, they'll be set up.
Next, create a folder called chatserver. You can put this wherever you like, but I prefer to use the /opt folder, so I used /opt/chatserver.
Back on your Windows box, find the project directory for the MainsoftChat application. Within its bin folders, you'll find the MainsoftChat.jar file. Copy it from your Windows machine to the directory that you just created on your Linux box.
Finally, you will set up a command script that can be used to execute the chat server application on Linux. Using a text editor, create a file called chatserver.sh and put the following code into it:
java -cp $JAVA_HOME/jre/lib/rt.jar:$JAVA_HOME/lib/tools.jar:$JAVA_HOME/lib/dt.jar
:/opt/vmwj2ee/:/opt/vmwj2ee/System.jar:/opt/vmwj2ee/J2EE.Helpers.jar
:/opt/vmwj2ee/J2SE.Helpers.jar:/opt/vmwj2ee/Microsoft.VisualBasic.jar
:/opt/vmwj2ee/Novell.Directory.Ldap.jar:/opt/vmwj2ee/System.Data.jar
:/opt/vmwj2ee/System.DirectoryServices.jar:/opt/vmwj2ee/System.Drawing.jar
:/opt/vmwj2ee/System.Runtime.Remoting.jar:/opt/vmwj2ee/
              System.Runtime.Serialization.Formatters.Soap.jar
:/opt/vmwj2ee/System.Web.Services.jar:/opt/vmwj2ee/System.Web.jar
:/opt/vmwj2ee/System.Xml.jar:/opt/vmwj2ee/jai_imageio.jar
:/opt/vmwj2ee/mscorlib.jar:/opt/vmwj2ee/vmwutils.jar:MainsoftChat.jar
              MainsoftChat.ChatServer 192.168.0.6 1234
(Alternatively, the command script is included with the download.)
You can now launch the chat server on Linux by changing to the /opt/chatserver directory and typing:
. chatserver.sh
If all has been set up right, you'll see something like this in Figure 7:

Figure 7. Running the chat server on Linux.
The Windows Forms Client
Now, this doesn't look very exciting right now - having a server listening on a port is only good if you have something that talks on that port in a language or protocol that the server understands. Here's where the Windows Dorms client application comes in. The full form is available in the download that comes with this article.
You can see the application running in Figure 8.

Figure 8. The chat client application.
This application uses the TcpClient Class Library to communicate with the server. When you launch the application, enter a user name and the IP and port for the server. So, if for example your Linux server is running on 192.168.0.6, port 1234, as in the above example, enter those values here and click Connect.
Once you connect successfully to the server, you should be able to chat with other clients (you can run more than one on your PC) with the Linux box serving the application. See Figures 9 and 10 to see this in action with the Windows front end and Linux back end, respectively.

Figure 9: Running the chat Forms on Windows, and a Linux backend.

Figure 10: The same chat session from the server perspective.
Conclusion
If you have a distributed application, with a centralized system that serves multiple clients, and you want to migrate the server towards Linux, you aren't limited to Web based servers such as Web applications or Web Services. In this article, you looked at how a TCP/IP based system such as a chat application can be migrated to Linux, and how your Windows Forms based clients can still interoperate with it.


