Introduction
Yes! Angular 7 is out with some cool new features. I really appreciate that you wanted to experience the brand new Angular. Here in this post, I am going to explain a bit about one of the Angular 7 features, which is Virtual Scrolling. At the end of this article, you will have an application that fetches the real data from the database and binds it to the UI by using Virtual Scrolling feature. I am not sure about you, but I am super excited to develop a sample application with this feature. Enough talking, let’s jump into the setup. I hope you will find this post useful.
Background
As Angular 7 was out last week, I wanted to try a few things with the same and that is the cause for this article. If you are really new to Angular, and if you need to try some other things, visiting my articles on the same topic wouldn’t be a bad idea.
Creating ngVirtualScrolling App
The first thing we are going to do is to create a dummy application.
Installing Angular CLI
Yes, as you guessed, we are using Angular CLI. If you haven’t installed Angular CLI, I recommend you to install the same. It is a great CLI tool for Angular, I am sure you will love that. You can do that by running the below command:
npm install -g @angular/cli
Once we set up this project, we will be using the Angular CLI commands and you can see here for understanding the things you can do with the CLI.
Generating a New Project
Now it is time to generate our new project. We can use the below command for the same:
ng new ngVirtualScrolling
And you will be able to see all the hard work this CLI is doing for us.
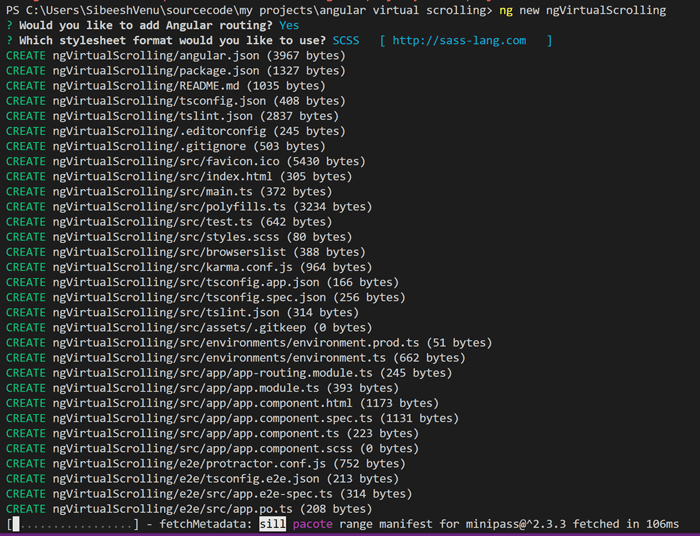
Generate ng project
Now that we have created our application, let’s run our application and see if it is working or not.

Build and open in the browser
As we develop, we will be using the Angular material for the design and we can install it now itself along with the animation and cdk.
install material, cdk, and animation
With the Angular 6+ versions, you can also do this by following the below command:
ng add @angular/material
Generating Components
Now our project is ready and we can start creating the components, again, CLI is going to do the work for us for free. If it is a freelance developer, how much would you pay him/her?
ng g c home
ng g c header
ng g c footer
Now, we have three components to work with. So let’s begin.
Set Up Header Component
I am going to edit only the HTML of the header component for myself and not going to add any logic. You can add anything you wish.
<div style="text-align:center">
  <h1>
    Welcome to ngVirtualScrolling at <a href="https://sibeeshpassion.com">Sibeesh Passion</a>
  </h1>
</div>
Set Up Footer Component
<p>
  Copyright @SibeeshPassion 2018 - 2019 :)
</p>
Set Up app-routing.module.ts
We are going to create a route only for home.
import { NgModule } from '@angular/core';
import { Routes, RouterModule } from '@angular/router';
import { HomeComponent } from './home/home.component';
const routes: Routes = [
  {
    path: '',
    redirectTo: '/home',
    pathMatch: 'full'
  },
  {
    path: 'home',
    component: HomeComponent
  }
];
@NgModule({
  imports: [RouterModule.forRoot(routes)],
  exports: [RouterModule]
})
export class AppRoutingModule { }
Set Up Router Outlet in app.component.html
Now we have a route and it is time to set up the outlet.
<app-header></app-header>
<router-outlet>
</router-outlet>
<app-footer></app-footer>
Set Up app.module.ts
Every Angular app will be having at least one NgModule class, the same is named and AppModule resides in a file named app.module.ts. You can always learn about the Angular architecture here.
import { BrowserModule } from '@angular/platform-browser';
import { NgModule } from '@angular/core';
import {MatButtonModule, MatCheckboxModule, MatMenuModule, MatCardModule, MatSelectModule}
from '@angular/material';
import { AppRoutingModule } from './app-routing.module';
import { AppComponent } from './app.component';
import { HeaderComponent } from './header/header.component';
import { FooterComponent } from './footer/footer.component';
import { HomeComponent } from './home/home.component';
import { ScrollingModule } from '@angular/cdk/scrolling';
import { MovieComponent } from './movie/movie.component';
import { MovieService } from './movie.service';
import { HttpModule } from '@angular/http';
import { BrowserAnimationsModule } from '@angular/platform-browser/animations';
@NgModule({
  declarations: [
    AppComponent,
    HeaderComponent,
    FooterComponent,
    HomeComponent,
    MovieComponent
  ],
  imports: [
    HttpModule,
    BrowserModule,
    AppRoutingModule,
    ScrollingModule,
    MatButtonModule, MatCheckboxModule, MatMenuModule,
          MatCardModule, MatSelectModule, BrowserAnimationsModule
  ],
  exports: [
    HttpModule,
    BrowserModule,
    AppRoutingModule,
    ScrollingModule,
    MatButtonModule, MatCheckboxModule, MatMenuModule, MatCardModule, MatSelectModule
  ],
  providers: [ MovieService ],
  bootstrap: [AppComponent]
})
export class AppModule { }
Do you see a ScrollingModule there? You should import it to use the virtual scrolling and it resides in the @angular/cdk/scrolling. As you might have already noticed, we have added one service called MovieService in the providers array. We will create one now.
Creating a Movie Service
import { Injectable } from '@angular/core';
import { RequestMethod, RequestOptions, Request, Http } from '@angular/http';
import { config } from './config';
@Injectable({
  providedIn: 'root'
})
export class MovieService {
  constructor(private http: Http) {
  }
get(url: string) {
    return this.request(url, RequestMethod.Get)
  }
request(url: string, method: RequestMethod): any {
    const requestOptions = new RequestOptions({
      method: method,
      url: `${config.api.baseUrl}${url}${config.api.apiKey}`
    });
const request = new Request(requestOptions);
    return this.http.request(request);
  }
}
As you can see, I haven’t done much with the service class and didn’t implement the error mechanism and other things as I wanted to make this as short as possible. This service will fetch the movies from an online database TMDB and here in this article and repository, I am using mine. I strongly recommend you to create your own instead of using mine. Can we set up the config file now?
Set Up config.ts
A configuration file is a way to arrange things in handy and you must implement it in all the projects you are working with.
const config = {
  api: {
        baseUrl: 'https://api.themoviedb.org/3/movie/',
        apiKey:'&api_key=c412c072676d278f83c9198a32613b0d',
        topRated:'top_rated?language=en-US&page=1'
    }
}
export { config };
Creating a Movie Component
Let’s create a new component now to load the movie into it. Basically, we will be using this movie component inside the cdkVirtualFor so that it will call this component each time and render it. Our movie component will be having the HTML as below:
<div class="container">
  <mat-card style="min-height: 500px;" class="example-card">
    <mat-card-header>
      <div mat-card-avatar class="example-header-image"></div>
      <mat-card-title>{{movie?.title}}</mat-card-title>
      <mat-card-subtitle>Release date: {{movie?.release_date}}</mat-card-subtitle>
    </mat-card-header>
    <img mat-card-image src="https://image.tmdb.org/t/p/w370_and_h556_bestv2/{{movie?.poster_path}}"
     alt="{{movie?.title}}">
    <mat-card-content>
      <p>
        {{movie?.overview}}
      </p>
    </mat-card-content>
  </mat-card>
</div>
And the typescript file will be having one property with @Input decorator so that we can input the values to it from the home component.
import { Component, OnInit, Input } from '@angular/core';
import { Movie } from '../models/movie';
@Component({
  selector: 'app-movie',
  templateUrl: './movie.component.html',
  styleUrls: ['./movie.component.scss']
})
export class MovieComponent implements OnInit {
  @Input()
  movie: Movie;

  constructor() {
  }
ngOnInit() {
  }
}
Set Up Home Component
Now here is the main part, the place where the virtual scrolling is happening. Let’s design the HTML now.
<div class="container" style="text-align:center">
  <div class="row">
    <cdk-virtual-scroll-viewport itemSize="500" class="example-viewport">
      <app-movie *cdkVirtualFor="let movie of ds"
       [movie]="movie" class="example-item">{{movie || 'Loading...'}}</app-movie>
    </cdk-virtual-scroll-viewport>
  </div>
</div>
Here itemSize is a mandatory property and you can give any number as per how many data you want to load to the component. We are inputting the values to our app-movie component by using [movie]=”movie”.
Let’s see the typescript code now:
import { Component, OnInit, ChangeDetectionStrategy } from '@angular/core';
import { DataSource, CollectionViewer } from '@angular/cdk/collections';
import { BehaviorSubject, Subscription, Observable } from 'rxjs';
import { MovieService } from '../movie.service';
import { Movie } from '../models/movie';
import { config } from '../config';
@Component({
  selector: 'app-home',
  templateUrl: './home.component.html',
  styleUrls: ['./home.component.scss'],
  changeDetection: ChangeDetectionStrategy.OnPush
})
export class HomeComponent {
  constructor(private movieService: MovieService) {
  }
  ds = new MyDataSource(this.movieService);
}
export class MyDataSource extends DataSource<Movie | undefined> {
  private page = 1;
  private initialData: Movie[] = [
    {
      id: 19404,
      title: 'Dilwale Dulhania Le Jayenge',
      overview: 'Raj is a rich, carefree, happy-go-lucky second generation NRI.
      Simran is the daughter of Chaudhary Baldev Singh, who in spite of being an NRI
      is very strict about adherence to Indian values. Simran has left for India to be married
      to her childhood fiancé. Raj leaves for India with a mission at his hands,
      to claim his lady love under the noses of her whole family. Thus begins a saga.',
      poster_path: '\/uC6TTUhPpQCmgldGyYveKRAu8JN.jpg'
    }
  ];
  private dataStream = new BehaviorSubject<(Movie | undefined)[]>(this.initialData)
  private subscription = new Subscription();
constructor(private movieService: MovieService) {
    super();
  }
connect(collectionViewer: CollectionViewer): Observable<(Movie | undefined)[]> {
    this.subscription.add(collectionViewer.viewChange.subscribe((range) => {
      console.log(range.start)
      console.log(range.end)
      this.movieService.get(config.api.topRated)
        .subscribe((data) => {
          this.formatDta(JSON.parse(data._body).results);
        });
    }));
    return this.dataStream;
  }
disconnect(): void {
    this.subscription.unsubscribe();
  }
formatDta(_body: Movie[]): void {
    this.dataStream.next(_body);
  }
}
I have a parent HomeComponent where I get the data from a class MyDataSource which extends DataSource<Movie | undefined>. This DataSource is an abstract class and residing in @angular/cdk/collections. As the MyDataSource class is extending from DataSource, we had to override two functions which are, connect() and disconnect(). According to the angular material documentation, the connect method will be called by the virtual scroll viewport to receive a stream that emits the data array that should be rendered. The viewport will call disconnect when the viewport is destroyed, which may be the right time to clean up any subscriptions that were registered during the connect process.
Inside the connect method, we are calling our own service to get the data.
this.movieService.get(config.api.topRated)
        .subscribe((data) => {
          this.formatDta(JSON.parse(data._body).results);
        });
Custom Styling
I have applied some custom styles to some components, which you can see in the GitHub repository. Please copy those from there if you are creating the application from scratch.
Output
Once you have implemented all the steps, you will be having an application which uses Angular 7 virtual scrolling with actual server data. Now let us run the application and see it in action.
Angular Virtual Scrolling Demo Start
Angular Virtual Scrolling Demo Middle
Conclusion
In this post, we have learned how to:
- Create an Angular 7 application
- Work with Angular CLI
- Generate components in Angular
- Use Material design
- Work with virtual scrolling in Angular 7
Please feel free to play with this GitHub repository. It may not be a perfect article on this topic, so please do share your findings while you work on the same. I would really appreciate that, thanks in advance.
Your Turn. What Do You Think?
Thanks a lot for reading. I will come back with another post on the same topic very soon. Did I miss anything that you think is needed? Could you find this post useful? Please share your valuable suggestions and feedback, but do try to stay on topic. If you have a question unrelated to this post, you’re better off posting it on Stack Overflow instead of commenting here. Tweet or email me a link to your question there and I’ll definitely try to help if I can.


