Introduction
I know that we touched upon the Throwing arm model in the Google Daydream Elements in an earlier article when we were looking into the Daydream and we could reference the code there if necessary. However, when working with controllers in VR, one of the most important things that we should know how to do is how to pick up and interact with game objects in the world.
Here are a couple of things that we’re going to look at:
- Highlighting an object when we select it (today)
- Picking up an object (later)
- Throwing the objected we picked up (later)
We’re going to start with the first part today. How to highlight a game object.
Creating a Highlight Effect on Game Objects
Our goal is to be able to pick up and throw items. A cool effect that we’ve seen before is that when we’re highlighting a game object, the object itself would be highlighted.
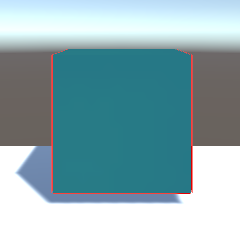
Like so (ignore that we’re using a cube):
Let’s see how we create a border highlight effect on a game object? We'll follow the link and we’ll have our answer! We have to create a shader to use!
Shaders are “…small scripts that contain the mathematical calculations and algorithms for calculating the Color of each pixel rendered, based on the lighting input and the Material configuration.”
Luckily for us, we don’t have to figure out how to create our own shaders. That’s something we might try to learn later, but for today, we’re going to just use the existing shader that’s provided for us in the link above, the Silhouette-Outlined Diffuse shader.
To create a new shader:
- In the Project pane on Unity, create a new folder called Shaders
- In the Shaders folder, select, right click and select Create > Shader > Standard Surface Shader, call it
Border - Open up
Border and let’s add the shader script above. Specifically, we only want the Silhouette effect, so the code we’re copying and pasting in our Border shader is:
Shader "Outlined/Silhouette Only" {
Properties {
_OutlineColor ("Outline Color", Color) = (0,0,0,1)
_Outline ("Outline width", Range (0.0, 0.03)) = .005
}
CGINCLUDE
#include "UnityCG.cginc"
struct app data {
float4 vertex : POSITION;
float3 normal : NORMAL;
};
struct v2f {
float4 pos : POSITION;
float4 color : COLOR;
};
uniform float _Outline;
uniform float4 _OutlineColor;
v2f vert(appdata v) {
v2f o;
o.pos = mul(UNITY_MATRIX_MVP, v.vertex);
float3 norm = mul ((float3x3)UNITY_MATRIX_IT_MV, v.normal);
float2 offset = TransformViewToProjection(norm.xy);
o.pos.xy += offset * o.pos.z * _Outline;
o.color = _OutlineColor;
return o;
}
ENDCG
SubShader {
Tags { "Queue" = "Transparent" }
Pass {
Name "BASE"
Cull Back
Blend Zero One
SetTexture [_OutlineColor] {
ConstantColor (0,0,0,0)
Combine constant
}
}
Pass {
Name "OUTLINE"
Tags { "LightMode" = "Always" }
Cull Front
Blend One OneMinusDstColor
CGPROGRAM
#pragma vertex vert
#pragma fragment frag
half4 frag(v2f i) :COLOR {
return i.color;
}
ENDCG
}
}
Fallback "Diffuse"
}
Don’t ask me what the code does, I don’t know either, but I can assure you that it works!
Now that we have our shader, the next thing we need to do is apply it on to a material so that we can use it on our game object to get our highlighting effect.
- Create a new folder in our project directory called Materials
- Right-click on the project panel and select Create > Material and let’s also call the new material
Outline - Select the new outline and then for the shader to be the outline we just made. Specifically, I was able to find it at Outlined/Silhouette Only.
Here’s what it’ll look like:

There are two variables that we can control and they are:
- Outline Color – The color of the outline that we will create the
game object. - Outline Width – How wide the outline will appear on our
game object.
Now that we have our outline material, it’s time to attach them to a game object we want to interact with. Let’s create it.
- Create a new sphere into the
game object. We’ll just call it - Move it to
position (0, 1.2, 2.5) to be right in front of the player. - In
Ball, in the Mesh Renderer component, select Materials and change the size of it to be 2. - For the 2nd material slot, add the Outline material we just created. You should now see a whitish outline on
Ball now. - To make the outline more visible, let’s change the sphere’s default material to be a different color. In Element 0, change the material to be. Let’s choose Cube Red that was provided to use from the Google VR SDK. Because we only choose to create an outline, we’re allowed to have multiple materials on our game object and still have our mesh outline!
Here’s what we should have:
On the left is our scene, we can barely see the white outline.
On the right, however, in the game pane, which is what the players see. We can see the outline, much more nicely.
Conclusion
With this, we have accomplished our original goal, creating an outline material that’ll work for any of our game objects and we learned a bit more about how to create a shader (or at least copy one) and how to use them in our materials.
In the next article, we’ll move on to our next step and look at how we might be able to highlight an object when we hover and select it.


