In this article, we will enhance our application and add Authentication and Authorization using Auth0 and JWT.
Article Series
Introduction
In the previous articles, we developed the Expressjs APIs for User Management with MongoDB database on mLab website and Angular client application talking to Express APIs and providing the views to Load, Add, Update and Delete users.
In this article, we will enhance our application and add Authentication and Authorization using Auth0 client and JWT, i.e., a user must need to login to perform CRUD operation on User Management page and Expressjs APIs should only be accessible to the trustable source that we will achieve through JWT, the Angular client will send some hashed string with all HTTP requests, that would be verified on Epxressjs end.
Background
This article is the third part of MEAN Stack with Angular 4, Auth0 Auth & JWT Authorization - Part 2 and I strongly recommend to read Part 1 and Part 2 before starting this one. Without reading the first two parts, you might not get a full understanding of this part.
Setup the Project to Work
(Please follow the same steps to make the attached solution runnable)
- Download the attached project from MEAN Stack with Angular 4, Auth0 Auth & JWT Authorization - Part 2 and follow the following steps to make it runnable:
- Download the attached source project. Extract it to your computer and open the folder mean-example in Visual Studio Code.
- In EXPLORER Panel, right click on client - > UserManagement folder and select option Open in Terminal.
- In terminal, run the command:
npm install, wait for command completion to fully download all the packages. - Next, in the same terminal, run the command:
ng build to build the Angular project and save the build in folder dist. - Once the client application is ready, right click on server folder in EXPLORER panel. Select option, Open in Terminal. In terminal, run the command:
npm install. - Once the packages are successfully downloaded, edit the file server -> app.js. Update the
MongoDB URL from mLab website (created in the first article). - In the same terminal, run the command:
node app - Open the browser (Firefox or Chrome), enter the URL http://localhost:3000, your application is ready to use.
Create Auth0 Client
-
Go to Auth0 website and login with credentials we created in the first article. The first step we need is to create Client. The Client in simple language is the account for the application we are going to develop. It has all settings & configurations needed to implement the Auth0 authentication in the applications.
-
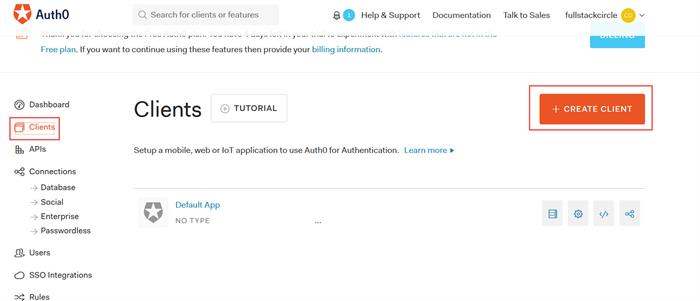
After logging into Auth0 website, you would see Clients link on the left side, click on it:
-
Next, click + NEW CLIENT button on the right side, you would land to Create Client page, enter the Application Name Mean Example and select client type Single Page Web Applications. Click on the Create button.

-
In the next screen, select Angular 2+ since our web application is developed in Angular 4.
-
The next page is the important one. There are four tabs - Quick Starts, Settings, Addons and Connections. For now, we will only use first two tabs. Quick Start tab is awesome, it has ready to use Angular project with auth service that has clientID, domain and callbackURL configured and also a brief tutorial about what to download and how to configure it. Download the attached project.
-
Click on the second tab Settings, this tab has information we need to properly configure our application with Auth0 client. We will use these settings wherever required later in the article.
-
Scroll down to the Settings tab and add http://localhost:3000/login in Allowed Callback URLs text box. We are specifying after successful login where the control should go, you would learn more about it in the upcoming steps.
-
Extract the downloaded project 01- login.zip to your computer. Open Visual Studio Code and open the extracted folder 01- login containing project files. In src -> app -> auth folder, you would find auth.service.ts file that contains all required code to Login, Logout and isAuthenticated functions. We will copy the required functions from here to our application, tweak a little bit and try to understand it.
Authentication Implementation
-
After configuring the Auth0 client, let's come back to our User Management application. The first thing to configure the Auth0 client as per Quick Start tutorial is to install auth0-js, so right click on client -> UserManagement folder and select option Open in Terminal (or just go to terminal and cd to UserManagement folder)
-
Enter the command: npm install --save auth0-js in a terminal and press the Enter key.
-
In the same terminal, enter the command: ng g service auth/auth --module app.module.ts to generate the auth service in auth folder and add it in AppModule as well for dependency injection.
-
Next, let's create the auth0-variables.ts file for AuthConfig interface to store the Auth configuration as per attached project in Quick Start guide. Run the command: ng g interface auth/auth0-variables to create the interface in auth folder.
-
From Quick Start's downloaded project 01-login, copy the content of file src -> app -> auth -> auth0-variables.ts and replace it with our newly created auth0- variables.ts in UserManagement application.
interface AuthConfig
{
clientID: string;
domain: string;
callbackURL: string;
}
export const AUTH_CONFIG: AuthConfig = {
clientID: 'XXXXXXXXXXXXXXXXXXXXXXXXXXXXXXXXXXX',
domain: 'XXXXX.auth0.com',
callbackURL: 'http://localhost:3000/login'
};
-
I made a small update, i.e., callbackURL from http://localhost:4200/callback to http://localhost:3000/login for very obvious reason. We are running our Expressjs node application on port 3000 and we want our application to redirect to login view after successful sign-in. We will put logic in the login component to handle both logged-in and logged-off user, so bear with me till then.
-
Next, copy the content of auth.service.ts from Quick Start's downloaded project 01-login and replace its content with our UserManagement application's src -> app -> auth -> auth.service.ts file. Update the redirectUri to http://localhost:3000/login. Go to Visual Studio Code's File Menu and select option Save all. Final AuthService should look like the following:
import { Injectable } from '@angular/core';
import { AUTH_CONFIG } from './auth0-variables';
import { Router } from '@angular/router';
import * as auth0 from 'auth0-js';
@Injectable()
export class AuthService {
auth0 = new auth0.WebAuth({
clientID: AUTH_CONFIG.clientID,
domain: AUTH_CONFIG.domain,
responseType: 'token id_token',
audience: `https://${AUTH_CONFIG.domain}/userinfo`,
redirectUri: 'http://localhost:3000/login',
scope: 'openid'
});
constructor(public router: Router) {}
public login(): void {
this.auth0.authorize();
}
public handleAuthentication(): void {
this.auth0.parseHash((err, authResult) => {
if (authResult && authResult.accessToken && authResult.idToken) {
window.location.hash = '';
this.setSession(authResult);
this.router.navigate(['/home']);
} else if (err) {
this.router.navigate(['/home']);
console.log(err);
alert(`Error: ${err.error}. Check the console for further details.`);
}
});
}
private setSession(authResult): void {
const expiresAt = JSON.stringify((authResult.expiresIn * 1000) +
new Date().getTime());
localStorage.setItem('access_token', authResult.accessToken);
localStorage.setItem('id_token', authResult.idToken);
localStorage.setItem('expires_at', expiresAt);
}
public logout(): void {
localStorage.removeItem('access_token');
localStorage.removeItem('id_token');
localStorage.removeItem('expires_at');
this.router.navigate(['/']);
}
public isAuthenticated(): boolean {
const expiresAt = JSON.parse(localStorage.getItem('expires_at'));
return new Date().getTime() < expiresAt;
}
}
-
Next, we need to update our AppComponent to call handleAuthentication function from AuthService in its constructor as per downloaded project 01-login. You can understand self-explanatory code of handleAuthentication function but I just want to explain setSession function that is being called from handleAuthentication function. In setSession function, we are saving the access_token, id_token and expires_at values in localStorage that would return from Auth0 once we would successfully be logged in. The localStorage is the HTML 5 feature which can store far more large data than a cookie and is more secure too. Go through the localStorage to browse its functions to store and remove the values. We will investigate the localStorage values in the browser during Auth0 login process. So, coming back to AppComponent, update the client -> UserManagement -> src -> app -> app.component.ts according to the following:
import { Component } from '@angular/core';
import { AuthService } from "./auth/auth.service";

@Component({
  selector: 'app-root',
  templateUrl: './app.component.html',
  styleUrls: ['./app.component.css']
})

export class AppComponent {
  constructor(public auth: AuthService) {
    auth.handleAuthentication();
  }
  title = 'app';
}
-
While we are updating the AppComponent, let's also add the login and logout links in app.component.html. Update the client -> UserManagement -> src -> app -> app.component.html with the following code:
<div>
  <nav class='navbar navbar-inverse'>
      <div class='container-fluid'>
          <ul class='nav navbar-nav'>
              <li><a [routerLink]="['home']">Home</a></li>
              <li><a [routerLink]="['user']">Users Management</a></li>
              <li>
               <h4 *ngIf="auth.isAuthenticated() ; else nologin">
                 <a (click)="auth.logout()" class="btn btn-warning">Log Out</a>
               </h4>
              <ng-template #nologin>
               <h4>
                 <a (click)="auth.login()" class="btn btn-success">Log In</a>
               </h4>
              </ng-template>
           </li>
          </ul>
      </div>
  </nav>
  <div class='container'>
      <router-outlet></router-outlet>
  </div>
</div>
-
In the above code, we are adding Log In, Log Out buttons and showing them based on a boolean value returned from isAuthenticated function. Go to AuthService and at the bottom you would see isAuthenticated function where we are only checking if the current time is still less than token expiry time that we stored in localStorage in setSession function. The if-else block is a Angular 4 feature that I already explained in my Angular 2 to Angular 4 article.
-
Next, let's create the Angular router guard, just a little intro about router guard ; guard interrupts the routing and perform our required operation, i.e., authentication, authorization, some pending tasks, etc. that we need to code. To create the guard, we just need to implement CanActivate interface and its method canActivate() that returns true/false value to allow navigation to the view where we apply this guard.
-
Right click on client->UserManagement and select the option Open in Terminal, enter the command: ng g guard guard/auth --module app.moduel to generate the guard in app->guard folder and add the reference in the AppModule.
-
Next, edit the newly created auth.guard.ts from guard folder and replace the content with the following code:
import { Injectable } from '@angular/core';
import { CanActivate, ActivatedRouteSnapshot,
         RouterStateSnapshot, Router } from '@angular/router';
import { Observable } from 'rxjs/Observable';
import { AuthService } from "../auth/auth.service";

@Injectable()
export class AuthGuard implements CanActivate {
  constructor(private router: Router,public _authService:AuthService){
  }

  canActivate(): boolean {
     let isAuth = this._authService.isAuthenticated();
       if(isAuth)
         return true;
       else {
         this.router.navigate(['/login']);
         return false;
        }
     }
}
-
In the above code, we are adding a AuthService reference, implementing the CanActive interface as described in guard documentation and implementing the canActive method. In canActive function, we are calling the isAuthenticated method from AuthService, that would tell us either the user is currently logged-in or logged- off. We have learned about isAuthenticated function in the previous step.
-
You can see in case of user not login, we are redirecting to login view, so let's create the login component where we will add the link to Log In & Log Out button and user-friendly message. Just to remind you, this login view will also be served as RedirectURL once a user would successfully be logged-in on Auth0.
-
Right click on client- >UserManagement folder and run the command: ng g component login
-
Edit the just created login.component.ts from client -> UserManagement -> src -> app -> ->login -> login.component.ts file and replace its content with the following code:
import { Component, OnInit } from '@angular/core';
import { AuthService } from "../auth/auth.service";

@Component({
selector: 'app-login',
  templateUrl: './login.component.html',
  styleUrls: ['./login.component.css']
})

export class LoginComponent implements OnInit {

  constructor(public _authService:AuthService) {}

  ngOnInit() {}
}
-
Nothing fancy in the above code, just getting AuthService reference to be called in the login.component.html.
-
Next, edit the client -> UserManagement -> src -> app - > ->login -> login.component.html and replace its content with the following:
<h4 *ngIf="_authService.isAuthenticated() ; else nologin">
  You are logged in! <a (click)="_authService.logout()"
  class="btn btn-warning">Log Out</a>, Go to <a href="/user"
  class="btn btn-info">User Management</a>
</h4>
<ng-template #nologin>
 <h4>
  You are not logged in! Please <a (click)="_authService.login()"
  class="btn btn-success">Log In</a> to continue.
 </h4>
</ng-template>
-
This code is almost the same as we added in the app.component.html. I don't think it needs any more explanation. Feel free to make it more attractive.
-
Almost there, next let's go to Expressjs code and add a code snippet to all handle unknown route. Edit the server -> app.js and update it as follows:
var express = require('express');
var path = require('path');
var bodyParser = require('body-parser');
var users = require('./routes/user');
var index = require('./routes/index');
var mongojs = require('mongojs');
var db = mongojs('mongodb://XXXX:XXXXX@ds149353.mlab.com:XXXXXX/userdb001',
['UserInfo']);
var port = 3000;
var app = express();
app.engine('html', require('ejs').renderFile);
app.use(express.static(path.join(__dirname,'../client/UserManagement/dist')));
app.use(bodyParser.json());
app.use(bodyParser.urlencoded({extended: false}));
app.set("userdb",db);
app.use('/', index);
app.use("/api",users);
app.get('*', function(req, res) {
res.render(path.join(__dirname,
'../client/UserManagement/dist/index.html'));
});
app.listen(port, function(){
console.log('Server started on port '+port);
});
-
At the end, we added * route to handle all kind of request to redirect them to Angular index.html. Go to File menu and select option Save All.
Test the Application
-
OK, we are ready to test our application, first, let's build our Angular Client application. Right click on client -> UserManagement folder and select option Open in Terminal. In Terminal, enter the command: ng build. Let it build until successfully done.
-
Next, right click on server folder and select option Open in Terminal. In Terminal, enter the command: node app. If you get Server started on port 3000 message, open the browser, Chrome or Firefox and enter the URL http://localhost:3000. You should see the following page:
-
There are two links, Home & User Management and one Log In button. Now try to go to User Management page by clicking on User Management link. You would see the following page:
-
Cool, it is not allowing us to see User Management page, remember Auth Guard, here it is in action. When we click on User Management, Auth guard checks if we are logged-in by calling the AuthSerivce's isAuthenticated method that is returning false since we are not logged-in yet.
-
Click on Log In button from top menu or login page (both are same). You would be redirected to Auth0 login page:
-
Now, Log In with Google or Sign Up with the new user and click on Log In button. press the F12/Ctrl+F12 or use Menu to go to Developer tools in Chrome browser. If the login is successful, you would see the following screen. (In Developer tools, go to Application tab, then from left menu Storage -> LocalStorage -> http://localhost:3000)
-
You can see in the above screenshot, Log In button is being replaced with Log Out and we can also see parameters saved in Local Storage that are done by setSession method called from handleAuthentication method where handleAuthentication is called from AppComponent constructor. Hopefully, it is clear to you guys now. And since we changed our redirectUri/callbackURL to http://localhost:3000/login wherever it was applicable, that's why it came back to login view.
-
Now click on User Management link from the top menu, you should see the User List with Add/Update and Delete buttons.
-
Click on Log Out button and check the application behavior.
Implement the JWT Authorization
-
First, let's understand why we need to implement JWT by example. You saw in the previous steps that we implemented the authentication and restricted the User Management page access to only logged-in users. If you read Part 1 of this article series, at the end of that article, we are using Postman tool to check all of our APIs. Use the Postman again and follow the steps to check the APIs, i.e., right click on server folder and select option, Open the Terminal, in the terminal, enter the command: node app. Go to browser and enter the URL http://localhost:3000/api/users or use Postman. You would able to see all users in a browser and through Postman, still, the user can be added, deleted or updated.
-
By keeping the above scenario in mind, our authentication is useless if our APIs are still accessible through a browser, Postman or any other tool like Fiddler or SoapUI. we need to fix it by restricting our APIs to be accessed by trustable source. Through JWT, we would be sending some kind of hashed string in all APIs request's header from Angular client and in Expressjs server side, it would be verified and sent back the response in case of a successful match.
-
To implement the JWT in Angular, we will be using angular2-jwt package. Please go through its documentation from this link, it is very brief and I don't need to copy paste it from there to my article.
-
The angular2- jwt automatically sends token with all HTTP request authorization header but we will use AuthHttp instead of HTTP class to handle our APIs requests. Let's see how.
-
First, let's install the angular2-jwt, right click on client -> UserManagement folder and select option Open in Terminal, enter the command: npm install angular2-jwt@0.2.0 -- save (The latest version doesn't work so I am using 0.2.0.)
-
Next, by looking at Github page, let's update our AppModule. Edit the client -> UserManagement -> src -> app -> app.module. ts file. Update the AppModule as follows:
import { BrowserModule } from '@angular/platform-browser';
import { NgModule } from '@angular/core';
import { HttpModule, Http, RequestOptions } from '@angular/http';
import { AppRoutingModule } from './app-routing.module';
import { AppComponent } from './app.component';
import { HomeComponent } from './home/home.component';
import { UserComponent } from './user/user.component';
import { ReactiveFormsModule } from '@angular/forms';
import { Ng2Bs3Mo]\\dalModule } from 'ng2-bs3-modal/ng2-bs3-modal';
import { UserService } from './service/user.service';
import { AuthService } from './auth/auth.service';
import { AuthGuard } from './guard/auth.guard';
import { LoginComponent } from './login/login.component';
import { CallbackComponent } from './callback/callback.component';
import { AuthHttp, AuthConfig } from 'angular2-jwt';
export function authHttpServiceFactory(http: Http, options: RequestOptions) {
return new AuthHttp(new AuthConfig(), http, options);
}
@NgModule({
declarations: [
AppComponent,
HomeComponent,
UserComponent,
LoginComponent,
CallbackComponent
],
imports: [
BrowserModule,
AppRoutingModule,
ReactiveFormsModule,
Ng2Bs3ModalModule,
HttpModule
],
providers: [UserService, AuthService, AuthGuard,
{
provide: AuthHttp,
useFactory: authHttpServiceFactory,
deps: [Http, RequestOptions]
}
],
bootstrap: [AppComponent]
})
export class AppModule { }
-
You can learn about the above updates on same Github page.
-
As per the documentation, "If you wish to only send a JWT on a specific HTTP request, you can use the AuthHttp class. This class is a wrapper for Angular 2's Http and thus supports all the same HTTP methods." So let's use AuthHttp for our APIs (GET, POST, PUT, DELETE) request in UserService instead of Http.
-
Edit the client -> UserManagement -> src -> app -> service -> user.service.ts file, import the angular2- jwt and replace the Http with AuthHttp in constructor. The Updated UserService should be the following:
import { Injectable } from '@angular/core';
import { IUser } from "../model/user";
import { Observable } from "rxjs/Observable";
import { Http, Response, Headers, RequestOptions} from '@angular/http';
import 'rxjs/add/operator/map';
import 'rxjs/add/operator/do';
import 'rxjs/add/operator/catch';
import { AuthHttp } from "angular2-jwt";

@Injectable()
export class UserService {
  users: IUser[];
  constructor(public _http: AuthHttp) { }
  get(): Observable<any> {
   let url="/api/users";
    return this._http.get(url)
    .map((response: Response) => <any>response.json())
    .catch(this.handleError);
  }

  post(model: any): Observable<any> {
   let url="/api/user";
    let body = JSON.stringify(model);
    console.log(body);
    let headers = new Headers({ 'Content-Type': 'application/json' });
    let options = new RequestOptions({ headers: headers });
    return this._http.post(url, body, options)
      .map((response: Response) => <any>response.json())
      .catch(this.handleError);
  }

  put(id: string, model: IUser): Observable<any> {
    let url="/api/user/"+id;
    delete model._id;
    let body = JSON.stringify(model);
    let headers = new Headers({ 'Content-Type': 'application/json' });
    let options = new RequestOptions({ headers: headers });
    return this._http.put(url, body, options)
      .map((response: Response) => <any>response.json())
      .catch(this.handleError);
  }

  delete(id: string): Observable<any> {
   let url="/api/user/"+id;
    let headers = new Headers({ 'Content-Type': 'application/json' });
    let options = new RequestOptions({ headers: headers });
    return this._http.delete(url,options)
      .map((response: Response) => <any>response.json())
      .catch(this.handleError);
  }

  private handleError(error: Response) {
    console.error(error);
    return Observable.throw(error.json().error || 'Server error');
  }
}
-
Now we have configured our Angular client application to include JWT in all HTTP Calls, we also need to update our Expressjs server APIs at the receiving end to take that JWT and verify it.
-
The Auth0 documentation has ready to use sample code and step by step guide how to update our Expressjs application to verify JWT on server end. Please login on your Auth0 account and then browse https://auth0.com/docs/quickstart/backend/nodejs/01-authorization URL. You can download the sample project or follow steps to update server -> app.js file. Please read the guide thoroughly. I am not posting it here because it would unnecessarily increase the article size.
-
Let's update the Expressjs server side, but before adding the code, we need some packages, i.e., express-jwt, jwks-rsa, express- jwt-authz.
-
express-jwt:Middleware that validates JsonWebTokens and sets req.user
-
jwks-rsa: The jwks-rsa library can be used alongside express-jwt to fetch your Auth0 public key and complete the verification process.
-
express-jwt-authz: The express-jwt - authz library can be used to add an authorization middleware to your endpoints.
-
Right click on server and select option Open in Terminal, enter the command: npm install -- save express- jwt jwks-rsa express- jwt-authz
-
Once all packages are successfully installed, edit the client -> app.js file and update it as follows:
var express = require('express');
var path = require('path');
var bodyParser = require('body-parser');
var users = require('./routes/user');
var index = require('./routes/index');
var mongojs = require('mongojs');
var db = mongojs('mongodb://XXXX:XXXX@ds149353.mlab.com:XXXXX/userdb001',
['UserInfo']);
const jwt = require('express-jwt');
const jwksRsa = require('jwks-rsa');
const checkJwt = jwt({
secret: jwksRsa.expressJwtSecret({
cache: true,
rateLimit: true,
jwksRequestsPerMinute: 5,
jwksUri: 'https://fullstackcircle.auth0.com/.well-known/jwks.json'
}),
audience: process.env.AUTH0_AUDIENCE,
issuer: 'https://fullstackcircle.auth0.com/',
algorithms: ['RS256']
});
var port = 3000;
var app = express();
app.engine('html', require('ejs').renderFile);
app.use(express.static(path.join(__dirname, '../client/UserManagement/dist')));
app.use(bodyParser.json());
app.use(bodyParser.urlencoded({extended: false}));
app.set("userdb",db);
app.use('/', index);
app.use("/api",checkJwt,users);
app.get('*', function(req, res) {
res.render(path.join(__dirname,
'../client/UserManagement/dist/index.html'));
});
app.listen(port, function(){
console.log('Server started on port '+port);
});
-
In the above code, get the jwksUri & issuer from https://auth0.com/docs/quickstart/backend/nodejs/01-authorization#configuration (make sure you are logged-in with your Auth0 account). section.
-
That's it for JWT implementation on both Angular & Expressjs applications. The brief explanation of JWT implementation is here, after creating the checkJwt, you can see, we added it in route as: app.use ("/ api",checkJwt,users); that will check for JWT token and verify it before serving any User APIs request.
-
Build the Angular client application by right clicking on client -> UserManagement folder and select the option, Open in Terminal enter the command: ng build
-
Run the server by right click on server folder and select the option, Open in Terminal enter the command: node app (after an Angular client is successfully built).
-
Open the browser, enter the URL: http://localhost:3000 and test it.
-
I also recommend you to go to my Part 1 and from step 40, test this application in Postman. You should receive an Unauthorized error, because there is no JWT token in HTTP request header. It means our application cannot be accessed from outside and is secured.
Summary
So basically, we created the client on Auth0 website that is kind of account for our application and has basic information for connecting our application to Auth0 and managing users. Auth0 has ready to use code and brief tutorial for Angular 2+ application for Sign In and Sign Up user, we downloaded the sample code that has already basic configuration setup according to our client settings. We used the AuthService from sample code, modified AppComponents and used auth0-variables.ts from downloaded sample application. In AuthService, there is a login code that redirects the user to Auth0 login page and returns, id_token expires_at and access_token that we save in localStorage. Other helping methods in AuthService are for log out and to check if user is still logged-in. We used the isAuthenticated method in Auth Guard to restrict the User Management page access. Next, we implemented the JWT authentication for user APIs with angular2-jwt package that almost does all work for use. It takes the access_token from localStorage and through its wrapper method AuthHttp, appends it with all HTTP requests header. This is pretty much we did on the client side.
On Expressjs server side, we added the code for JWT implementation by using express-jwt package. Thanks to Auth0, we also had a sample project and brief tutorial how to configure it in Expressjs application. We are using different packages that take the JWT token from HTTP request and verify it. Since we are using RS256 algorithm for signing keys that work as public/private keypairs. The token sent from Angular can be verified against the public key on Auth0 account. We specify the public key URL as a jwksUri while creating the checkjwt object that verifies that the access_token included in the request is valid. Just debug the Angular Client code and you would see that while logging in to Auth0 account, same jwksUri is being called to get private keys. So, ignoring the complexity and just for understanding, there are two keys created on Auth0 account when signing-in, one is sent from the Angular client that is verified against another key on the server side fetched from Auth0 account, if the combination is correct, the request is valid, otherwise, it is invalid. You can also add a scope (access level e.g. read, write, etc.) in the request. Check the Auth0 documentation how to do it.
Now, our application knows the request is coming from a trustable source by verifying the JWT token.
History
- 9th September, 2017: Created
- 10th September, 2017: Fixed attached project


 General
  News
News  Suggestion
  Question
  Bug
Bug  Answer
  Joke
Joke  Praise
  Rant
Rant  Admin
Admin 


