Introduction
In this tutorial, we are going to build a virtual keyboard, in my case, I'm building an Arabic keyboard for a project I'm working on right now but you can easily adapt it to build a virtual keyboard or a transliteration system for any language .The framework we are going to use is Angular.js, so let's get started.
What's Transliteration?
Transliteration simply means converting one language alphabet to another phonetically equivalent alphabet. In this case, we will write Arabic with Latin/English letters. The virtual keyboard will take care of transliterating our input to Arabic alphabet.
For example, salam (hello) will be transliterated to ????.
For a demo example of this, check this [online virtual arabic keyboard].
So how can we create this virtual keyboard using Angular.js. When I first wanted to create this tool, I thought that creating it in Angular.js would be difficult but it turns out that it's even simpler to build it using the Google great framework.
How to Use the Virtual Keyboard?
The virtual keyboard can be used in two ways:
Either via mouse - in this case, there is no transliteration, just simple text concatenation.
Or via physical keyboard - in this case, we type in English so our system needs to transliterate and convert the English alphabet to Arabic and put it on the textarea for the user to copy.
Getting Started
To get started, we need to configure our local development machine with the necessary tools, so start by installing the Node.js platform if it's not already installed. Here is a tutorial on how to install Node.js under Ubuntu using NVM. Or just grab the installer from the official Node.js website and install it yourself.
Next, we need to install http-server, a local http server for serving static files so we can test our Angular.js app locally.
So just open your terminal if you are under Linux/MAC or your command prompt if you are under Windows and enter:
npm install http-server -g
Next, after installing http-server, create your development folder, let's name it virtual-keyboard and just create a bunch of files and folders.
mkdir virtual-keyboard    && cd virtual-keyboard
touch index.html
mkdir scripts styles images
Building and Styling the Keyboard Layout
<!DOCTYPE html>
<head>
<meta charset="utf-8">
<meta http-equiv="X-UA-Compatible" content="IE=edge">
<title>Virtual Keyboard</title>
<meta name="viewport" content="width=device-width,initial-scale=1">
<link rel="stylesheet" href="styles/bootstrap.min.css">
<link rel="stylesheet" href="styles/style.css">
</head>
<body >
    <div class="section">
        <div style="width:100%;margin: auto">
            <div>
            <div class="txtWrapper">
                <textarea dir="rtl" placeholder="..."
                ng-model="text" ng-change="trans()"
                 auto-focus="autoFocus">
                 </textarea>
             </div>
             <div>
                 <div class="keysWrapper">
                     <div style="width:100%;margin:auto">
                         <div class="keyWrapper">
                         <div class="clearfix">
                             <a ng-repeat="obj in shema" ng-click="putc(obj.arabic)">
                                 <div class="arabicKey"><span>{[{ obj.arabic }]}</span></div>
                             </a>
                         </div>
                         </div>
                     </div>
                 </div>
             </div>
        </div>
    </div>
<script src="scripts/angular.js"></script>
<script src="scripts/app.js"></script>
</body>
</html>
Then under the styles folder, download and put bootstrap, then create a style.css file, open it and copy the following styles:
.txtWrapper {
    background: #A52121;
    border: 1px solid #213143;
    padding: 0px;
    margin: 0px;
}
.txtWrapper textarea {
  background: #fff;
    border: 1px solid #000;
    box-sizing: border-box;
    height: 200px;
    padding: 20px;
    text-align: right;
    width: 100%;
}

.keyboardArea {
  text-align: right;
  direction: ltr;
}
.keyWrapper{
    position: relative;
    padding: 5px;
    margin: 0 0 10px;
  background: #000;
  width:100%;
  color:white;
  border-style:groove;
  z-index: 999;

}
.keyWrapper a{
  background: rgba(255, 255, 255, 0.04);
  border: 1px solid #000;
  color: #fff;
  cursor: pointer;
  display: inline-block;
  float: right;
  font-size: 25px;
  height: 40px;
  margin: 0 1px 2px;
  position: relative;
  text-align: center;
  text-decoration: none;
  width: 50px;
  transition: 0.25s;
}
.arabicKey {
    position: absolute;
    right: 5px;
    top: 0;
    color:white;
}
.keyWrapper a:hover .arabicKey{
  color: blue;
  font-size: 26px;
}
Building the Angular.js App
Under scripts folder, create an app.js file, then add the code as we add in the following steps.
First, we will start by creating our app:
var app = angular.module('myKeyboard',[]);
Next, we declare a constant which holds the schema of our keyboard, i.e., the mapping between Arabic and English letters.
app.constant('SHEMA',[
{ "arabic": "\u0627", "latin": ["a"]},
{ "arabic": "\u0628", "latin": ["b", "B"]},
{ "arabic": "\u062A", "latin": ["t"]},
{ "arabic": "\u062B", "latin": ["c"]},
{ "arabic": "\u062C", "latin": ["j"]},
{ "arabic": "\u062D", "latin": ["h"]},
{ "arabic": "\u062E", "latin": ["h'","kh="]},
{ "arabic": "\u062F", "latin": ["d"]},
{ "arabic": "\u0630", "latin": ["z"]},
{ "arabic": "\u0631", "latin": ["r", "R"]},
{ "arabic": "\u0632", "latin": ["Z"]},
{ "arabic": "\u0633", "latin": ["s"]},
{ "arabic": "\u0634", "latin": ["C"]},
{ "arabic": "\u0635", "latin": ["S"]},
{ "arabic": "\u0636", "latin": ["D"]},
]);
Next, we create the auto focus directive:
app.directive('autoFocus',[ function() {
    return {
        restrict: 'A',
        scope: {
            value: "=autoFocus"
        },
        link: function($scope, $element, attrs) {
            $scope.$watch("value", function(currentValue, previousValue) {
                $element[0].focus();
            })
        }
    }
}])
Then, we use it:
<textarea auto-focus="autoFocus"></textarea>
This directive is very important to our keyboard, but only when using the keyboard through the mouse because when we click on the virtual keyboard keys, the textarea loses focus, so we need to give it the focus back so instead of doing that manually, each time we press a key, we set it via code with the help of this directive.
Finally, we write the controller:
app.controller('KeyboardController',["$scope","SHEMA",function($scope,SHEMA) {
    $scope.text = "";
    $scope.shema = SHEMA;

    $scope.putc = function(letter){
        $scope.text += letter;
        $scope.autoFocus = true;
    }
    $scope.trans = function(){
            var txt = $scope.text;
            angular.forEach($scope.shema, function(obj, k){
                    angular.forEach(obj.latin, function(c, kk){

                        var re = new RegExp(c);
                        txt = txt.replace(re,obj.arabic);
                    });
            });

            $scope.text = txt;
            return ;

    }

}]);
In the controller, we inject the $scope and the SHEMA constant.
The $scope.text model is bound to the textarea via ng-model so whatever exists in $scope.text exists in the textarea.
The $scope.puts is activated when we use the keyboard via mouse, it's bound to each virtual keyboard key through ng-click which is fired when we click on our keyboard keys. In this case, we don't need transliteration, we just need to concatenate the pressed Arabic letter with textarea $scope.text which is initialized with an empty string in the first place.
<textarea dir="rtl" ng-model="text" auto-focus="autoFocus"></textarea>
The $scope.trans() method gets everytime the textarea changes the change event is fired when we type on our actual keyboard.
<textarea dir="rtl" ng-model="text" ng-change="trans()" auto-focus="autoFocus"></textarea>
$scope.trans() takes care of transliterating what we type (in English) on the fly and changes $scope.text to contain the Arabic text equivalent of what we've typed.
The essential part of trans() method is this:
var re = new RegExp(c);
txt = txt.replace(re,obj.arabic);
Which simply uses a JavaScript regular expression function to replace the Latin letters in our text by their equivalents in Arabic.
To test the virtual keyboard:
First clone the GitHub repository:
git clone  https://github.com/techiediaries/virtual-arabic-keyboard.git
cd virtual-arabic-keyboard
 http-server
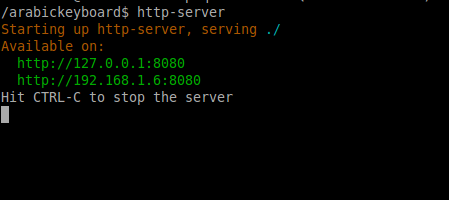
On your terminal/command prompt, navigate to http://127.0.0.1:8080 with your web browser
You should see:

Conclusion
So that's the end of this tutorial. You can find the complete code of this virtual Arabic keyboard on this
GitHub repository. A live demo is available also on this online arabic keyboard website.
This post Building an Arabic transliteration system or virtual keyboard using Angular.js first appeared on techiediaries.


