Hello Developers, We are back with a new android firebase tutorial. This time we will discuss about Firebase Cloud Messaging (FCM). We will be using Firebase to add cloud messaging in android app.
To download the full code for theFirebase Cloud Messaging app, go to the link below and click on Download Now Button. Android Firebase Cloud Messaging Tutorial
What is Firebase Cloud Messaging?
Firebase Cloud Messaging is a powerful API that lets you deliver messages reliably and independent of the platform you are developing on. Using FCM, developers can notify the users that new data is available for sync and send notification messages. These are very useful for testing, sending marketing and engagement messages. It comes in with built-in targeting and analytics.
We can use Firebase Cloud Message for sending instant messages of upto 4KB in size.
A typical implementation of Firebase Cloud Messaging system will include an app server that interacts with FCM either using HTTP or XMPP protocol, and a client app. Messages and notifications can be sent to the client app using the app server or the Firebase notifications console. In a nutshell FCM makes android cloud messaging very easy even for beginners in android development.
In this tutorial we will create a simple android firebase cloud messaging app that will the user about firebase android login functionality. This post will help you get up and running with integrating Firebase Cloud Messaging to android. It will also act as an android notification tutorial since it we will talking about NotificationCompat for sending push notifications to your phone.
Adding Firebase Cloud Messaging
To add FCM to your app for push notifications using Firebase follow the below steps :
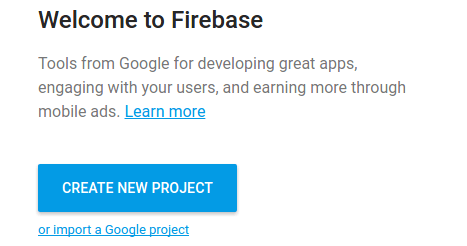
- Go to Firebase Website firebase.google.com and create a firebase account to start with. Go to Firebase console and Create a New Project by clicking on the “Create New Project” Button as shown below.
- Give the Project name and country you are currently in, Once you are done click on “Create Project” button.

- In the next screen choose “Add Firebase to your Android app” and then add the package details and Debug signing certificate SHA-1 key( This is required if you want to enable certain features like Dynamic Links, Invites, and Google Sign-In etc. otherwise it is an optional field).
This will download the google-services.json file. Download it to your computer. We will add it to our android app later.
Once you are done with this, We will create a client Android Application that will receive the notification from Firebase Cloud Messaging service.
To prevent the project from having errors and issues like this, please ensure that you have gone through and implemented the following pre-requisites.
Pre-requisites
- Android Studio installed on your PC (Unix or Windows). For working with Firebase you should install Android Studio 1.5 or higher. Also download the latest Google Play services SDK from through Android SDK Manager.
- A real time android device (Smartphone or Tablet) configured with Android Studio. The device should be running Android 2.3 (Gingerbread) or newer, and Google Play services 9.2.0 or newer.
- Firebase SDK should be added to your android project
Creating a New Project
- Go to File → New → New Project and enter your Application Name.
- Enter company domain, this is used to uniquely identify your App’s package worldwide. Remember to use the same package name as used in the Firebase console.
- Choose project location and minimum SDK and on the next screen choose Empty Activity, since we would be adding most of the code ourselves. Then Click on Next.
- Choose an Activity Name. Make sure Generate Layout File check box is selected, Otherwise we have to generate it ourselves. Then click on Finish. We have used the Activity Name as MainActivity.
Gradle will configure your project and resolve the dependencies, Once it is complete proceed for next steps.
Add Permissions and Dependencies
- After Gradle syncs the project, add the google-services.json file to your project’s app folder as shown below.
- Since we need to connect to the Network add the Internet permission in AndroidManifest.xml file. Also add the Vibrate since we would be generating a notification alert on the android device.
AndroidManifest.xml
<uses-permission android:name="android.permission.INTERNET"/>
<uses-permission android:name="android.permission.VIBRATE"/>
- Also add the entry for a service that extends
FirebaseMessagingService in order to handle the message after receiving notifications on apps in the background. We will extend this service. To receive notifications in apps. This is absolutely necessary for android push notifications to work while the app is not active.
<service
    android:name=".MyAndroidFirebaseMessagingService">
    <intent-filter>
        <action android:name="com.google.firebase.MESSAGING_EVENT"/>
    </intent-filter>
</service>
- Add an entry for a service that extends
FirebaseInstanceIdService which will be used to handle the registration token lifecycle. This is required for sending messages to specific devices/device groups.
<service
    android:name=".MyAndroidFirebaseInstanceIDService">
    <intent-filter>
        <action android:name="com.google.firebase.INSTANCE_ID_EVENT"/>
    </intent-filter>
</service>
- Also add an entry for a result activity, User will be taken to this activity on clicking on the notification. You may want to replace this activity with some special place in your app where you want to drive the user for example, sending the users to an offers page.
<activity android:name=".ResultActivity"/>
On completion your AndroidManifest.xml should look like this.
AndroidManifest.xml
="1.0"="utf-8"
<manifest xmlns:android="http://schemas.android.com/apk/res/android"
package="com.androidtutorialpoint.firebasecloudmessagingtutorial">
<uses-permission android:name="android.permission.INTERNET"/>
<uses-permission android:name="android.permission.VIBRATE"/>
<application
android:allowBackup="true"
android:icon="@mipmap/ic_launcher"
android:label="@string/app_name"
android:supportsRtl="true"
android:theme="@style/AppTheme">
<activity android:name=".MainActivity">
<intent-filter>
<action android:name="android.intent.action.MAIN" />
<category android:name="android.intent.category.LAUNCHER" />
</intent-filter>
</activity>
<activity android:name=".ResultActivity"/>
<service
android:name=".MyAndroidFirebaseMsgService">
<intent-filter>
<action android:name="com.google.firebase.MESSAGING_EVENT"/>
</intent-filter>
</service>
<service
android:name=".MyAndroidFirebaseInstanceIdService">
<intent-filter>
<action android:name="com.google.firebase.INSTANCE_ID_EVENT"/>
</intent-filter>
</service>
</application>
</manifest>
- Now open your project’s
build.gradle from the project’s home directory and add the following dependency.
build.gradle
classpath 'com.google.gms:google-services:3.0.0'
- Next, open your app’s
build.gradle from the and add the following at the end.
build.gradle
apply plugin: 'com.google.gms.google-services'
- To write the Firebase Cloud Messaging Android client app, we have to add FirebaseMessaging API : add the following dependencies in the dependency section in your app’s
build.gradle
compile 'com.google.android.gms:play-services:9.2.0'
compile 'com.google.firebase:firebase-messaging:9.2.1'
Adding Functionality
- Create a new java class
MyAndroidFirebaseMsgService and add the following code. It is a service that extends FirebaseMessagingService. It performs all kind of message handling in the background and sends the push notification once it is available.
MyAndroidFirebaseMsgService
package com.androidtutorialpoint.firebasecloudmessagingtutorial;
import android.app.NotificationManager;
import android.app.PendingIntent;
import android.content.Context;
import android.content.Intent;
import android.media.RingtoneManager;
import android.net.Uri;
import android.support.v4.app.NotificationCompat;
import android.util.Log;
import com.google.firebase.messaging.FirebaseMessagingService;
import com.google.firebase.messaging.RemoteMessage;
public class MyAndroidFirebaseMsgService extends FirebaseMessagingService {
private static final String TAG = "MyAndroidFCMService";
@Override
public void onMessageReceived(RemoteMessage remoteMessage) {
Log.d(TAG, "From: " + remoteMessage.getFrom());
Log.d(TAG, "Notification Message Body: " + remoteMessage.getNotification().getBody());
createNotification(remoteMessage.getNotification().getBody());
}
private void createNotification( String messageBody) {
Intent intent = new Intent( this , ResultActivity. class );
intent.addFlags(Intent.FLAG_ACTIVITY_CLEAR_TOP);
PendingIntent resultIntent = PendingIntent.getActivity( this , 0, intent,
PendingIntent.FLAG_ONE_SHOT);
Uri notificationSoundURI = RingtoneManager.getDefaultUri(RingtoneManager.TYPE_NOTIFICATION);
NotificationCompat.Builder mNotificationBuilder = new NotificationCompat.Builder( this)
.setSmallIcon(R.mipmap.ic_launcher)
.setContentTitle("Android Tutorial Point FCM Tutorial")
.setContentText(messageBody)
.setAutoCancel( true )
.setSound(notificationSoundURI)
.setContentIntent(resultIntent);
NotificationManager notificationManager =
(NotificationManager) getSystemService(Context.NOTIFICATION_SERVICE);
notificationManager.notify(0, mNotificationBuilder.build());
}
}
On receiving a message onMessageReceived() is called. Inside this function we are logging the message to the LogCat console and calling the createNotification() with the message text. The createNotification() method will create a push notification in the android notification area as shown below.
We are using NotificationCompat.Builder to create a new notification with default notification sound and passing the ResultActivity to the intent.
- Create a java class
MyAndroidFirebaseInstanceIdService and add the following code. It is a service that extends FirebaseInstanceIdService and handles the creation, rotation, and updating of registration tokens. It makes sure theat the given message is sent to specific devices/device groups.
MyAndroidFirebaseInstanceIdService
package com.androidtutorialpoint.firebasecloudmessagingtutorial;
import android.util.Log;
import com.google.firebase.iid.FirebaseInstanceId;
import com.google.firebase.iid.FirebaseInstanceIdService;
public class MyAndroidFirebaseInstanceIdService extends FirebaseInstanceIdService {
private static final String TAG = "MyAndroidFCMIIDService";
@Override
public void onTokenRefresh() {
String refreshedToken = FirebaseInstanceId.getInstance().getToken();
Log.d(TAG, "Refreshed token: " + refreshedToken);
}
private void sendRegistrationToServer(String token) {
}
}
The onTokenRefreshcallback fires on generation of a new token. We are calling getToken() in the context of onTokenRefresh() to ensure that we are accessing a currently available registration token.
Then we are simply logging the refreshed Token.
- Open activity_main.xml add the following code. We have only one TextView just to display the activity name.
activity_main.xml
="1.0"="utf-8"
<LinearLayout xmlns:android="http://schemas.android.com/apk/res/android"
xmlns:app="http://schemas.android.com/apk/res-auto"
xmlns:tools="http://schemas.android.com/tools"
android:layout_width="match_parent"
android:layout_height="match_parent"
android:fitsSystemWindows="true"
tools:context=".MainActivity">
<TextView
android:layout_width="match_parent"
android:layout_height="wrap_content"
android:id="@+id/textView1"
android:text="Welcome to Main Activity"
android:textAppearance="@style/TextAppearance.AppCompat.Large"
android:textStyle="bold"
android:layout_marginTop="100dp"
android:textAlignment="center" />
</LinearLayout>
MainActivity.java
package com.androidtutorialpoint.firebasecloudmessagingtutorial;

import android.support.v7.app.AppCompatActivity;
import android.os.Bundle;

public class MainActivity extends AppCompatActivity {

    @Override
    protected void onCreate(Bundle savedInstanceState) {
        super.onCreate(savedInstanceState);
        setContentView(R.layout.activity_main);
    }
}
- Create a new Activity ResultActivity.java and put the following code.
ResultActivity.java
package com.androidtutorialpoint.firebasecloudmessagingtutorial;

import android.os.Bundle;
import android.support.v7.app.AppCompatActivity;
import android.widget.TextView;

public class ResultActivity extends AppCompatActivity {
    private TextView textView ;

    @Override
    protected void onCreate(Bundle savedInstanceState) {
        super.onCreate(savedInstanceState);
        setContentView(R.layout.activity_main);
        textView = (TextView)findViewById(R.id.textView1);
        textView.setText("Welcome to the Result Activity");
    }
}
We are reusing the layout activity_main.xml for the result activity and just changing the Text to “Welcome to the Result Activity”. This activity will be called when the user will click on the Notification received.
Now the app is complete, we will test the app by sending a notification from the Firebase Notifications panel.
Log on to Firebase console then follow the steps in the images.
This will generate a new Notification message on your android device as shown below.
Congrats!! You have successfully integrated Firebase Cloud Messaging to Android Application for messaging and push notifications. You can see all the messages in the notifications panel in the firebase console.


 General
  News
News  Suggestion
  Question
  Bug
Bug  Answer
  Joke
Joke  Praise
  Rant
Rant  Admin
Admin 


