Thanks everyone for your response on my last blog for entity framework, as discussed in last blog, let’s see what is repository pattern and how to implement the same.
Introduction
Repository pattern or unit of work pattern as it is also known, is creating an abstraction layer between our services or business layer and data access layer. There are multiple ways to implement the repository pattern, we can have a single repository for all, or we can implement each repository for each class.
So let’s get started and implement the repository pattern, we will be using the same student app discussed in the last blog, and implement the repository pattern. Before starting one thing to clarify, we are not removing the data access layer, we are just replacing it with repository pattern.
Prerequisite
We will be using the below given IDE and Frameworks in this blog.
- VS 2015
- Entity Framework 6.0
- Web API 2.0
- Class Library Project
We will create a WebApi project and consume the Repository layer directly in our API controllers to see it working, in real life project, please have a service layer in between. So let’s get started and create our project.
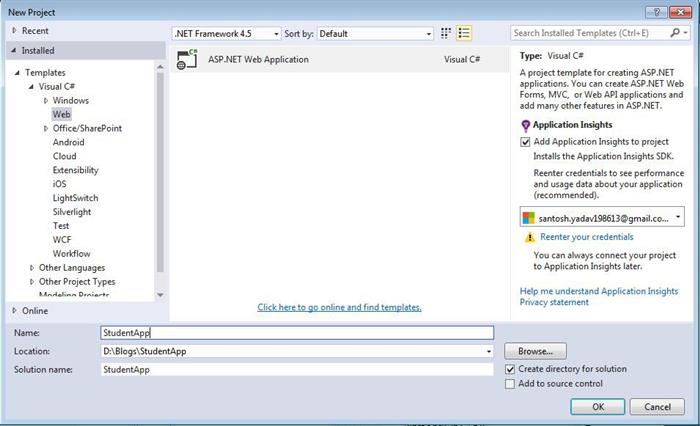
- Create a project. Go to File->New->Project name it as
StudentApp and click OK. Choose ASP.NET Web Application.
- On Next page, create MVC from templates, an select Web API from “Add folders and core references for”, MVC will be select by default, click OK to wait for some time, your project will be loaded.

- Now once our project is loaded, let’s see what are the things we need to make it work, as informed we will create a different project to create our Repository Layer.
- Leave your project as it is and a new project, right click on solution and Add->New Project and choose Class Library, name it as
StudentApp.Repository and click ok. - Let’s add Entity Framework as reference to our project, we will use NuGet so right click on this recently created project and click Manage NuGet Packages and goto Browse tab and search for
EntityFramework and install, it will ask to accept, click accept and references will be added. - In Entity Framework, we create context classes which connect to your database, there are 2 options, we can use a single context class and all Models or we can create each context for every Models available.
- For database, we will be using
localDb, if you open your web.config file from studentApp, we will find a DefaultConnection as connectionString, we will change the database name and change it to StudentDataBase. - Now we need one more project for our Models, let’s add a new
ClassLibrary project and name it as StudentApp.Model.
- Project will be loaded with Class1.cs, let’s rename the class and change it to
Student, it will ask whether you want to rename all references, say yes. - Now add few properties to our class, we will see the advantages of entity framework as well.
namespace StudentApp.Model
{
    public class Student
    {
        public int StudentID { get; set; }
        public string FristName { get; set; }
        public string LastName { get; set; }
        public DateTime DateOfBirth { get; set; }
        public DateTime CreatedDate { get; set; }
        public DateTime? ModeifiedDate { get; set; }
    }
}
- Done with our model class, now build our model project and add reference of this project to our Repository. To add, just right click on our Repository project Add-> reference, a box will open from left side, choose Project. It will show us 2 options, choose
StudentApp.Model and click ok.
- In our Repository project, rename the class1.cs file to StudentContext.cs. So if you are thinking what context class does, it is the model which will talk to our database and help us retrieve the data from DB, let DB know which are the tables DB needs to create, with which properties and which database to target.
- To create out
StudentContext, we need to inherit DbContext class, our default constructor will have parameter which will be connectionString Name from our config class. Let’s see the code below.
namespace StudentApp.DAL
{
    public class StudentContext : DbContext
    {
        public StudentContext() : base("DefaultConnection")
        {

        }

        public DbSet<Student> Student { get; set; }

        protected override void OnModelCreating(DbModelBuilder modelBuilder)
        {
            base.OnModelCreating(modelBuilder);
        }
    }
}
- Line number 5 has the default constructor which will initialize our database, the parameter passed is the same as our
connectionString Name. - Line number 10 has the property as
Student, DbSet<> tells the database that we need to create a table with name as Student in our database and onModelCreting() method lets us modify properties to table before table is created in DB. - As already informed in the introduction, repository pattern creates an abstraction between Service and data access layer, it means there will be interface or
abstract class is involved. - Let’s create a folder as Interface, we will add all interfaces in this folder. So let’s add our interface called
IStudentRepository and 2 methods as “Get” and “Add”.
using StudentApp.Model;
using System.Collections.Generic;
using System.Threading.Tasks;

namespace StudentApp.Repository.Interface
{
    public interface IStudentRepository
    {
         Task<List<Student>> Get();
         Task<bool> Add(Student student);
    }
}
- Now, we need to implement the interface as well, let’s add a class called
StudentRepository and implement the IStudentRepository.
using StudentApp.Model;
using StudentApp.Repository.Interface;
using System;
using System.Collections.Generic;
using System.Data.Entity;
using System.Threading.Tasks;

namespace StudentApp.Repository
{
    public class StudentRepository : IStudentRepository
    {
        private StudentContext _context = new StudentContext();

        public StudentRepository(StudentContext context)
        {
            this._context = context;
        }

        public async Task<List<Student>> Get()
        {
            return await _context.Student.ToListAsync();
        }

        public async Task<bool> Add(Student student)
        {
            student.CreatedDate = DateTime.Now;
            _context.Student.Add(student);
            int x = await _context.SaveChangesAsync();
            return x == 0 ? false : true;
        }
    }
}
- If you notice line number 14, we are passing
StudentContext as parameter in StudentRepository class, this is called Construction injection. - Add reference of
Student.Model and StudentApp.DAL to StudentApp. To add reference, right click on Student solution and Add->Reference and select solutions, select both StudentApp.Model and Repository project and click OK. - Now let’s add an API, to Right click on Controller Folder and click Add->Controller, from next screen, select Web API 2 Controller – Empty.
- Name the controller as
student, we will be calling the same 2 methods in this API.
using StudentApp.Model;
using StudentApp.Repository;
using StudentApp.Repository.Interface;
using System.Collections.Generic;
using System.Threading.Tasks;
using System.Web.Http;

namespace StudentApp.Controllers
{
    public class StudentController : ApiController
    {
        private IStudentRepository _repository;

        public StudentController()
        {
            this._repository = new StudentRepository(new StudentContext());
        }

        public StudentController(IStudentRepository repository)
        {
            this._repository = repository;
        }
        public async Task<List<Student>> Get()
        {
            return await _repository.Get();
        }

        public async Task<bool> Post(Student student)
        {
            return await _repository.Add(student);
        }
    }
}
- If you notice unlike class we have created the instance of
IStudentRepository interface, and on line no. 16, we have assigned the StudentRepository instance to it, this is the best part, so in future if you create another class implementing the interface, we need to change only 1 line of code to use it. - Line no. 19 has the construction injection, where we are injecting the interface in the controller.
- Now build the
Student project and press F5. Once project is built and page is loaded, append /Api/Student/Get. We will get the below screen.
- Now we will add a new student using Advanced Rest Client, you can use chrome store to add this App.
- In host, enter http://localhost:7565/Api/Student/Post and in payload provide
{FristName : “Santosh”,LastName: “Yadav”,DateOfBirth: “11/13/1986”}. Below is the request and response.
- Now you can call get again and check.
- You can do the same for
Put method and see the result.
Conclusion
Below are the advantages or scenarios where repository pattern can be implemented:
- You want to maximize the amount of code that can be tested with automation and to isolate the data layer to support unit testing.
- You access the data source from many locations and want to apply centrally managed, consistent access rules and logic.
- You want to implement and centralize a caching strategy for the data source.
- You want to improve the code’s maintainability and readability by separating business logic from data or service access logic.
- You want to use business entities that are strongly typed so that you can identify problems at compile time instead of at run time.
- You want to associate a behavior with the related data. For example, you want to calculate fields or enforce complex relationships or business rules between the data elements within an entity.
- You want to apply a domain model to simplify complex business logic.
If you want to remove the creation of object of class from our code, we can go ahead and use Dependency Injection framework, which provides the high level of abstraction.
Repository pattern is just not limited to Entity Framework can be applied in your smaller project as well.
You can get code from https://github.com/santoshyadav198613/EntityFramework/tree/RepositoryPattern for this tutorial. You can reach out to me at santosh.yadav198613@gmail.com, in case you have any query.
This member has not yet provided a Biography. Assume it's interesting and varied, and probably something to do with programming.


