Introduction
Hola Studio is a free framework for HTML5 game development.You can try it:
http://studio.holaverse.com
Also, there are tutorials for you. Hola Studio is easy to use and easy to learn:
http://developers.holaverse.com/docs
You would be amazed that it cost only 30 mins to finished a game like FlappyBird, even if you are a newbie!
What's more, it helps you to avoid reinventing the wheel, develop games, publish your game to platform to earn lost of money, collect and analyse players' feedback for optimization.
Background
To make the HTML5 game development easier, faster and help to avoid reinventing the wheel, software engineer - Xinajing Li, decides to create a tool.After 2 years, there is a fantastic, free and open-source framework for you to use!
There will be a example for game development!
Game-Making —— Whack a Mole
This section will show you how to create a classic: “Whack a Mole”. With this tutorial, you should be able to quickly use Hola Studio to implement a game workflow mode and utilize functional modules.
Before undertaking the tutorial, you may experience the final product using the link below.
Link: Whack a Mole
Prepare Project Resources
In order to facilitate the process, we have provided all of the resources needed in this tutorial under the following link. Once you have downloaded the resource project, follow the instructions in Importing Project to important the project into Hola Studio.
Download Resource Project
You can also download a copy of the finished project, if there’s anything you are uncertain about during the tutorial, you can compare your current project with the final one.
Tip: Using the same browser will share from the same cache, we suggest that if you run multiple instances of Hola Studio that you do so in multiple browsers.
Download Completed Project
Importing Project
Launch Hola Studio, users of the online version can directly access it online
Open File -> Import Project to import the downloaded resource project (zip file)
Once finished importing, the project state should look like this: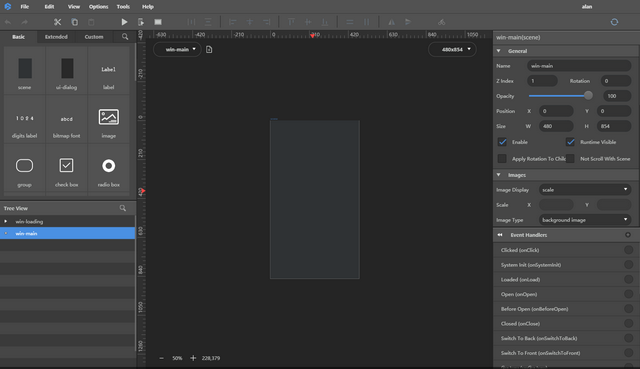
Game Resources
Check the game’s resources, open File -> Resource Manager to check for the following:

In the Resource Manager you can upload any sort of game resource. You can also edit and view the various files. The following two directories are main, which includes the images required by this tutorial and music, which includes all the music files that you will need. Open the main folder to see the thumbnails for all the images.
Game UI Layout
When it comes to designing layout, Hola Studio has a both simple and easy visual interface. Developers need only drag and configure components to complete the UI layout.
Scene UI
The project comes with a scene already in place. It will be the game scene. Users may drag the scene from the left side into the scene editor to add more scenes.
As seen above, the right side shows the Parameter Settings. Click on Image -> URL to Choose a button, then in the maindirectory, select background_sky to load as the background image.
Moles
Mole Models
Drag an image from the component list into the scene editor, then from Image -> URL, select hole as the image.
On the right, in General -> Name change the name to hole_0
In General->Position, set the position to x = 20 and y = 340
Select another image component from the list and when dragging it into the scene editor, move it atop the hole_0 image. The blue border around hole_0 should appear signifying that the newly dragged-in image component will be a child of hole_0.
Set the name of the image to image_clip [placeholder for use later], set the image position to x = 22 and y = -64 [location relative the parent component’s location], set the image size to W = 61 and H = 84, the delete any contents inside the URL field so as to leave it blank.
Drag an image in as a child to image_clip, change its name to mole, and set its location to x = 0 and y = 0. While in the background image state, set the URL to mole, and set the Image Type to image_0. Find url and set it to mole, then set the Image Type toimage_1. In its url set the image to dizzy [image_0 and image_1 are here to be ready to change the mole’s state]
Now that the mole is ready, you can save it as a custom component. Select the hole_0 and right click in the middle of the screen to open the menu, click on Make Component. Next create a name and select a group to save it under. Now the component can be pulled out any time we need to use it. For rules regarding the usage of custom components, click on About Custom Components
Drag moles onto the screen. You can try selecting the hole and pressing the c key to conduct a quick-copy-and-paste. We have created 9 moles for our demonstration. Once you have finished copying and pasting your moles, use the upper toolbar to arrange the layout of the interface, as shown below.
Tip: We recommend sorting in order of left-to-right, top-to-bottom.
Mole Animation
For instructions on animation, please click: Animation
To give the moles an up and down animation, first open the Animation Editor of the mole in hole_0, as shown below.
Change the name to Up and set the duration to 100. Set the second field (post-animation) of the Y range should be set to --100 (this will be the mole appearing), and click save. Now the animation list will show the Up option. Where it says Default Animation, chooseNone.
Next in the name, enter Down to replace up, in the delay play box, enter 1500, set the Y range’s right value to ++100 (this will be the mole disappearing), and save.
Click on the animation list and select up from the drop-down menu. For Next Animation, select down and save.
Every mole will have an animation, we can quickly assign the animations of similar targets. Select the mole and open its right-click menu, select Sync To Same Type from the bottom and a window will appear, in the search box, enter mole, then for Content to Sync selectAnimation.
Some developers may already be wondering why the moles are reaching for the skies as they go through their up animation. Wonder not, during the initialization we will reset the position of the moles underground, moving them back down 100 pixels. Select the mainscene, and click on the Before Open event at the bottom of the right-side event list to enter the code editor so as to set the moles’ initial positions.
var win = this.getWindow();
for(var i = 0; i < 9; i++) {
var mole= win["hole_" + i].image_clip.getChild(0);
mole.setPosition(mole.x, mole.y + 100);
}
As the moles move past the holes, we will want them to not display. This is where the image_clip image comes in. In a for-loop, after we set the moles’ positions, we’ll want to add this code:
mole.setPosition(mole.x, mole.y + 100);
mole.getParent().setClipRect(0, 0, mole.w, mole.h);
Next to trigger the 1-by-1 emergence of the moles, we will need to use a timer, place a timer component from the component list into the scene editor, open the code editor for the onTimeout event, and enter the following code:
var win = this.getWindow();
var index = Math.floor(Math.random() * 9);
var mole = win["hole_"+index].image_clip.getChild(0);
if(mole.y === 100) {
mole.animate("up");
}
Click preview to see the moles appearing 1-by-1!
The Hammer
Now we need a tool. As before, drag in an image and change its name to hammer. Change the rotation to 20 and set the url tohammer, toggle the enable (to prevent its covering the moles and thereby not affecting events)
The hammer will need a down and up animation, which will also be set up via the animation button on the toolbar
a. up settings:
b. down settings:
Once the hammer animations are set up, we need to configure the hammer’s events. The hammer is supposed to whack the moles. Thus we will select hole_0 -> image_clip -> mole and we will open the code editor for the onClick event of the on the bottom right of the screen and enter the following code:
var win = this.win;
win.hammer.setPosition(this.getParent().x,this.getParent().y-50);
win.hammer.animate("down");
Moles hit by the hammer, should appear dizzy, this will require implementing the previously configured dizzy image, below the code above, enter the following code:
var mole = this;
var position = this.getPosition();
if(position.y === 100){
return;
}
else{
mole.setImage(1);
setTimeout(function () {
mole.setImage(0)
}, 1000);
}
A whacked mole should appear as shown below:
Points
Games needs goals to be interesting so we need to add points. Drag in a digit label component, change its name to score, and set its location to x = 0 and y = 0. Set the size to W = 150 and H = 50. On the right, find Image -> URL and select the score image. In the Specifics section, set Image Rows to 4 and Image Cols to 3, where it reads All Text enter 0123456789n., and Set the Text to 0digit label component
In the main interface, where it says Before Open, define a global ‘score’ variable
window.score = 0
In the onClick event of main -> hole_0 -> image_clip -> mole, re-enter the code editor, and add the code to add to the score.
if(position.y === 100){
return;
}else{
…
window.score++;
win.score.setValue(window.score);
}
Preview it to see that when you whack a mole, you will not get points!
Music and Sound Effects
We want to add background music and a sound when the moles get hit.
First, drag a sound_music component and a sound_effect component into the scene editor.
Select the sound_music component, on the right where it says Image -> Image Type select checked state image, and under URLselect sound-music-on under the music folder, and confirm it. Under the unchecked state image of its Image Type, set the URLsetting to sound-music-off.
Select the sound_effect component, find the checked state image under the Image -> Image Type, and where it says URL, select thesound-effect-on under music and confirm it. Next under Image Type, find the unchecked state image, and set the URL to sound-effect-off.
Move the sound effect and music components to a suitable position, as shown below
As shown below, in Options -> Project Settings -> Sound Config -> Sound_Music -> Choose Audio, select bgm.mp3, for the Sound Effect choose hit.mp3.
Now to add the code to play the audio. The music should play when Auto Play is checked, when loading the game it should automatically play. The sound effect needs a trigger mechanism, we will play it when the moles get hit. Enter the code editor for theonClick event of hole_0 -> image_clip -> mole. Enter the sound effect code into the preexisting code as shown below [this code includes the previous onClick code, pay close attention to where you are adding code
var win = this.win
win.hammer.setPosition(this.getParent().x,this.getParent().y-50);
win.hammer.animate("down");
var mole = this;
var position = this.getPosition();
if(position.y === 100){
return;
}else{
mole.setImage(1);
win.playSoundEffect("hit.mp3");
window.score++;
win.score.setValue(window.score);
setTimeout(function () {
mole.setImage(0)
}, 1000);
}
Before we synced the animation properties between all the similar components. Likewise, we can synchronize events [don’t forget to select the “mole” target objects when syncing] as shown below:
In addition to the score, we need to add a time limit. Then as the game ends, we need to display a game over display.
From the component list, drag in a picture to serve as our game over display. Change its name to board, and once it is placed somewhere suitable, set the image URL to the image board, and uncheck the Enable and Runtime Visible checkboxes.
Drag in an image component as a child to the board component. Name it continue place it somewhere suitable and set the imageURL to continue.
Drag in a timer to keep track of time. Name it sec and under Specific -> times, set it to 1, set the Duration to 30000ms, enter the following code for the onTimeout event: [This code can be generated by the code generator]Code Generator Instructions
this.win.pause();
this.win.board.setVisible(true).setEnable(true);
var me = this;
Restart Game
When clicking on the continue image, the game should restart. Enter the following code for the onClick event of the continue image:
<code>
this.win.replay()</code>
With that, the game is finished!
After following the steps above, you should have a fundamental understanding of how Hola Studio works. To further optimize the game, you can try to do the following by yourself:
Add more game screens, for example a start splash or a score screen.
There are still a few bugs, for example it’s possible to chain-whack a single mole.
You can make the game display more immersive, like by turning the clouds into independent images that animate across the sky.
You can try running the game through adaptation. For more, click on: Adaptation Rules
Any question, email to alan.nie@holaverse.com
This member has not yet provided a Biography. Assume it's interesting and varied, and probably something to do with programming.


 General
  News
News  Suggestion
  Question
  Bug
Bug  Answer
  Joke
Joke  Praise
  Rant
Rant  Admin
Admin 


